Power Steering Rack Removal
Power Steering Rack Removal1. Place the front wheels in a straight ahead position.
2. Use a steering wheel holder to prevent steering wheel from turning.
3. Remove the front wheels.
4. Remove the No.1 engine under cover sub-assembly.
5. Remove the rear engine under cover assembly.
6. Drain the front differential oil.
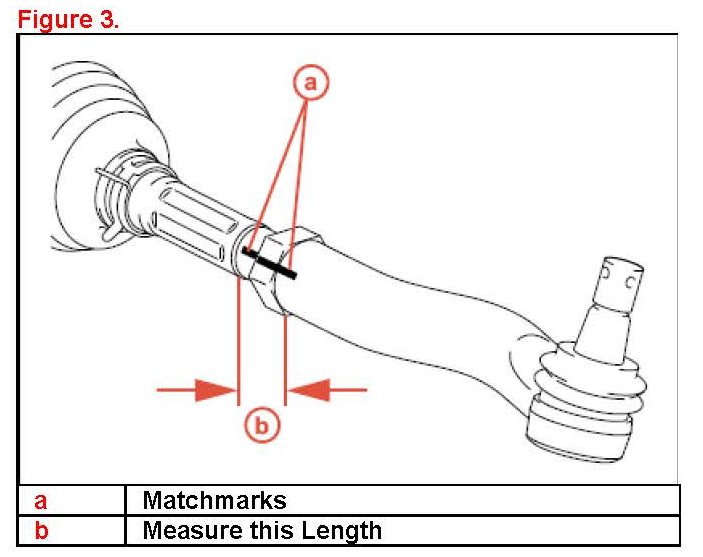
7. Remove the tie rod end sub-assembly.
A. Put matchmarks on the tie rod end and steering rack end.
B. Measure the length b and record the data to aid in reassembly.
C. Remove the tie rod end.
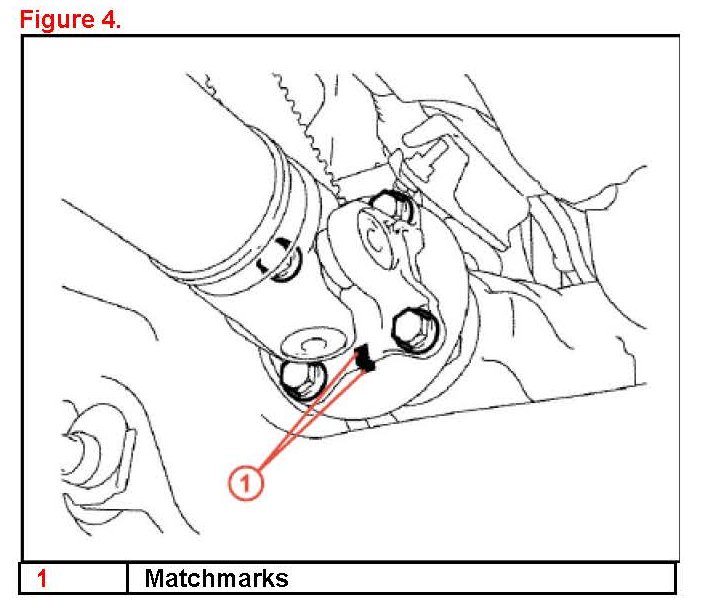
8. Remove the front propeller shaft.
A. Put matchmarks on the propeller shaft flange and the differential.
B. Remove the 4 nuts washers and bolts attaching the propeller shaft to the front differential.
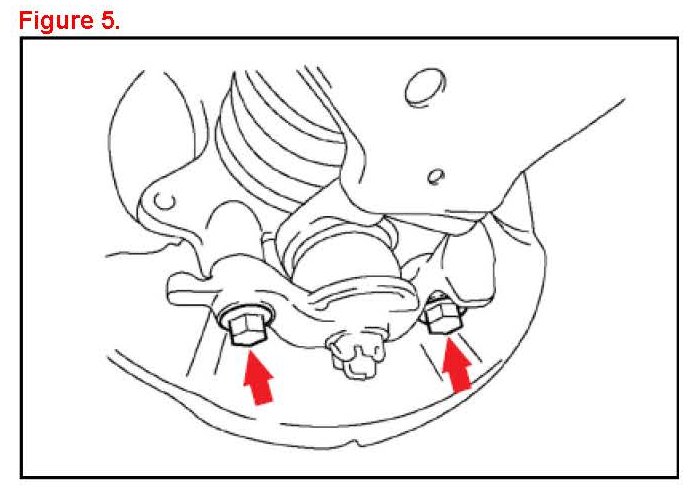
9. Remove the 2 bolts that attach the front lower control arm and repeat for the opposite side
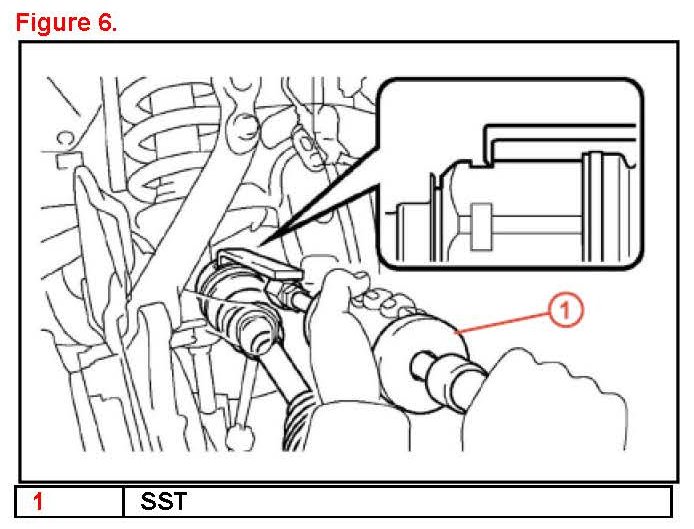
10. Remove the driveshaft using the SSTs.
SST: 09520-01010-02, 09520-32040
NOTE
^ Be careful not to damage the dust cover or the oil seal.
^ Keep the drive shaft level while handling it.
Repeat for the opposite side
11. Disconnect the front differential breather tube bracket and hose
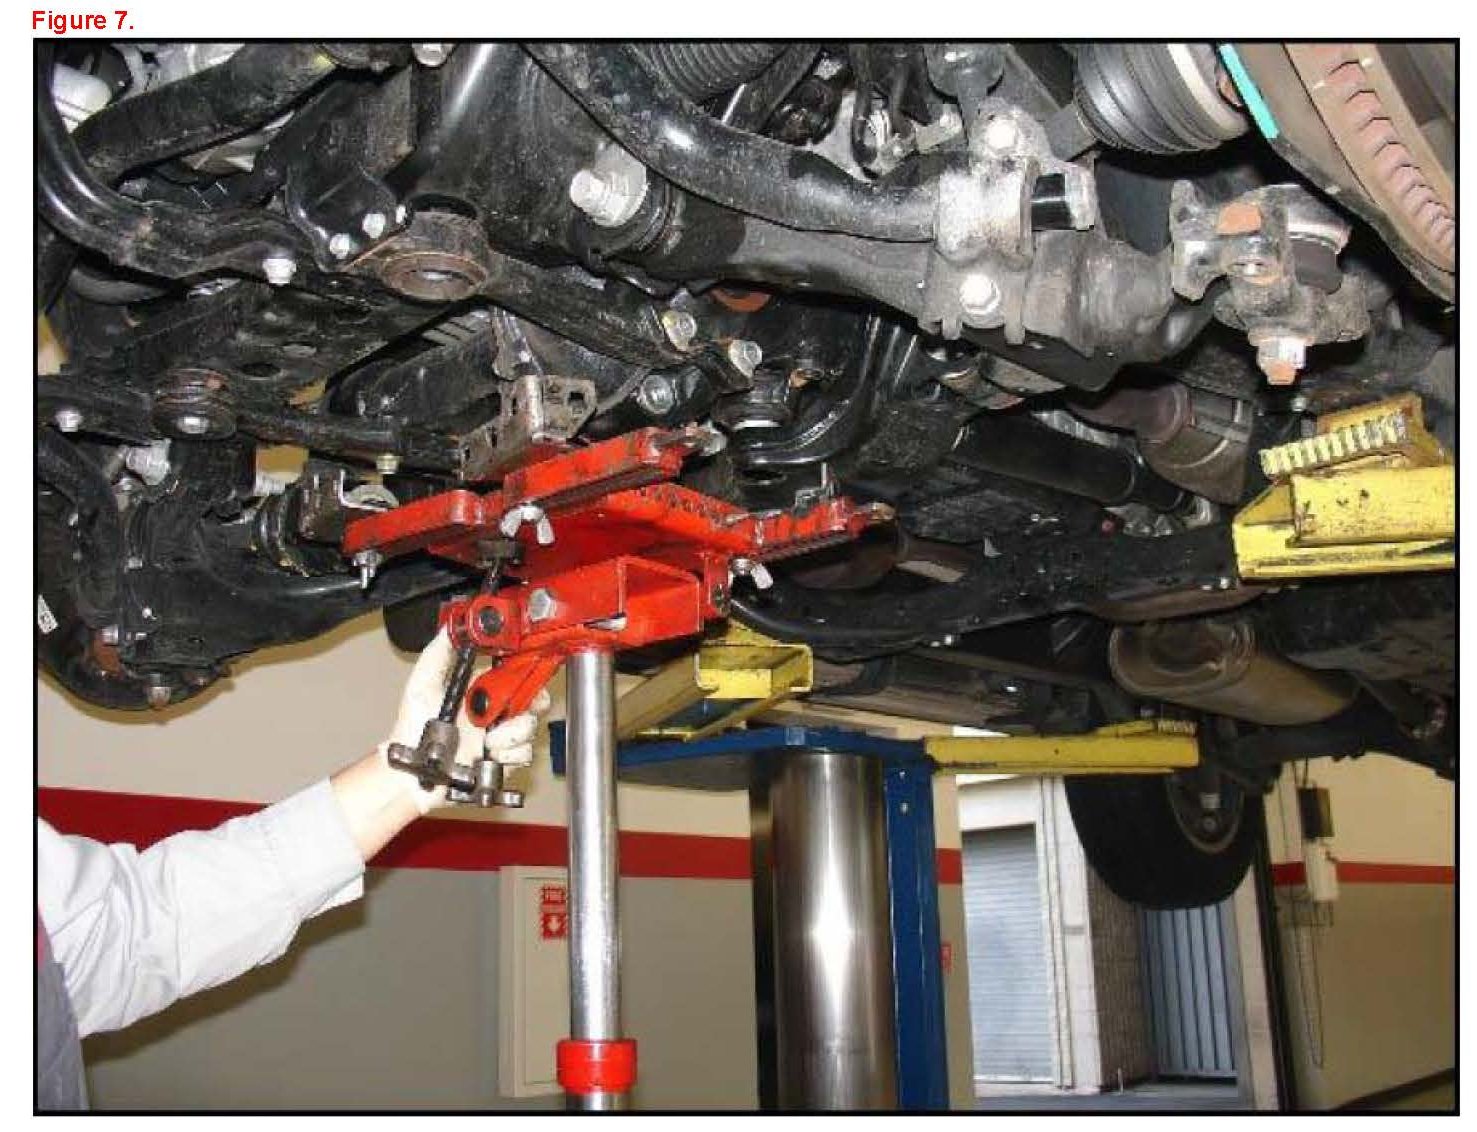
12. Support the front differentia with a high lift transmission jack.
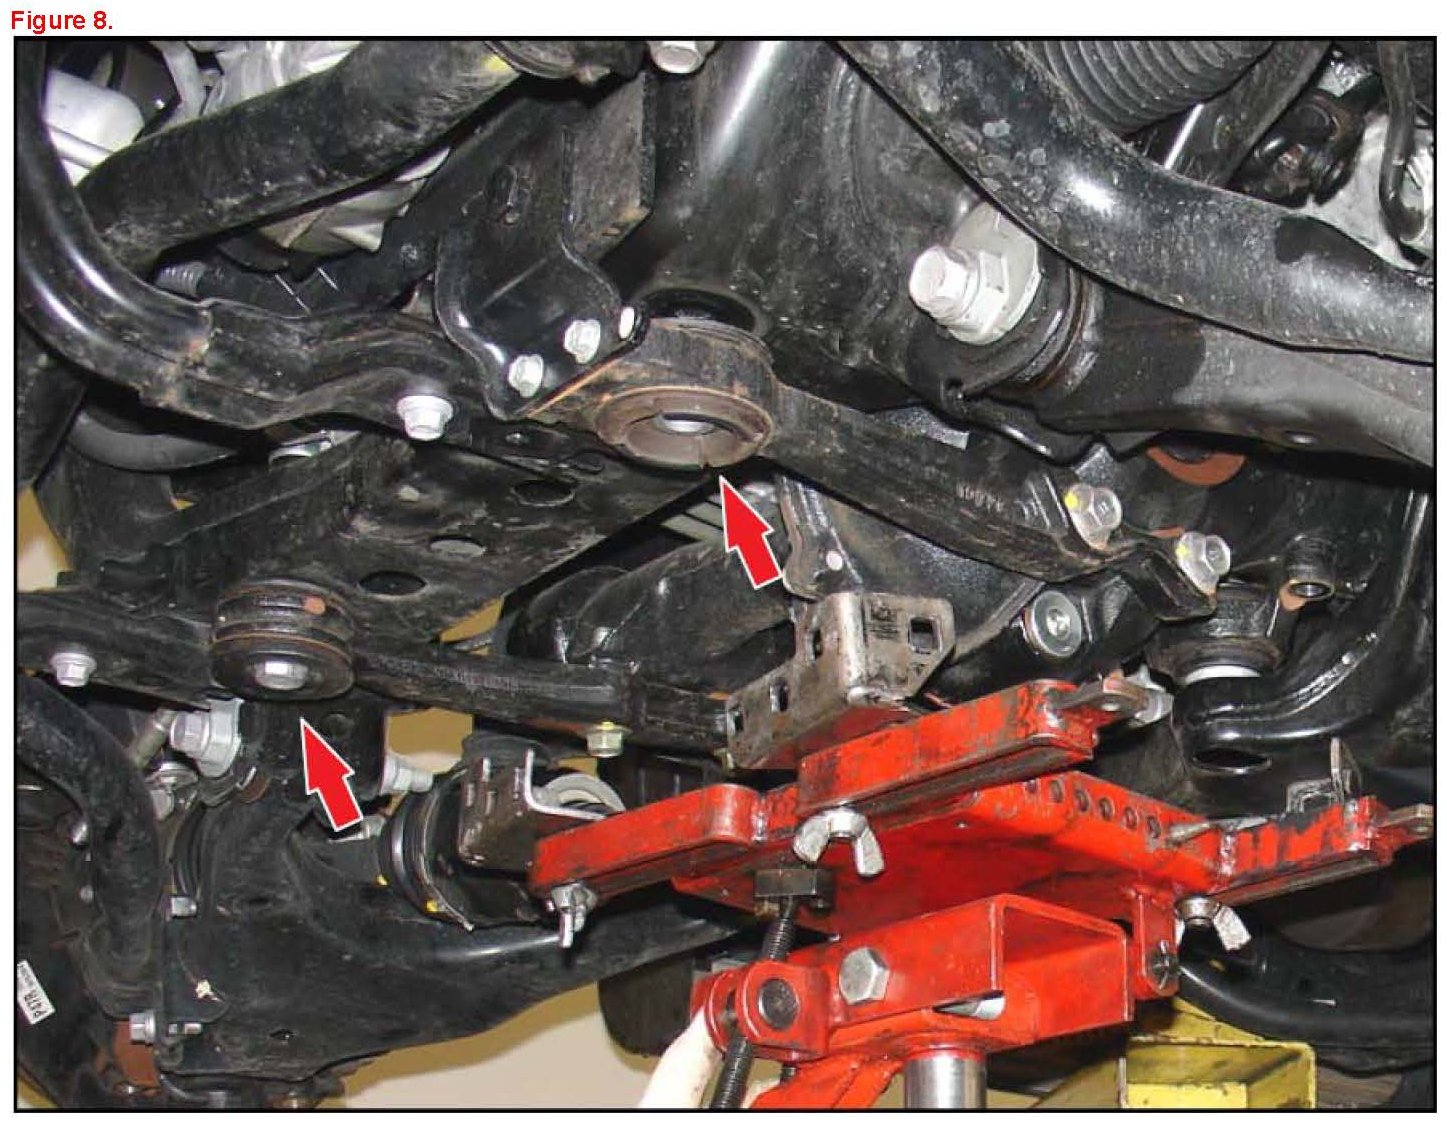
13. Remove the two front differential mounting nuts and bolts.
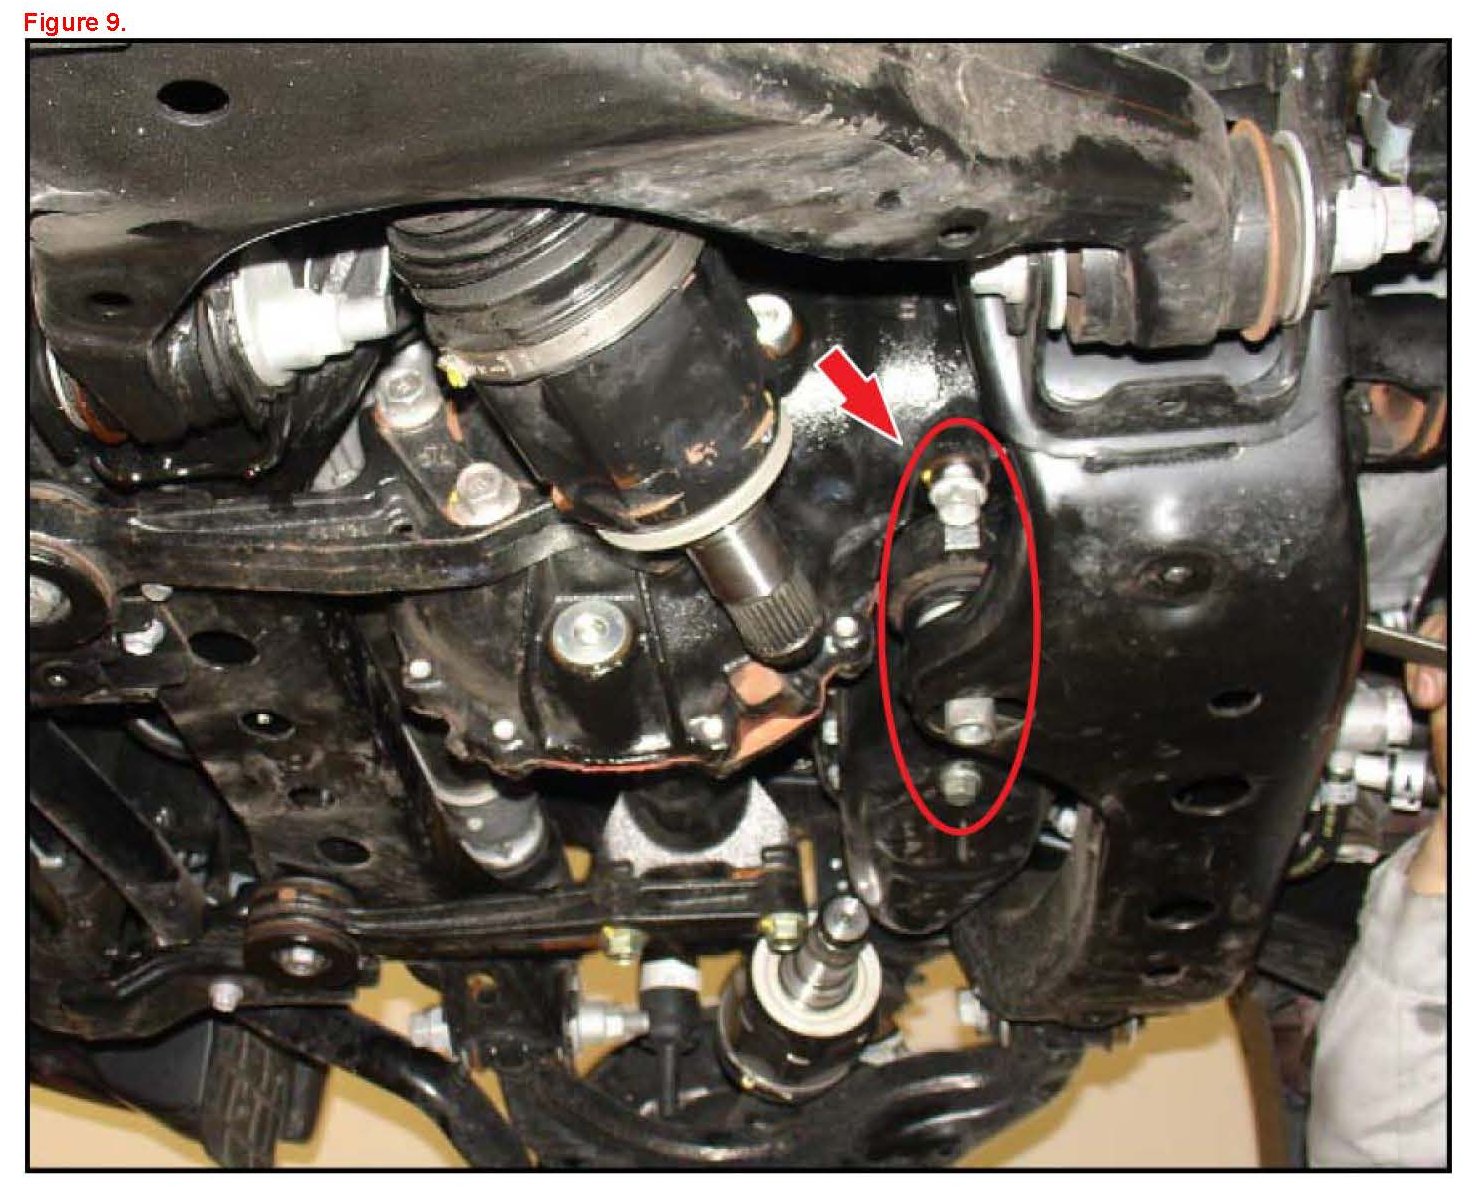
14. Remove the No.3 front differential mounting nut and bolt.
15. Disconnect the actuator connector.
16. Lower the jack and remove the front differential.
17. Put matchmarks on the No.2 steering intermediate shaft and power steering gear to aid during reassembly.
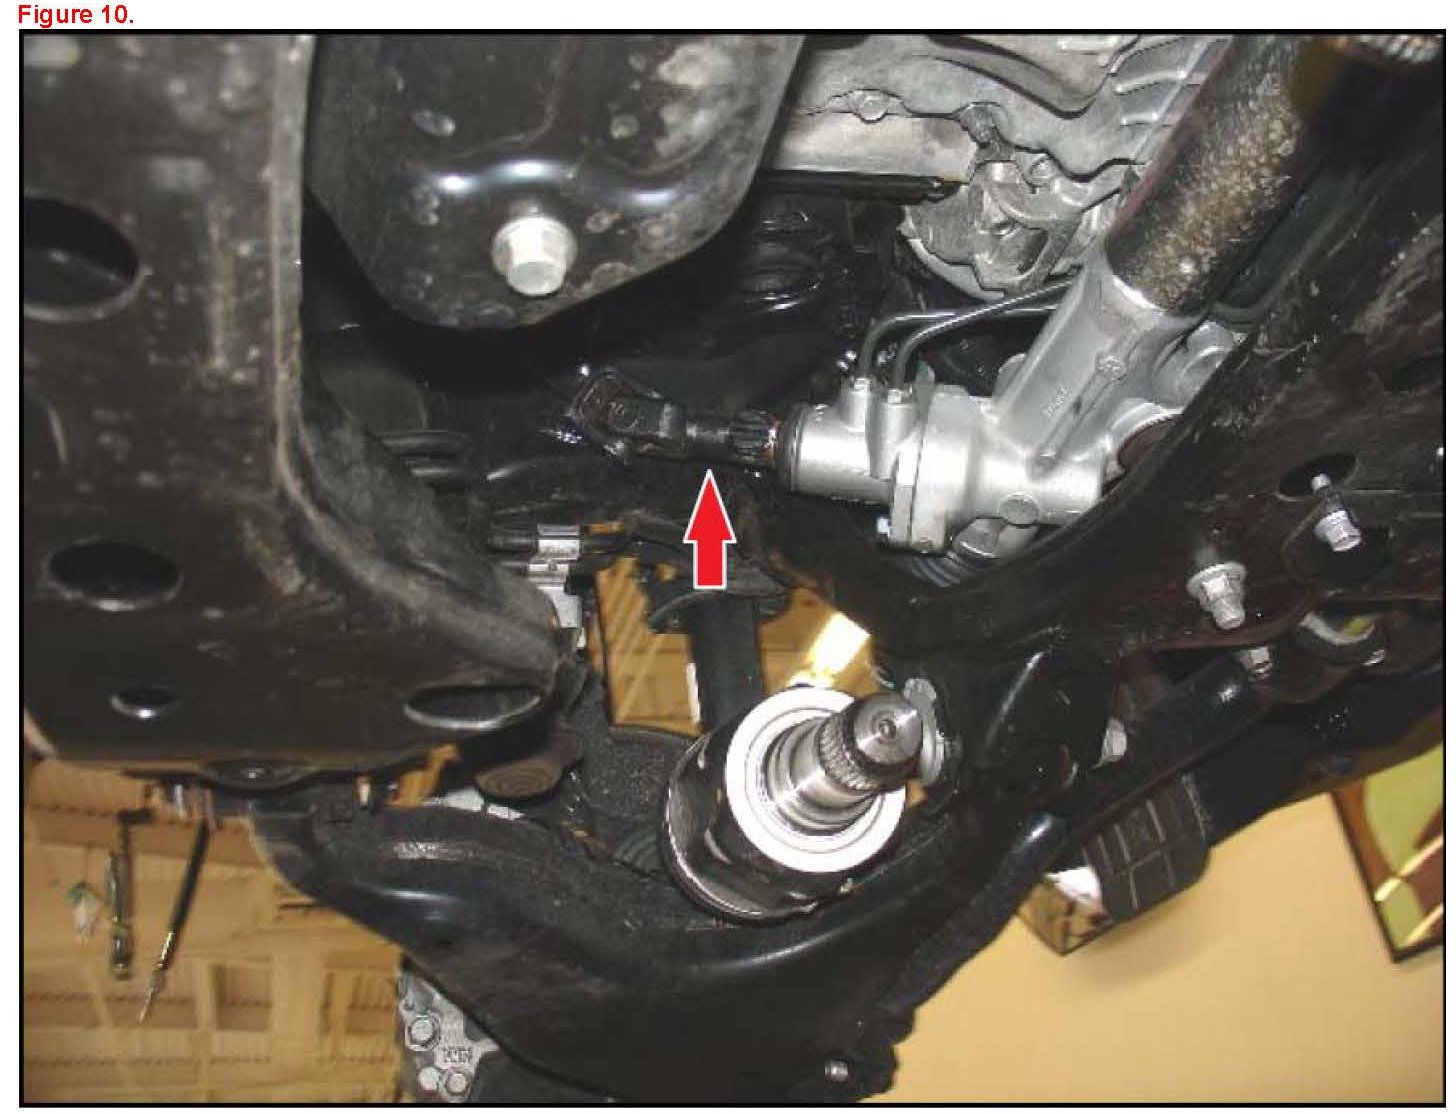
18. Remove the pinch bolt that attaches the intermediate shaft to the input shaft of the power steering gear.
19. Remove the power steering hoses from the power steering gear.
20. Loosen the two nuts and two bolts that attach the power steering rack.
NOTE
At this time bolts cannot be removed due to clearance.
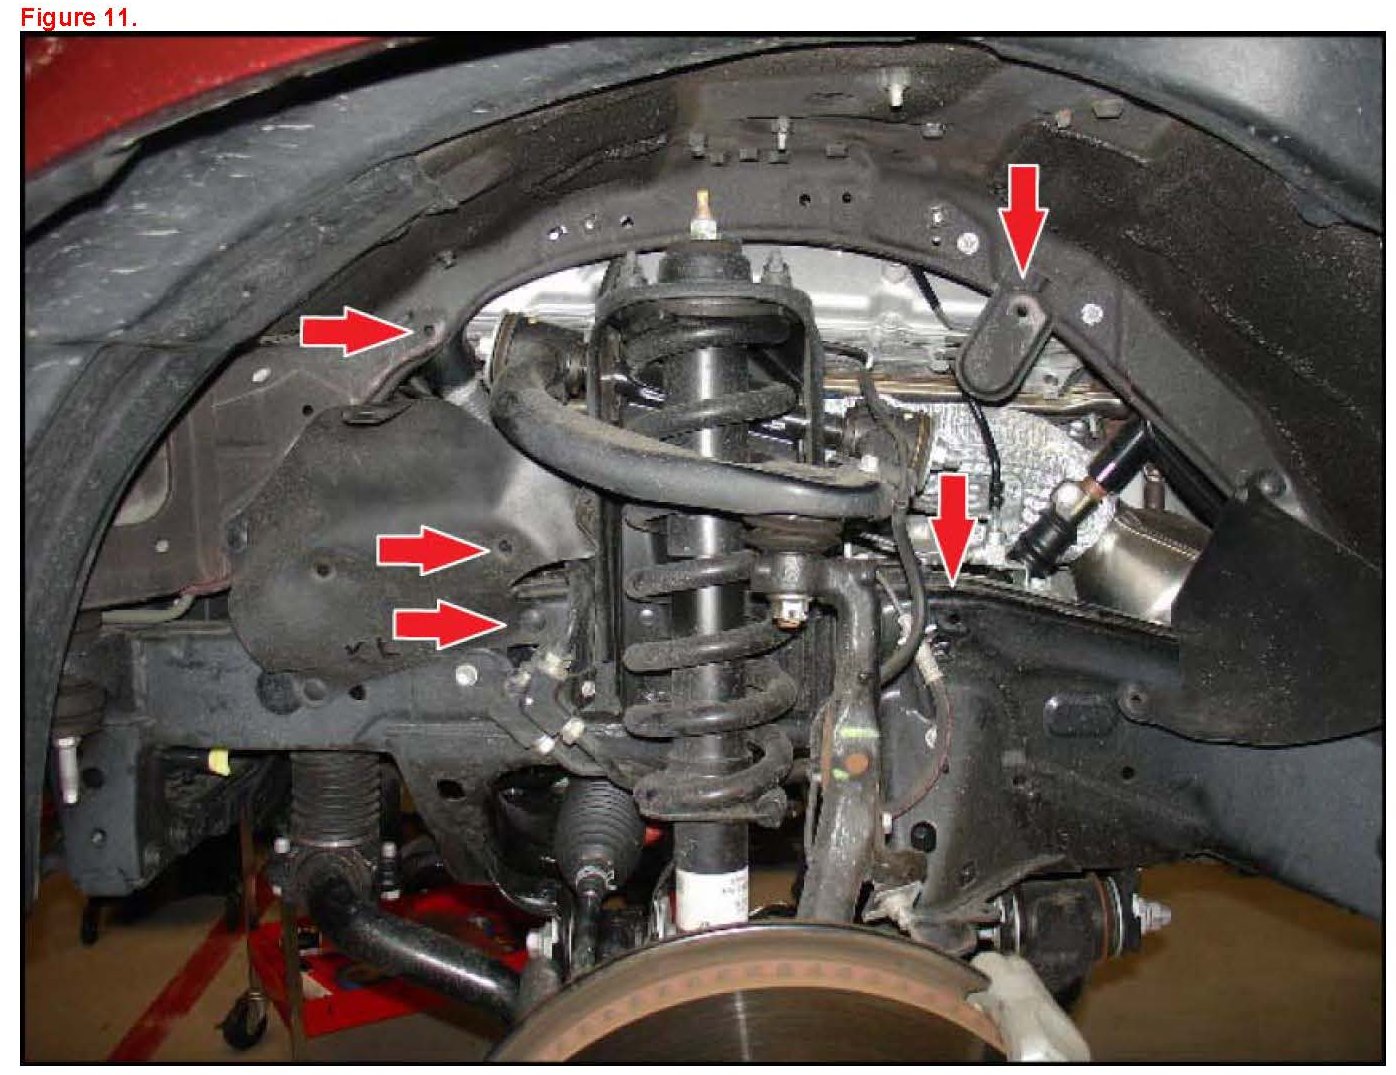
21. Raise the engine assembly to gain enough clearance to remove bolts.
A. Remove the clips to gain access into the engine area.
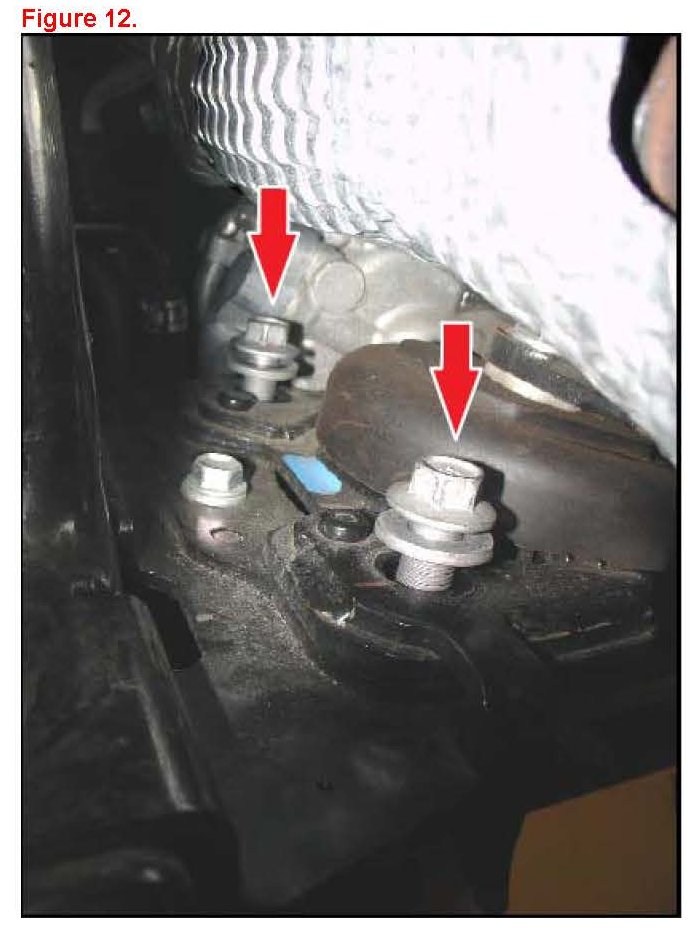
B. Remove the two engine mount bolts Repeat for the opposite side.
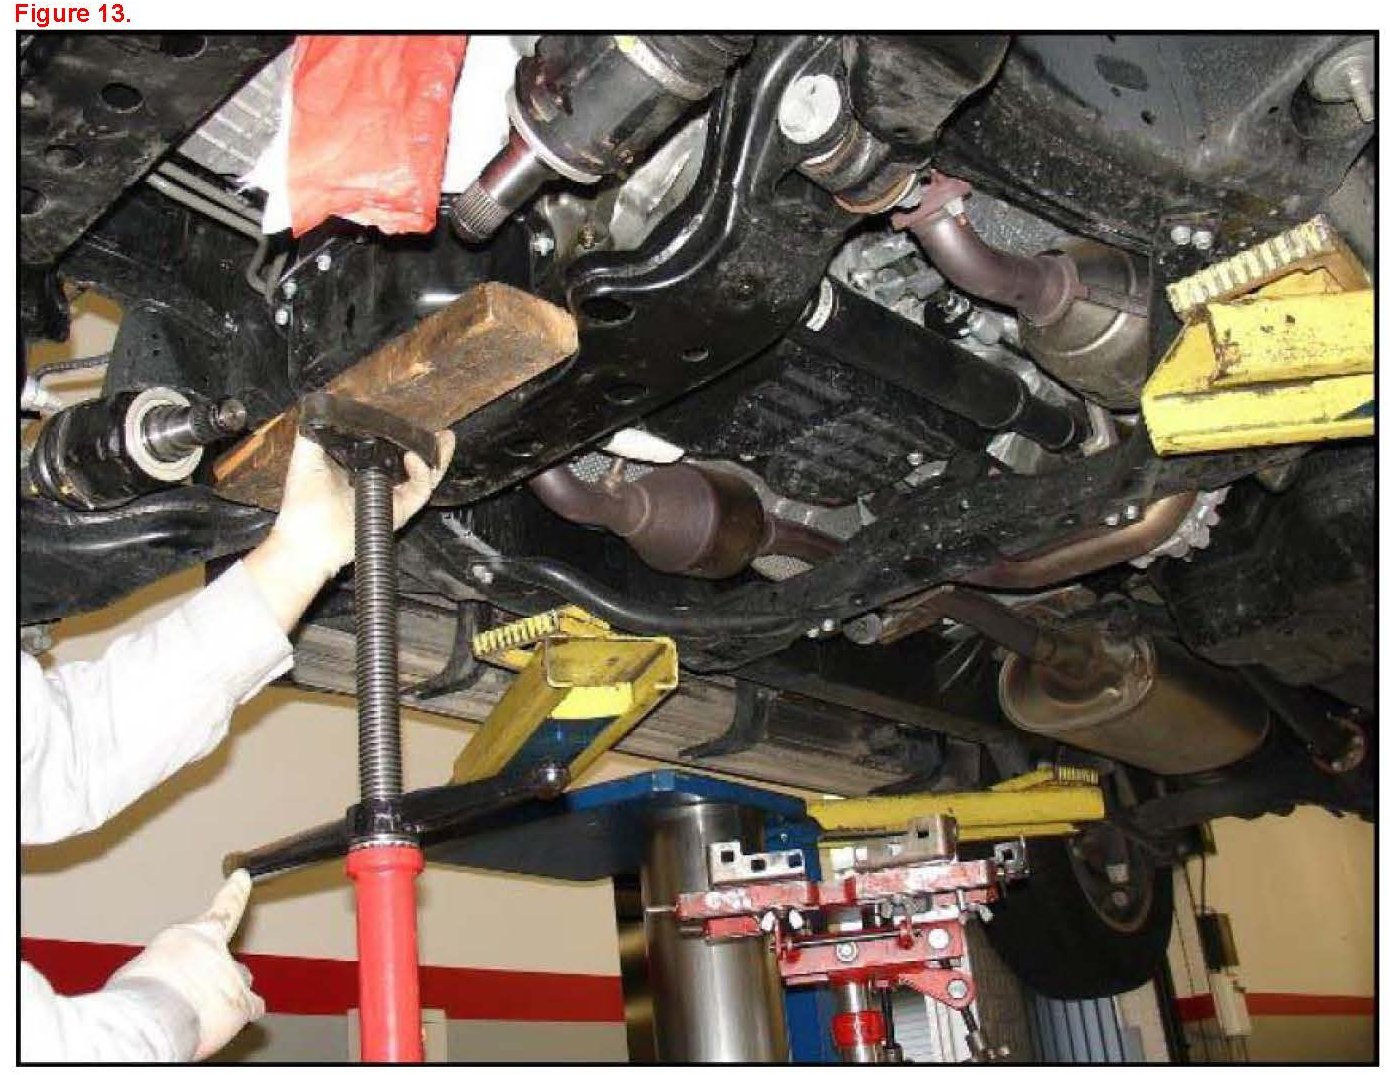
C. Use a utility stand and a wooden block to raise the engine to aid in removing the power steering rack bolt
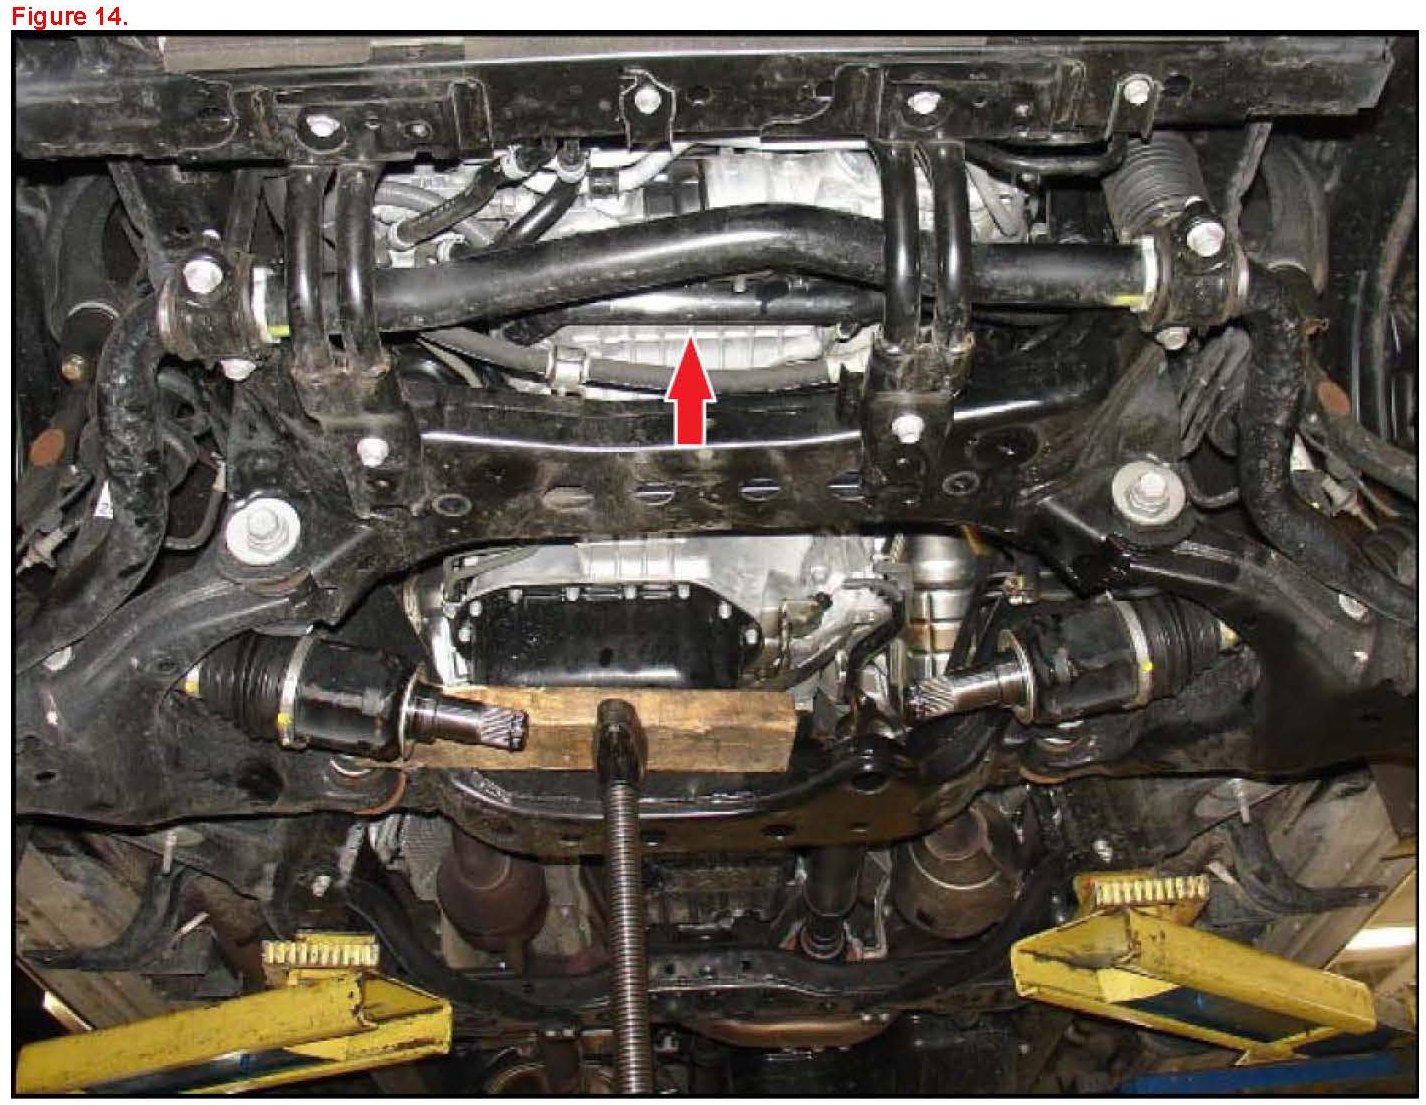
22. Remove the two 10 mm bolts that attach the wire harness to the engine to increase clearance to remove the power steering gear
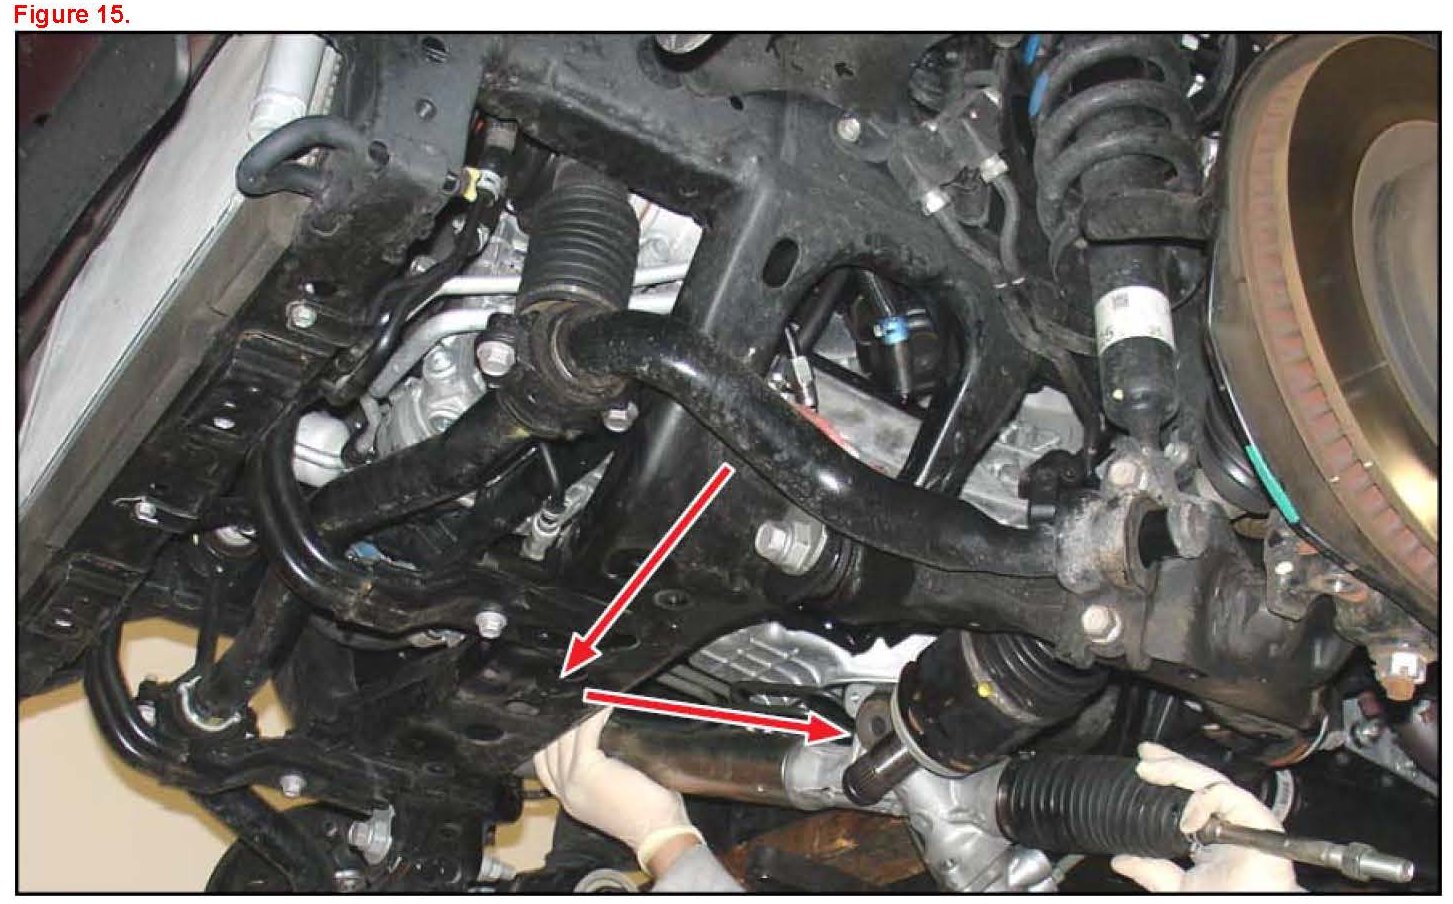
23. Remove the power steering gear by sliding toward the passenger side first then down toward the driver side.