Canada - Interior - 2nd Row Seat, Rattle Noise

Bulletin
L-TCI-3118
Issue Date
March 08, 2012
Market
Canada
Title
RATTLE NOISE FROM 2ND ROW SEAT
Service Category
Vehicle Interior
Section
Seat

APPLICABILITY:
INTRODUCTION:
Some 2011 - 2012 MY GX460 vehicles may exhibit a rattle type noise from the second row passenger side seat back cover area when driving over rough roads and bumps. This noise may be coming from a mass damper located under the seat back cover on the seat frame. A revised damper has been developed to address this condition.
PRODUCTION CHANGE INFORMATION:

This TSB applies to vehicles produced BEFORE the Production Change Effective VINs shown.

PARTS INFORMATION:
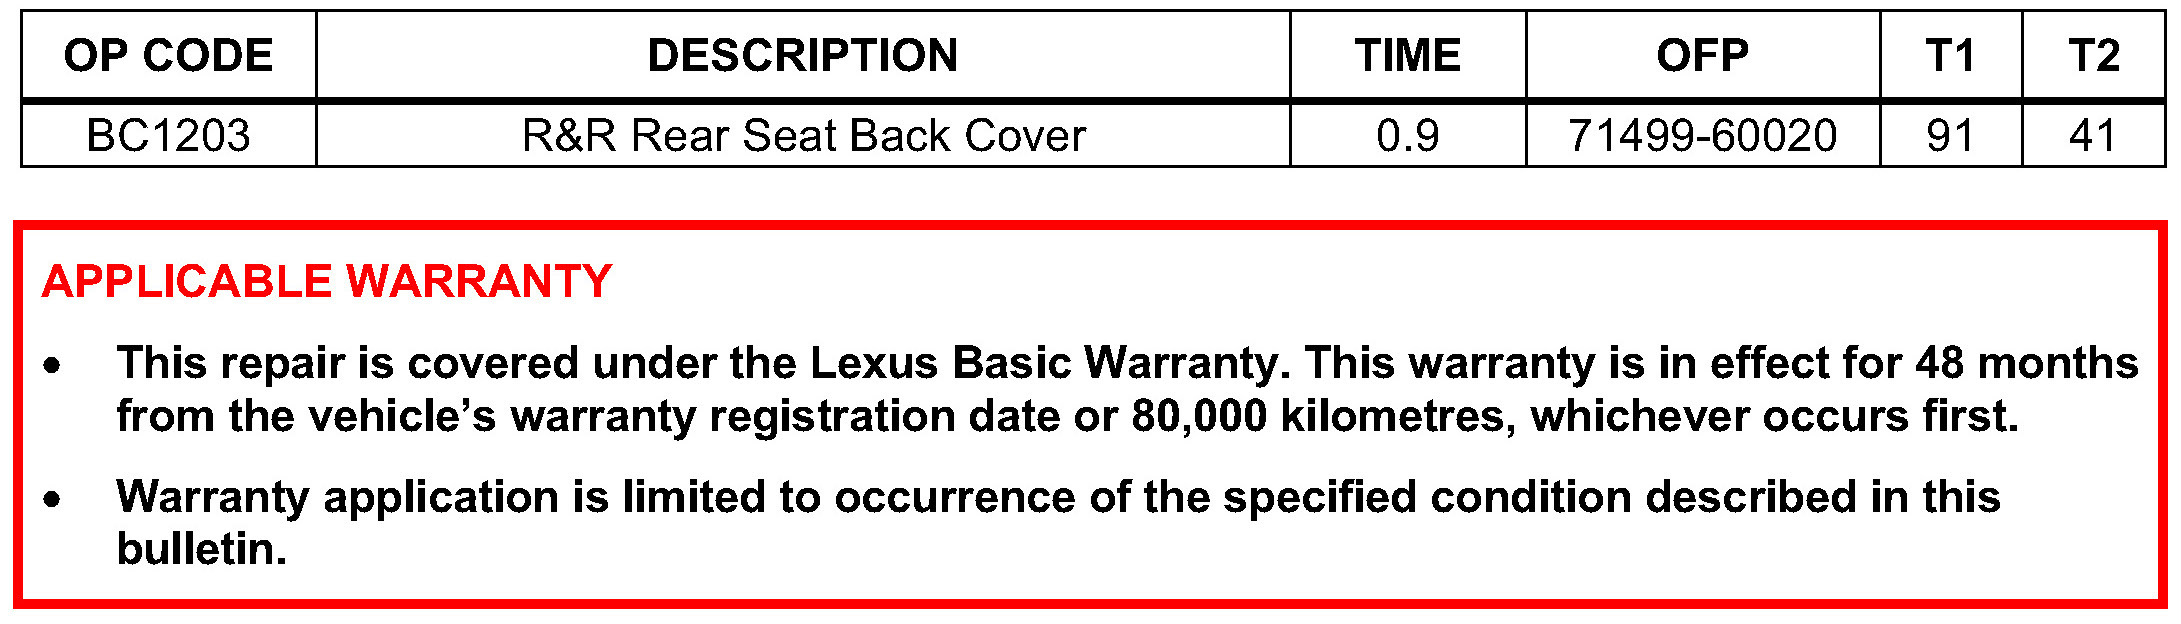
WARRANTY INFORMATION:
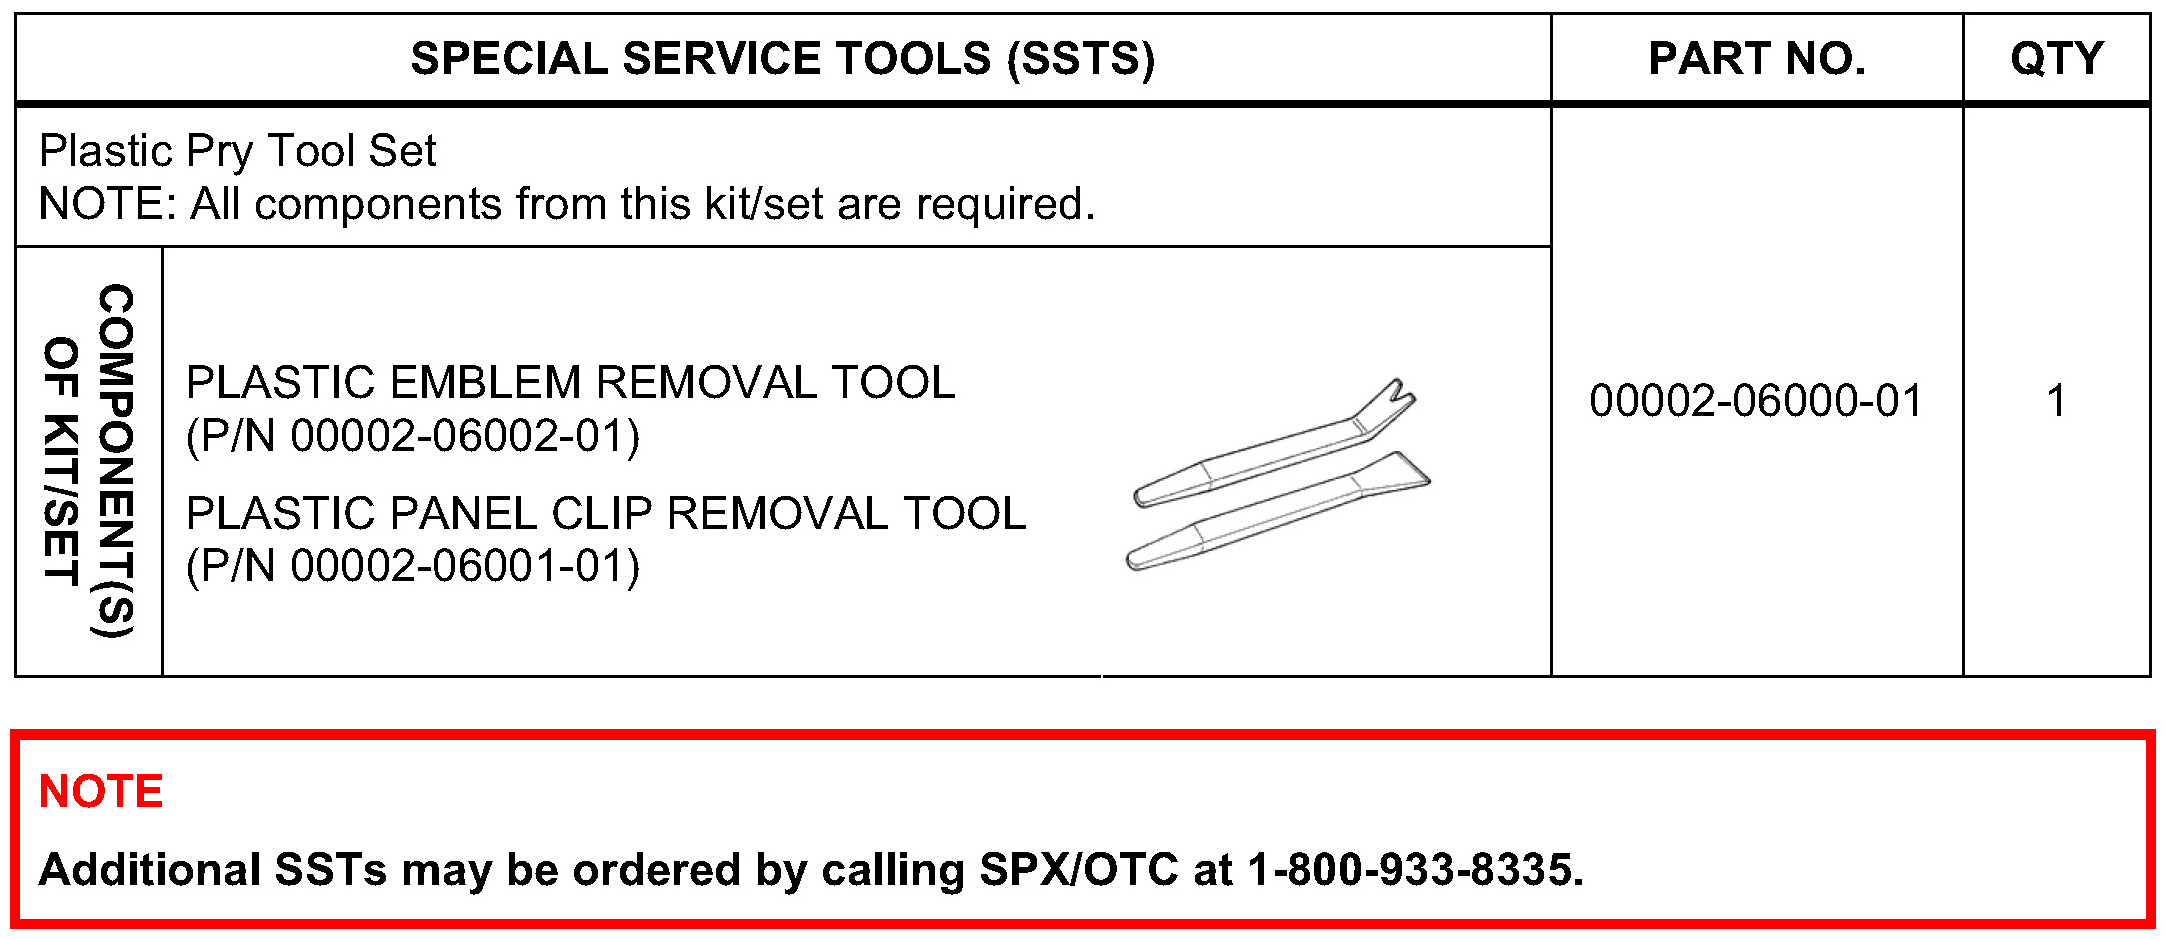
REQUIRED TOOLS & EQUIPMENT:
REPAIR PROCEDURE:
1. Verify condition. This rattle noise occurs due to insufficient insulation on the mass damper in the seat back. Confirm by duplicating the noise, then removing the seat back to determine if the noise continues or not. If the noise is not coming from the mass damper, this TSIB does not apply.
2. Follow repair procedures below once the type of seat has been identified.
This C/M is applied only for split side Walk-in type.
Split Side Walk-in Type
HINT
Damper is on right hand side of the seat.
3. Replace the seat damper.
DISASSEMBLY FOR 60/40 SPLIT SIDE WALK-IN TYPE SEAT
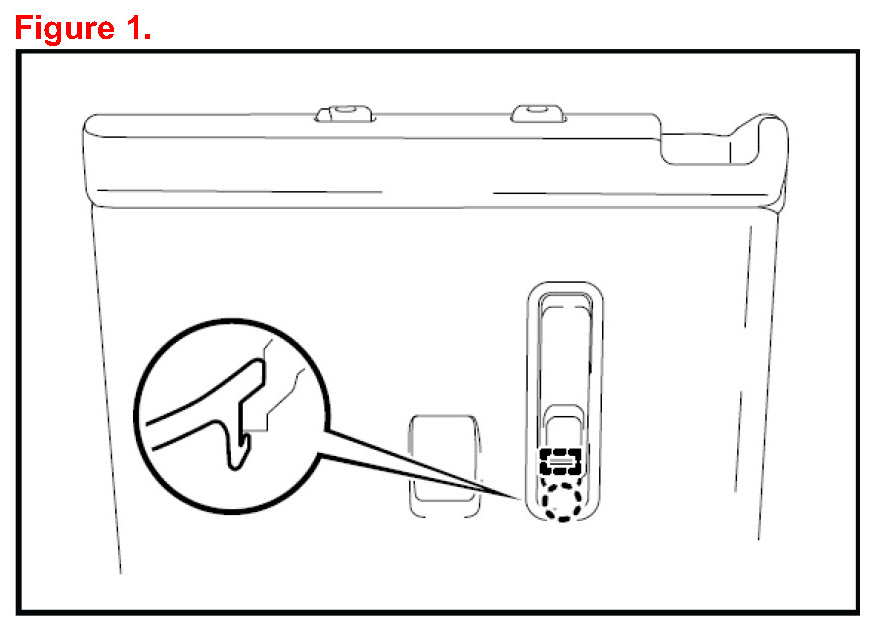
1. Remove Rear Seat Cover Cap
- Using a plastic pry tool, detach the claw and then remove the cover cap.
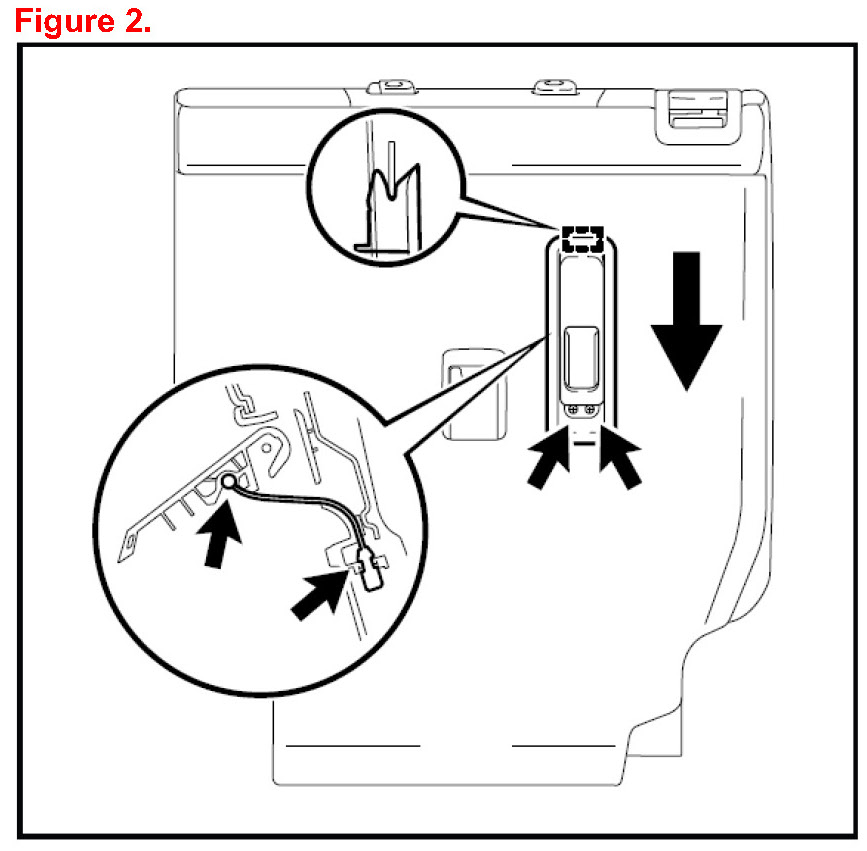
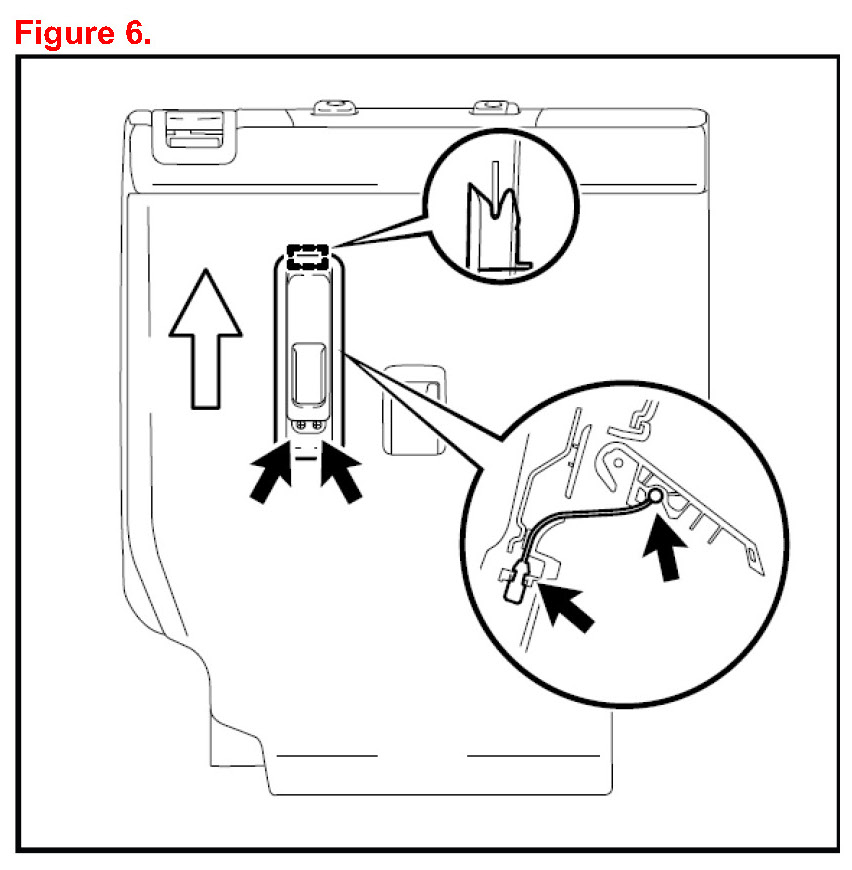
2. Remove rear center back lock control lever.
A. Remove the 2 screws.
B. Move the lever in the direction of the arrow to detach the guide and remove the lever.
C. Detach the cable clamp and disconnect the cable from the lever.
3. Remove rear seat back cover.
A. Press the seat back lock release button to release the lock and fold down the seat back.
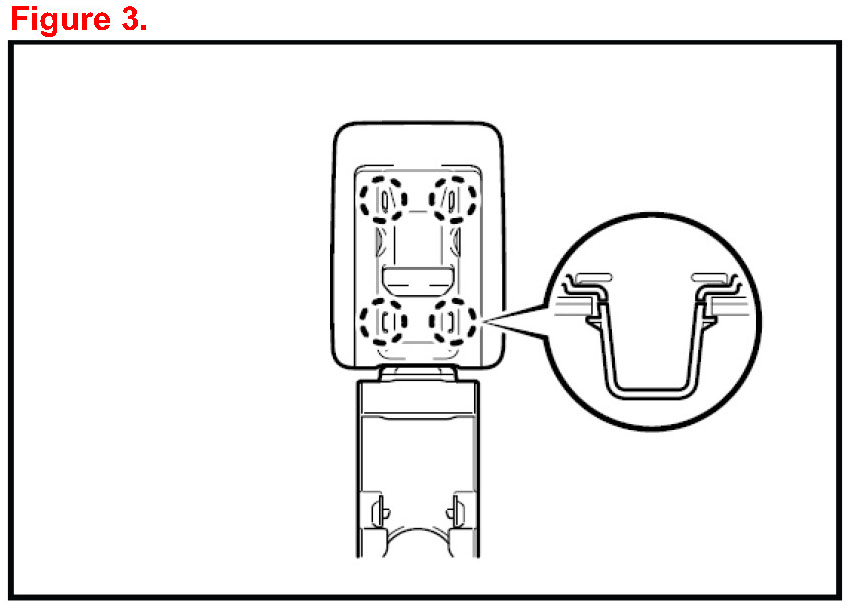
B. Using a plastic pry tool, detach the 4 claws and remove the cover.
4. Remove rear seat back board subassembly RH.
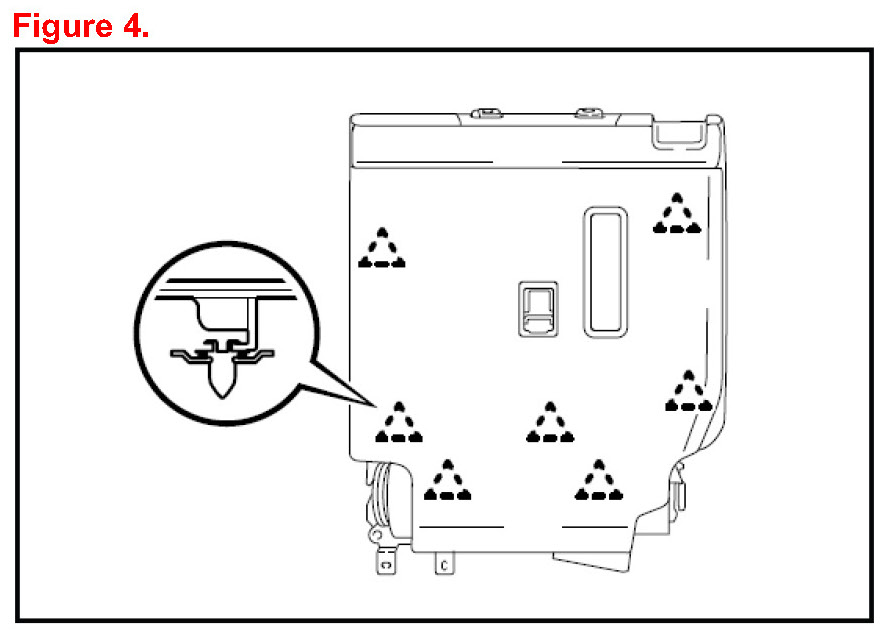
- Using a clip remover, detach the 7 clips and remove the carpet.
INSTALLATION OF MASS DAMPER
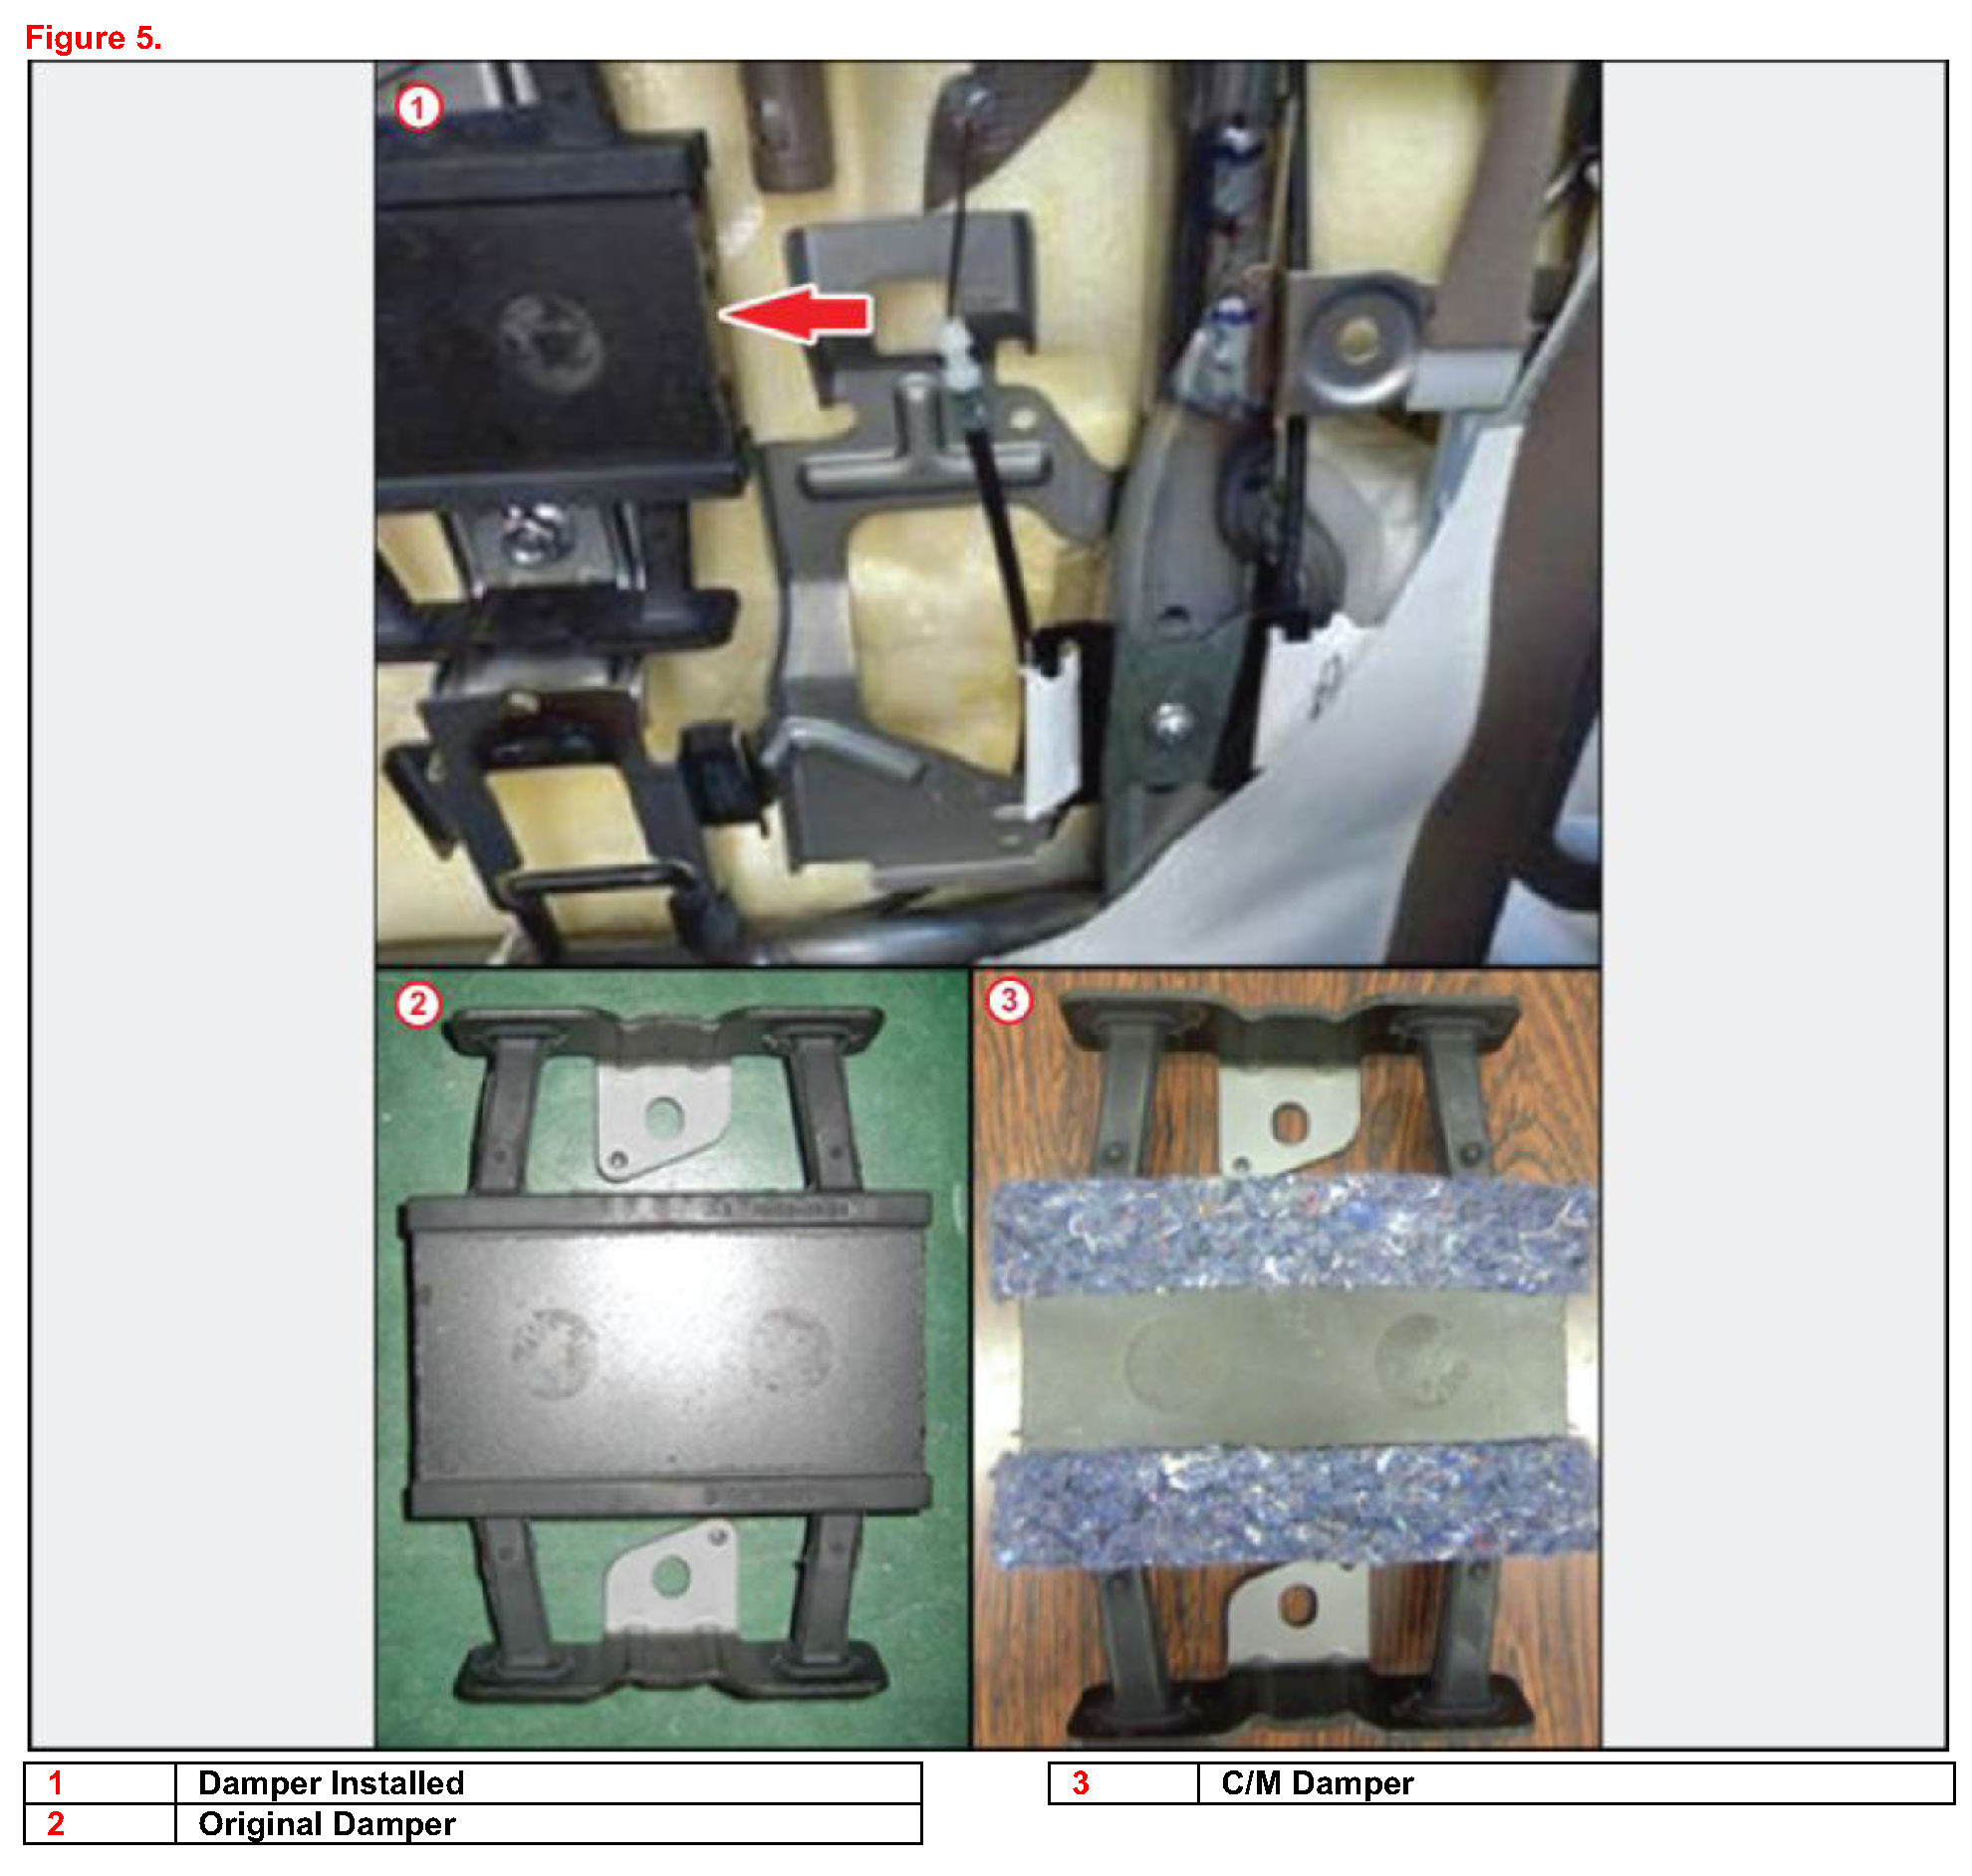
Upon seat back removal, locate damper pictured, remove the two bolts securing the dampener and replace with new service part. See Figure 5.
Torque: 5.5 N-m (55 kgf-cm, 4 ft-lbf)
REASSEMBLY FOR 60/40 SPLIT SIDE WALK-IN TYPE SEAT
1. Install rear seat back board subassembly RH.
- Attach the 7 clips to install the seat back board.
2. Install rear seat back cover.
- Attach the 4 claws to install the cover.
3. Install rear center back lock control lever.
A. Attach the cable clamp to connect the cable to the lever.
B. Move the lever in the direction of the arrow to attach the guide.
C. Install the lever with the 2 screws.
NOTE:
Issue of this Technical Service Bulletin is to ensure that proper repair information is available. IT DOES NOT CONSTITUTE AN AUTHORIZATION FOR REPAIR. Normal provisions of the formal warranty policy, as applicable, will apply.