Part 2
INTERIOR PANELS / TRIM: ROOF HEADLINING: REMOVAL
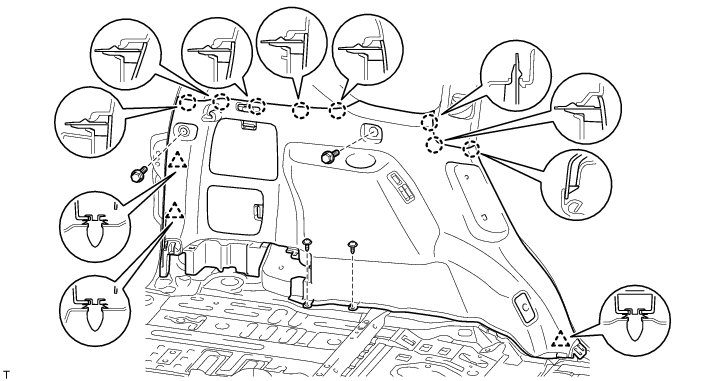
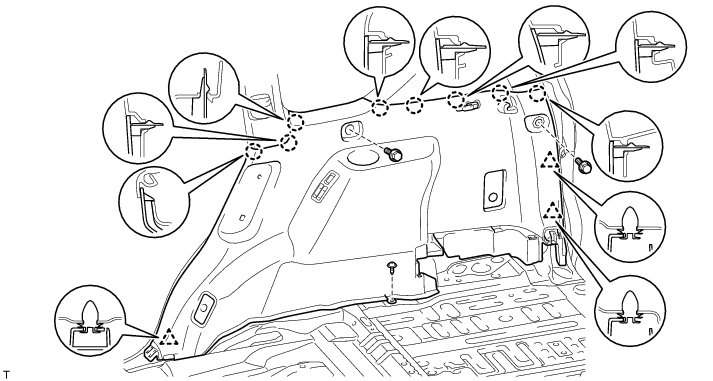
45. REMOVE DECK TRIM SIDE PANEL ASSEMBLY RH
(a) w/o Rear No. 2 Seat:
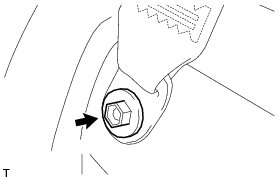
Remove the bolt and disconnect the rear No. 1 seat outer belt floor anchor.
(1) Remove the 4 bolts and screw.
(2) Detach the 5 clips and 8 claws.
(3) Disconnect each connector and remove the deck trim side panel.
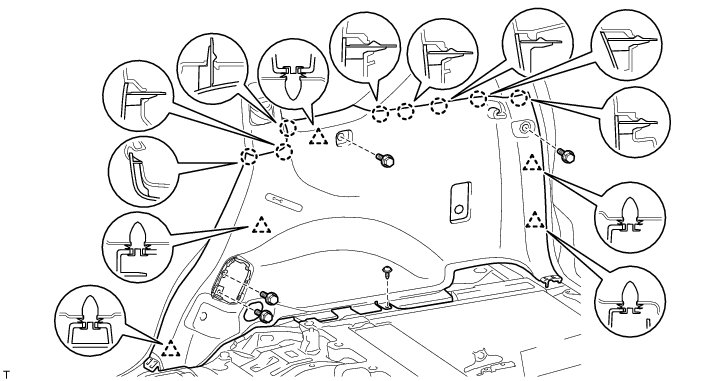
(b) w/ Rear No. 2 Seat:
Remove the bolt and disconnect the rear No. 1 seat outer belt floor anchor.
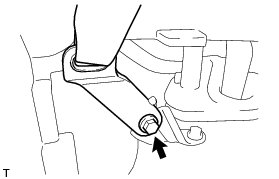
Remove the bolt and disconnect the rear No. 2 seat outer belt floor anchor.
(1) Remove the 2 bolts and screw.
(2) Detach the 3 clips and 8 claws.
(3) Disconnect each connector and remove the deck trim side panel.
46. REMOVE FRONT QUARTER TRIM PANEL ASSEMBLY LH
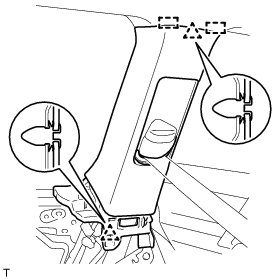
(a) Move the rear shoulder belt anchor adjuster to the lowest position.
(b) Detach the 2 clips and 2 guides.
(c) Pass the rear No. 1 seat outer belt floor anchor through the front quarter trim panel and remove the front quarter trim panel.
47. REMOVE FRONT QUARTER TRIM PANEL ASSEMBLY RH
HINT
Use the same procedure described for the LH side.
48. REMOVE REAR QUARTER TRIM PANEL ASSEMBLY LH
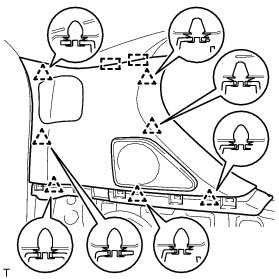
(a) w/o Rear No. 2 Seat:
(1) Detach the 7 clips and 2 guides and remove the rear quarter trim panel.
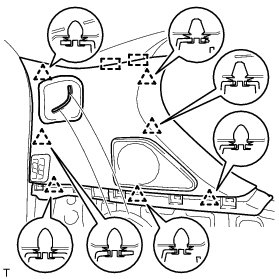
w/ Rear No. 2 Seat:
(1) Detach the 7 clips and 2 guides.
(2) Disconnect the connector.
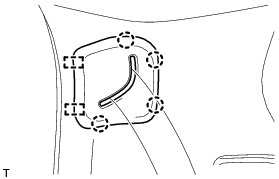
Detach the 4 clips and 2 guides, pass the rear No. 2 seat outer belt floor anchor through the rear quarter trim panel and remove the rear quarter trim panel.
49. REMOVE REAR QUARTER TRIM PANEL ASSEMBLY RH
HINT
Use the same procedure described for the LH side.
50. REMOVE ASSIST GRIP SUB-ASSEMBLY
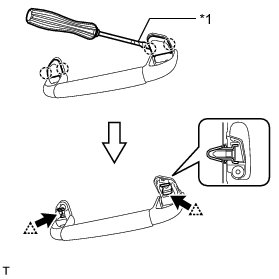
HINT
Use the same procedure for the other assist grip.
(a) Using a screwdriver, detach the 4 claws and remove the 2 assist grip covers.
HINT
Tape the screwdriver tip before use.
Text in Illustration

(b) Detach the 2 clips and remove the assist grip.
(c) Remove the 2 clips from the vehicle body.
51. REMOVE REAR ASSIST GRIP ASSEMBLY LH
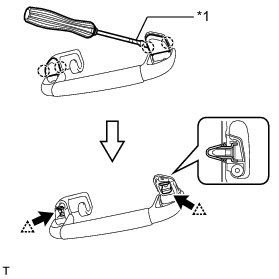
(a) Using a screwdriver, detach the 4 claws and remove the 2 assist grip covers.
HINT
Tape the screwdriver tip before use.
Text in Illustration

(b) Detach the 2 clips and remove the assist grip.
(c) Remove the 2 clips from the vehicle body.
52. REMOVE REAR ASSIST GRIP ASSEMBLY RH
HINT
Use the same procedure described for the LH side.
53. REMOVE ASSIST GRIP (w/ Rear No. 2 Seat)
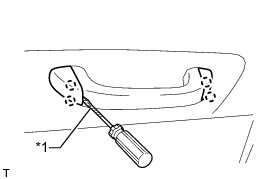
HINT
Use the same procedure for the other assist grip.
(a) Using a screwdriver, detach the 4 claws and open the 2 covers.
HINT
Tape the screwdriver tip before use.
Text in Illustration

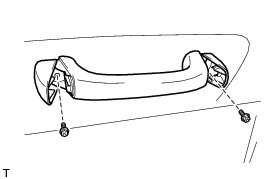
Remove the 2 bolts and assist grip.
54. REMOVE VISOR BRACKET COVER
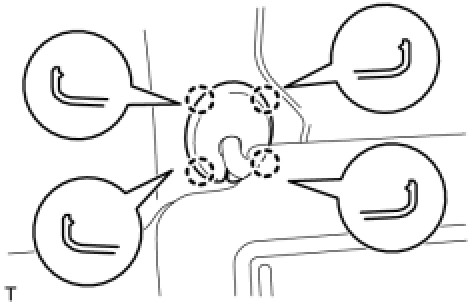
HINT
Use the same procedure for the other visor bracket cover.
(a) Detach the 4 claws and remove the visor bracket cover.
55. REMOVE VISOR ASSEMBLY LH
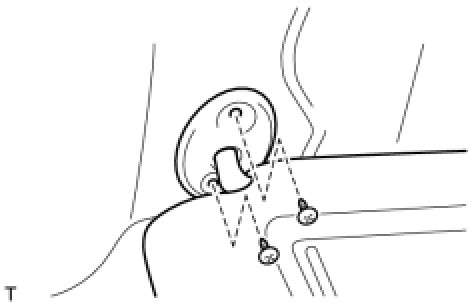
(a) Remove the 2 screws and visor.
56. REMOVE VISOR ASSEMBLY RH
HINT
Use the same procedure described for the LH side.
57. REMOVE VISOR HOLDER
HINT
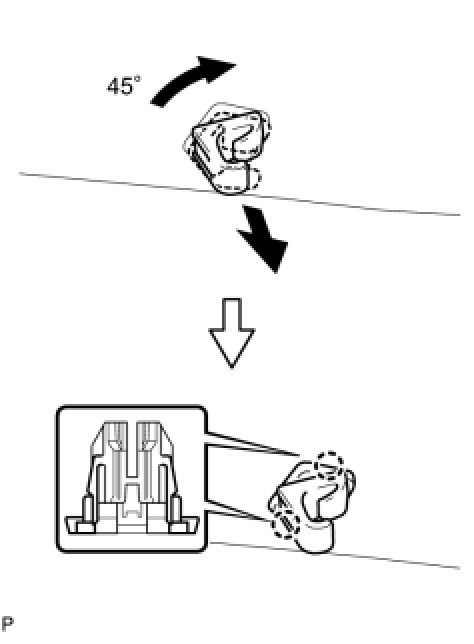
Use the same procedure for the other visor holder.
(a) Turn the visor holder approximately 45° and pull it out as shown in the illustration.
(b) Detach the 2 claws and remove the visor holder.
58. REMOVE MAP LIGHT ASSEMBLY Removal
59. REMOVE FRONT ROOF TOP GARNISH (w/ Lane Departure Alert System) Removal
60. REMOVE RAIN SENSOR COVER Removal
61. REMOVE INNER REAR VIEW MIRROR STAY HOLDER COVER
(a) w/o Automatic High Beam System:
Remove the inner rear view mirror stay holder cover Removal.
(b) w/ Automatic High Beam System:
Remove the inner rear view mirror stay holder cover Removal.
62. REMOVE NO. 1 ROOM LIGHT ASSEMBLY
(a) for Center:
Remove the No. 1 room light assembly Removal.
(b) for Rear:
Remove the No. 1 room light assembly Removal.
63. REMOVE REAR SIDE NO. 1 AIR DUCT (w/ Rear Air Conditioning System) Removal
64. REMOVE ROOF HEADLINING ASSEMBLY
(a) Disconnect the inner mirror connector.
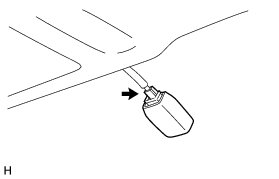
Disconnect the rain sensor connector.
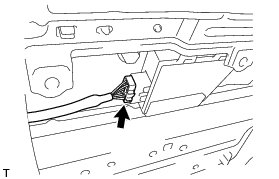
Disconnect the drive gear connector.
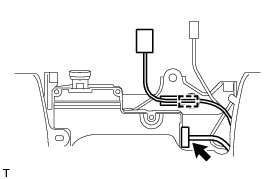
w/ Lane Departure Alert System:
Disconnect the connector and detach the clamp.
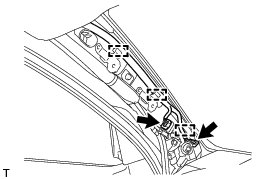
Disconnect the 2 connectors and detach the 3 clamps from the front pillar LH.
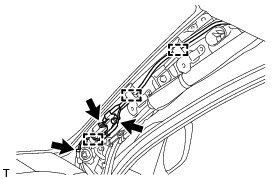
Remove the bolt.
(b) Disconnect the 2 connectors and detach the 3 clamps from the front pillar RH.
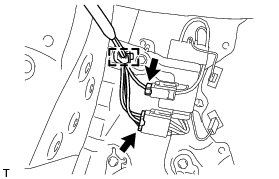
Disconnect the 2 connectors and detach the clamp from the rear pillar LH.
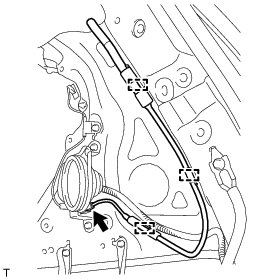
Disconnect the connector and detach the 3 clamps from the rear pillar RH.
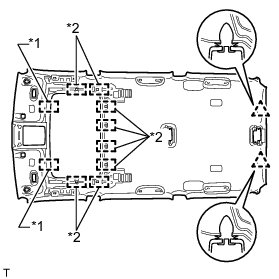
Detach the 2 clips, 2 guides and 8 fasteners.
Text in Illustration
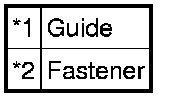
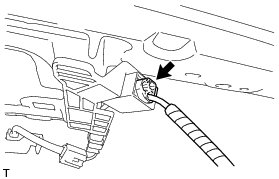
Disconnect the antenna cord connector.
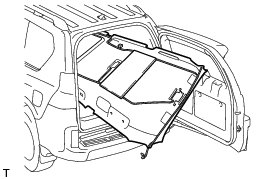
Remove the roof headlining from the back door as shown in the illustration.
NOTICE:
Be careful not to damage the roof headlining when removing it.
65. REMOVE FRONT SHOULDER BELT ANCHOR PLATE SUB-ASSEMBLY LH
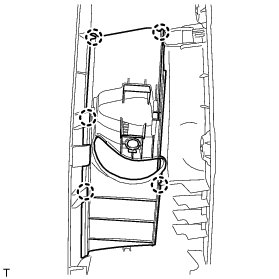
(a) Detach the 5 claws of the front shoulder belt anchor plate and slide the front shoulder belt anchor plate to remove it.
66. REMOVE FRONT SHOULDER BELT ANCHOR PLATE SUB-ASSEMBLY RH
HINT
Use the same procedure described for the LH side.
67. REMOVE REAR SHOULDER BELT ANCHOR PLATE SUB-ASSEMBLY LH
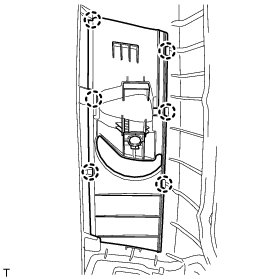
(a) Detach the 6 claws of the rear shoulder belt anchor plate and slide the rear shoulder belt anchor plate to remove it.
68. REMOVE REAR SHOULDER BELT ANCHOR PLATE SUB-ASSEMBLY RH
HINT
Use the same procedure described for the LH side.
69. REMOVE NO. 1 ROOF SIDE RAIL GARNISH LH
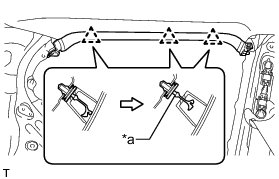
(a) Detach the 3 clips.
(b) Cut off the 3 clips and remove the roof side rail garnish.
Text in Illustration

(c) Remove the 3 clips from the vehicle body.
70. REMOVE NO. 1 ROOF SIDE RAIL GARNISH RH
HINT
Use the same procedure described for the LH side.
71. REMOVE ROOF SIDE INNER GARNISH CAP LH (w/o Rear No. 2 Seat)
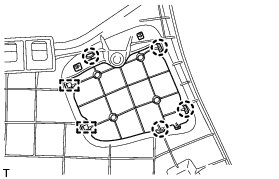
(a) Detach the 4 claws and 2 guides and remove the roof side inner garnish cap.
72. REMOVE ROOF SIDE INNER GARNISH CAP RH (w/o Rear No. 2 Seat)
HINT
Use the same procedure described for the LH side.
73. REMOVE REAR SEAT SHOULDER BELT HANGER LH
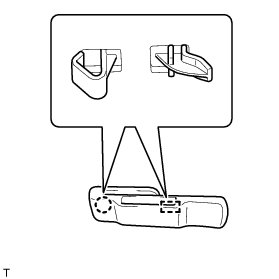
(a) Detach the claw and guide and remove the rear seat shoulder belt hanger.
74. REMOVE REAR SEAT SHOULDER BELT HANGER RH
HINT
Use the same procedure described for the LH side.
75. REMOVE QUARTER TRIM COVER
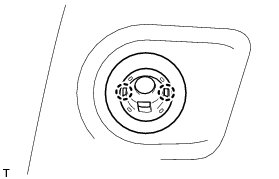
HINT
Use the same procedure for the other quarter trim cover.
(a) Detach the 2 claws and remove the quarter trim cover.
76. REMOVE QUARTER TRIM JACK COVER
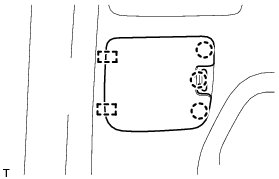
(a) Detach the 3 claws and 2 guides and remove the quarter trim jack cover.
77. REMOVE DECK SIDE TRIM COVER LH
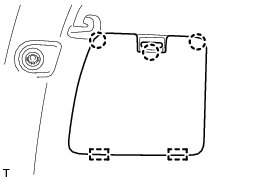
(a) Detach the 3 claws and 2 guides and remove the deck side trim cover.