Reassembly
INTERIOR PANELS / TRIM: ROOF HEADLINING: REASSEMBLY
1. INSTALL NO. 2 ANTENNA CORD SUB-ASSEMBLY Installation
2. INSTALL NO. 1 ROOF WIRE
(a) Apply butyl tape to the roof headlining so that the tape is aligned with the wire harness marking as shown in the illustration.
HINT
Use butyl tape that has a width of 10 mm (0.394 in.).
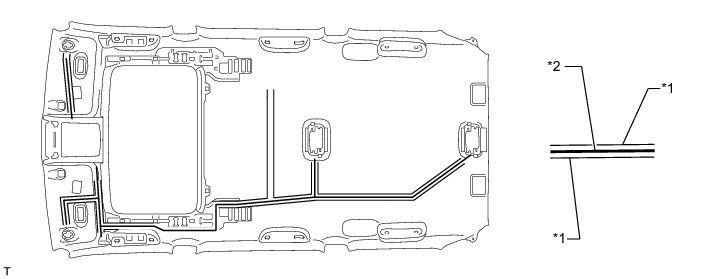
Text in Illustration

(b) Align the No. 1 roof wire with the wire harness installation points as shown in the illustration and attach it to the roof headlining to install it.
HINT
Be sure to securely attach the roof wire so that it is not twisted.
(c) Attach each clamp.
HINT
Make sure the inner mirror wire harness and rain sensor wire harness are securely set into the cutouts of the roof headlining.
(d) Turn the visor connectors approximately 90° clockwise to install them to the roof headlining.
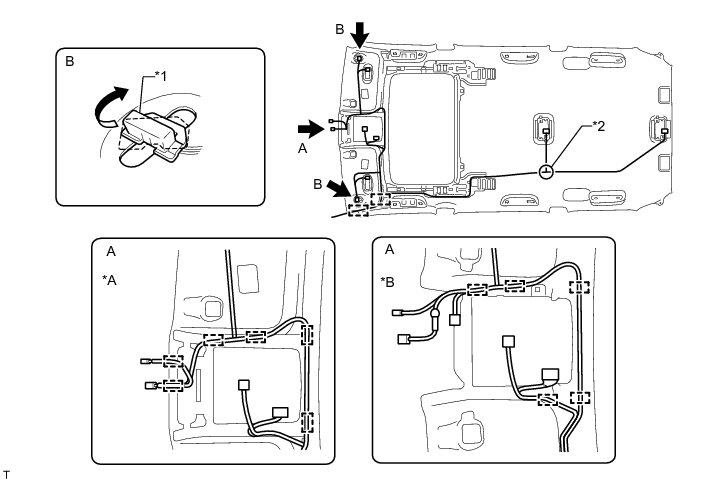
Text in Illustration

3. INSTALL VANITY LIGHT ASSEMBLY
HINT
Use the same procedure for the other vanity light.
(a) Attach the 3 claws to install the vanity light.
4. INSTALL NO. 3 ROOF SILENCER PAD
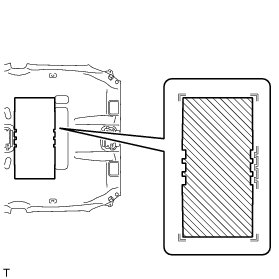
(a) Align the No. 3 roof silencer pad with the markings on the roof headlining and install the No. 3 roof silencer pad to the position shown in the illustration using hot-melt glue or double-sided tape.
5. INSTALL ROOF SIDE AIR OUTLET REGISTER (w/ Rear Air Conditioning System)
HINT
Use the same procedure for all roof side air outlet registers.
(a) Attach the 6 claws to install the roof side air outlet register.