Body - Front Bumper Cover Paint Chipped Or Peeling
L-SB-0151-10November 17, 2010
Front Bumper Cover Paint Peeling or Chipping
Service Category
Vehicle Exterior
Section
Paint/Coatings
Market
USA

Applicability
Introduction
Some 2010 - 2011 model year GX 460 vehicles may exhibit a condition where paint peels or chips on the front bumper cover. The paint may peel or chip on the left side of the bumper cover at or near the rear edge where the bumper cover and front fender meet. The following procedure has been developed to address this condition and increase the gap between the bumper cover and front fender.
Production Change Information

This TSIB applies to vehicles produced BEFORE the Production Change Effective VINs shown.

Warranty Information
APPLICABLE WARRANTY
^ This repair is covered under the Lexus Comprehensive Warranty. This warranty is in effect for 48 months or 50,000 miles, whichever occurs first, from the vehicle's in-service date.
^ Warranty application is limited to occurrence of the specified condition described in this bulletin.

Parts Information

Required Tools & Equipment
Repair Procedure
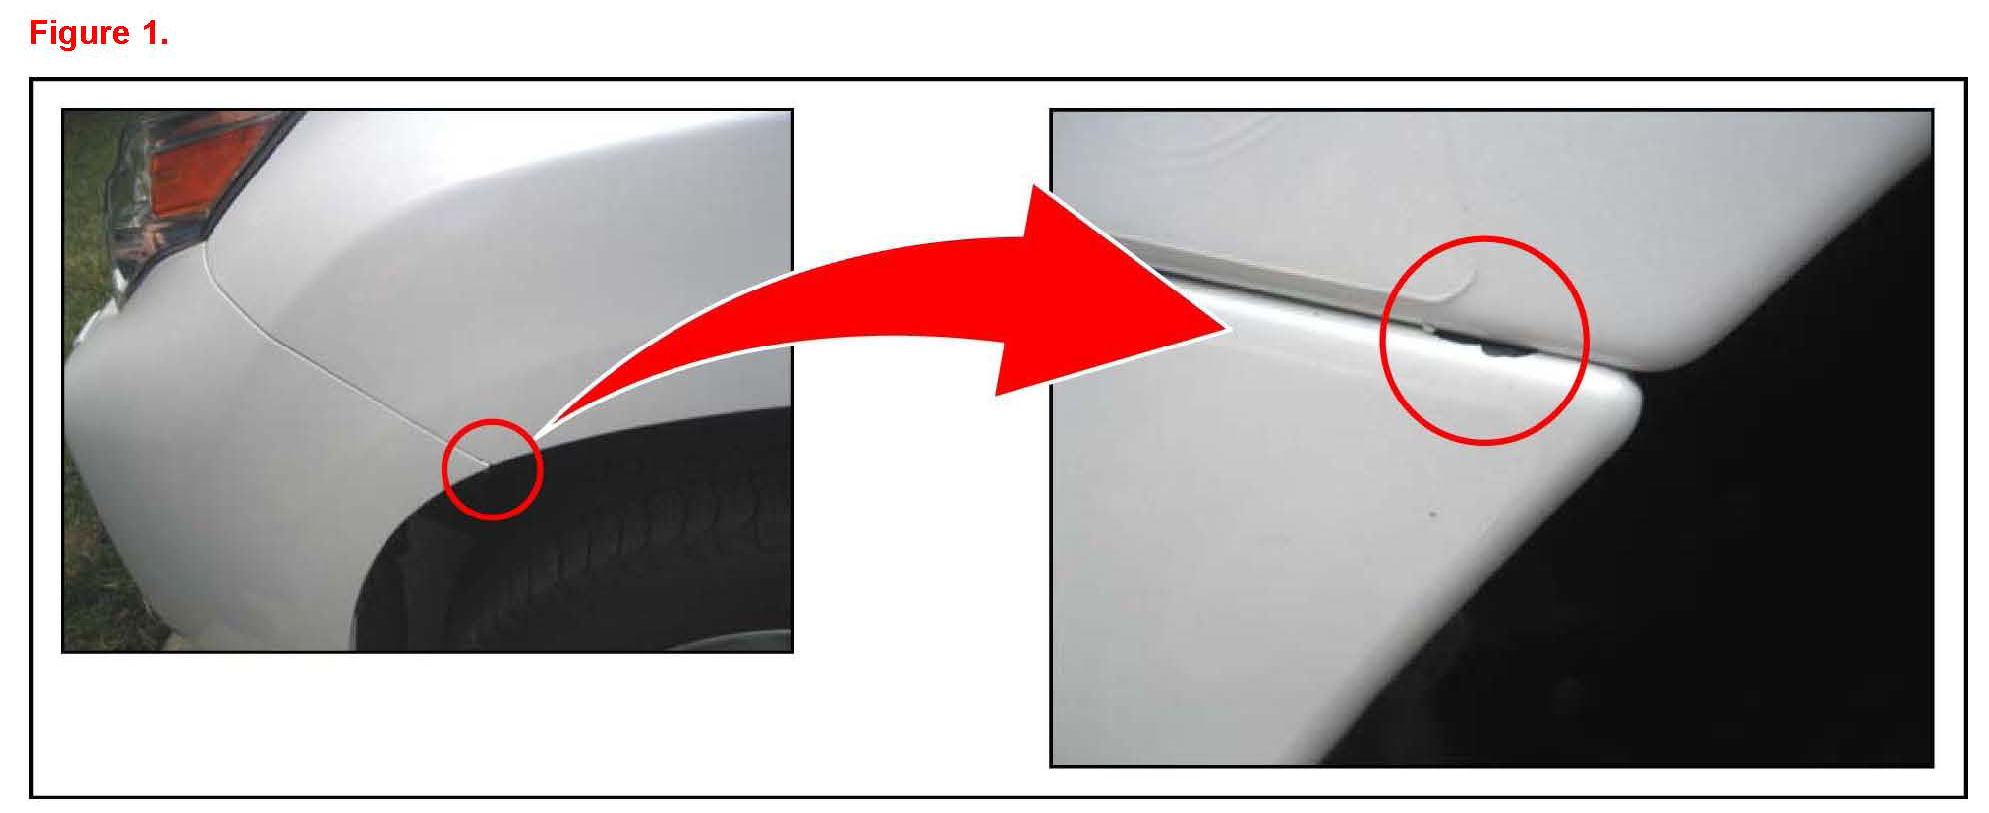
1. Confirm that the front bumper cover paint is peeling or chipping at the location indicated in Figure 1.
^ If the front bumper cover paint is peeling or chipping as indicated above proceed to step 2.
^ If the front bumper cover paint is not peeling or chipping as indicated above STOP This TSIB does NOT apply.
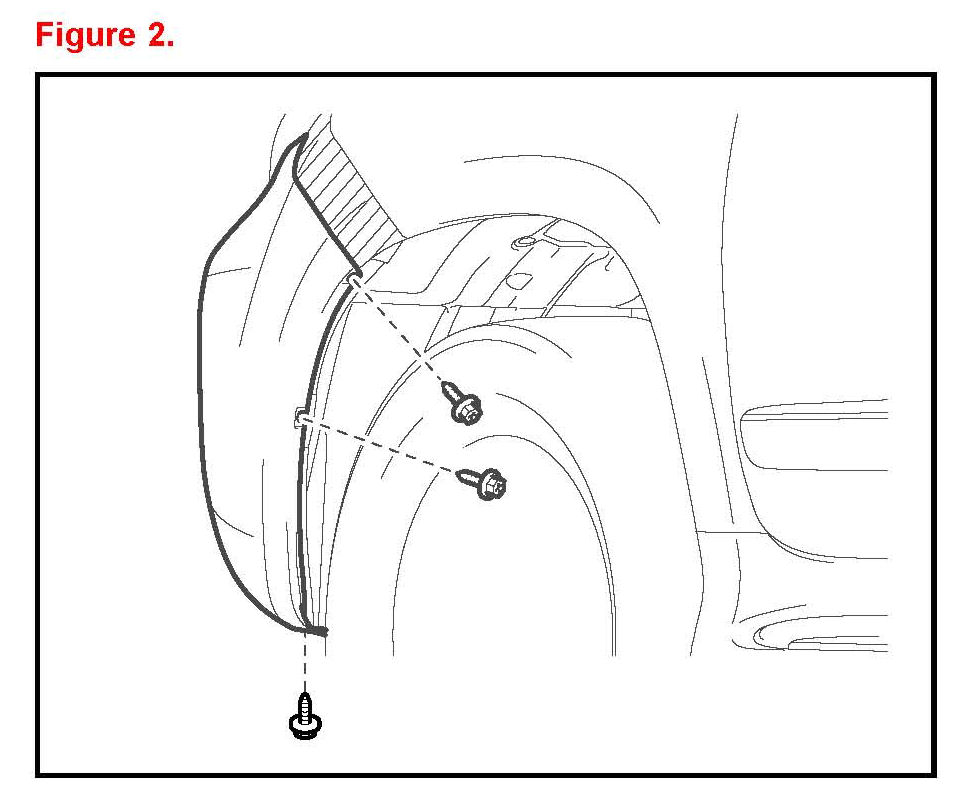
2. Remove the 3 screws.
3. Prepare one support shim from P/N 52117-48020.
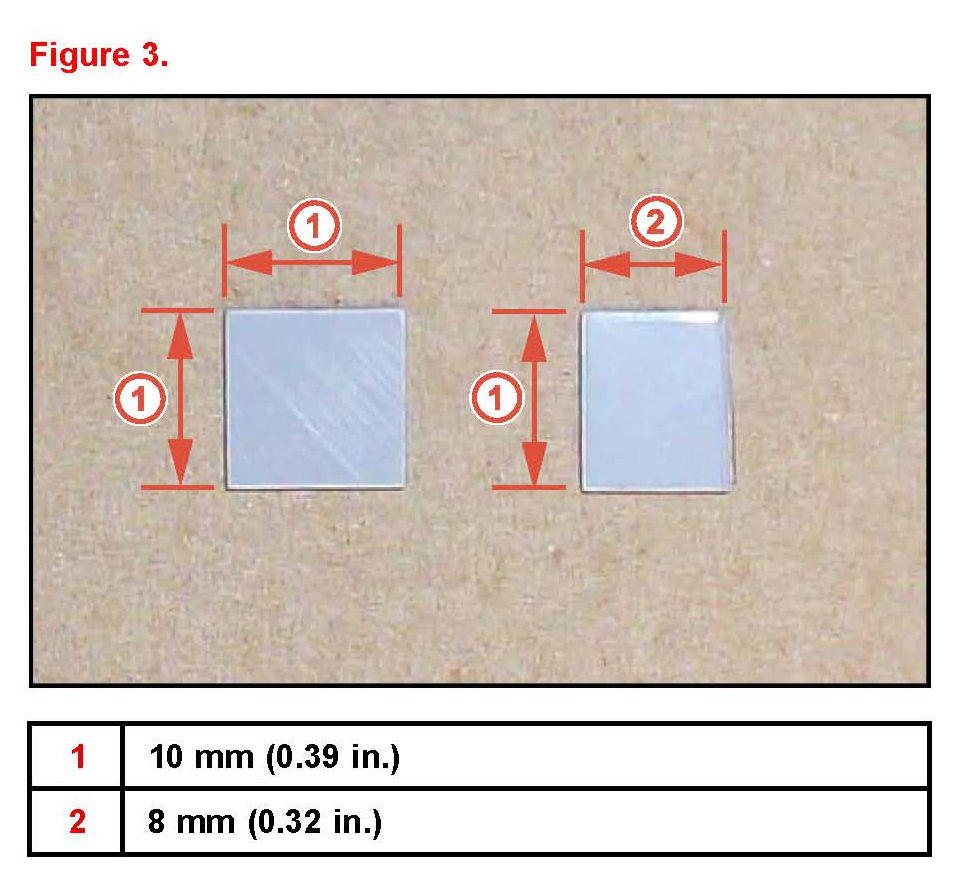
The original dimension of the shim is 10 x 10 mm (0.39 x 0.39 in.). Trim 2 mm (0.08 in.) off of one side of the shim so that the modified shim dimension is 10 x 8 mm (0.39 x 0.32 in.).
Original Shim Dimension: 10 x 10 mm (0.39 x 0.39 in.)
Modified Shim Dimension: 10 x 8 mm (0.39 x 0.32 in.)
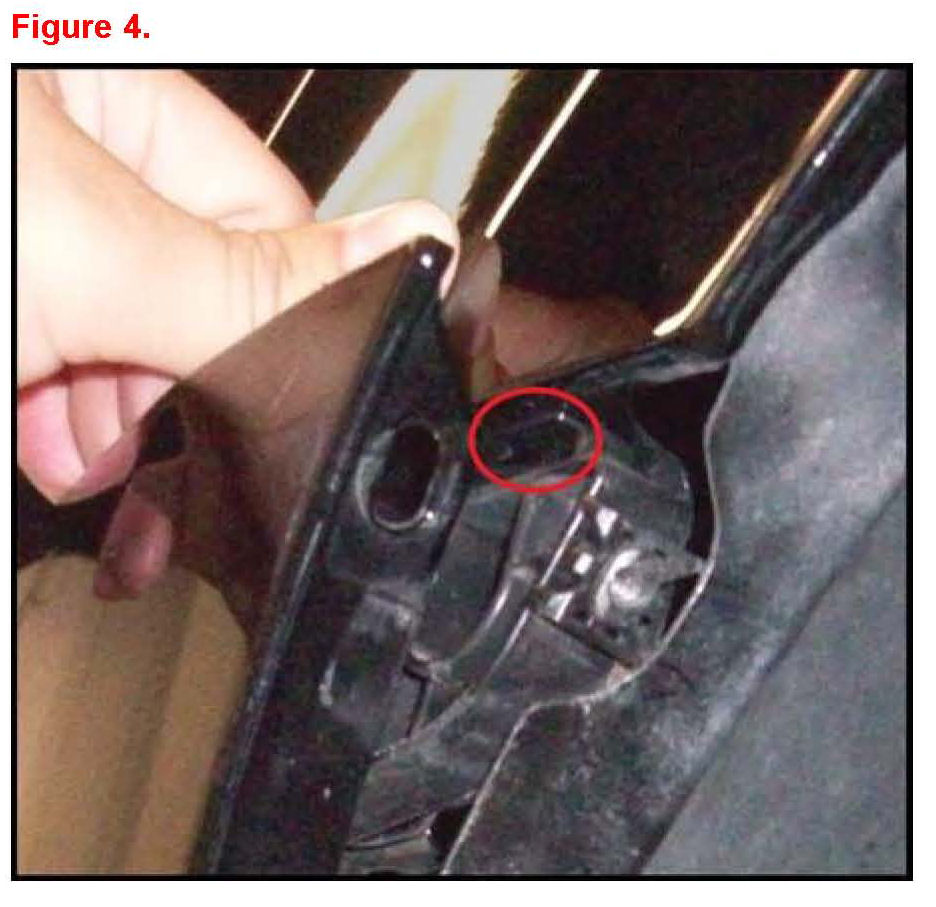
4. Prepare the inside of the left front bumper support at the location shown by cleaning with 3M(TM) General Purpose Adhesive Cleaner or equivalent.
5. Install the modified shim to the front bumper support at the location indicated.
6. Install and tighten the bumper cover screws.
A. Install and tighten the UPPER screw SLOWLY while firmly pressing forward on the bottom end of the bumper cover.
B. Install and tighten the LOWER screw SLOWLY while firmly pressing forward on the bottom end of the bumper cover.
C. Install and tighten the bottom screw.
7. Ensure the gap between the bumper cover and front fender is greater than 0.1 mm.
If a piece of paper can be inserted in the gap between the bumper cover and front fender, the gap is OK.
^ If the gap is OK proceed to step 8.
^ If the gap is NOT greater than 0.1 mm replace the bumper cover.
8. Repaint the affected area.