Removal
AUDIO / VIDEO: STEREO COMPONENT AMPLIFIER (for 14 Speakers): REMOVAL
1. DISCONNECT CABLE FROM NEGATIVE BATTERY TERMINAL
NOTICE:
* w/ Navigation System:
After the engine switch is turned off, the display and navigation module display (navigation system) records various types of memory and settings. As a result, after turning the engine switch off, be sure to wait for the time specified in the following table before disconnecting the cable from the negative (-) battery terminal.
Waiting Time before Disconnecting Cable from Negative (-) Battery Terminal:

* When disconnecting the cable, some systems need to be initialized after the cable is reconnected Repair Instruction - Initialization.
2. REMOVE REAR NO. 2 SEAT ASSEMBLY (w/ Rear No. 2 Seat)
(a) Remove the rear No. 2 seat assembly Removal.
3. REMOVE REAR NO. 1 SEATBACK ASSEMBLY
(a) for 60/40 Split Double-folding Seat Type LH Side:
Remove the rear No. 1 seatback assembly Removal.
(b) for 60/40 Split Double-folding Seat Type RH Side:
Remove the rear No. 1 seatback assembly Removal.
(c) for 60/40 Split Slide Walk-in Seat Type LH Side:
Remove the rear No. 1 seatback assembly Removal.
(d) for 60/40 Split Slide Walk-in Seat Type RH Side:
Remove the rear No. 1 seatback assembly Removal.
4. REMOVE REAR NO. 1 FLOOR STEP COVER (w/ Rear No. 2 Seat) Removal
5. REMOVE QUARTER SCUFF PLATE LH (w/ Rear No. 2 Seat) Removal
6. REMOVE REAR DOOR SCUFF PLATE LH Removal
7. REMOVE REAR DOOR OPENING TRIM WEATHERSTRIP LH Removal
8. REMOVE OUTER LAP BELT ANCHOR COVER Removal
9. REMOVE TONNEAU COVER ASSEMBLY (w/ Tonneau Cover) Removal
10. REMOVE REAR NO. 1 SEAT OUTER LAP BELT ANCHOR COVER Removal
11. REMOVE NO. 1 LUGGAGE COMPARTMENT TRIM HOOK Removal
12. REMOVE NO. 1 TONNEAU COVER HOLDER CAP (w/o Tonneau Cover) Removal
13. REMOVE FRONT DECK SIDE TRIM COVER RH (w/ Tonneau Cover) Removal
14. REMOVE ASSIST GRIP PLUG (w/ Rear No. 2 Seat) Removal
15. REMOVE ASSIST GRIP SUB-ASSEMBLY (w/ Rear No. 2 Seat) Removal
16. REMOVE DECK TRIM SIDE PANEL ASSEMBLY LH Removal
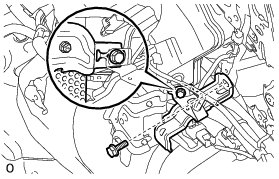
17. REMOVE AMPLIFIER BRACKET
(a) Remove the 2 bolts and amplifier bracket.
18. REMOVE STEREO COMPONENT AMPLIFIER ASSEMBLY WITH BRACKET
(a) Disconnect the 4 connectors.
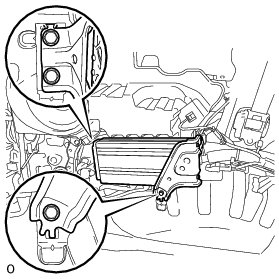
(b) Remove the 3 bolts and stereo component amplifier assembly with bracket.
19. REMOVE NO. 1 AMPLIFIER BRACKET
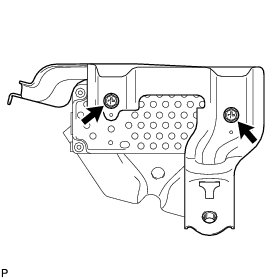
(a) Remove the 2 screws and No. 1 amplifier bracket.
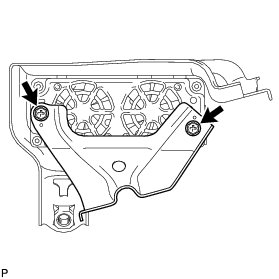
20. REMOVE NO. 2 AMPLIFIER BRACKET
(a) Remove the 2 screws and No. 2 amplifier bracket.