Installation
AUDIO / VIDEO: RADIO ANTENNA CORD: INSTALLATION
INSTALLATION
1. INSTALL ANTENNA CORD SUB-ASSEMBLY (w/o DVD Player)
(a) Install the antenna cord sub-assembly with the 2 bolts.
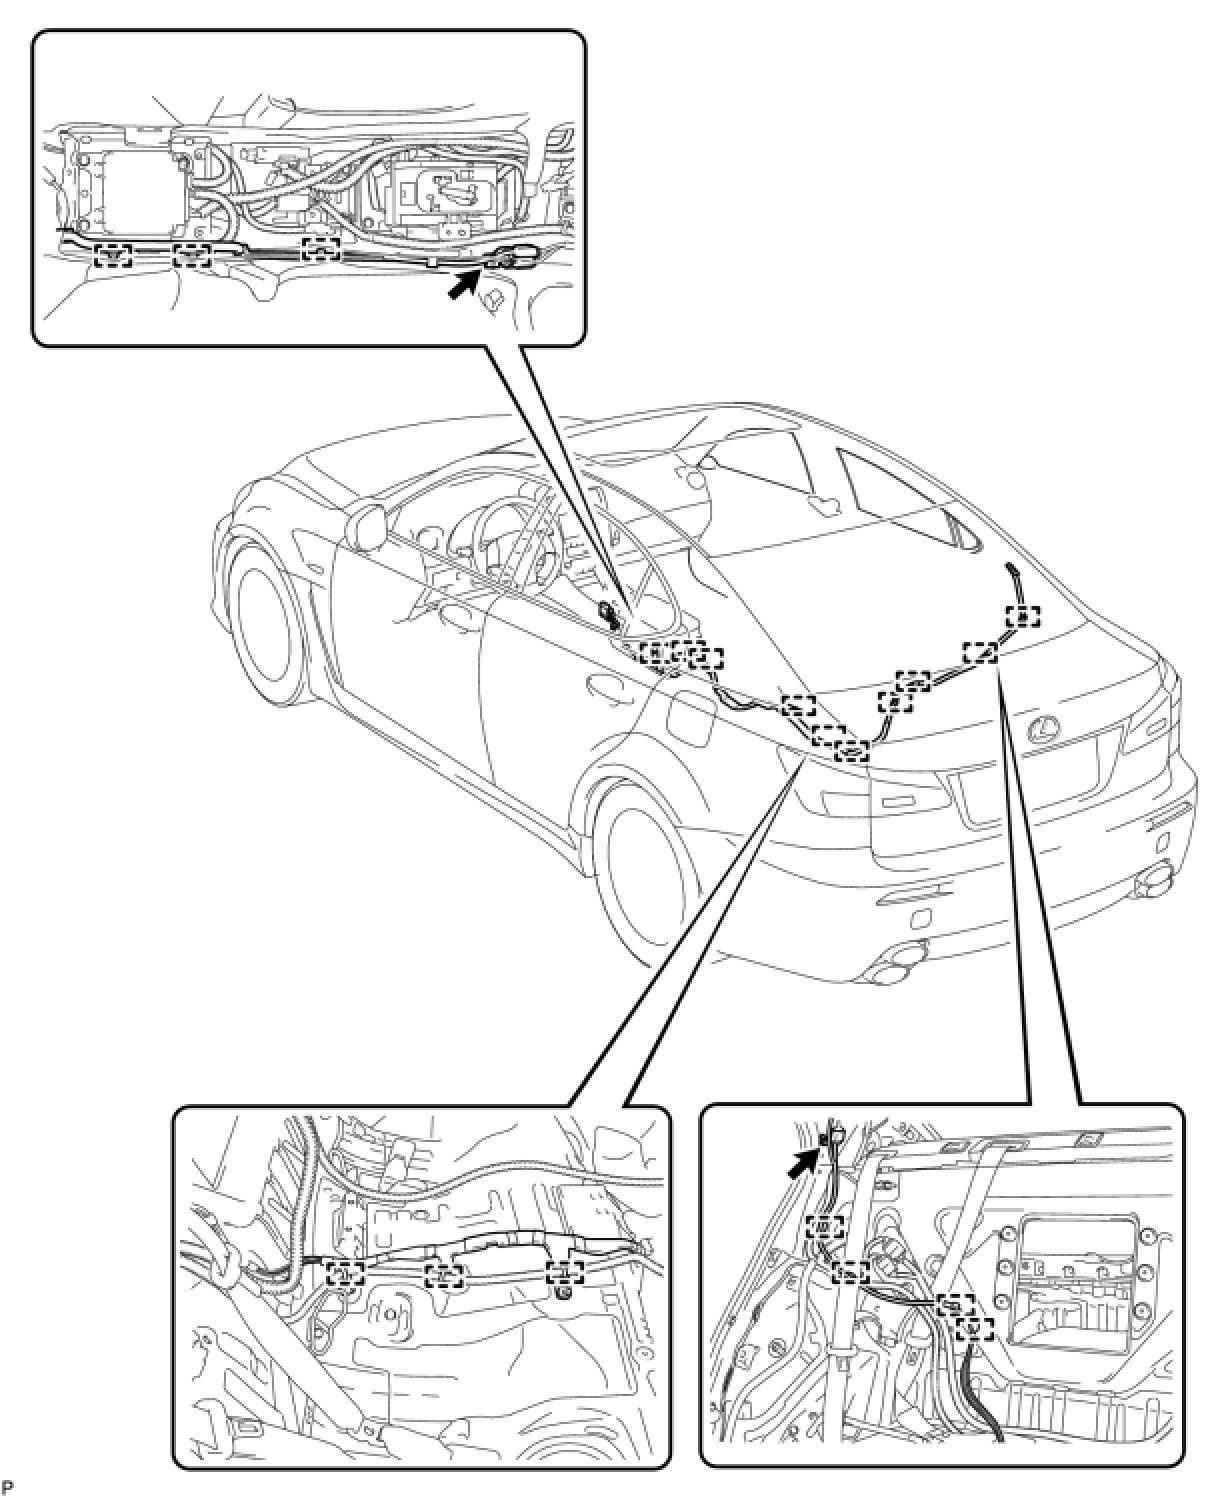
Torque: 7.0 Nm (71 kgf-cm, 62 in-lbf)
(b) Engage the 10 clamps.
(c) Connect the connectors.
2. INSTALL ANTENNA CORD SUB-ASSEMBLY (w/ DVD Player)
(a) Install the antenna cord sub-assembly with the 2 bolts.
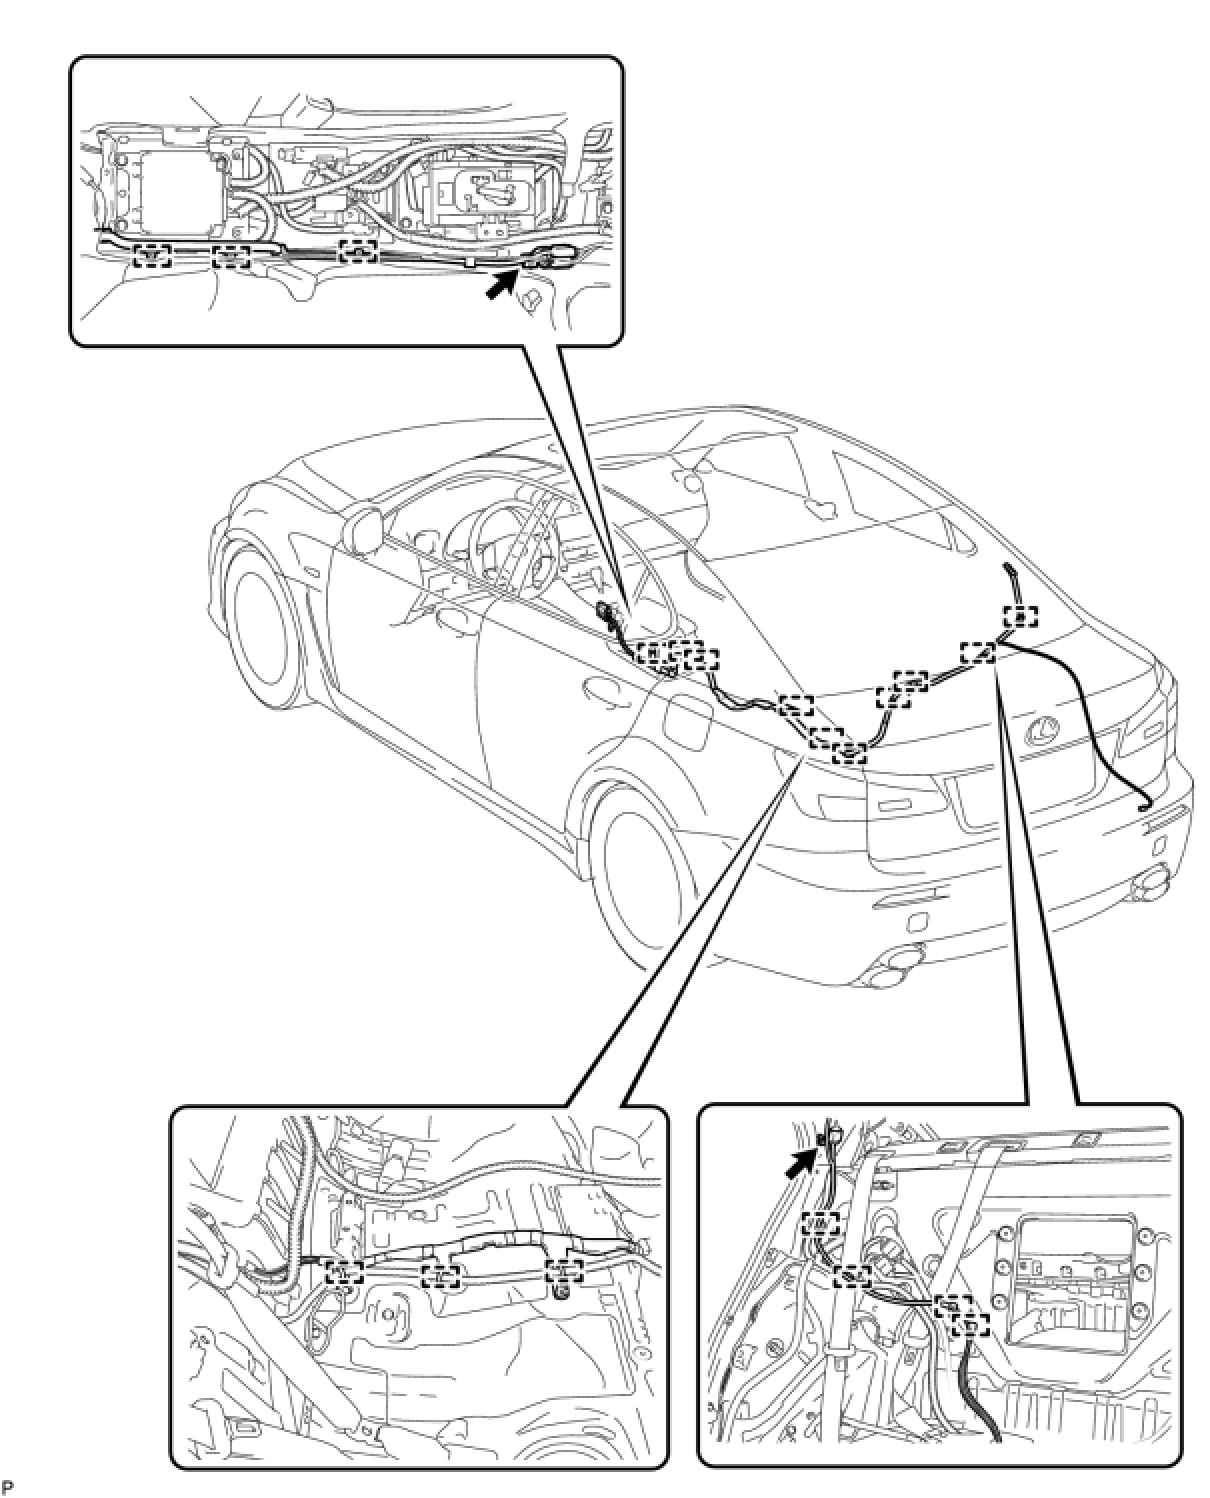
Torque: 7.0 Nm (71 kgf-cm, 62 in-lbf)
(b) Engage the 10 clamps.
(c) Connect the connectors.
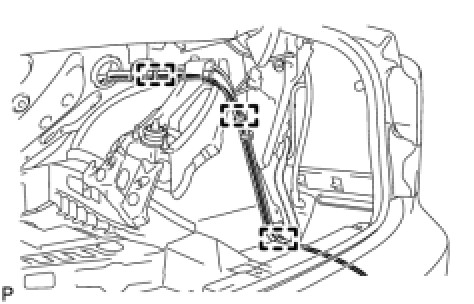
(d) Engage the 3 clamps.
(e) Connect the connector.
3. INSTALL SIDE LUGGAGE COMPARTMENT TRIM COVER (w/ DVD Player) Installation
4. INSTALL NO. 1 LUGGAGE COMPARTMENT TRIM HOOK (w/ DVD Player) Installation
5. INSTALL FRONT LUGGAGE COMPARTMENT TRIM COVER (w/ DVD Player) Installation
6. INSTALL NO. 2 LUGGAGE COMPARTMENT TRIM HOOK (w/ DVD Player) Installation
7. INSTALL ROPE HOOK (w/ DVD Player) Installation
8. INSTALL NO. 2 ROOM LIGHT ASSEMBLY (w/ DVD Player) Installation
9. INSTALL REAR LUGGAGE COMPARTMENT TRIM COVER (w/ DVD Player) Installation
10. INSTALL ROPE HOOK ASSEMBLY (w/ DVD Player) Installation
11. INSTALL DECK SIDE TRIM BOX LH (w/ DVD Player)
12. INSTALL DECK SIDE TRIM BOX RH (w/ DVD Player)
13. INSTALL LUGGAGE COMPARTMENT TRIM COVER (w/ DVD Player)
14. INSTALL ROOF SIDE INNER GARNISH
HINT: Use the same procedure for the RH side and the LH side Installation.
15. INSTALL REAR SEAT SIDE GARNISH
HINT: Use the same procedure for the RH side and the LH side Installation.
16. INSTALL REAR DOOR SCUFF PLATE
HINT: Use the same procedure for the RH side and the LH side Installation.
17. INSTALL REAR SEATBACK ASSEMBLY Installation
18. INSTALL REAR SEAT HEADREST ASSEMBLY
19. INSTALL REAR SEAT CUSHION ASSEMBLY Installation
20. INSTALL NO. 2 ANTENNA CORD SUB-ASSEMBLY
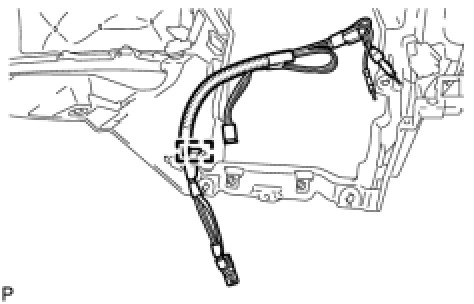
(a) Engage the clamp and install the No. 2 antenna cord sub-assembly.
21. INSTALL INSTRUMENT PANEL SAFETY PAD ASSEMBLY Installation
22. CONNECT INSTRUMENT PANEL WIRE ASSEMBLY Installation
23. INSTALL NO. 1 CONSOLE BOX DUCT Installation
24. INSTALL NO. 2 CONSOLE BOX DUCT Installation
25. INSTALL FRONT STEREO COMPONENT SPEAKER ASSEMBLY (w/ Front Center Speaker) Installation
26. INSTALL NO. 3 INSTRUMENT PANEL SPEAKER PANEL SUB-ASSEMBLY Installation
27. INSTALL NO. 2 INSTRUMENT PANEL REGISTER ASSEMBLY Installation
28. INSTALL NO. 1 INSTRUMENT PANEL REGISTER ASSEMBLY Installation
29. INSTALL FRONT PILLAR GARNISH LH Installation
30. INSTALL FRONT PILLAR GARNISH RH
HINT: Use the same procedure for the RH side and the LH side.
31. INSTALL GLOVE COMPARTMENT DOOR ASSEMBLY Installation
32. INSTALL FRONT PASSENGER SIDE KNEE AIRBAG ASSEMBLY Installation
33. INSTALL NO. 2 INSTRUMENT PANEL UNDER COVER SUB-ASSEMBLY Installation
34. INSTALL SIDE INSTRUMENT PANEL RH Installation
35. INSTALL FRONT DOOR OPENING TRIM COVER RH Installation
36. INSTALL FRONT DOOR SCUFF PLATE RH
HINT: Use the same procedure for the RH side and the LH side.
37. INSTALL COMBINATION METER ASSEMBLY Installation
38. INSTALL INSTRUMENT CLUSTER FINISH PANEL SUB-ASSEMBLY Installation
39. INSTALL DRIVER SIDE KNEE AIRBAG ASSEMBLY Installation
40. INSTALL LOWER INSTRUMENT PANEL FINISH PANEL SUB-ASSEMBLY Installation
41. INSTALL NO. 1 INSTRUMENT PANEL UNDER COVER SUB-ASSEMBLY Installation
42. INSTALL SIDE INSTRUMENT PANEL LH Installation
43. INSTALL FRONT DOOR OPENING TRIM COVER LH Installation
44. INSTALL FRONT DOOR SCUFF PLATE LH Installation
45. INSTALL TURN SIGNAL SWITCH ASSEMBLY WITH SPIRAL CABLE SUB-ASSEMBLY Installation
46. INSTALL STEERING COLUMN COVER Installation
47. ADJUST SPIRAL CABLE SUB-ASSEMBLY Installation
48. INSTALL STEERING WHEEL ASSEMBLY Installation
49. INSTALL STEERING PAD Installation
50. INSTALL LOWER NO. 3 STEERING WHEEL COVER Installation
51. INSTALL LOWER NO. 2 STEERING WHEEL COVER Installation
52. INSTALL INTEGRATION CONTROL PANEL WITH RADIO RECEIVER ASSEMBLY (w/o Navigation System) Installation
53. INSTALL MULTI-DISPLAY WITH RADIO RECEIVER ASSEMBLY (w/ Navigation System) Installation
54. INSTALL CENTER LOWER INSTRUMENT CLUSTER FINISH PANEL Installation
55. INSTALL NO. 3 INSTRUMENT PANEL REGISTER ASSEMBLY Installation
56. INSTALL CONSOLE BOX Installation
57. INSTALL CONSOLE BOX REGISTER ASSEMBLY Installation
58. INSTALL REAR ASH RECEPTACLE ASSEMBLY Installation
59. INSTALL FRONT ASH RECEPTACLE ASSEMBLY Installation
60. INSTALL CONSOLE PANEL SUB-ASSEMBLY Installation
61. INSTALL UPPER NO. 2 CONSOLE PANEL GARNISH Installation
62. INSTALL UPPER NO. 1 CONSOLE PANEL GARNISH Installation
63. INSTALL SHIFT LEVER KNOB SUB-ASSEMBLY Installation
64. CONNECT CABLE TO NEGATIVE BATTERY TERMINAL
NOTE:
When disconnecting the cable, some systems need to be initialized after the cable is reconnected Repair Instruction - Initialization.
65. INSPECT STEERING PAD Installation
66. INSPECT SRS WARNING LIGHT
Diagnosis System