Rear Console Box: Installation: Installation
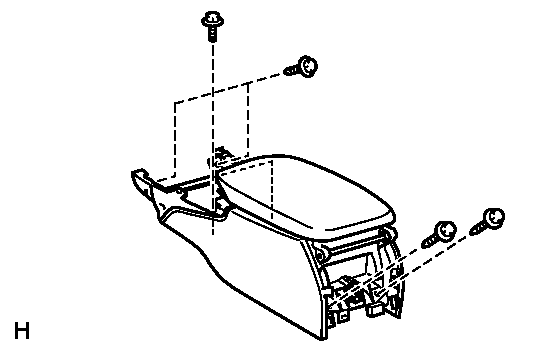
- INSTALL CONSOLE BOX ASSEMBLY
- Connect the connector.
 Courtesy of © TOYOTA, LICENSE AGREEMENT TMS1002
- Install the console box assembly with the 4 bolts and 2 screws.
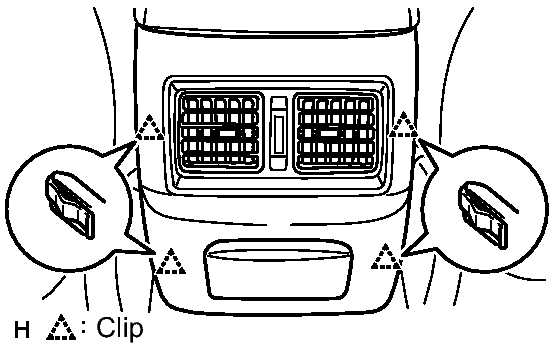
- INSTALL CONSOLE BOX REGISTER ASSEMBLY
- Engage the 4 clips to install the register.
 Courtesy of © TOYOTA, LICENSE AGREEMENT TMS1002
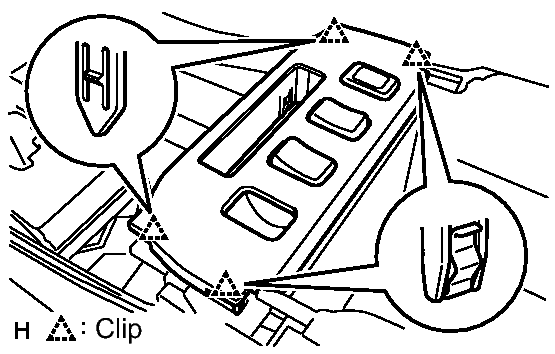
- INSTALL CONSOLE BOX PLATE
- Connect the connector.
 Courtesy of © TOYOTA, LICENSE AGREEMENT TMS1002
- Engage the 4 clips to install the console box plate.
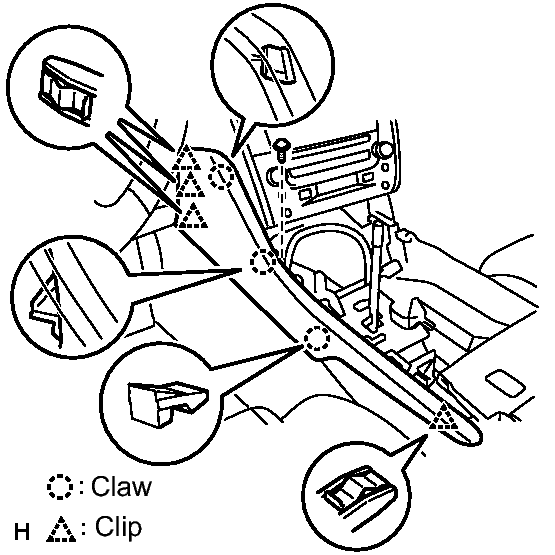
- INSTALL INSTRUMENT PANEL FINISH PANEL END LH
- Engage the 4 clips and 3 claws to install the instrument panel finish panel end LH.
 Courtesy of © TOYOTA, LICENSE AGREEMENT TMS1002
- Install the screw.
- INSTALL INSTRUMENT PANEL FINISH PANEL END RH
- Engage the 3 clips and 3 claws to install the instrument panel finish panel end RH.
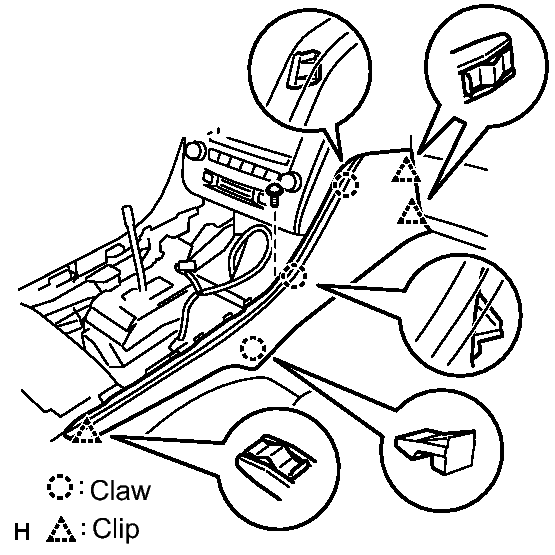 Courtesy of © TOYOTA, LICENSE AGREEMENT TMS1002
- Install the screw.
- INSTALL CONSOLE UPPER PANEL ASSEMBLY
- Connect the connector.
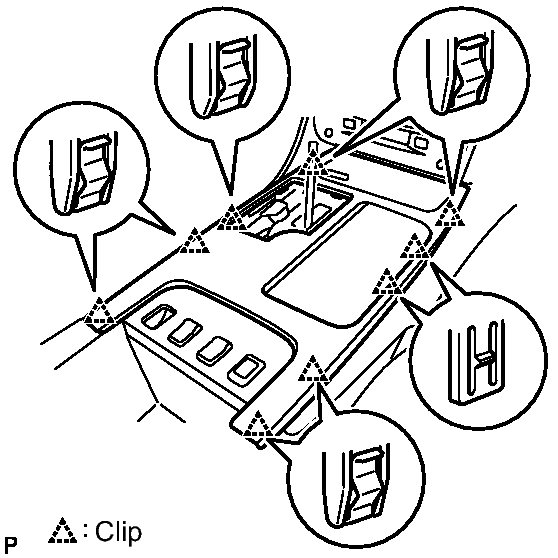 Courtesy of © TOYOTA, LICENSE AGREEMENT TMS1002
- Attach the 9 clips to install the console upper panel assembly.
- Install the shift lever knob and turn it in the direction indicated by the arrow.
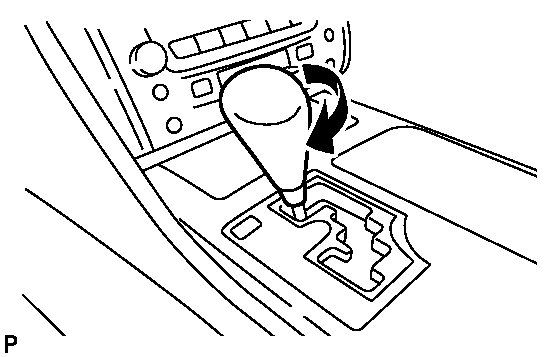 Courtesy of © TOYOTA, LICENSE AGREEMENT TMS1002
- INSTALL FRONT CONSOLE UPPER PANEL GARNISH
- Engage the claws to install the garnish.