Canada - Interior - Third Row Seats, Rattle
BulletinTSB2636
Issue Date
March 31, 2009
Title
RATTLE NOISE FROM THIRD ROW SEATS
Component
BODY COMPONENTS
Models
'08-'09 LX570
INTRODUCTION:
Some customers may complain of a rattle noise coming from the third row seats while driving with the seats in the stowed position. Use this repair procedure to address customer concerns.

APPLICABILITY:
PRODUCTION CHANGE INFORMATION:

This TSB applies to vehicles produced BEFORE the Production Change Effective VIN shown.
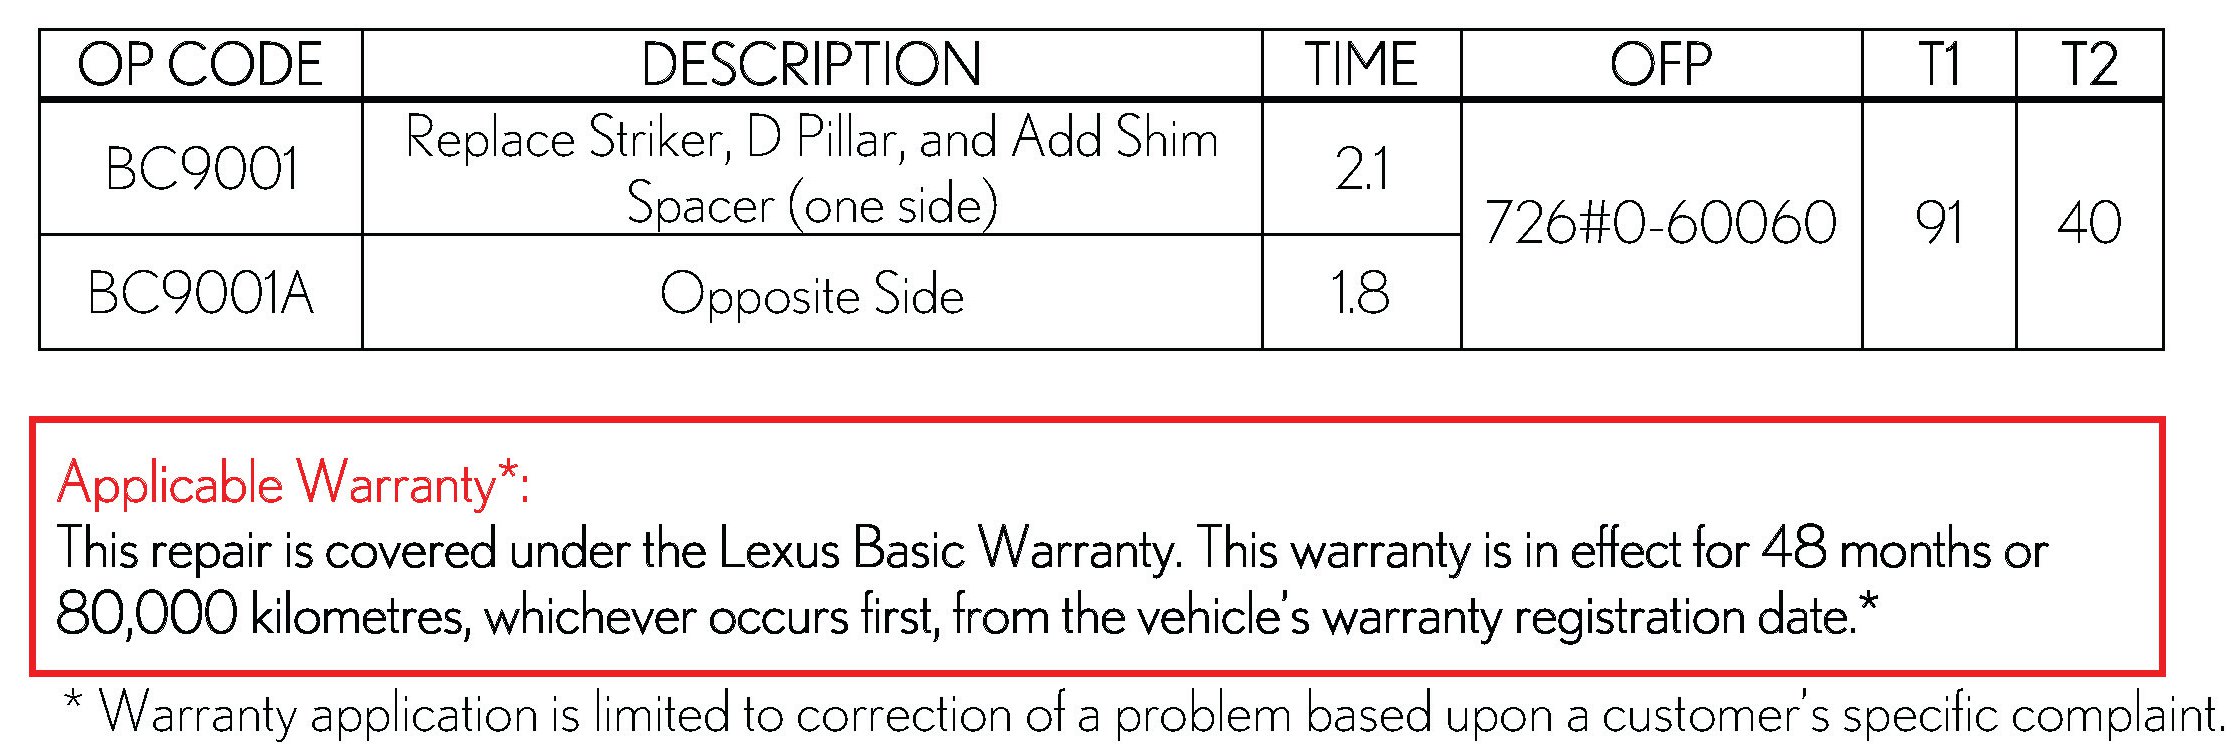
WARRANTY INFORMATION:
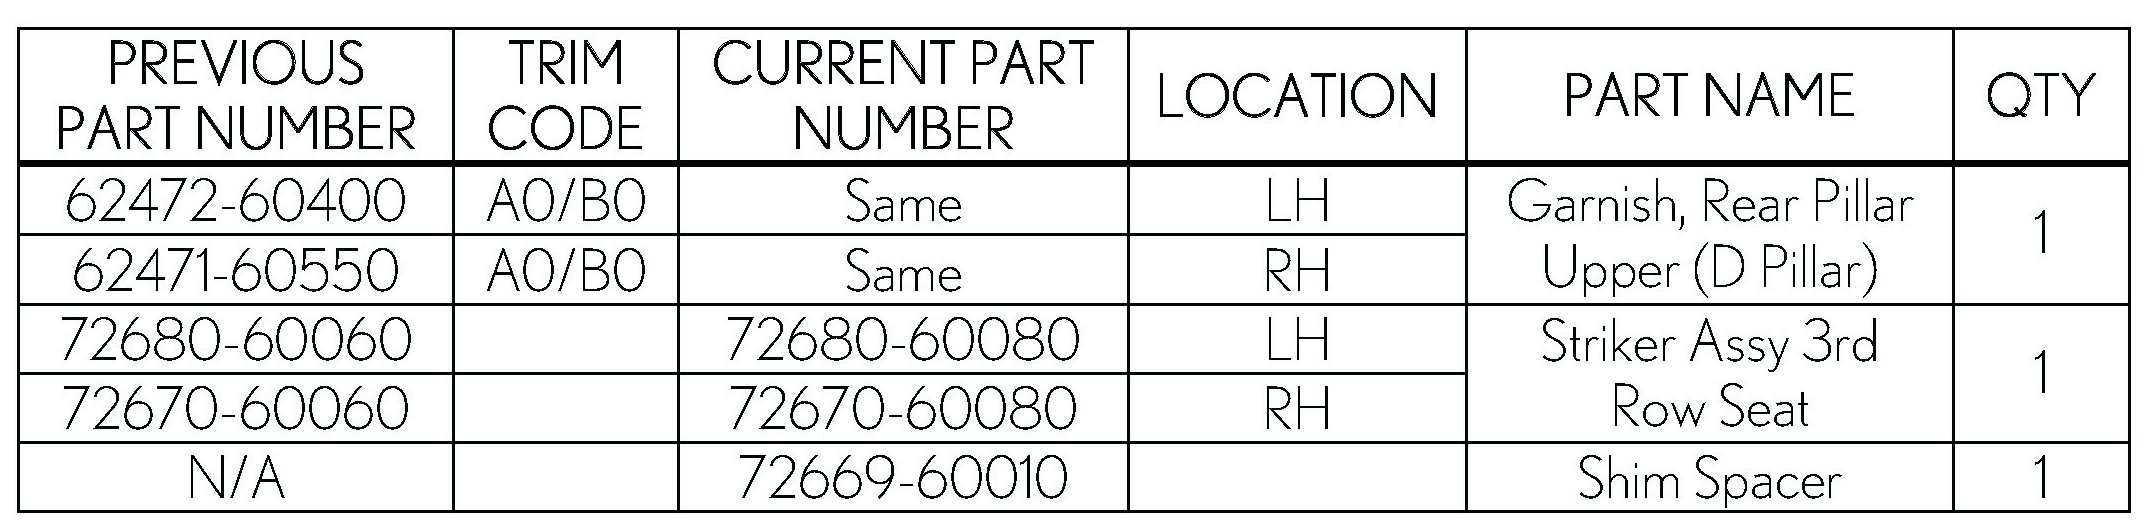
PARTS INFORMATION:
REPAIR PROCEDURE:
HINT
Use the same procedure for Left hand side and Right hand side. The following shows Left side.
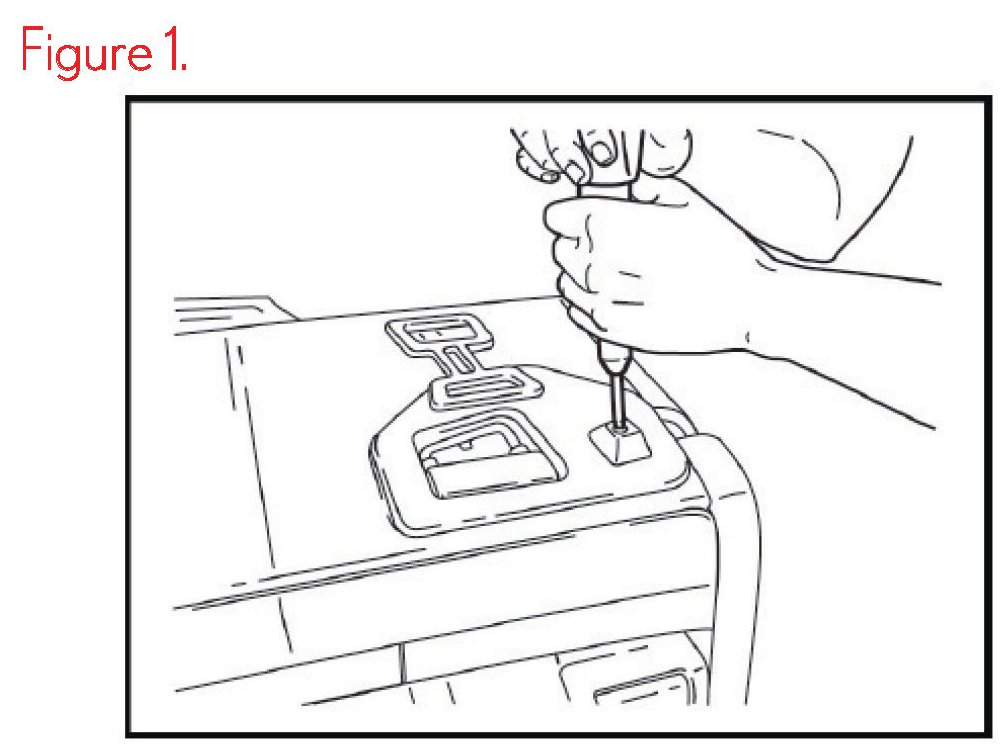
1. With the seatback folded down, remove the rubber bumper from the back of the seat.
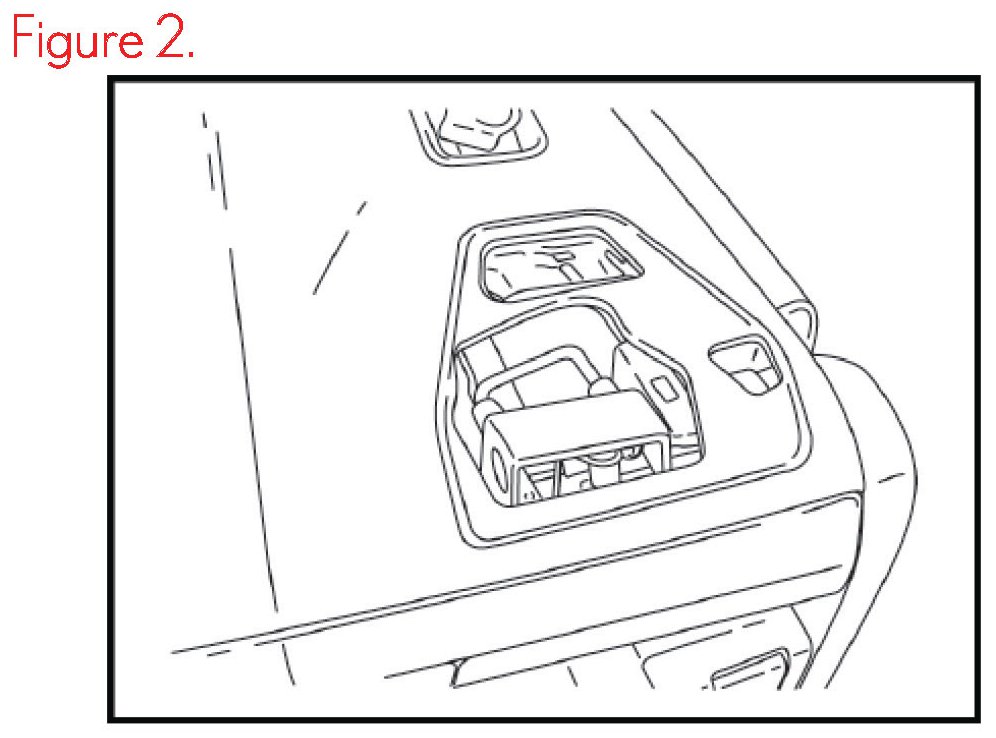
2. Remove the seat bezel by disengaging the clip and hook.
3. Release the "J" hook for the upper seat cover.
HINT
Start from the outer side next to D pillar to prevent the J hook from breaking.
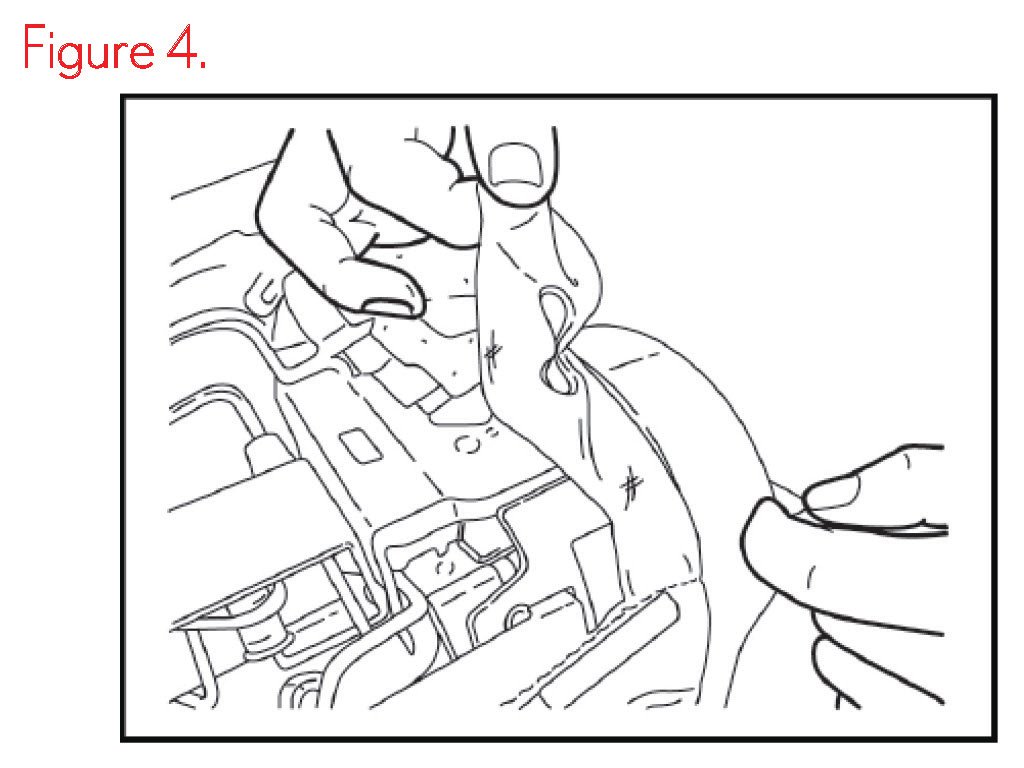
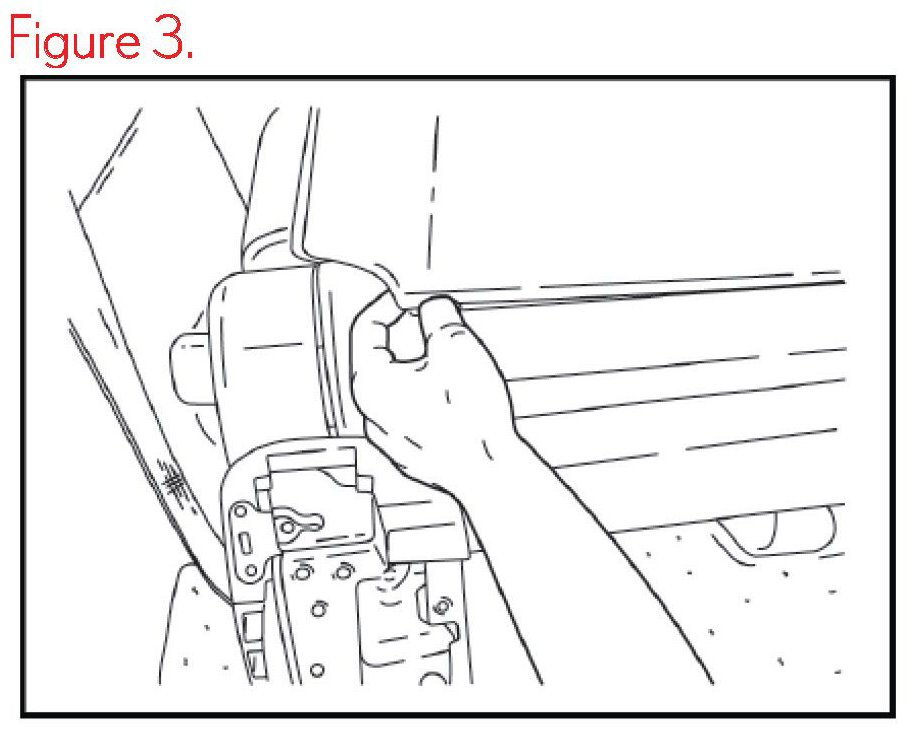
4. Unhook the seat cover from the inner and outer part of the seat frame.
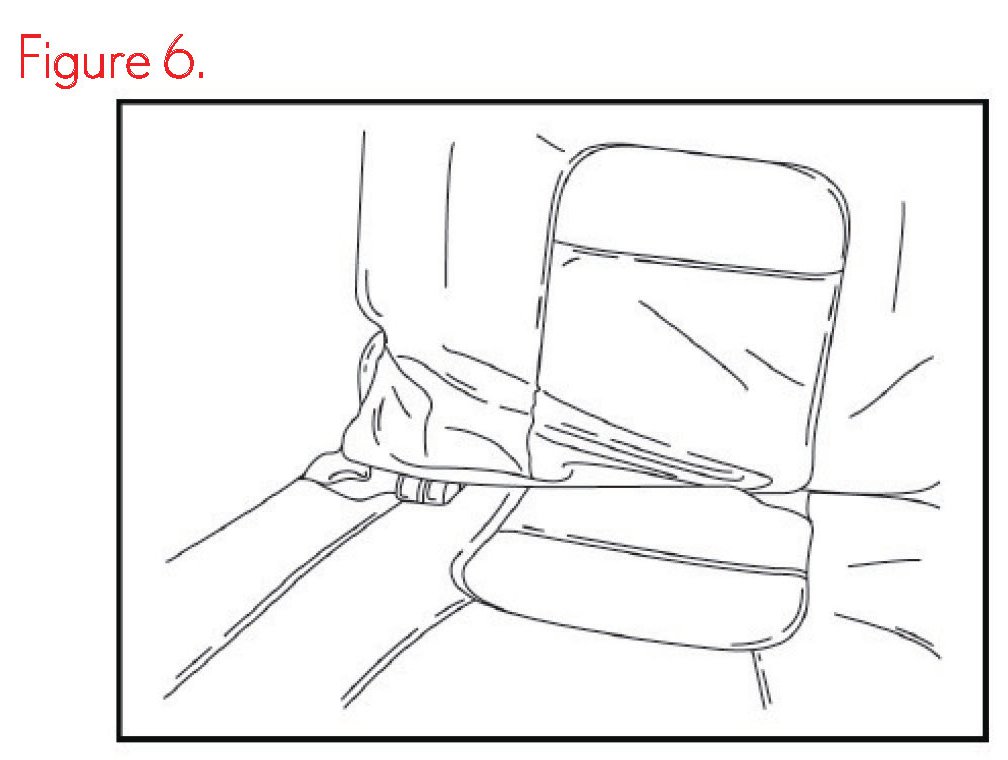
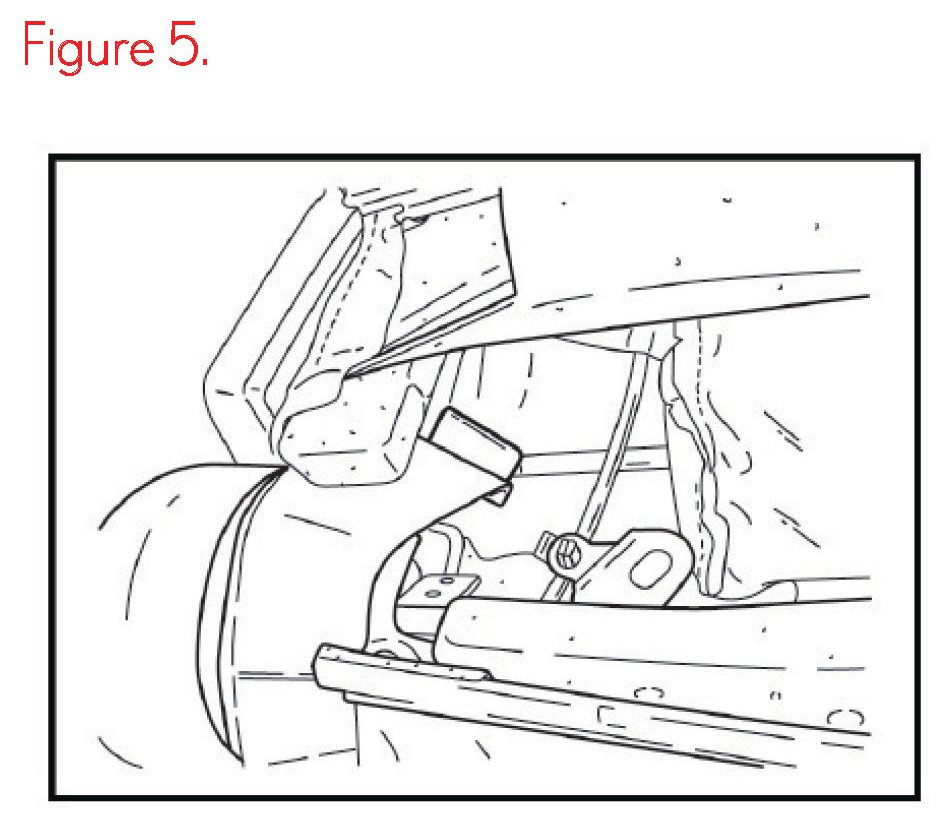
5. Place seat back in the upright position and push seat cover and foam pad from back to front on the lower portion of the seat.
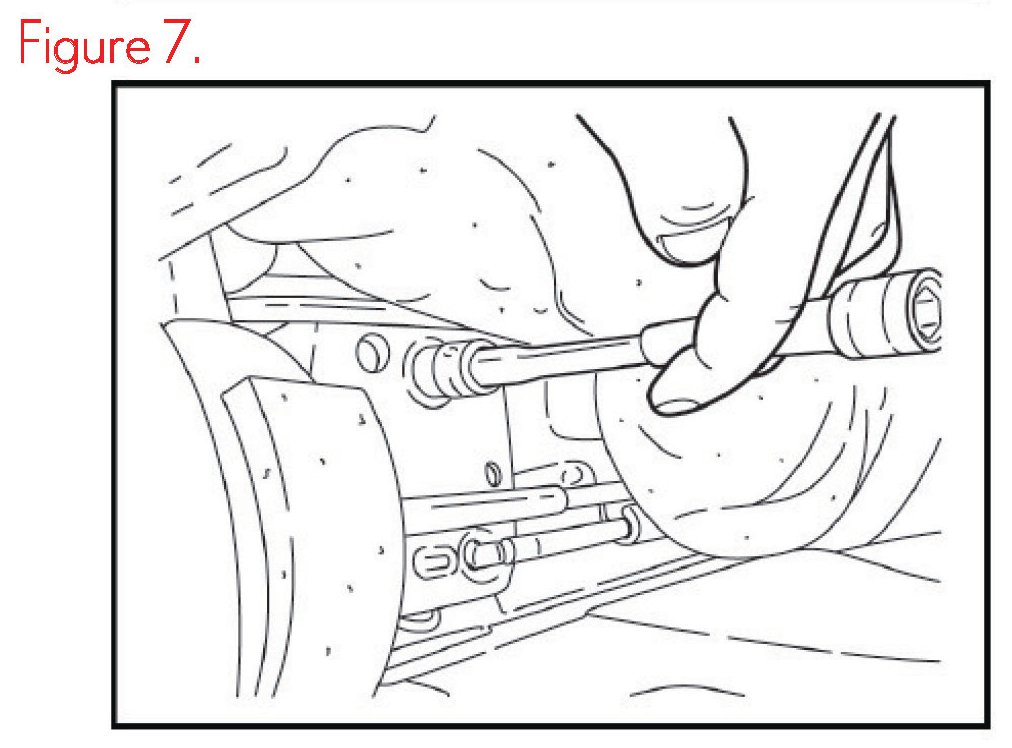
6. Lift the foam pad on the front side of seat; locate the 2 nuts holding the striker assembly and remove them.
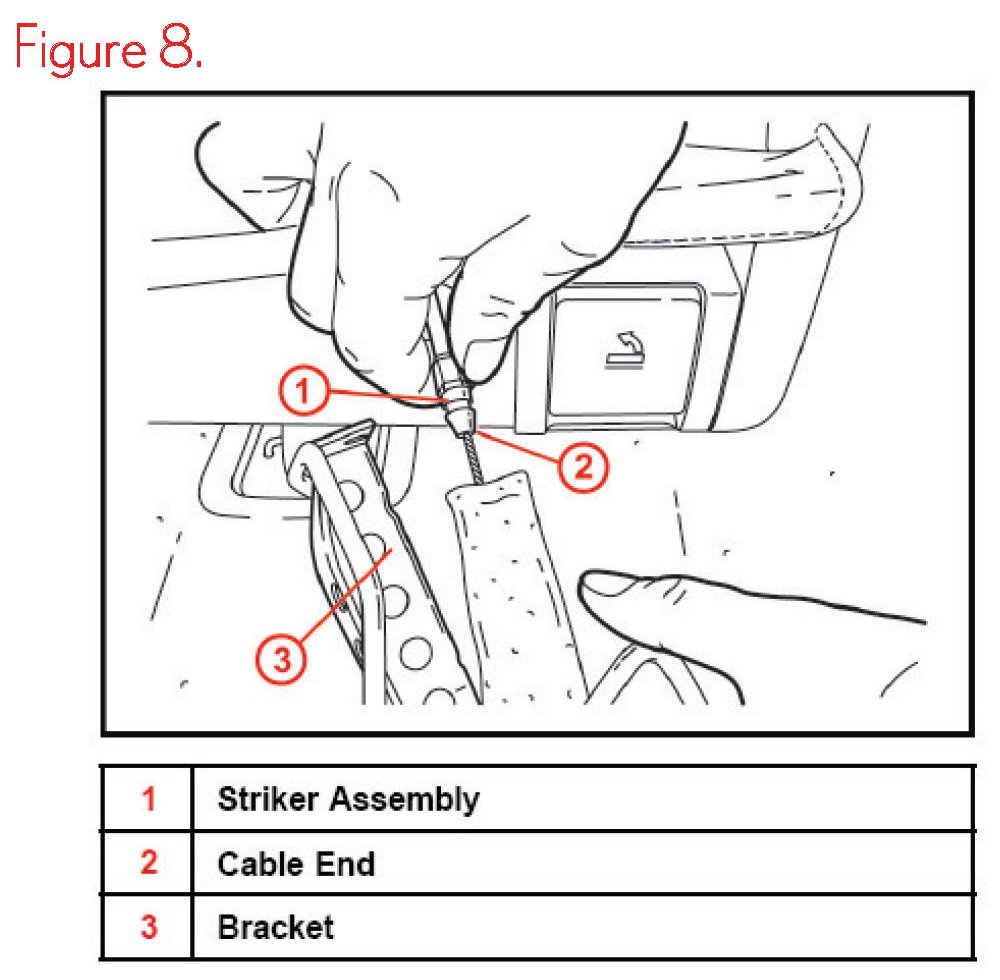
7. Remove the cable from the striker assembly.
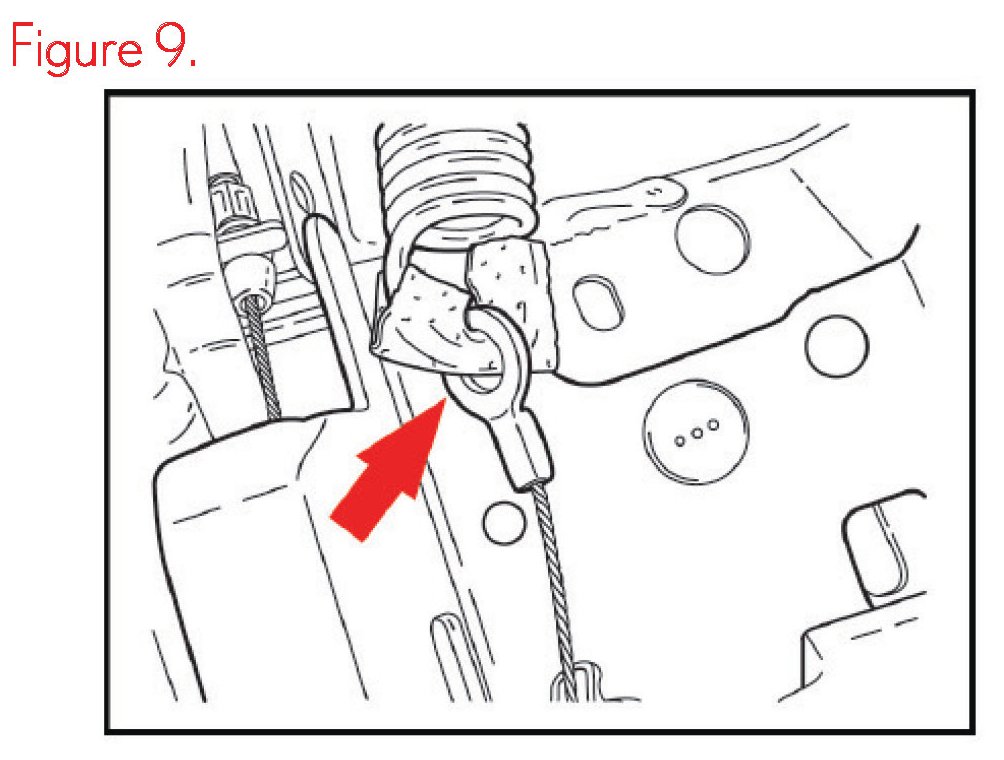
8. Remove the spring from the cable end of the striker.
9. Re-install new striker bracket and re assemble seat in reverse order.
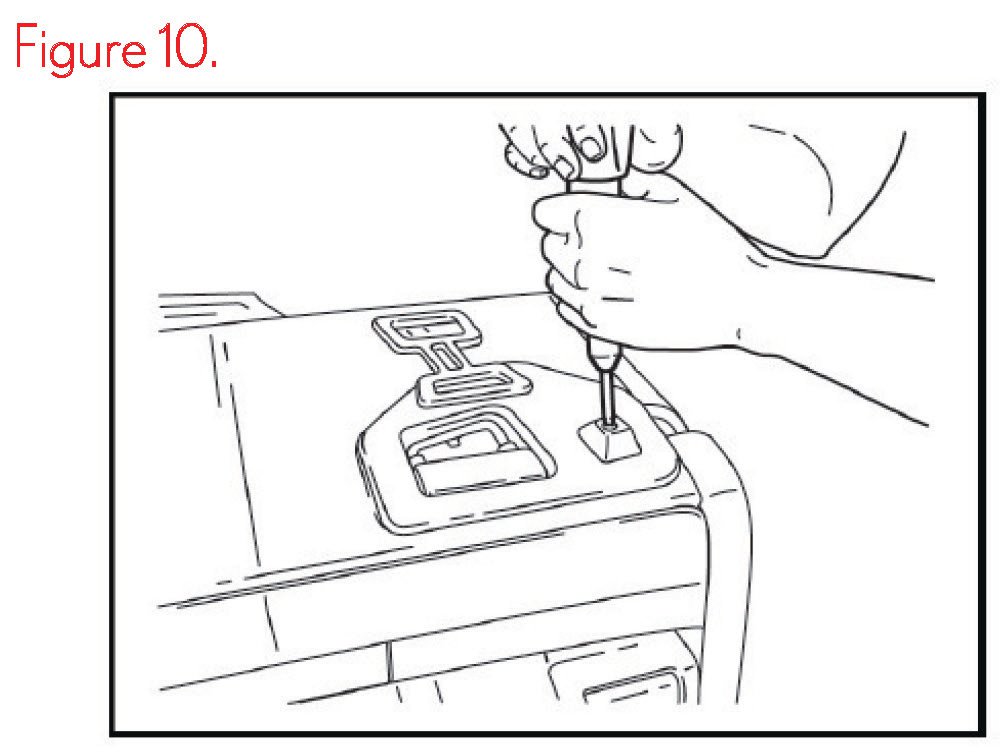
10. Upon re-installing rubber bumper onto the seat back, add shim spacer between bumper and seat.
11. Replace Upper Rear Pillar Garnish (D Pillar) using the instructions outlined.
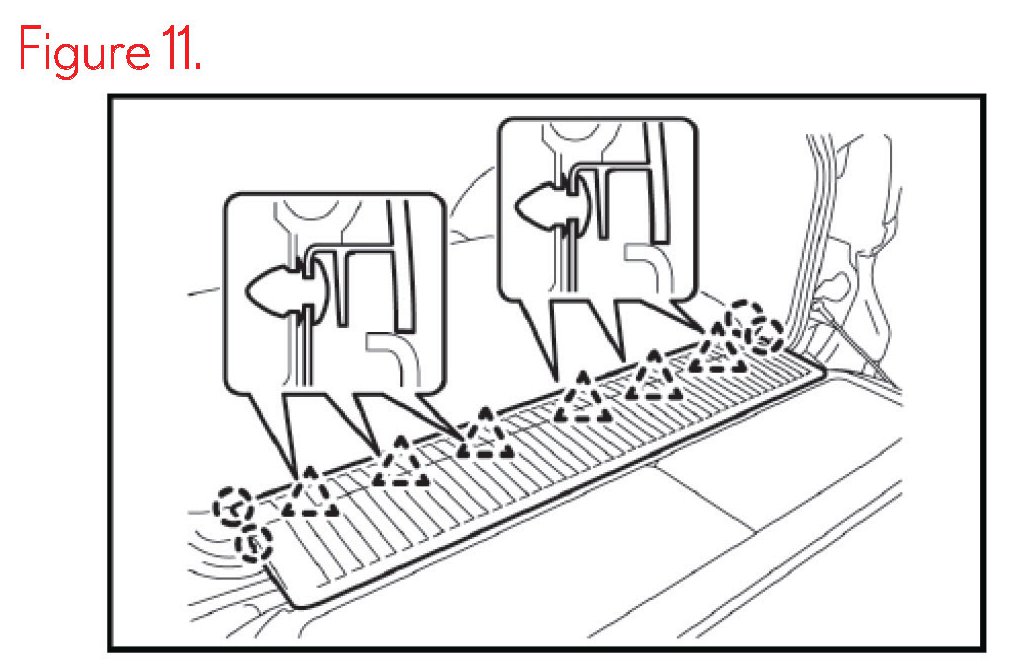
A. Remove rear floor mat rear support plate by detaching the 6 clips and 4 claws.
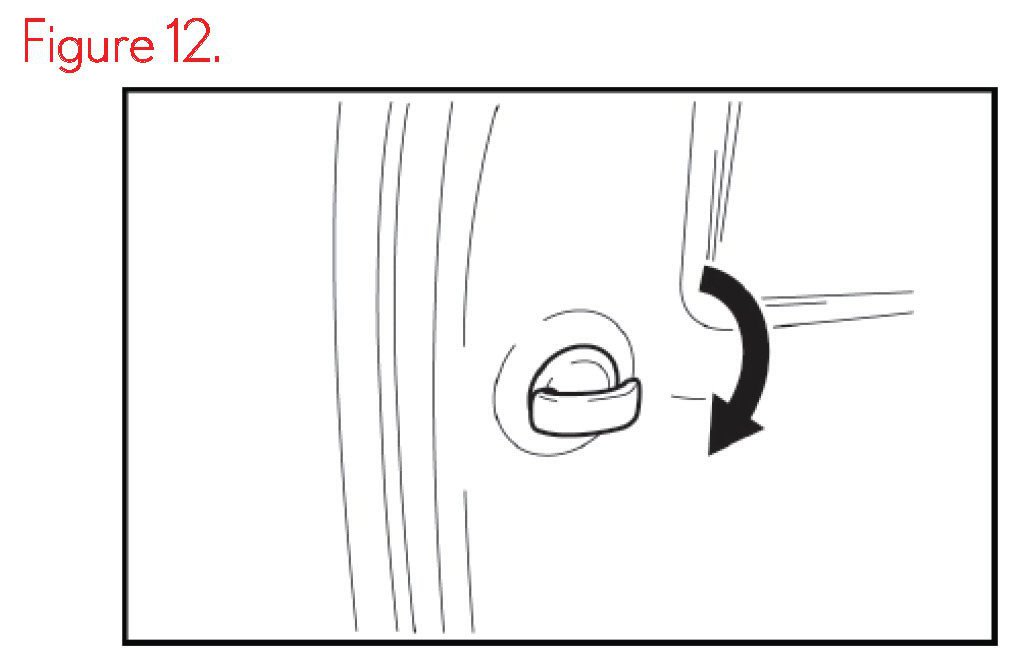
B. Remove No. 1 luggage compartment trim hook by turning it clockwise.
HINT
Use the same procedure to remove the luggage compartment trim hook on the other side.
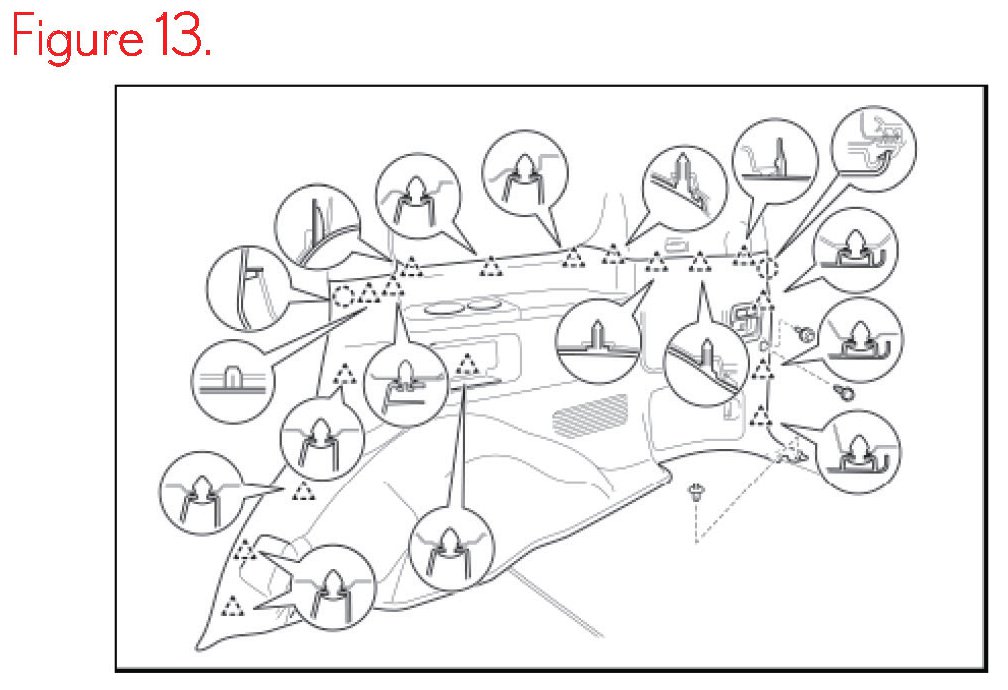
C. For rear No. 2 seat with power stow function.
(1) Remove the screw and clip.
(2) Detach the 17 clips and 2 claws.
(3) Disconnect the thermistor connector and then remove the quarter trim panel.
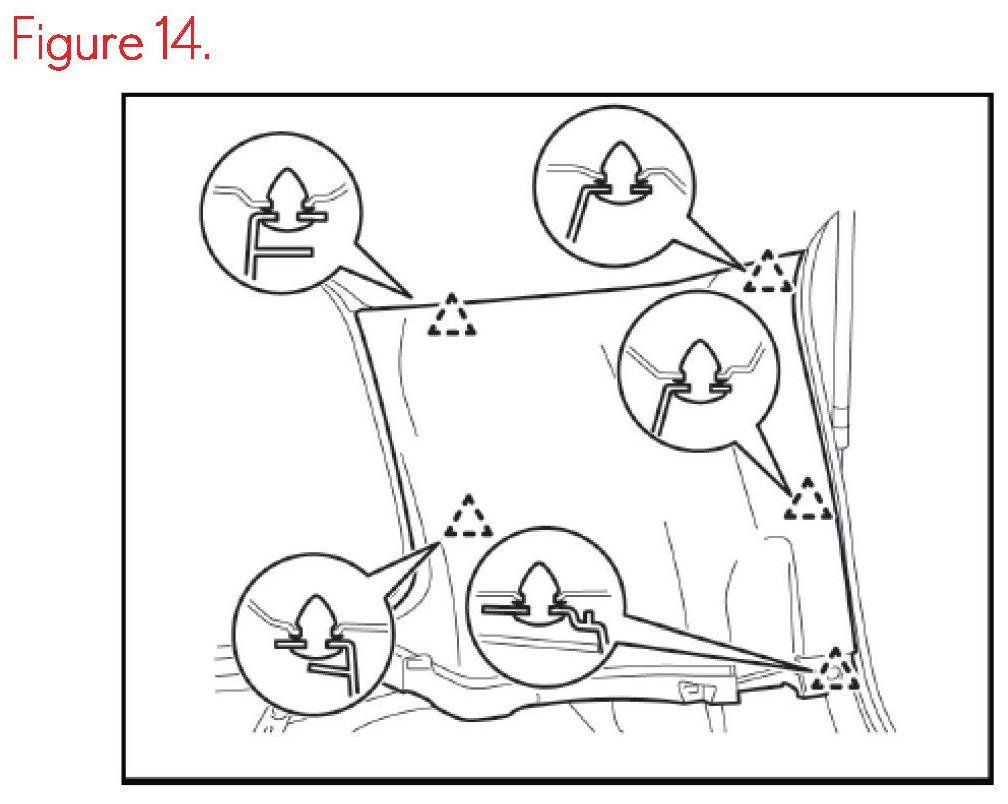
D. Remove the rear upper pillar garnish.
(1) Detach the 5 clips.
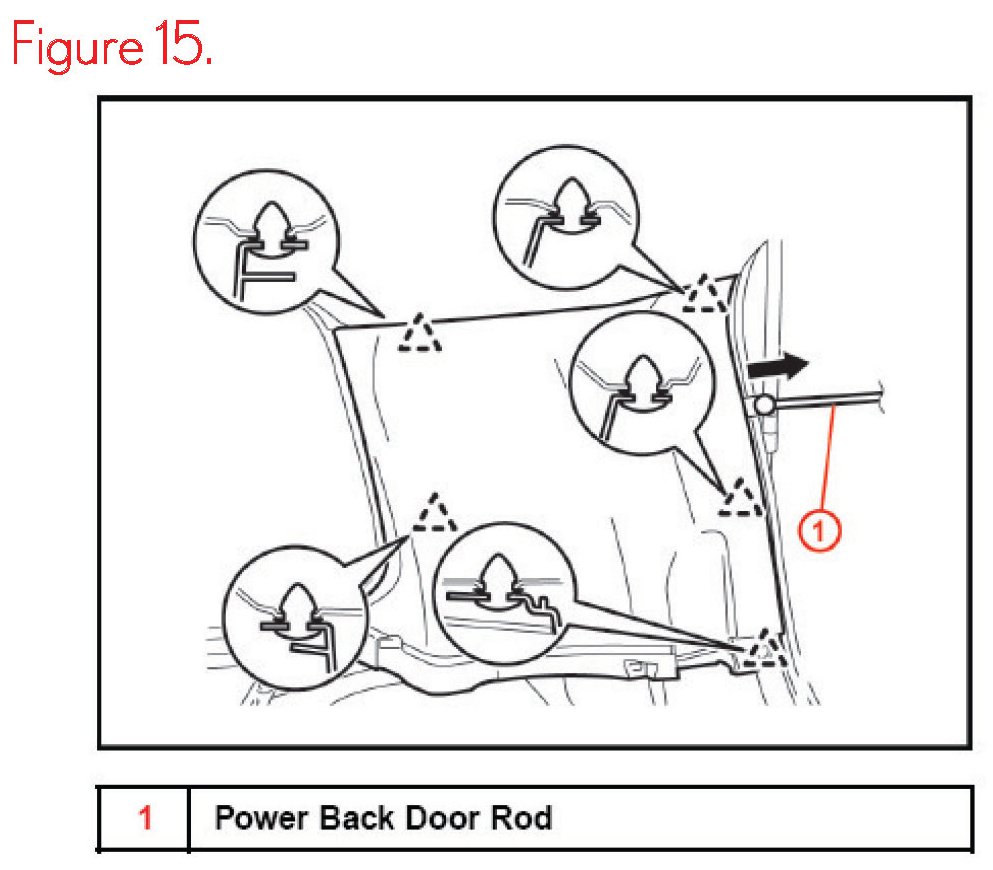
(2) Pass the power back door rod through the rear upper pillar garnish, and remove.
12. Return Seat to the stowed position and road test to confirm condition is no longer present.
NOTE:
Issue of this Technical Service Bulletin is to ensure that proper repair information is available. IT DOES NOT CONSTITUTE AN AUTHORIZATION FOR REPAIR. Normal provisions of the formal warranty policy, as applicable, will apply.