Installation
SEAT: REAR NO. 2 SEAT ASSEMBLY (w/ Automatic Folding-up Function): INSTALLATION
HINT:
- Use the same procedures for the LH side and RH side.
- The procedures listed below are for the LH side.
1. INSTALL FOLD SEAT SWITCH ASSEMBLY
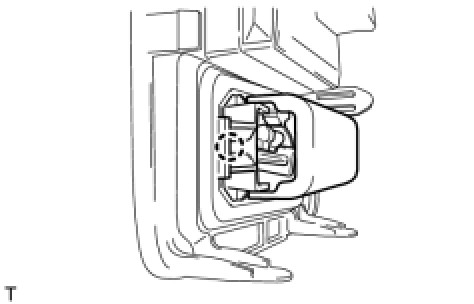
(a) Attach the claw to install the light.
(b) Connect the connector.
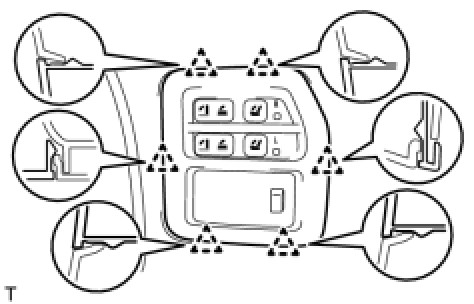
(c) Attach the 6 clips to install the fold seat switch.
2. INSTALL REAR SEAT LOCK STRIKER SUB-ASSEMBLY
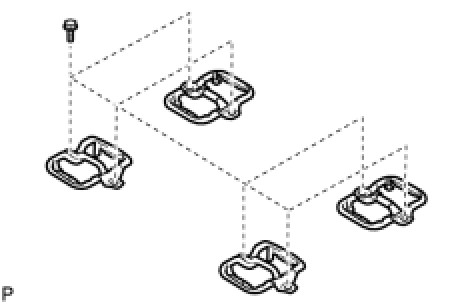
(a) Install the 4 seat lock strikers with the 8 bolts.
Torque: 37 Nm (377 kgf-cm, 27 ft-lbf)
(b) Return the floor carpet to its original position.
3. INSTALL NO. 3 SEAT CUSHION COVER
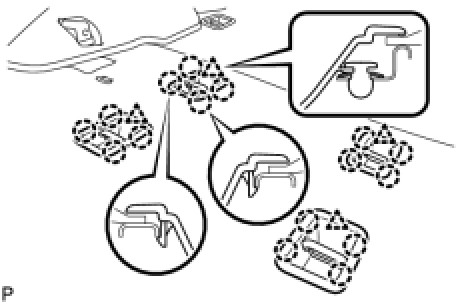
(a) Attach the 16 claws and 4 clips to install the 4 seat cushion covers.
4. INSTALL FOLD SEAT LEG LOCK SUB-ASSEMBLY
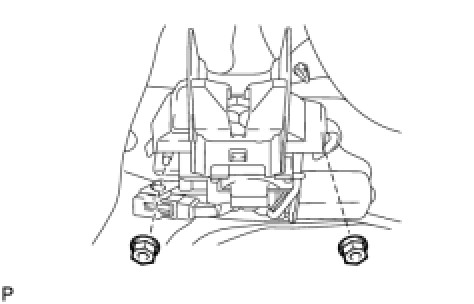
(a) Install the fold seat leg lock with the 2 nuts.
Torque: 12 Nm (122 kgf-cm, 9 ft-lbf)
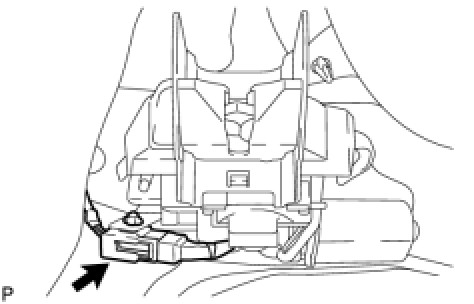
(b) Attach the 2 cable clamps.
(c) Connect the connector.
5. INSTALL NO. 1 WOOFER BOX SPEAKER ASSEMBLY (for RH Side, w/ Woofer) Installation
6. INSTALL REAR ROOF NO. 1 AIR DUCT (for LH Side) Installation
7. INSTALL FRONT QUARTER TRIM PANEL ASSEMBLY LH Installation
8. INSTALL NO. 1 LUGGAGE COMPARTMENT TRIM HOOK Installation
9. INSTALL REAR FLOOR MAT REAR SUPPORT PLATE Installation
10. INSTALL REAR DOOR SCUFF PLATE LH Installation
11. INSTALL REAR STEP COVER Installation
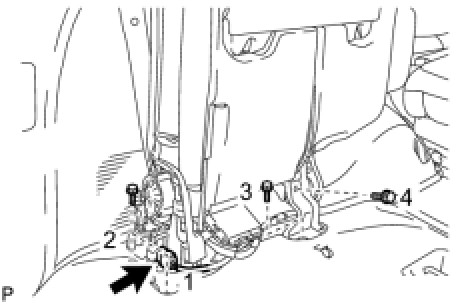
12. INSTALL REAR NO. 2 SEAT ASSEMBLY
(a) Temporarily install the seat with the 4 bolts.
NOTICE:
Be careful not to damage the vehicle body.
(b) Tighten the bolts in the order shown in the illustration.
Torque: 37 Nm (377 kgf-cm, 27 ft-lbf)
(c) Connect the connector.
13. CONNECT CABLE TO NEGATIVE BATTERY TERMINAL
NOTICE:
When disconnecting the cable, some systems need to be initialized after the cable is reconnected Repair Instruction - Initialization.
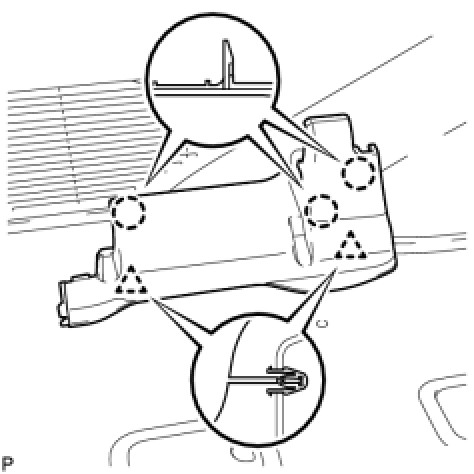
14. INSTALL REAR NO. 2 SEAT HINGE COVER LH
(a) Attach the 3 claws and 2 clips to install the cover.
15. INSTALL REAR SEAT CUSHION HINGE COVER LH
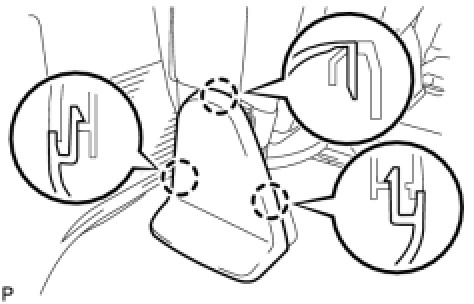
(a) Attach the 3 claws to install the cover.
(b) Return the seat to the upright position.
16. INSTALL REAR NO. 2 SEAT HEADREST ASSEMBLY LH