Part 1
INTERIOR PANELS / TRIM: ROOF HEADLINING: INSTALLATION
HINT:
A bolt without a torque specification is shown in the standard bolt chart Standard Bolt - Specified Torque For Standard Bolts.
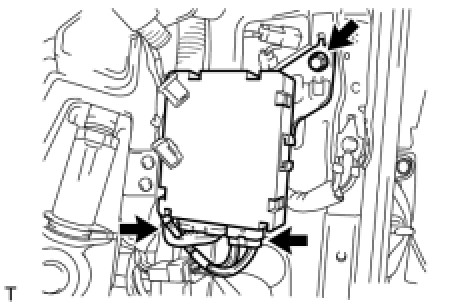
1. INSTALL NO. 2 MULTIPLEX NETWORK BODY ECU
(a) Install the multiplex network body ECU with the bolt.
(b) Connect the 2 connectors.
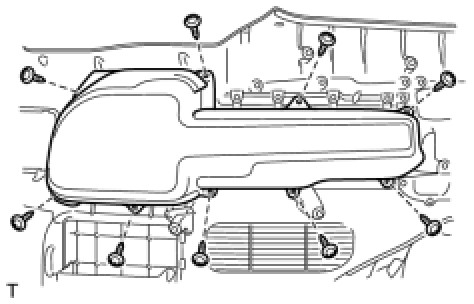
2. INSTALL SIDE TRIM BOX (w/o Woofer)
(a) Install the side trim box with the 9 screws.
3. INSTALL SIDE TRIM BOX COVER (w/o Woofer)
(a) Install the side trim box cover.
4. INSTALL QUARTER TRIM LID SUB-ASSEMBLY RH
(a) Install the quarter trim lid.
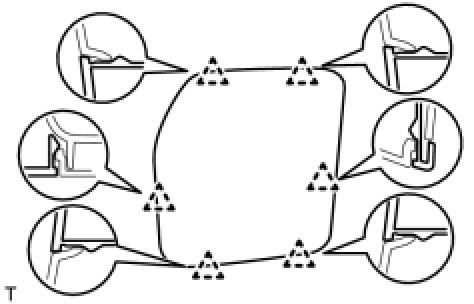
5. INSTALL QUARTER TRIM COVER LH (for Rear No. 2 Seat with Automatic Folding-up Function)
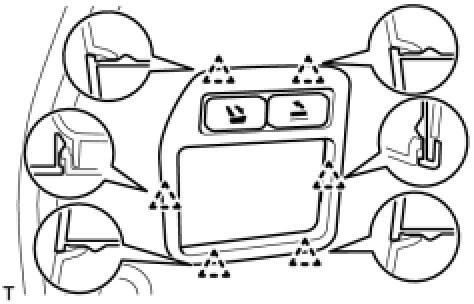
(a) Attach the 6 clips to install the quarter trim cover.
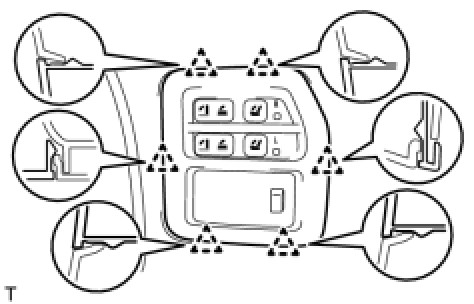
6. INSTALL FOLD SEAT SWITCH ASSEMBLY (for Rear No. 2 Seat with Automatic Folding-up Function)
(a) Attach the 6 clips to install the fold seat switch.
7. INSTALL REAR NO. 2 SEAT COVER BEZEL (for Rear No. 2 Seat with Manual Folding-up Function)
(a) Attach the 6 clips to install the No. 2 seat cover bezel.
8. INSTALL REAR NO. 1 SEAT COVER BEZEL (for Rear No. 2 Seat with Manual Folding-up Function)
HINT:
Use the same procedures described for the LH side.
9. INSTALL REAR SEAT LOCK CONTROL LEVER SUB-ASSEMBLY LH (for Rear No. 2 Seat with Manual Folding-up Function) Installation
10. INSTALL REAR SEAT LOCK CONTROL LEVER SUB-ASSEMBLY RH (for Rear No. 2 Seat with Manual Folding-up Function)
HINT:
Use the same procedures described for the LH side.
11. INSTALL NO. 2 SIDE TRIM BASE COVER LH
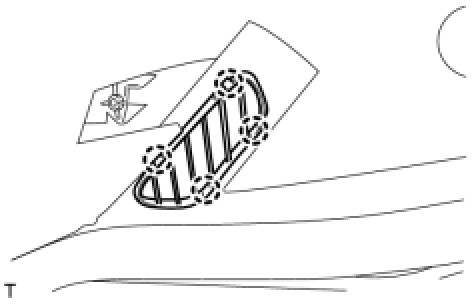
(a) Attach the 4 claws to install the cover.
12. INSTALL NO. 2 SIDE TRIM BASE COVER RH
HINT:
Use the same procedures described for the LH side.
13. INSTALL NO. 1 SIDE TRIM BASE COVER LH
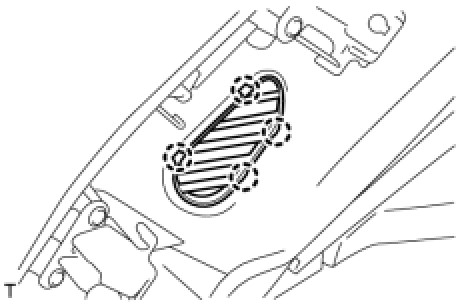
(a) Attach the 4 claws to install the cover.
14. INSTALL NO. 1 SIDE TRIM BASE COVER RH
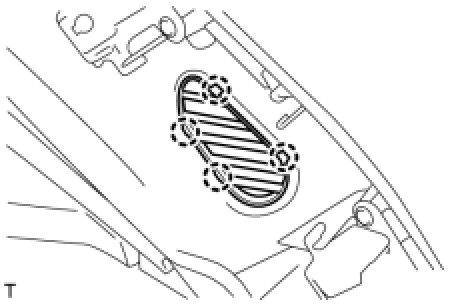
(a) Attach the 4 claws to install the cover.
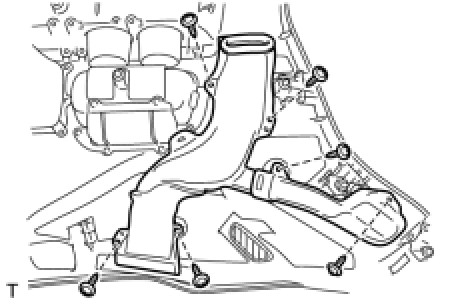
(b) Install the duct with the 6 screws.
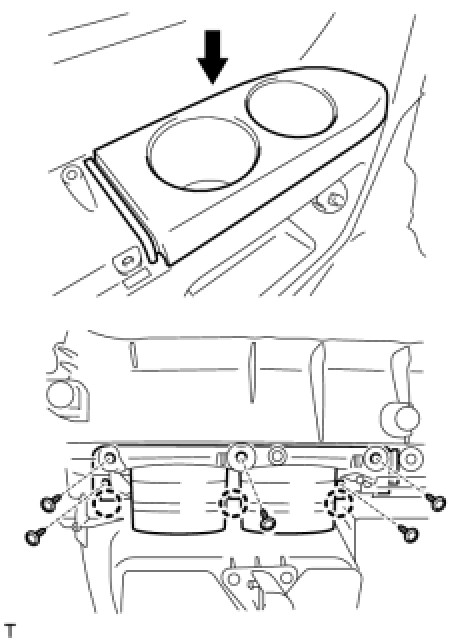
15. INSTALL NO. 2 CUP HOLDER
(a) Attach the 3 claws to install the cup holder.
(b) Install the 5 screws.
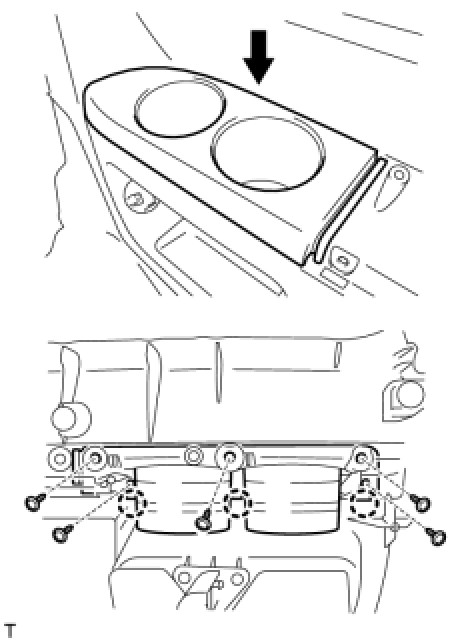
16. INSTALL NO. 1 CUP HOLDER
(a) Attach the 3 claws to install the cup holder.
(b) Install the 5 screws.
17. INSTALL QUARTER TRIM COVER SUB-ASSEMBLY LH
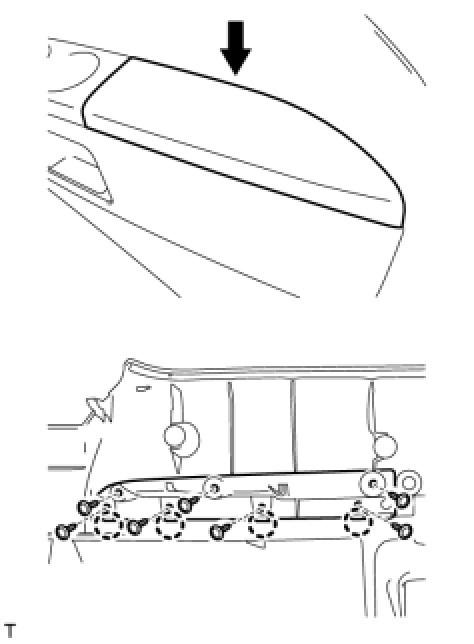
(a) Attach the 4 claws to install the quarter trim cover.
(b) Install the 7 screws.
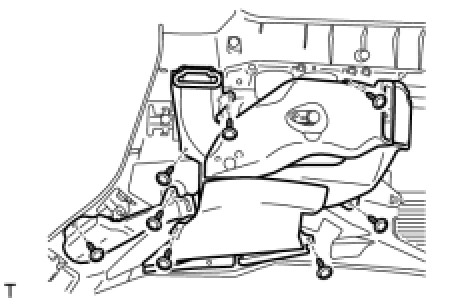
(c) Install the duct with the 8 screws.
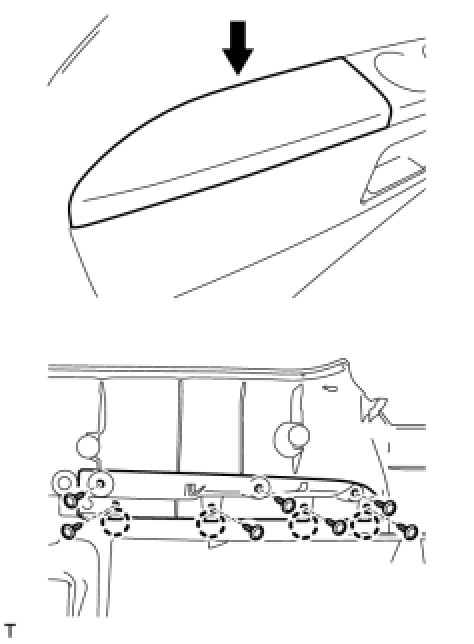
18. INSTALL QUARTER TRIM COVER SUB-ASSEMBLY RH
(a) Attach the 4 claws to install the quarter trim cover.
(b) Install the 7 screws.
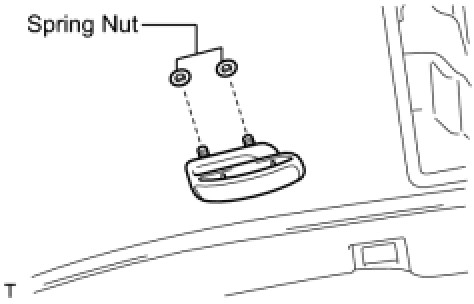
19. INSTALL REAR NO. 2 SEAT SHOULDER BELT HANGER LH
(a) Install the hanger with new 2 spring nuts.
20. INSTALL REAR NO. 2 SEAT SHOULDER BELT HANGER RH
HINT:
Use the same procedures described for the LH side.
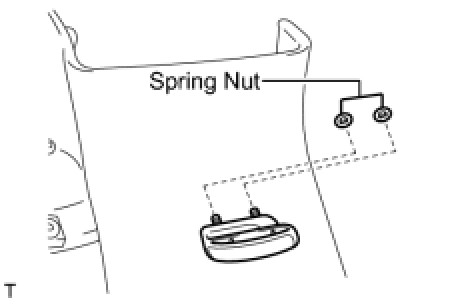
21. INSTALL REAR NO. 1 SEAT SHOULDER BELT HANGER
HINT:
Use the same procedure to install the hanger on the other side.
(a) Install the hanger with new 2 spring nuts.
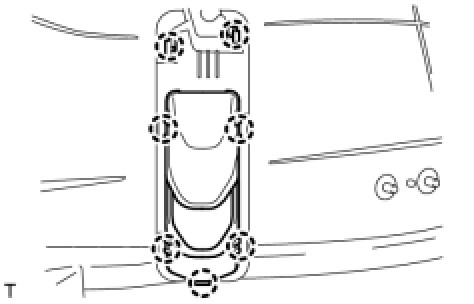
22. INSTALL ROOF SIDE INNER GARNISH COVER LH
(a) Attach the 7 claws to install the cover.
23. INSTALL ROOF SIDE INNER GARNISH COVER RH
HINT:
Use the same procedures described for the LH side.
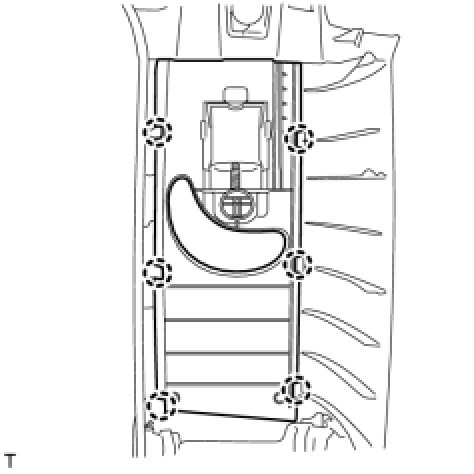
24. INSTALL REAR SHOULDER BELT ANCHOR PLATE SUB-ASSEMBLY LH
(a) Attach the 6 claws to install the plate.
25. INSTALL REAR SHOULDER BELT ANCHOR PLATE SUB-ASSEMBLY RH
HINT:
Use the same procedures described for the LH side.
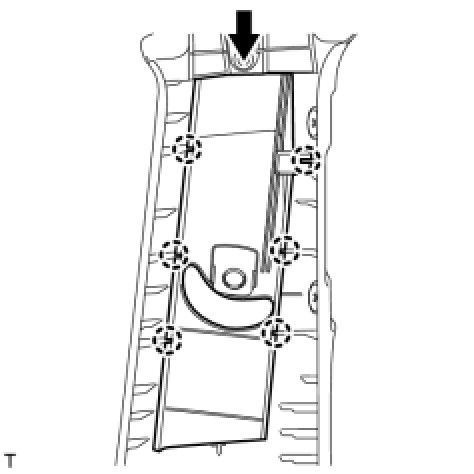
26. INSTALL FRONT SHOULDER BELT ANCHOR PLATE SUB-ASSEMBLY LH
(a) Slide the plate in the direction shown in the illustration and attach the 6 claws to install the plate.
27. INSTALL FRONT SHOULDER BELT ANCHOR PLATE SUB-ASSEMBLY RH
HINT:
Use the same procedures described for the LH side.
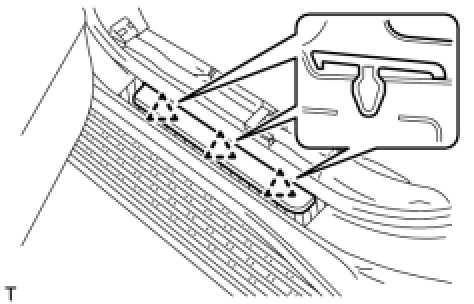
28. INSTALL REAR DOOR SCUFF PLATE OUTSIDE LH
(a) Attach the 3 clips to install the rear door scuff plate outside.
29. INSTALL REAR DOOR SCUFF PLATE OUTSIDE RH
HINT:
Use the same procedures described for the LH side.
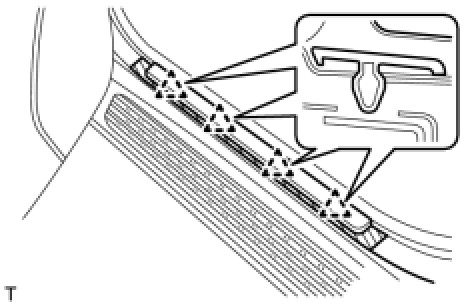
30. INSTALL FRONT DOOR SCUFF PLATE OUTSIDE LH
(a) Attach the 4 clips to install the front door scuff plate outside.
31. INSTALL FRONT DOOR SCUFF PLATE OUTSIDE RH
HINT:
Use the same procedures described for the LH side.
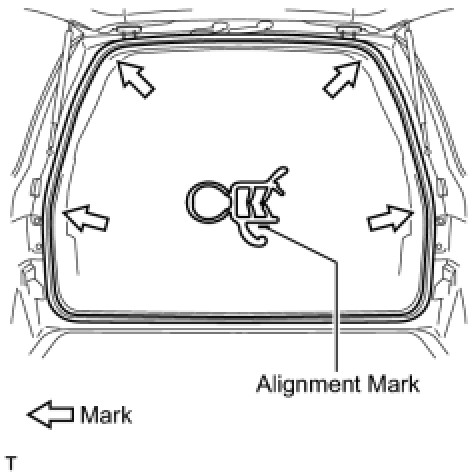
32. INSTALL BACK DOOR WEATHERSTRIP
(a) Install the back door weatherstrip as shown in the illustration.
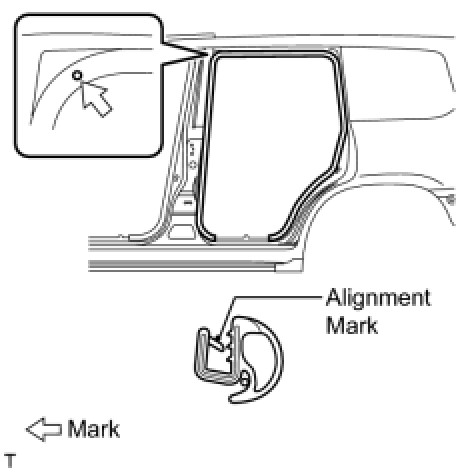
33. INSTALL REAR DOOR OPENING TRIM WEATHERSTRIP LH
(a) Install the rear door opening trim weatherstrip as shown in the illustration.
34. INSTALL REAR DOOR OPENING TRIM WEATHERSTRIP RH
HINT:
Use the same procedures described for the LH side.
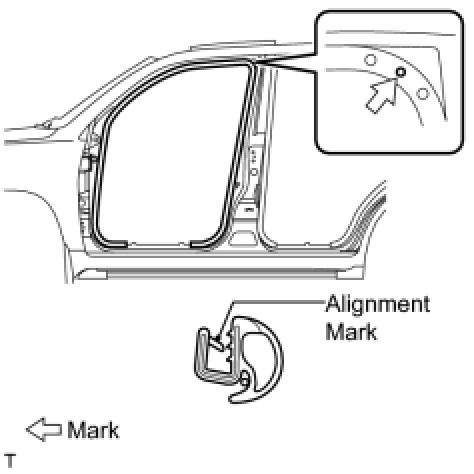
35. INSTALL FRONT DOOR OPENING TRIM WEATHERSTRIP LH
(a) Install the front door opening trim weatherstrip as shown in the illustration.
36. INSTALL FRONT DOOR OPENING TRIM WEATHERSTRIP RH
HINT:
Use the same procedures described for the LH side.
37. INSTALL ROOF HEADLINING ASSEMBLY
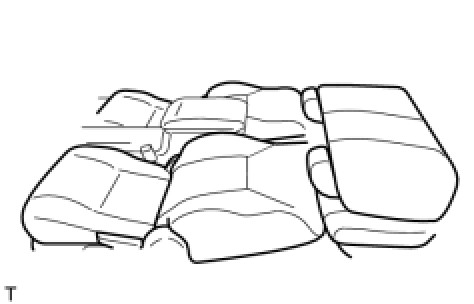
HINT:
- When installing the roof headlining, connect the cable to the negative (-) battery terminal and move the front seats and No. 1 rear seat to the position shown in the illustration.
- After moving the seats, disconnect the cable from the negative (-) battery terminal.
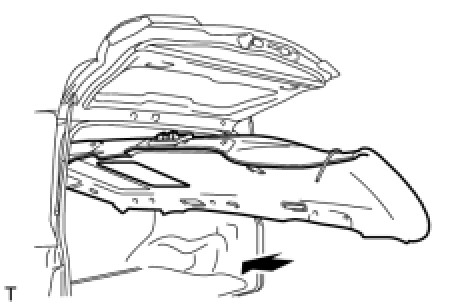
(a) Place the headlining in the cabin from the rear of the vehicle as shown in the illustration.
NOTICE:
Be careful not to damage the roof headlining when placing it in the cabin.
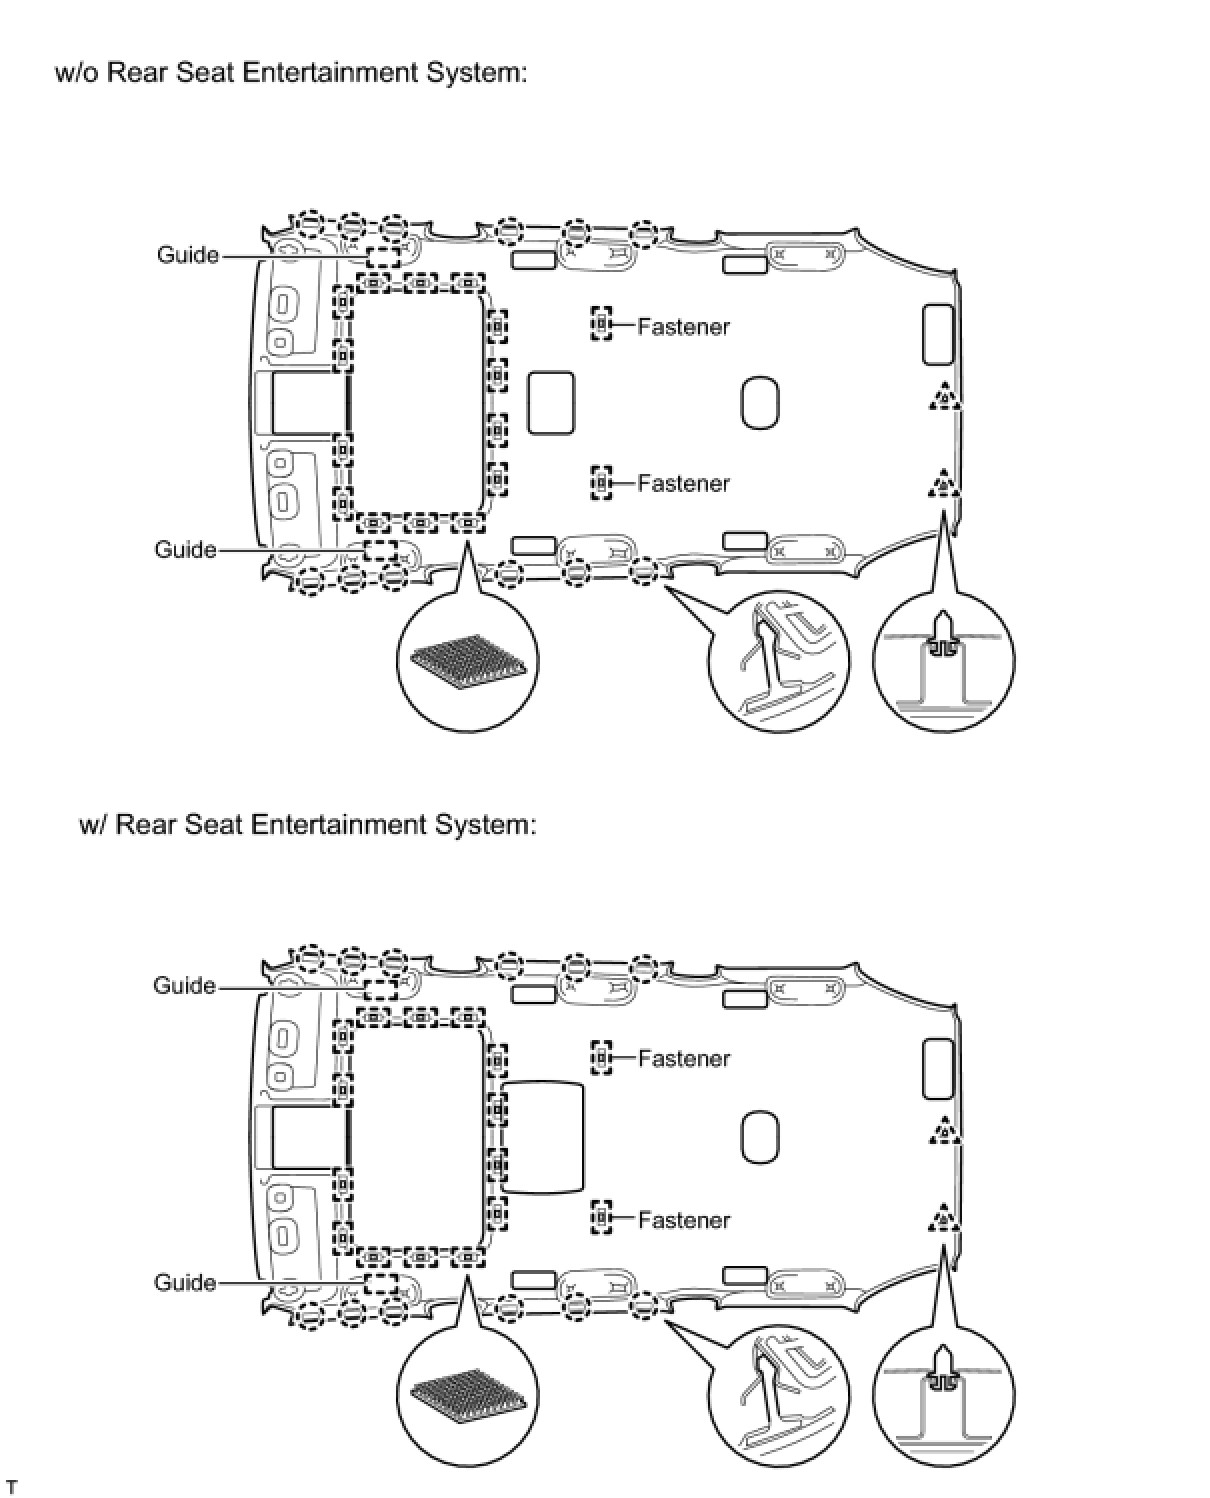
(b) Attach the 2 guides, 12 claws, 2 clips and 16 fasteners to install the headlining.
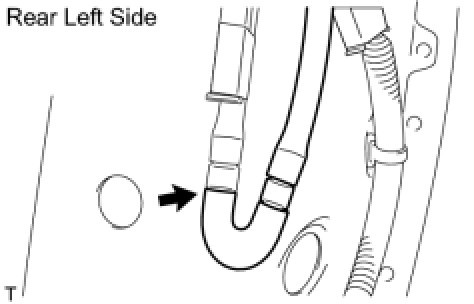
(c) Connect the washer hose.
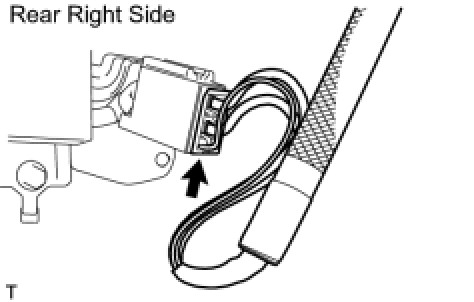
(d) Connect the antenna cord connector.
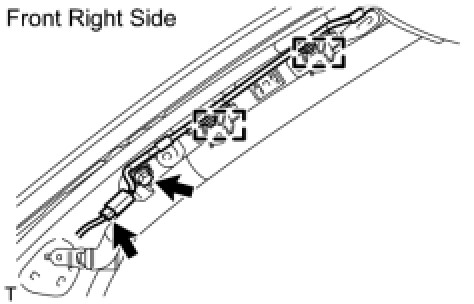
(e) Connect the antenna cord connector and attach the 2 clamps.
(f) Install the bolt.
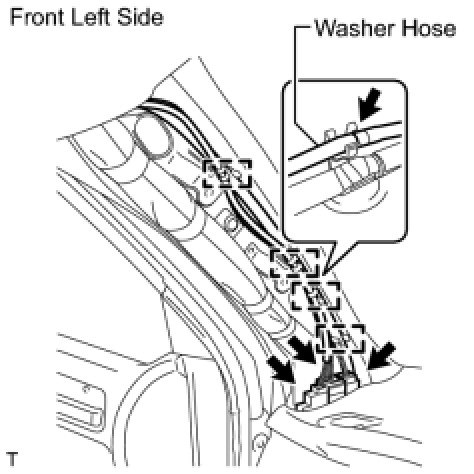
(g) Connect the 3 roof wire connectors and washer hose.
(h) Attach the 4 clamps.
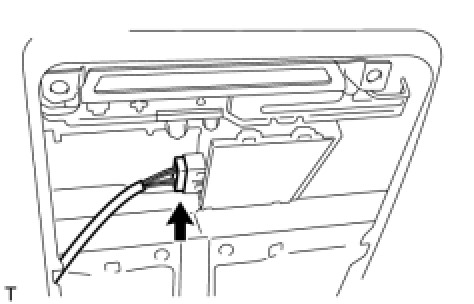
(i) Connect the drive gear connector.
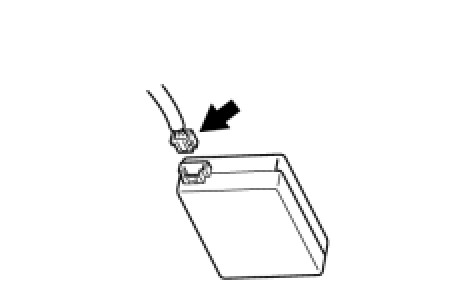
(j) Connect the rain sensor connector.
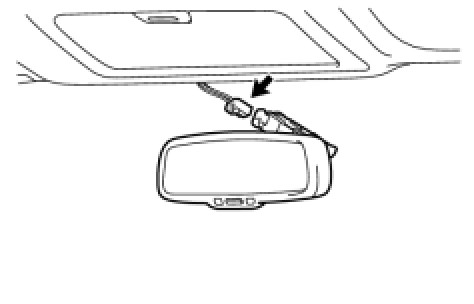
(k) Connect the inner mirror connector.
38. INSTALL FRONT ROOF SIDE RAIL GARNISH LH
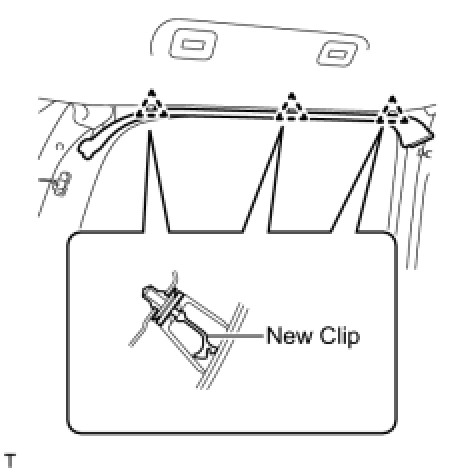
(a) Install 3 new clips to the roof side rail garnish.
(b) Attach the 3 clips to install the roof side rail garnish.
39. INSTALL FRONT ROOF SIDE RAIL GARNISH RH
HINT:
Use the same procedures described for the LH side.
40. INSTALL 3RD SEAT ASSIST GRIP ASSEMBLY
HINT:
Use the same procedure to install the 3rd seat assist grip on the other side.
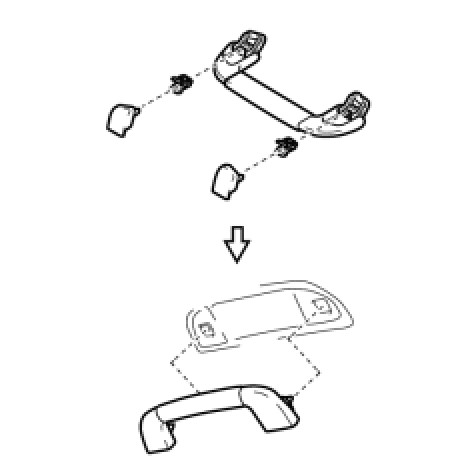
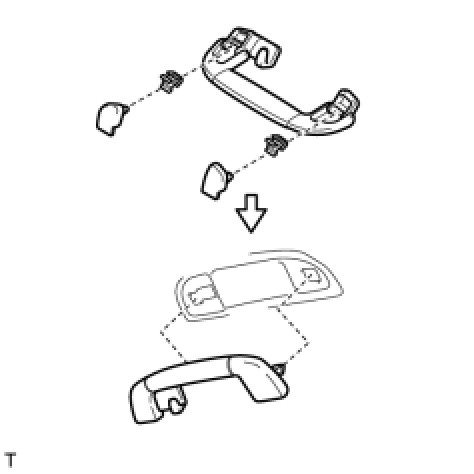
(a) Assemble the assist grip, 2 clips and 2 covers as shown in the illustration.
(b) Install the assist grip.
41. INSTALL NO. 2 ASSIST GRIP ASSEMBLY LH
(a) Assemble the assist grip, 2 clips and 2 covers as shown in the illustration.
(b) Install the assist grip.
42. INSTALL NO. 2 ASSIST GRIP ASSEMBLY RH
HINT:
Use the same procedures described for the LH side.
43. INSTALL ASSIST GRIP ASSEMBLY
HINT:
Use the same procedure to install the assist grip on the other side.
(a) Assemble the assist grip, 2 clips and 2 covers as shown in the illustration.
(b) Install the assist grip.
44. INSTALL SEAT BELT ANCHOR COVER
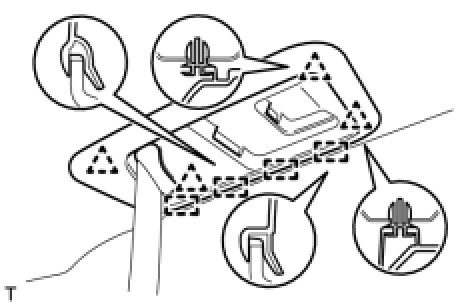
(a) Attach the 4 guides and 4 clips to install the seat belt anchor cover.
45. INSTALL RAIN SENSOR COVER Installation