Installation
AUDIO / VIDEO: STEREO COMPONENT AMPLIFIER: INSTALLATION
1. INSTALL NO. 2 AMPLIFIER BRACKET
(a) Set the aligning protrusions of the bracket, labeled A, into the holes of the amplifier.
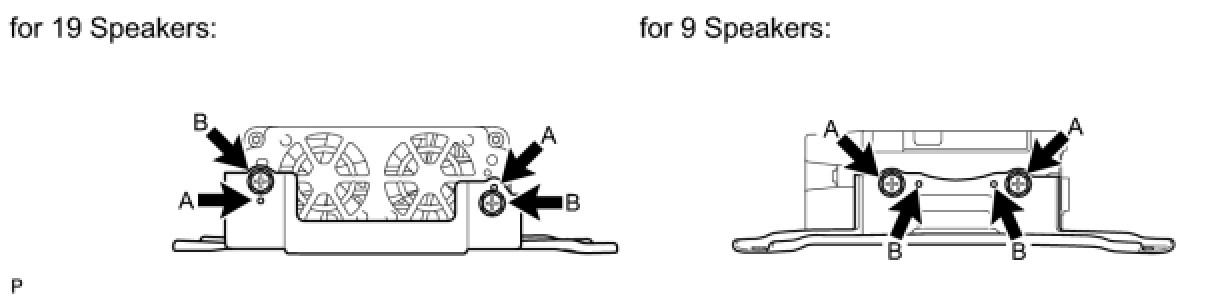
(b) Install the bracket with the 2 screws labeled B.
Torque: 3.0 Nm (30 kgf-cm, 26 in-lbf)
2. INSTALL NO. 1 AMPLIFIER BRACKET
(a) Set the aligning protrusions of the bracket, labeled A, into the holes of the amplifier.
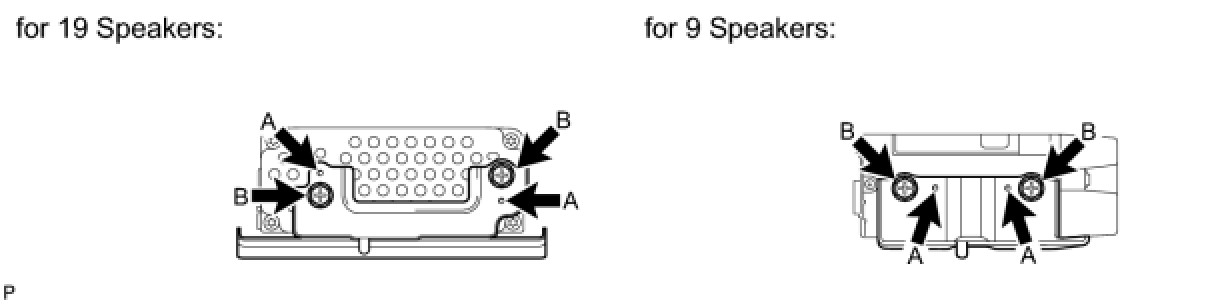
(b) Install the bracket with the 2 screws labeled B.
Torque: 3.0 Nm (30 kgf-cm, 26 in-lbf)
3. INSTALL AMPLIFIER COVER (for 9 Speakers)
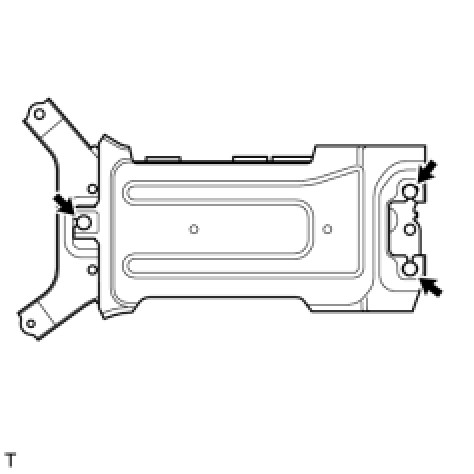
(a) Attach the 3 clips to install the cover.
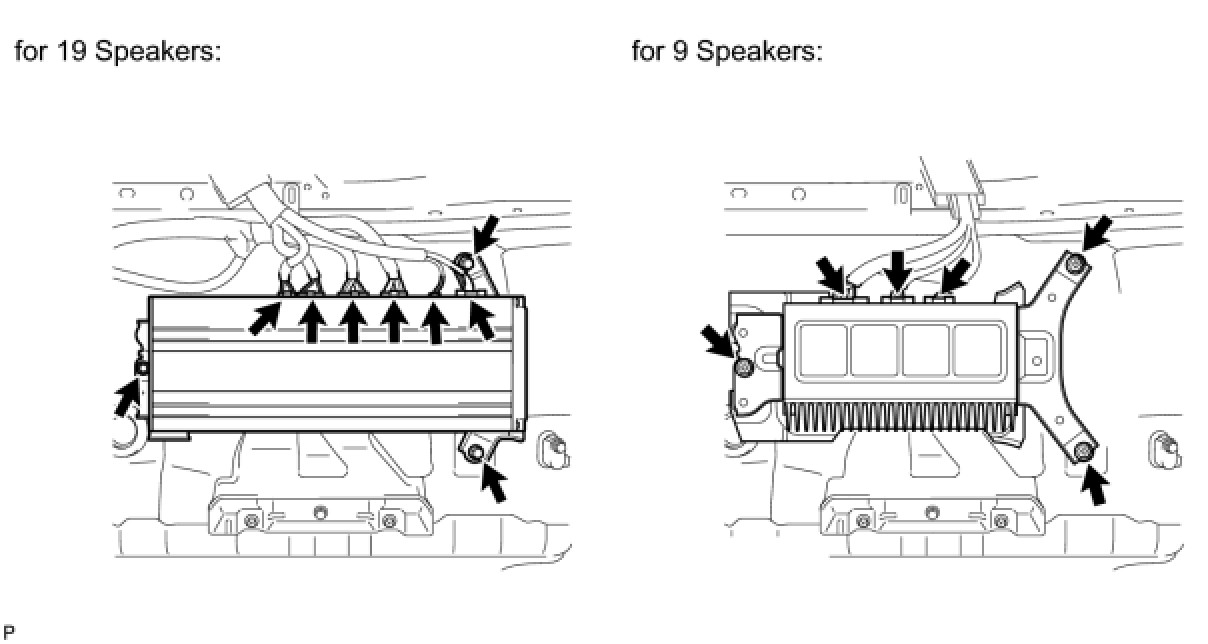
4. INSTALL STEREO COMPONENT AMPLIFIER ASSEMBLY WITH BRACKET
(a) Install the amplifier with the 3 bolts.
Torque: 7.5 Nm (76 kgf-cm, 66 in-lbf)
(b) for 19 Speakers:
Connect the 6 connectors.
(c) for 9 Speakers:
Connect the 3 connectors.
5. INSTALL FRONT FLOOR CARPET ASSEMBLY
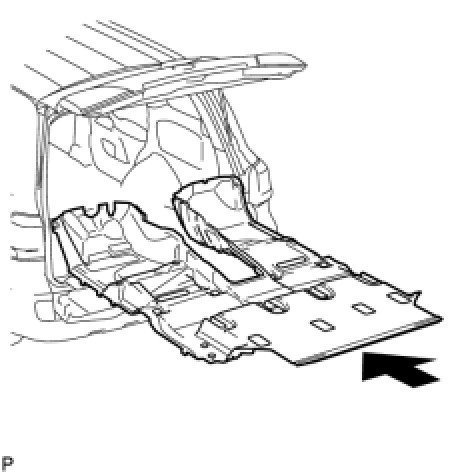
(a) Open the tail gate and back door, insert the carpet into the cabin from the rear, and install it to the floor.
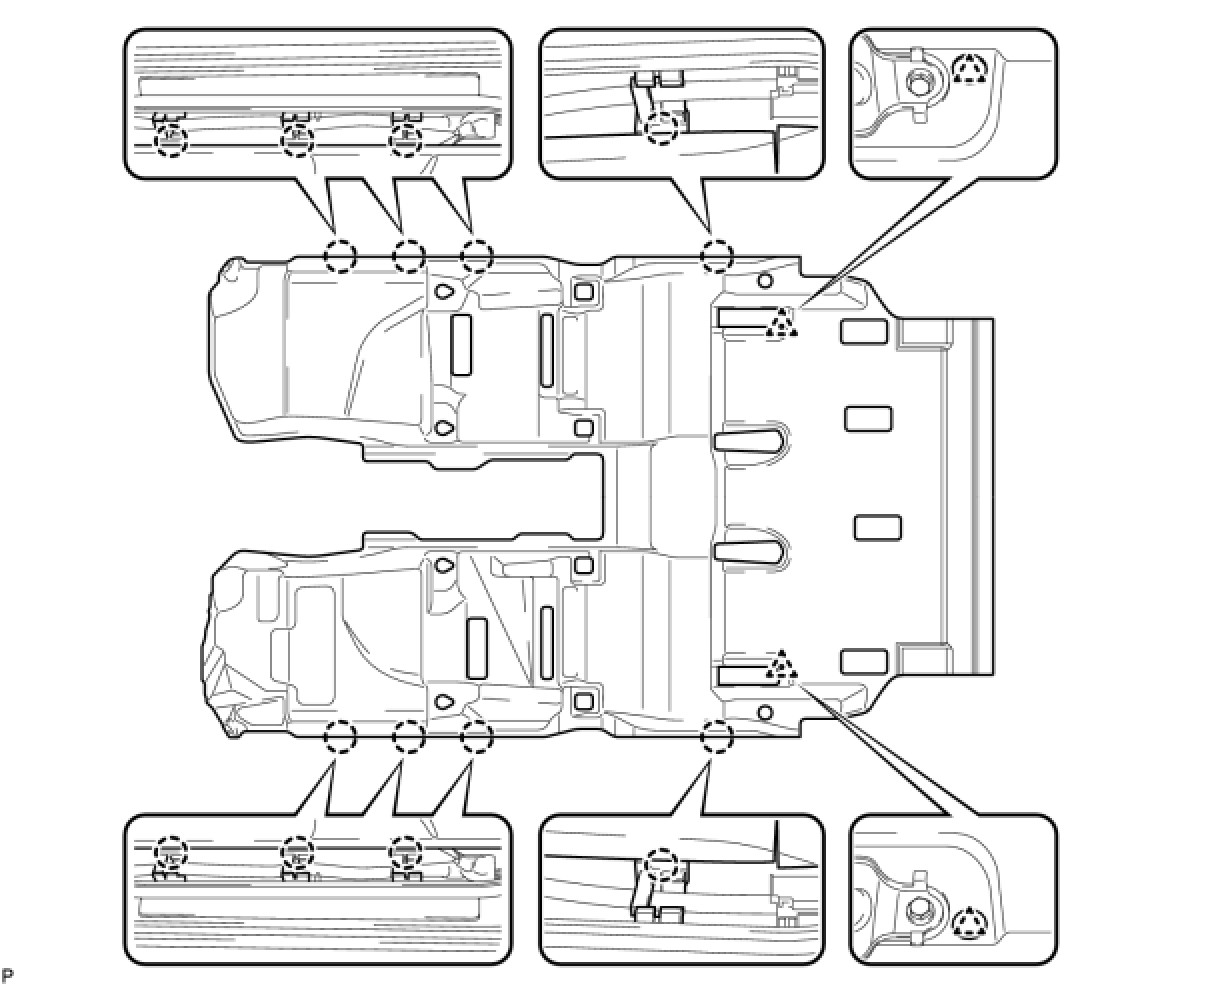
(b) Attach the 2 clips and 8 claws.
6. INSTALL REAR CONSOLE BOX SUB-ASSEMBLY (w/o Cool Box)
(a) Install the rear console box Installation.
7. INSTALL COOLING BOX ASSEMBLY (w/ Cool Box)
(a) Install the cooling box Installation.
8. INSTALL REAR NO. 2 SEAT PROTECTOR
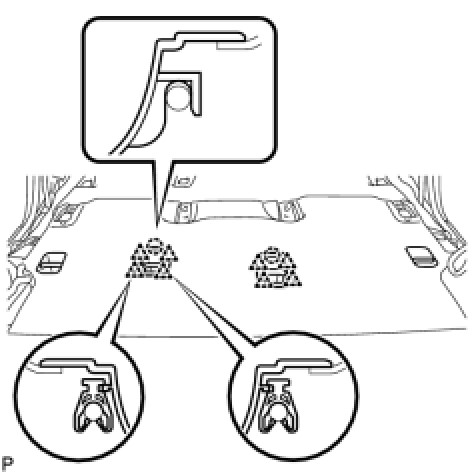
(a) Attach the 4 clips and claw to install the protector.
HINT:
Use the same procedures to install the protector on the other side.
9. INSTALL REAR NO. 1 SEAT PROTECTOR
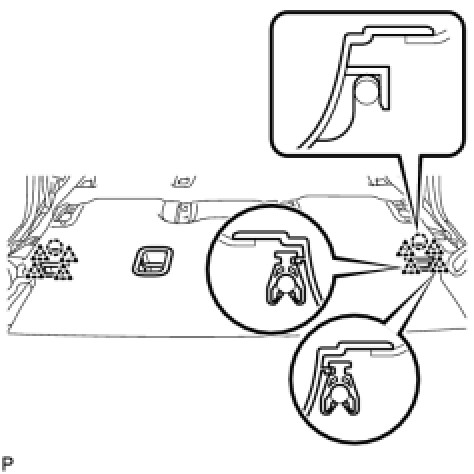
(a) Attach the 4 clips and claw to install the protector.
HINT:
Use the same procedures to install the protector on the other side.
10. INSTALL REAR AIR DUCT GUIDE
HINT:
Use the same procedures for both sides.
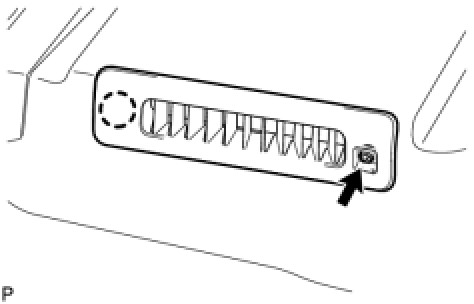
(a) Attach the claw to install the guide.
(b) Install the screw.
11. INSTALL AIR DUCT PLUG
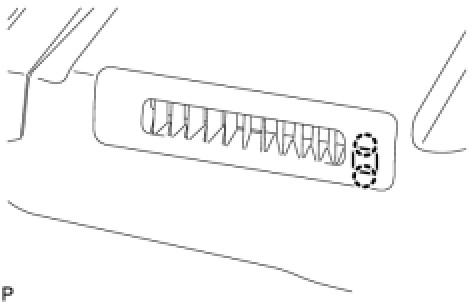
(a) Attach the 2 claws to install the plug.
HINT:
Use the same procedures for both sides.
12. INSTALL AIR HEATER GUIDE
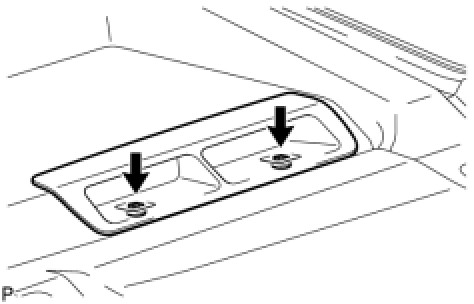
(a) Install the guide with the 2 screws.
HINT:
Use the same procedures for both sides.
13. INSTALL NO. 2 AIR DUCT PLUG
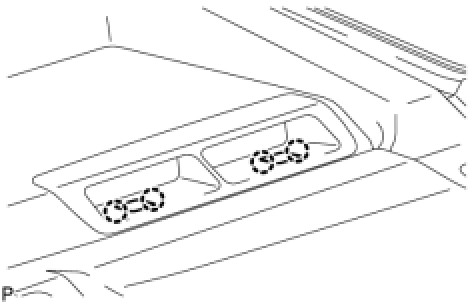
(a) Attach the 4 claws to install the 2 plugs.
HINT:
Use the same procedures for both sides.
14. INSTALL REAR DOOR SCUFF PLATE RH Installation
15. INSTALL REAR DOOR SCUFF PLATE LH Installation
16. INSTALL REAR STEP COVER Installation
17. INSTALL COWL SIDE TRIM BOARD RH Installation
18. INSTALL NO. 2 INSTRUMENT PANEL UNDER COVER SUB-ASSEMBLY Installation
19. INSTALL COWL SIDE TRIM BOARD LH Installation
20. INSTALL NO. 1 INSTRUMENT PANEL UNDER COVER SUB-ASSEMBLY Installation
21. INSTALL FRONT DOOR SCUFF PLATE RH Installation
22. INSTALL FRONT DOOR SCUFF PLATE LH Installation
23. INSTALL INSTRUMENT SIDE PANEL RH Installation
24. INSTALL INSTRUMENT SIDE PANEL LH Installation
25. INSTALL REAR NO. 1 SEAT ASSEMBLY RH Installation
26. INSTALL REAR NO. 3 SEAT CUSHION HINGE COVER Installation
27. INSTALL REAR NO. 1 SEAT CUSHION HINGE COVER Installation
28. INSTALL REAR NO. 4 SEAT CUSHION HINGE COVER Installation
29. INSTALL REAR NO. 2 SEAT CUSHION HINGE COVER Installation
30. INSTALL REAR NO. 1 SEAT ASSEMBLY LH Installation
31. INSTALL REAR NO. 4 SEAT CUSHION HINGE COVER Installation
32. INSTALL REAR NO. 2 SEAT CUSHION HINGE COVER Installation
33. INSTALL REAR NO. 5 SEAT CUSHION HINGE COVER Installation
34. INSTALL REAR NO. 3 SEAT CUSHION HINGE COVER Installation
35. INSTALL FRONT SEAT ASSEMBLY RH
(a) Install the front seat assembly RH Installation.
36. INSTALL FRONT SEAT ASSEMBLY LH
(a) Install the front seat assembly LH Installation.
37. CONNECT CABLE TO NEGATIVE BATTERY TERMINAL
NOTICE:
When disconnecting the cable, some systems need to be initialized after the cable is reconnected Repair Instruction - Initialization.
38. INSTALL ENGINE ROOM SIDE COVER LH Installation
39. CHECK SRS WARNING LIGHT
(a) Check the SRS warning light Service Precautions.