Exhaust (3MZ-FE): Removal
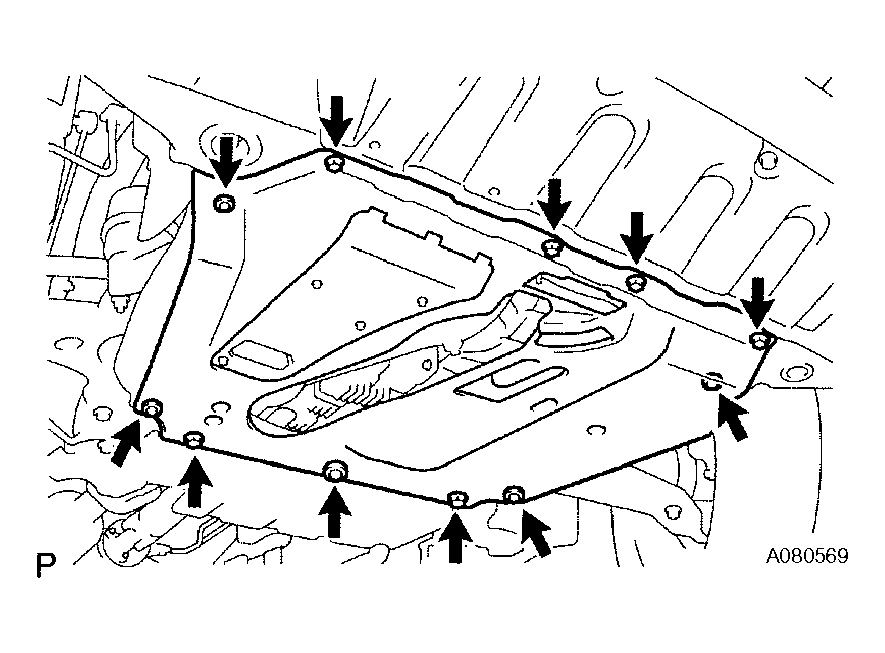
- REMOVE ENGINE UNDER COVER ASSEMBLY
- w/ Engine the 5 clips, 4 bolts and 2 screws, and then remove the engine under cover.
- Remove the 5 clips, 4 bolts and 2 screws, and then remove the engine under cover.
 Courtesy of © TOYOTA, LICENSE AGREEMENT TMS1002
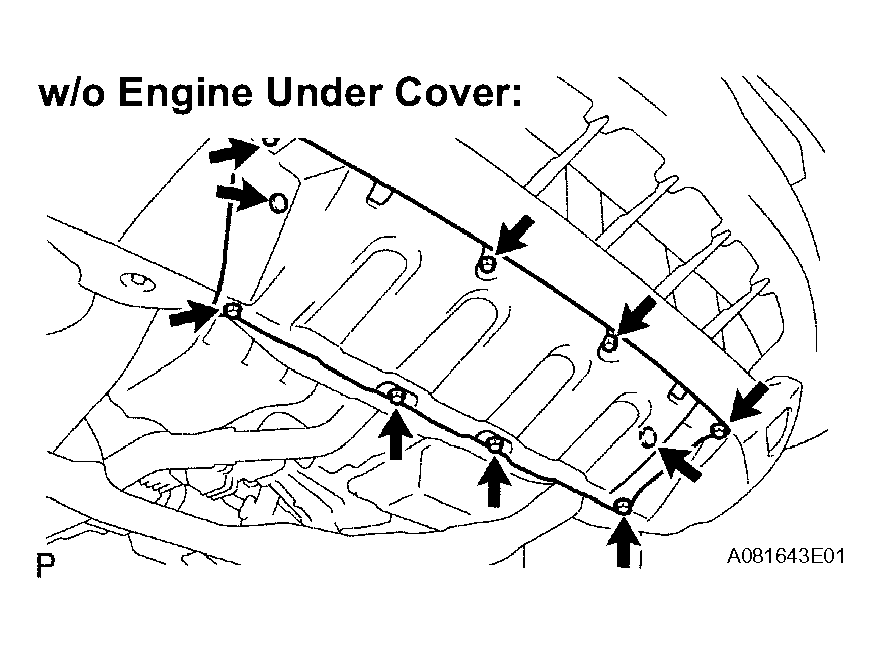
- REMOVE ENGINE UNDER COVER NO. 1
- w/o Engine under cover
- Remove the 2 clips, 6 bolts and 2 screws, and then remove the engine under cover No. 1.
 Courtesy of © TOYOTA, LICENSE AGREEMENT TMS1002
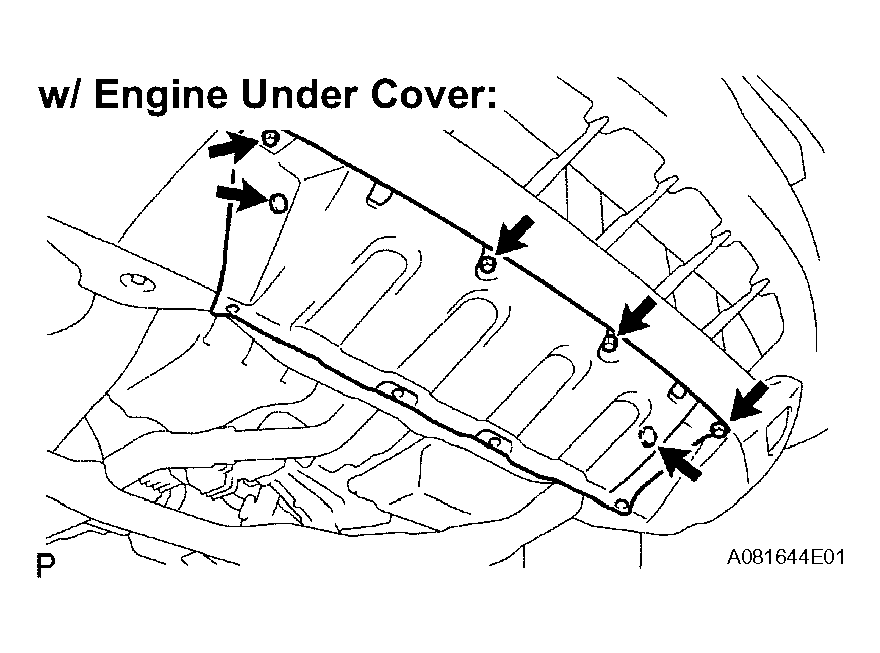
- w/ Engine under cover
- Remove the 2 clips, 2 bolts and 2 screws, and then remove the engine under cover No. 1.
 Courtesy of © TOYOTA, LICENSE AGREEMENT TMS1002
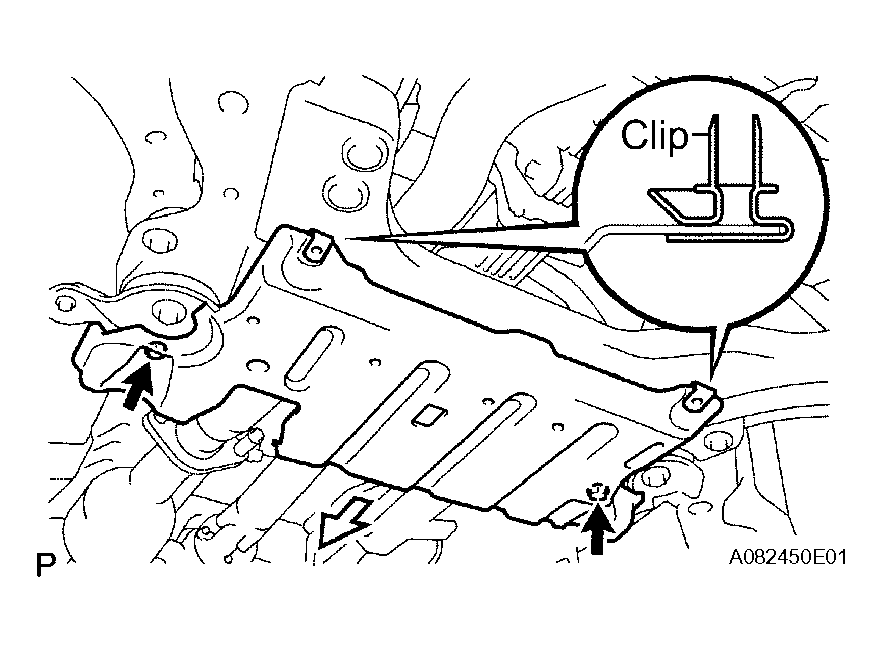
- REMOVE ENGINE UNDER COVER NO. 2
- w/ Engine under cover No. 2.
- Remove the 2 bolts.
- Slide the engine under cover No. 2 toward the rear to detach it from the retainers, and then remove the engine under cover No. 2.
 Courtesy of © TOYOTA, LICENSE AGREEMENT TMS1002
- REMOVE HEATED OXYGEN SENSOR
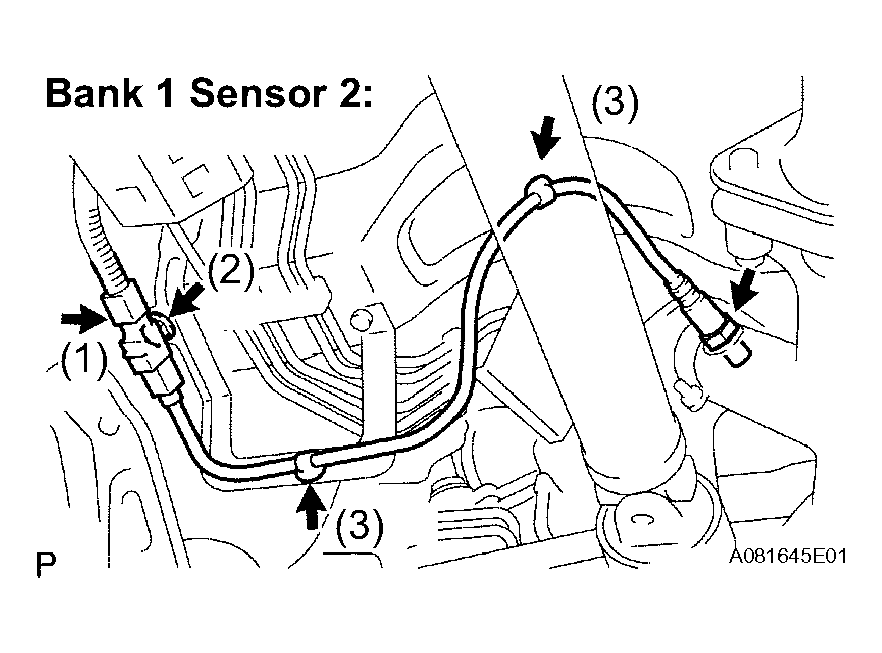
- Bank 1 Sensor 2
- Disconnect the heated oxygen sensor connector.
- Remove the connector clamp.
- Remove the 2 wire harness clamps.
- Remove the heated oxygen sensor.
 Courtesy of © TOYOTA, LICENSE AGREEMENT TMS1002
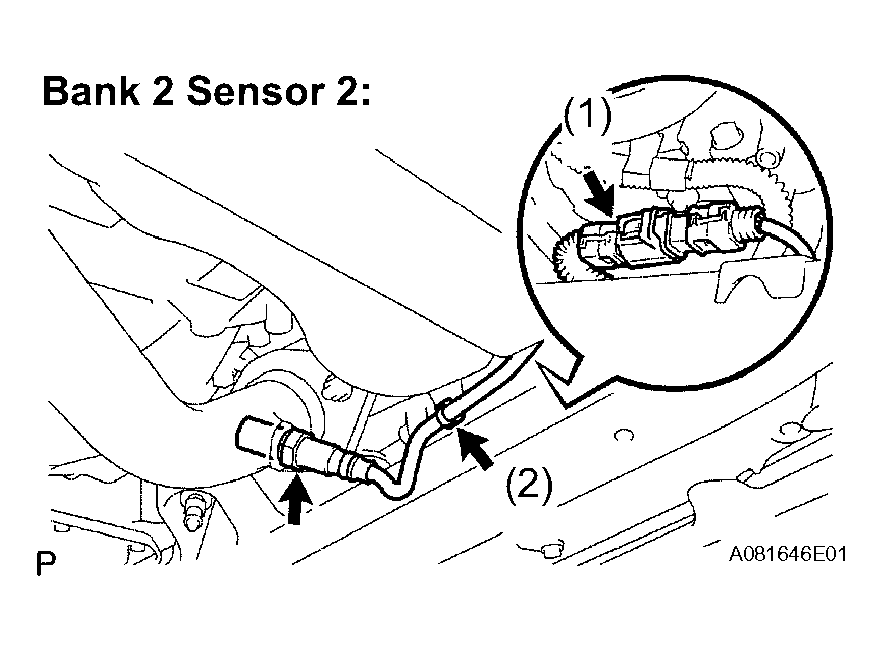
- Bank 2 Sensor 2
- Disconnect the heated oxygen sensor connector.
- Remove the wire harness clamp.
- Remove the heated oxygen sensor.
 Courtesy of © TOYOTA, LICENSE AGREEMENT TMS1002
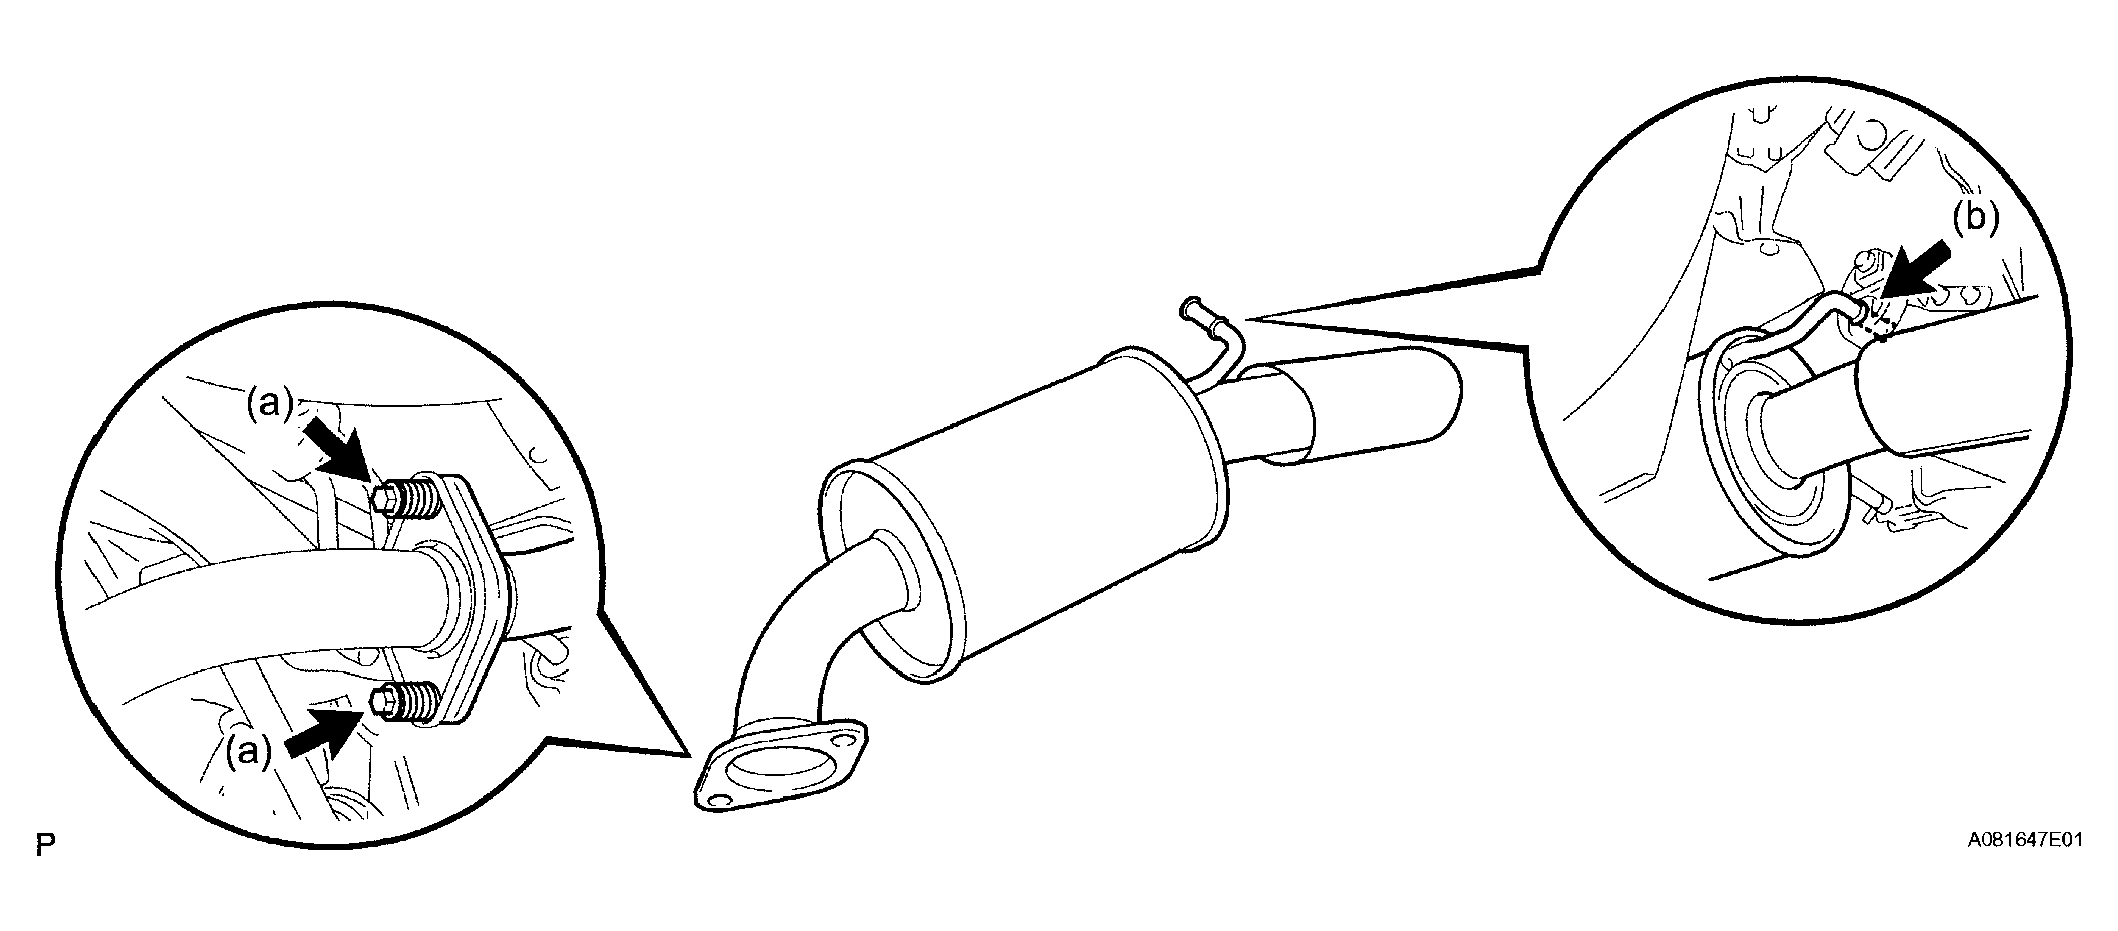
- REMOVE EXHAUST PIPE ASSEMBLY TAIL
- Remove the 2 bolts and 2 compression springs.
- Remove the exhaust pipe tail from the exhaust pipe support.
- Remove the gasket from the exhaust pipe center.
 Courtesy of © TOYOTA, LICENSE AGREEMENT TMS1002
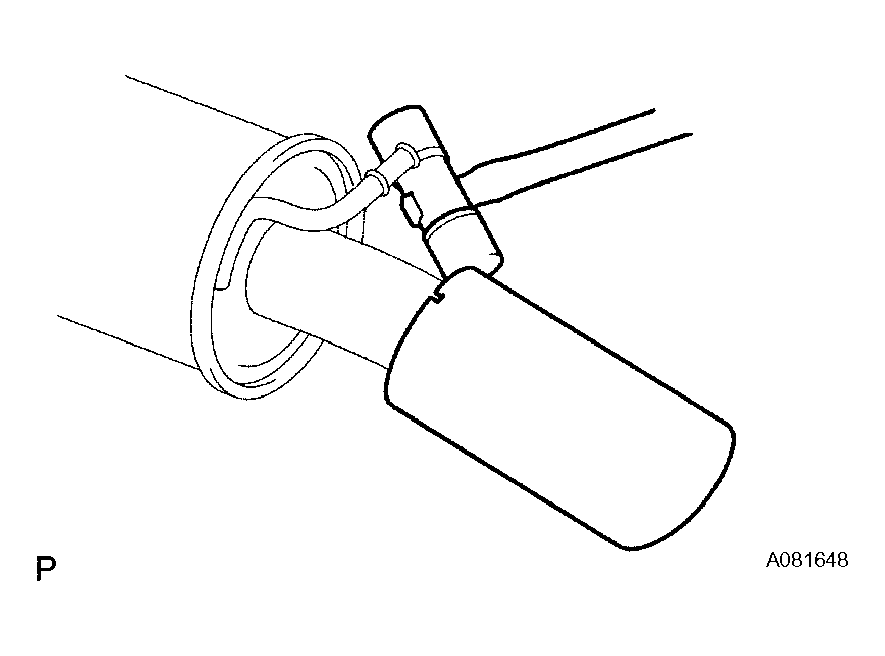
- REMOVE EXHAUST TAIL PIPE BAFFLE SUBASSEMBLY
- Using a plastic hammer, tap the exhaust tail pipe baffle uniformly to remove.
 Courtesy of © TOYOTA, LICENSE AGREEMENT TMS1002
- REMOVE EXHAUST PIPE ASSEMBLY CENTER
- Remove the 2 bolts and 2 compression springs.
- Remove the exhaust pipe center from the 4 exhaust pipe supports.
- Remove the gasket from the exhaust pipe front No. 3.
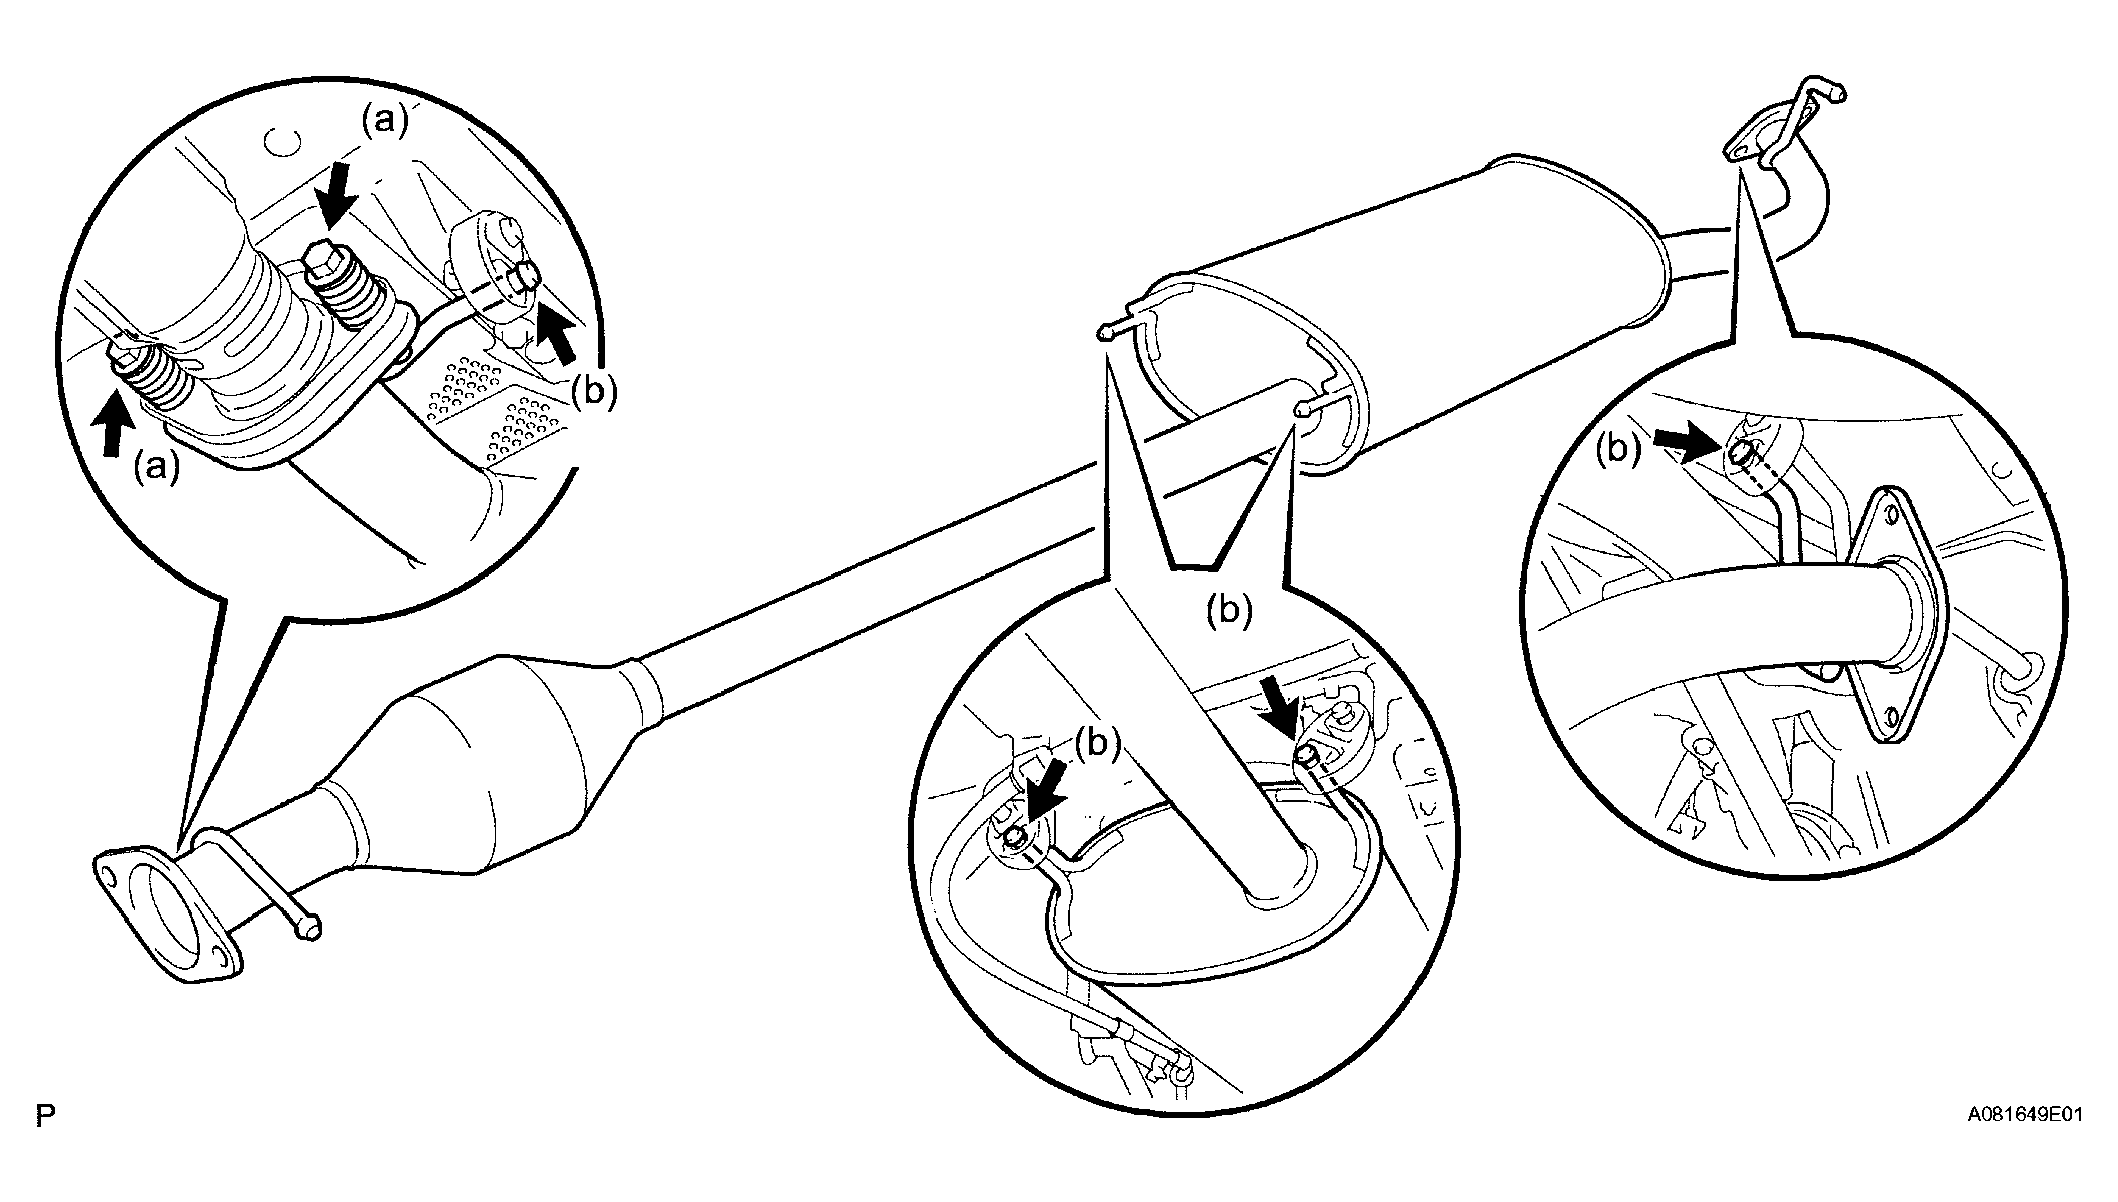 Courtesy of © TOYOTA, LICENSE AGREEMENT TMS1002
- REMOVE EXHAUST PIPE SUB-ASSEMBLY FRONT NO. 3
- Remove the 2 bolts and 2 nuts, and remove the exhaust pipe front No. 3 and the 2 gaskets.
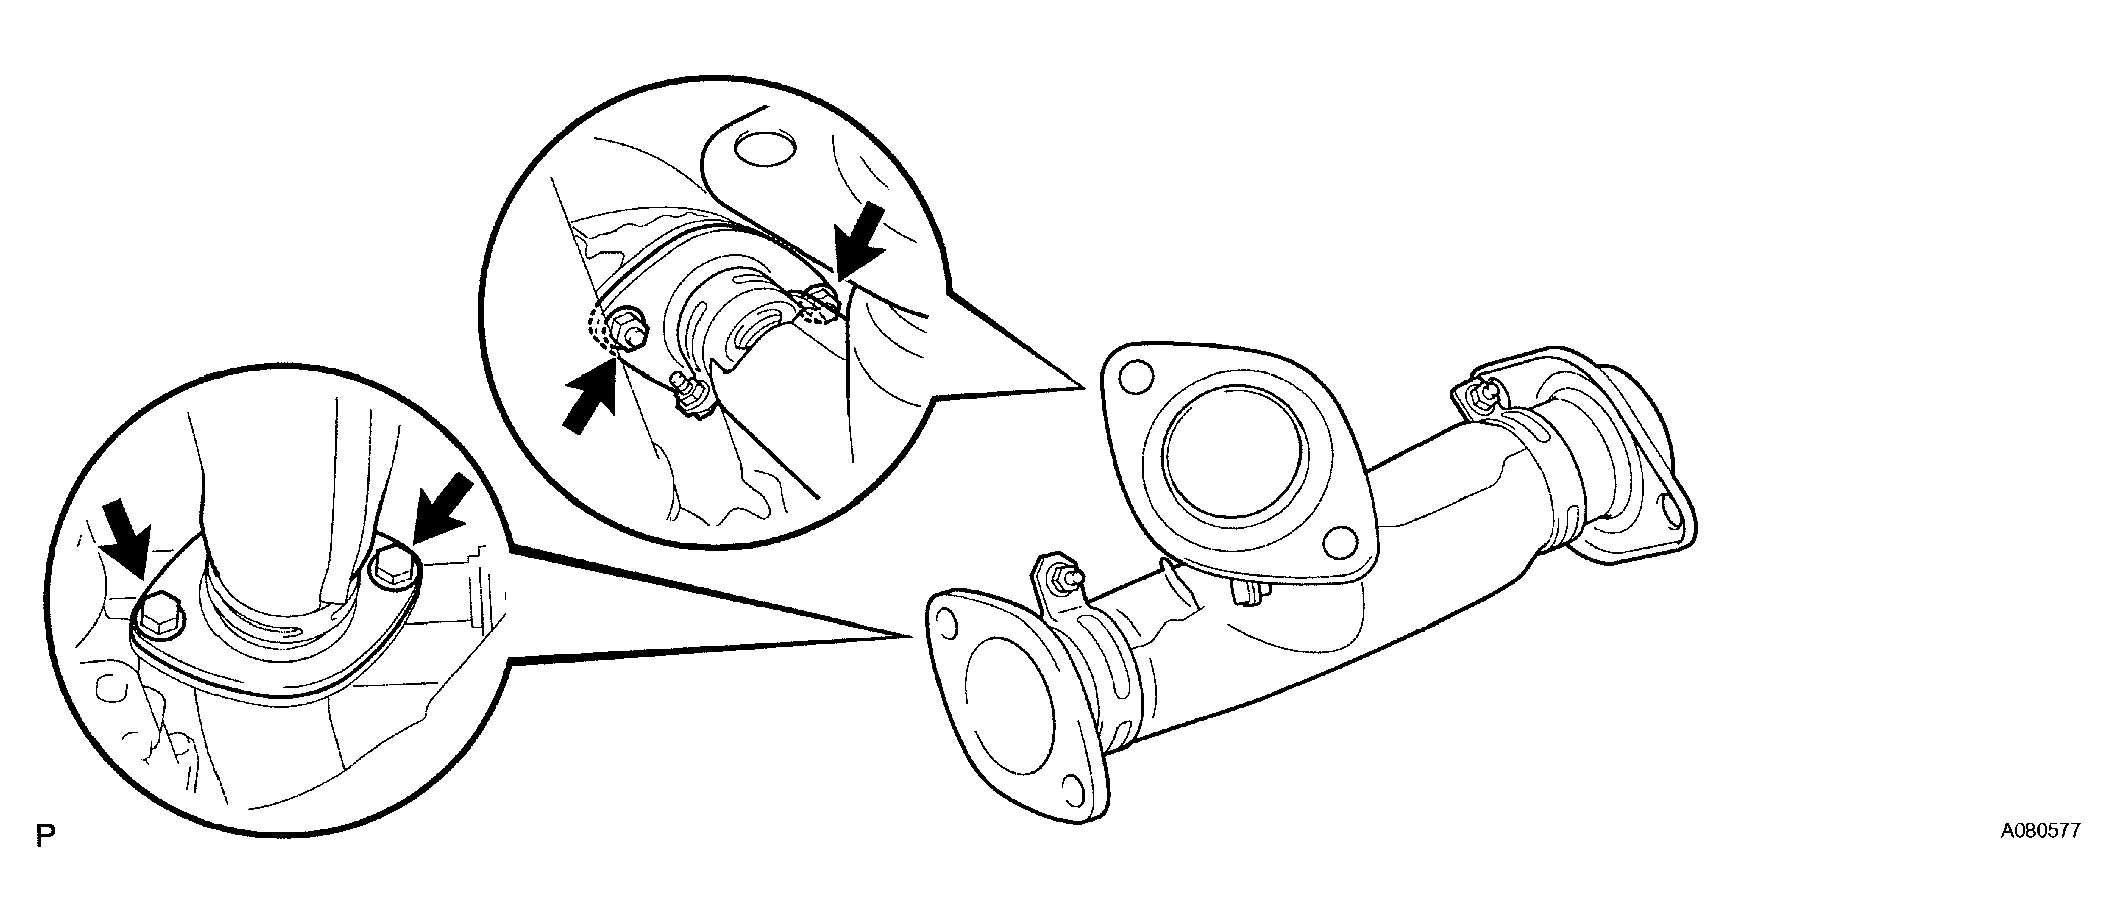 Courtesy of © TOYOTA, LICENSE AGREEMENT TMS1002
- REMOVE EXHAUST PIPE ASSEMBLY FRONT
- Remove the 2 nuts.
- Loosen the clamp bolts, and remove the exhaust pipe front and the gasket.
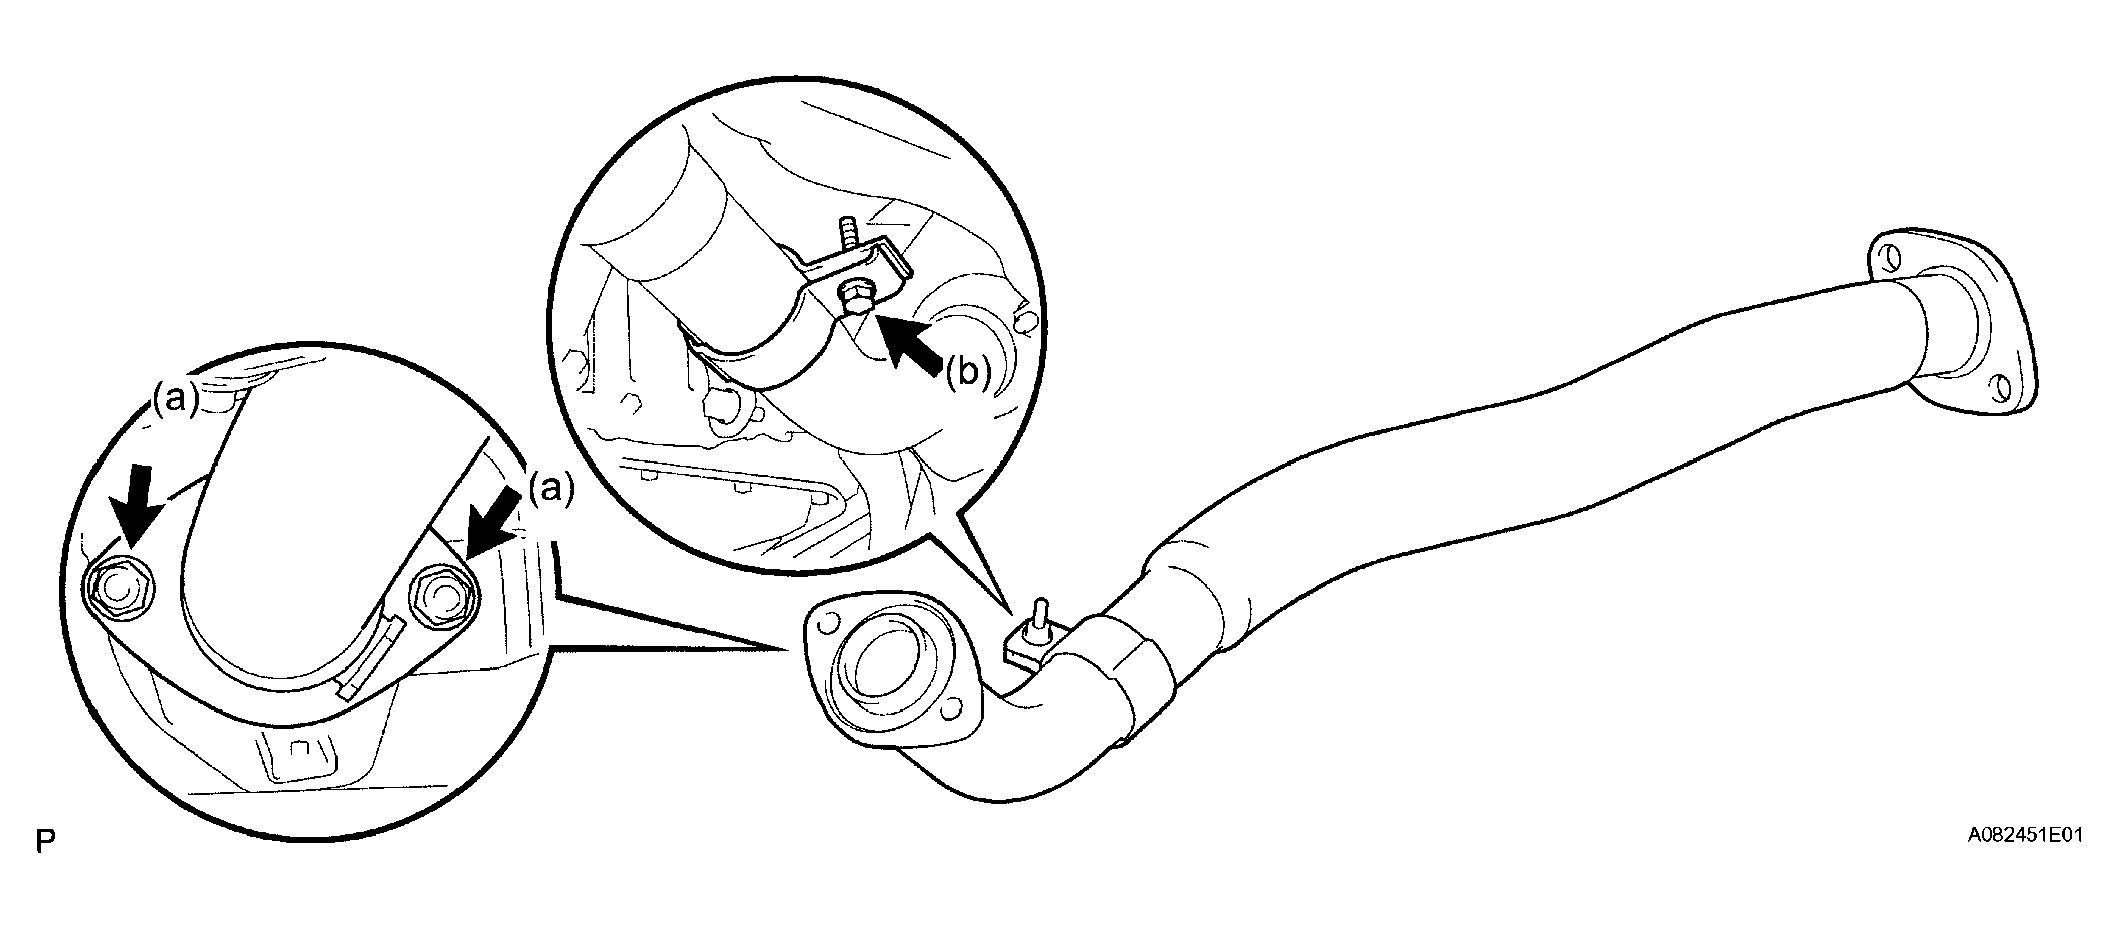 Courtesy of © TOYOTA, LICENSE AGREEMENT TMS1002