Speakers - Buzzing Noise at Low Volume
No: 86/19/97/NASRef: WSM section 86
Issue: 1
Date: 09/19/97
Audio Harness Installation
AFFECTED VEHICLE RANGE:
DEFENDER (LD) 1997 MY
SITUATION:
RADIO BUZZING NOISE
Induced electrical noise in the audio amplifier input harness might cause a buzzing noise through one or more speakers at low volume levels.
RESOLUTION:
NEW AMPLIFIER INPUT HARNESS
To eliminate the buzzing noise an improved amplifier harness is available. Perform the procedure outlined to properly install the new harness.
PARTS INFORMATION:
LRN-00-0001 D90 amplifier harness
WARRANTY CLAIMS:
86.50.89/31 Time 0.50 hrs.
Wiring harness amplifier repair
COMP CODE: 6X5K
Normal warranty policy and procedures apply
REPAIR PROCEDURE:
INSTALLATION OF AMPLIFIER HARNESS
1. Ensure radio code is available and then disconnect the battery.
2. Remove the radio.
3. Remove right hand front seat base and compartment cover.
4. Locate the red 10-way connector in the center console.
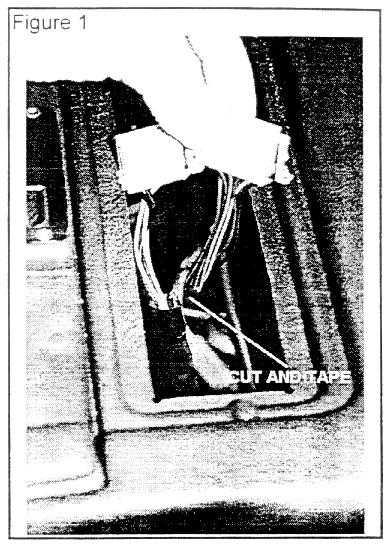
5. Cut off the 10-way connector as close to the harness as possible and discard the connector (Figure 1).
6. Insulate the exposed wires with several turns of electrical tape.
7. In the right side seat-base compartment, disconnect the brown 8-way connector from the amplifier.
8. Cut off and discard the 8-way connector as close to the harness as possible and discard the connector.
9. Insulate the exposed wires with several turns of electrical tape.
10. In the center console remove the grommet from the hole.
11. Stretch grommet open and fit the 8-way connector of the new harness through.
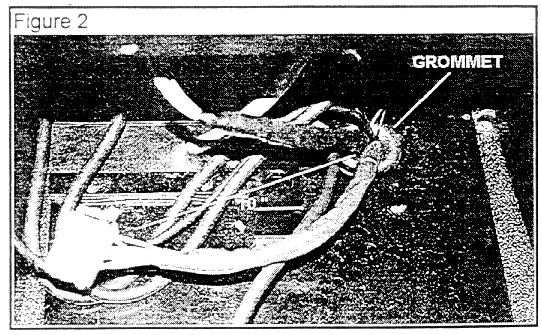
12. Continue feeding harness downward through the grommet until approximately 10 in. of wiring from the 10-way connector to the grommet remains in the center console (Figure 2).
13. Install the grommet carefully back in the radio hole taking care not to damage the wires.
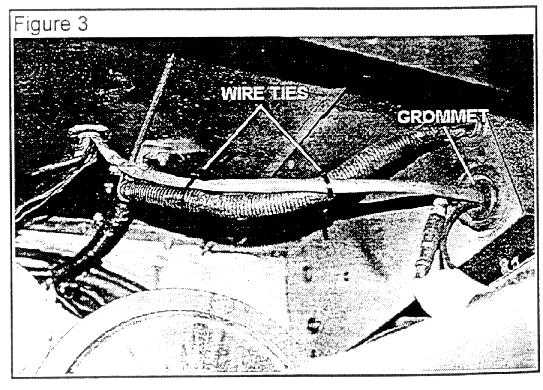
14. From underneath the vehicle feed the brown 8- way connector through the grommet (Figure 3) into the right seat base compartment the same way as described in step 11.
15. Secure the new audio harness to the existing harness using wire ties as shown in Figure 3.
16. In the right side seat base compartment route the harness to the audio amplifier and connect.
17. Install radio.
18. Install right hand front seat base and compartment cover.
19. Connect battery.
20. Code radio.
21. Test audio system operation.