Panel, Instrument: Removal: Removal
 Courtesy of CHRYSLER GROUP, LLC
- Remove the steering column. Refer to COLUMN, REMOVAL
.
- Remove the ignition switch.
- Remove the instrument cluster. Refer to REMOVAL
.
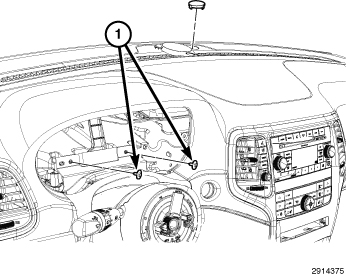
- Remove the bolts (1) from behind the cluster.
 Courtesy of CHRYSLER GROUP, LLC
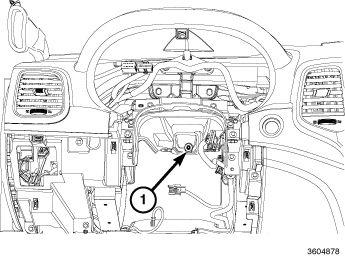
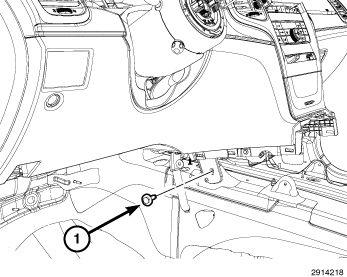
- From inside the vehicle, remove the bolt (1) that secures the instrument panel support beam to the support bracket of the cowl panel.
 Courtesy of CHRYSLER GROUP, LLC
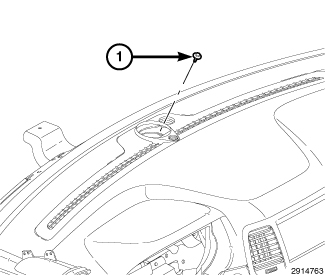
- Remove the fenceline bolt (1).
 Courtesy of CHRYSLER GROUP, LLC
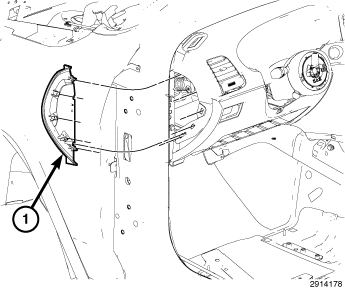
- Remove the left end cap (1).
- Remove the left cowl trim panel. Refer to PANEL, COWL TRIM, SIDE, REMOVAL .
 Courtesy of CHRYSLER GROUP, LLC
- Remove the left A-pillar trim. Refer to PANEL, A-PILLAR TRIM, REMOVAL .
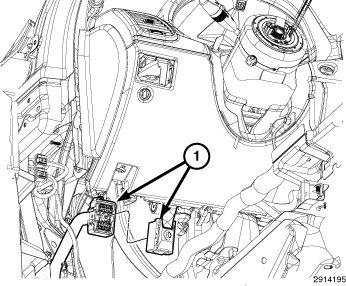
- Disconnect the left wire harness (1).
 Courtesy of CHRYSLER GROUP, LLC
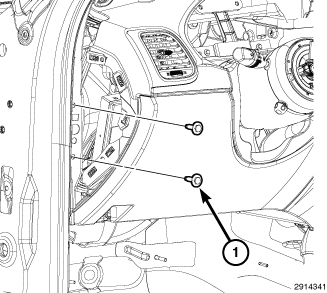
- Remove the left side retaining bolts (1).
 Courtesy of CHRYSLER GROUP, LLC
- Remove the front floor console. Refer to CONSOLE, FLOOR, REMOVAL .
- Remove the radio. Refer to RADIO, REMOVAL
.
- Remove the bin from the center of the instrument panel.
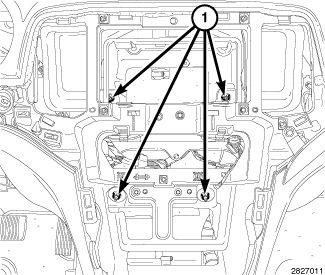
- Remove the four nuts (1) that secure the HVAC housing to the center of the instrument panel support.
 Courtesy of CHRYSLER GROUP, LLC
- Remove the two center support bolts (1).
- Remove the glove box. Refer to GLOVE BOX, INSTRUMENT PANEL, REMOVAL .
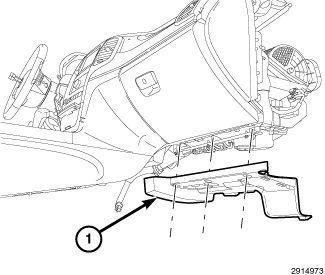 Courtesy of CHRYSLER GROUP, LLC
- Remove the right silencer panel (1).
- Remove the passenger side cowl trim panel. Refer to PANEL, COWL TRIM, SIDE, REMOVAL .
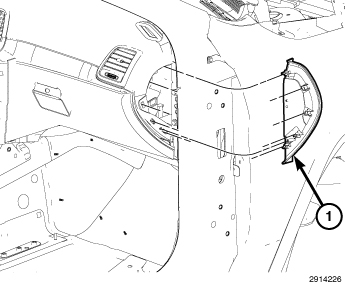 Courtesy of CHRYSLER GROUP, LLC
- Remove the right end cap (1).
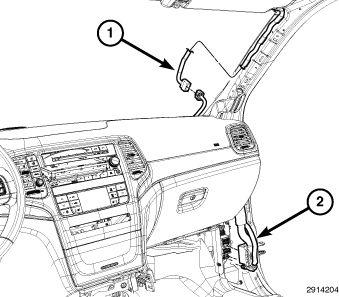 Courtesy of CHRYSLER GROUP, LLC
- Remove the passenger side A-pillar trim. Refer to PANEL, A-PILLAR TRIM, REMOVAL .
- Remove the defroster ducts.
- Disconnect the right side wire harness (1 and 2).
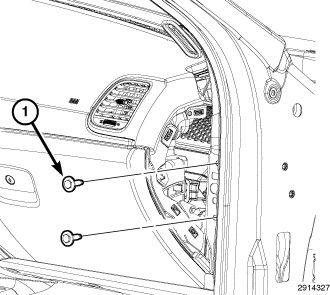 Courtesy of CHRYSLER GROUP, LLC
- Remove the right side support fasteners (1).
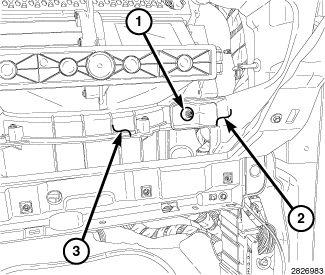 Courtesy of CHRYSLER GROUP, LLC
- Remove the bolt to the right side HVAC.
- Remove the center duct.
- Disconnect the HVAC electrical connectors. Refer to HOUSING, HVAC, REMOVAL
.
- Remove the instrument panel assembly.