C/V Joint-Outer
 Courtesy of CHRYSLER LLC
- Apply a light coat of grease to the C/V joint components before assembling them.
- Align inner race, cage and housing according to the alignment reference marks.
- Insert inner race (1) into the cage (2) and rotate race into the cage.
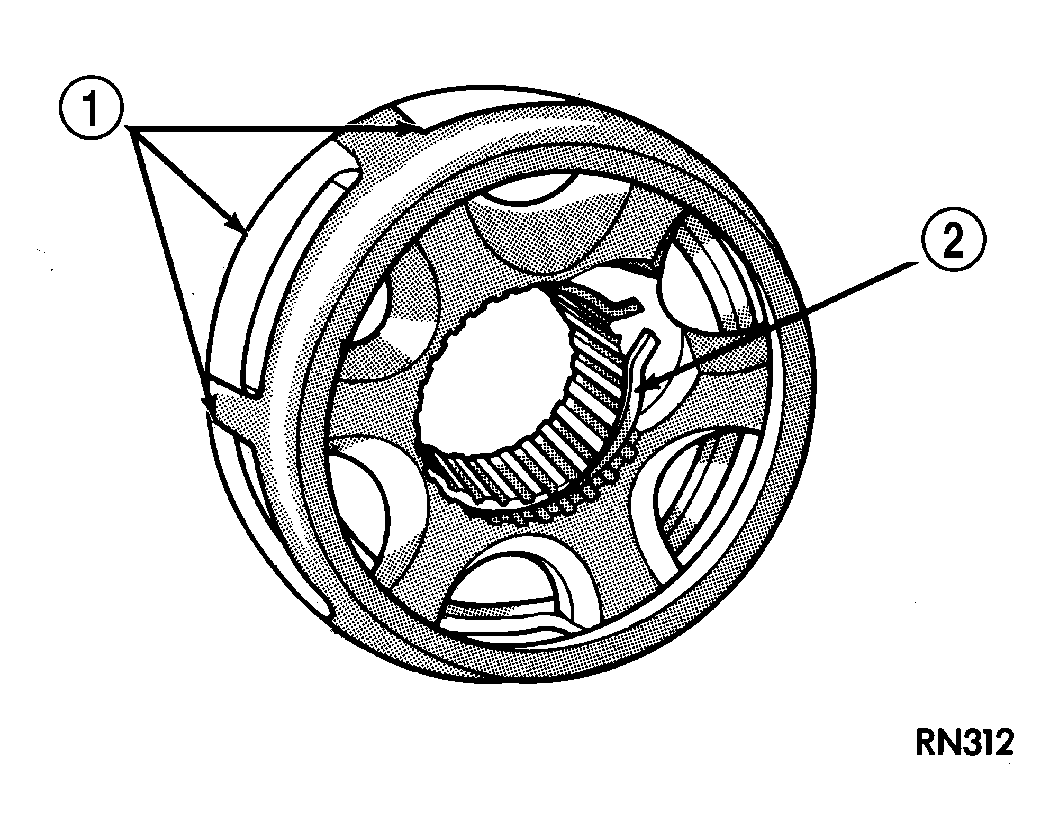 Courtesy of CHRYSLER LLC
- Rotate inner race/hub in the cage (1).
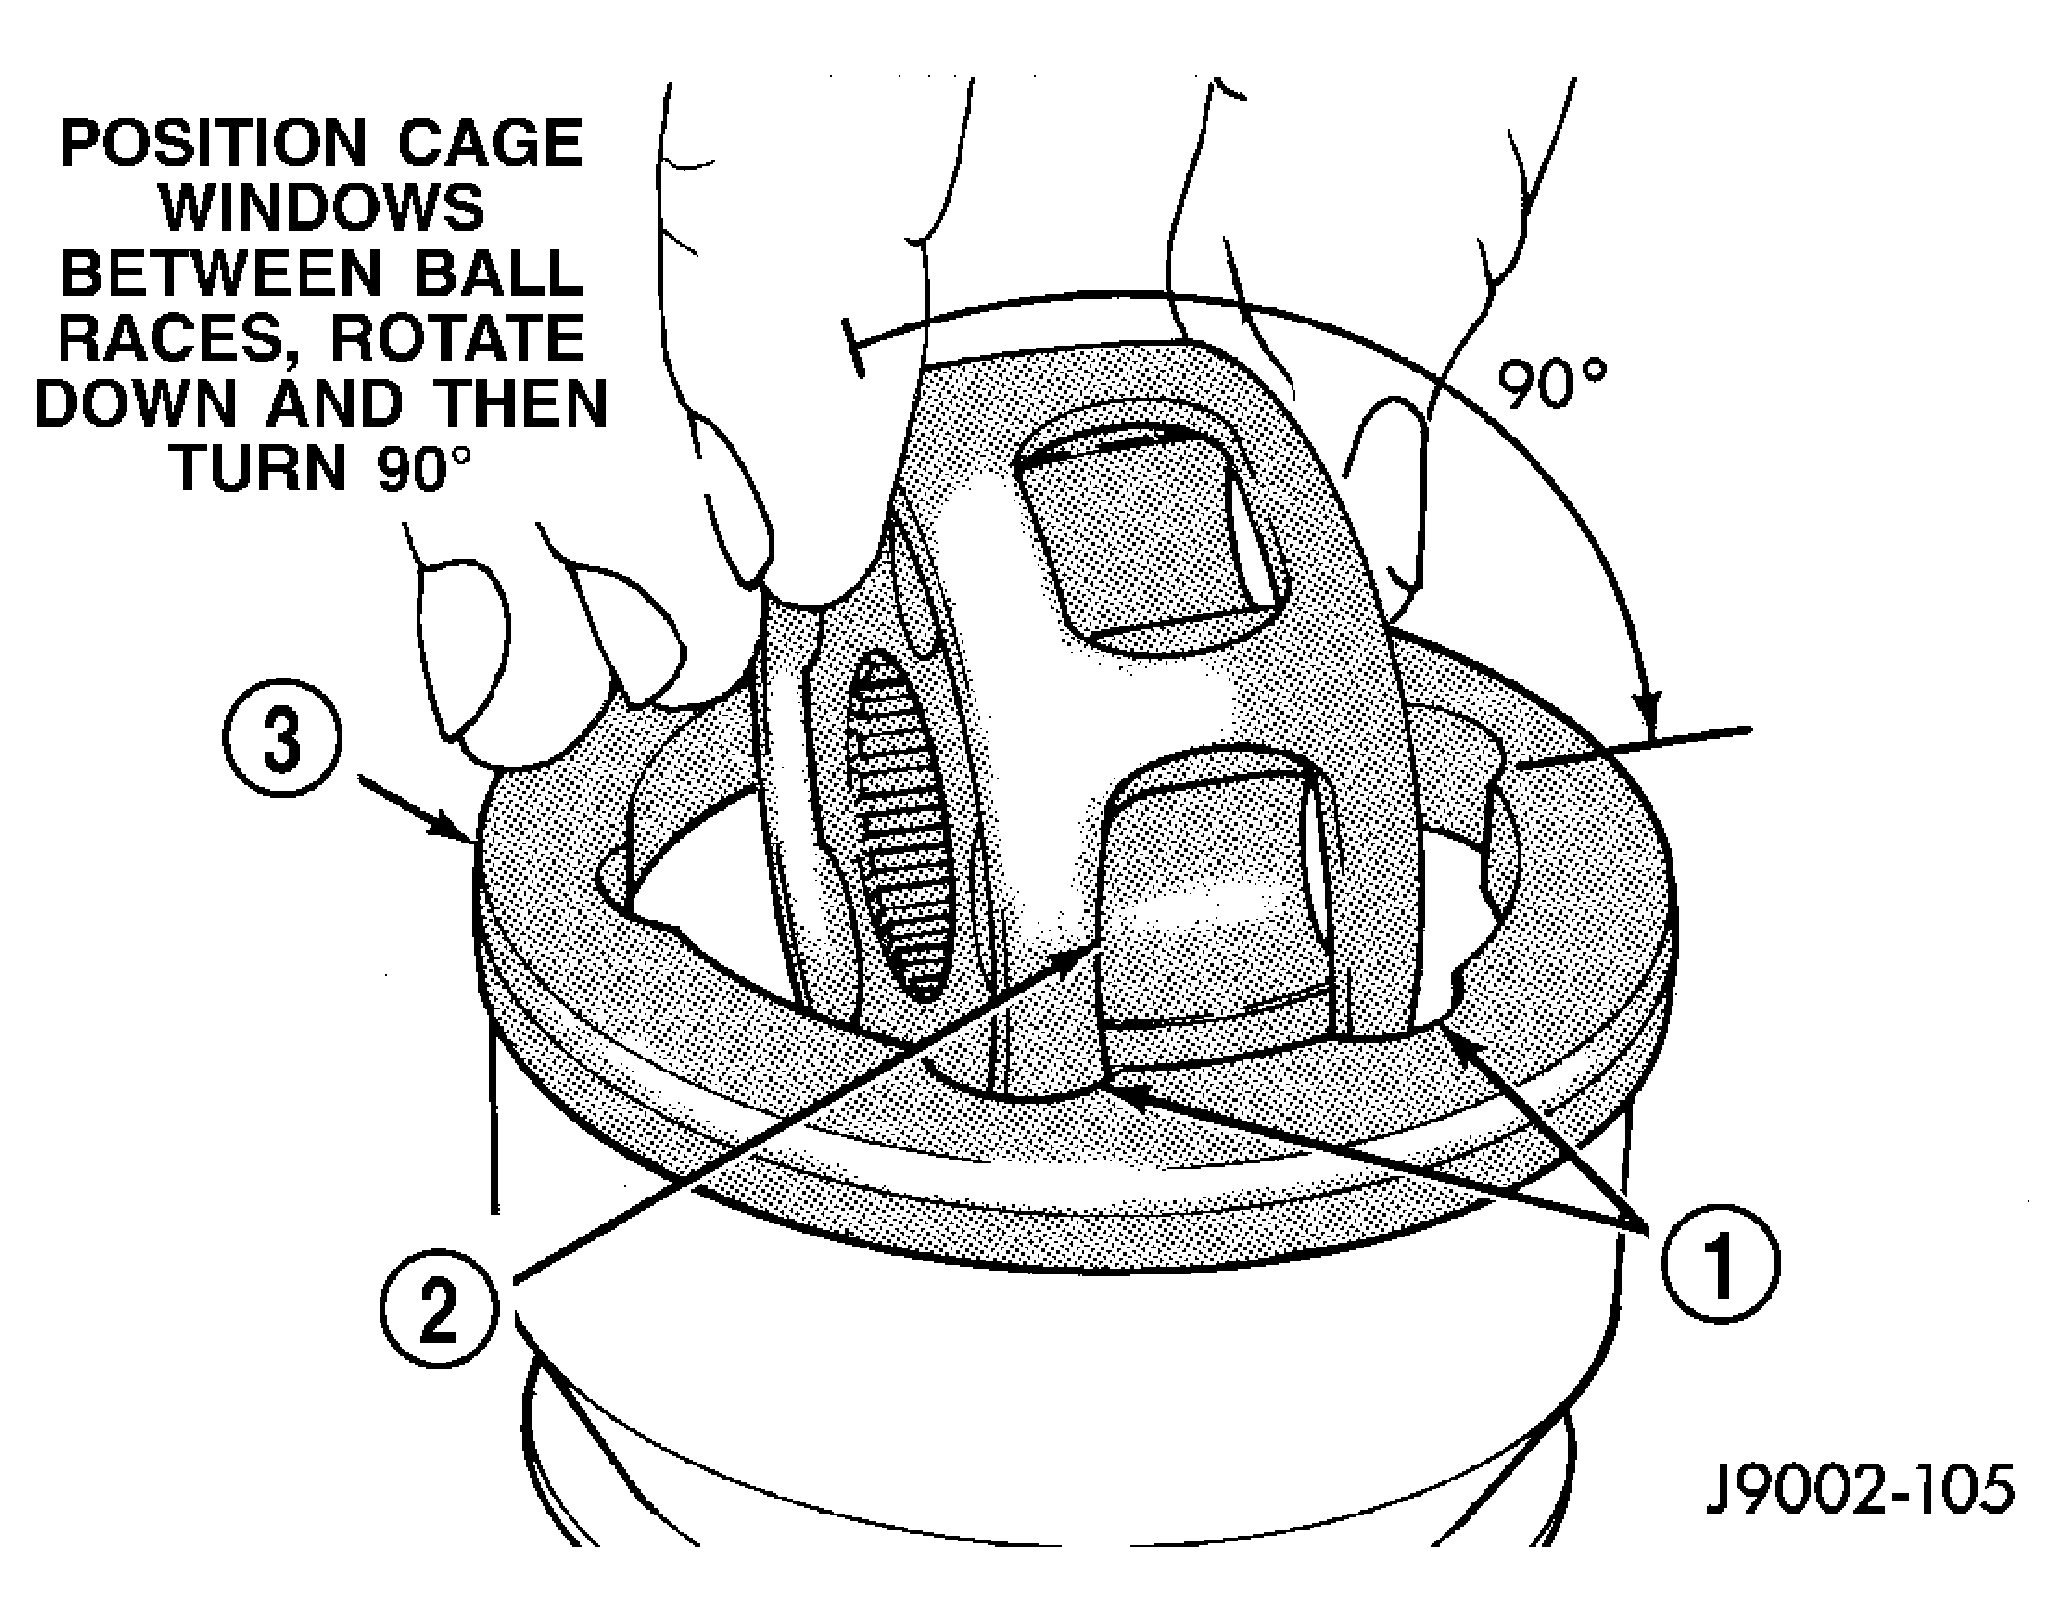 Courtesy of CHRYSLER LLC
- Insert cage into the housing (3).
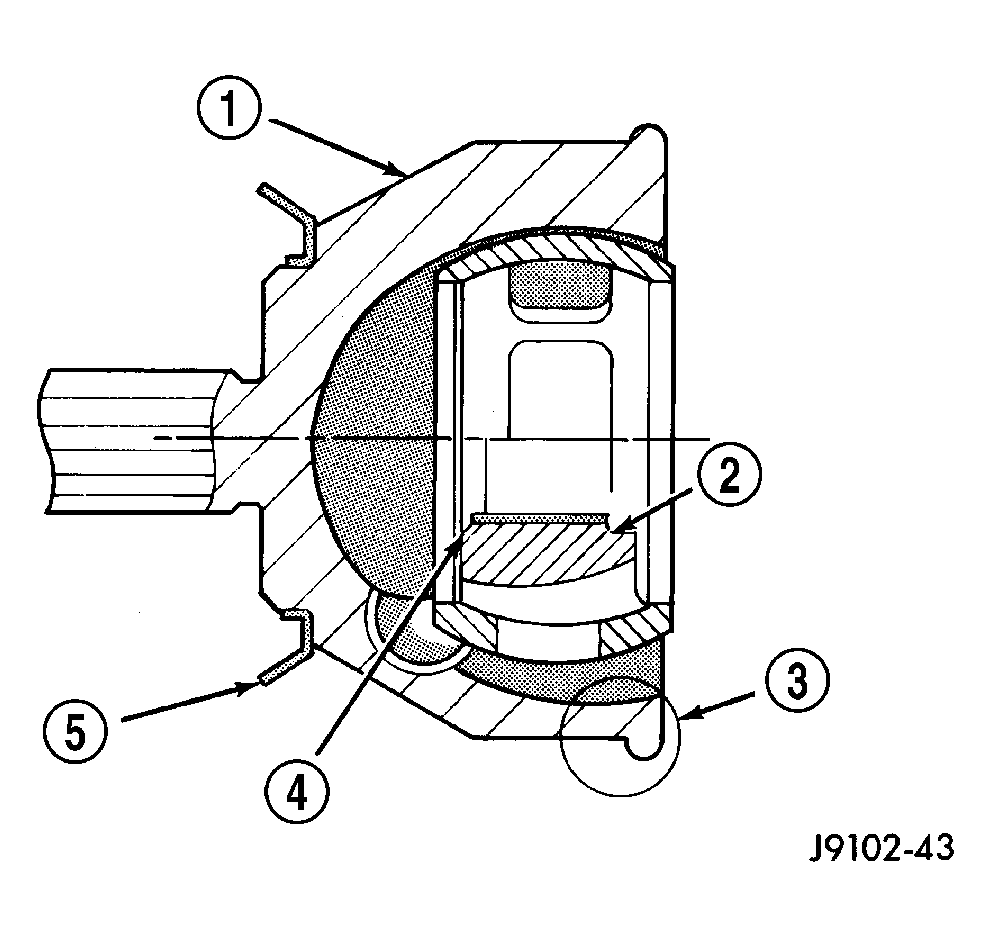 Courtesy of CHRYSLER LLC
- Rotate cage 90° into the housing (1).
 Courtesy of CHRYSLER LLC
- Apply lubricant included with replacement boot/joint to the ball races. Spread lubricant equally between all the races.
- Tilt inner race/hub (2) and cage (3) and install the balls (4).
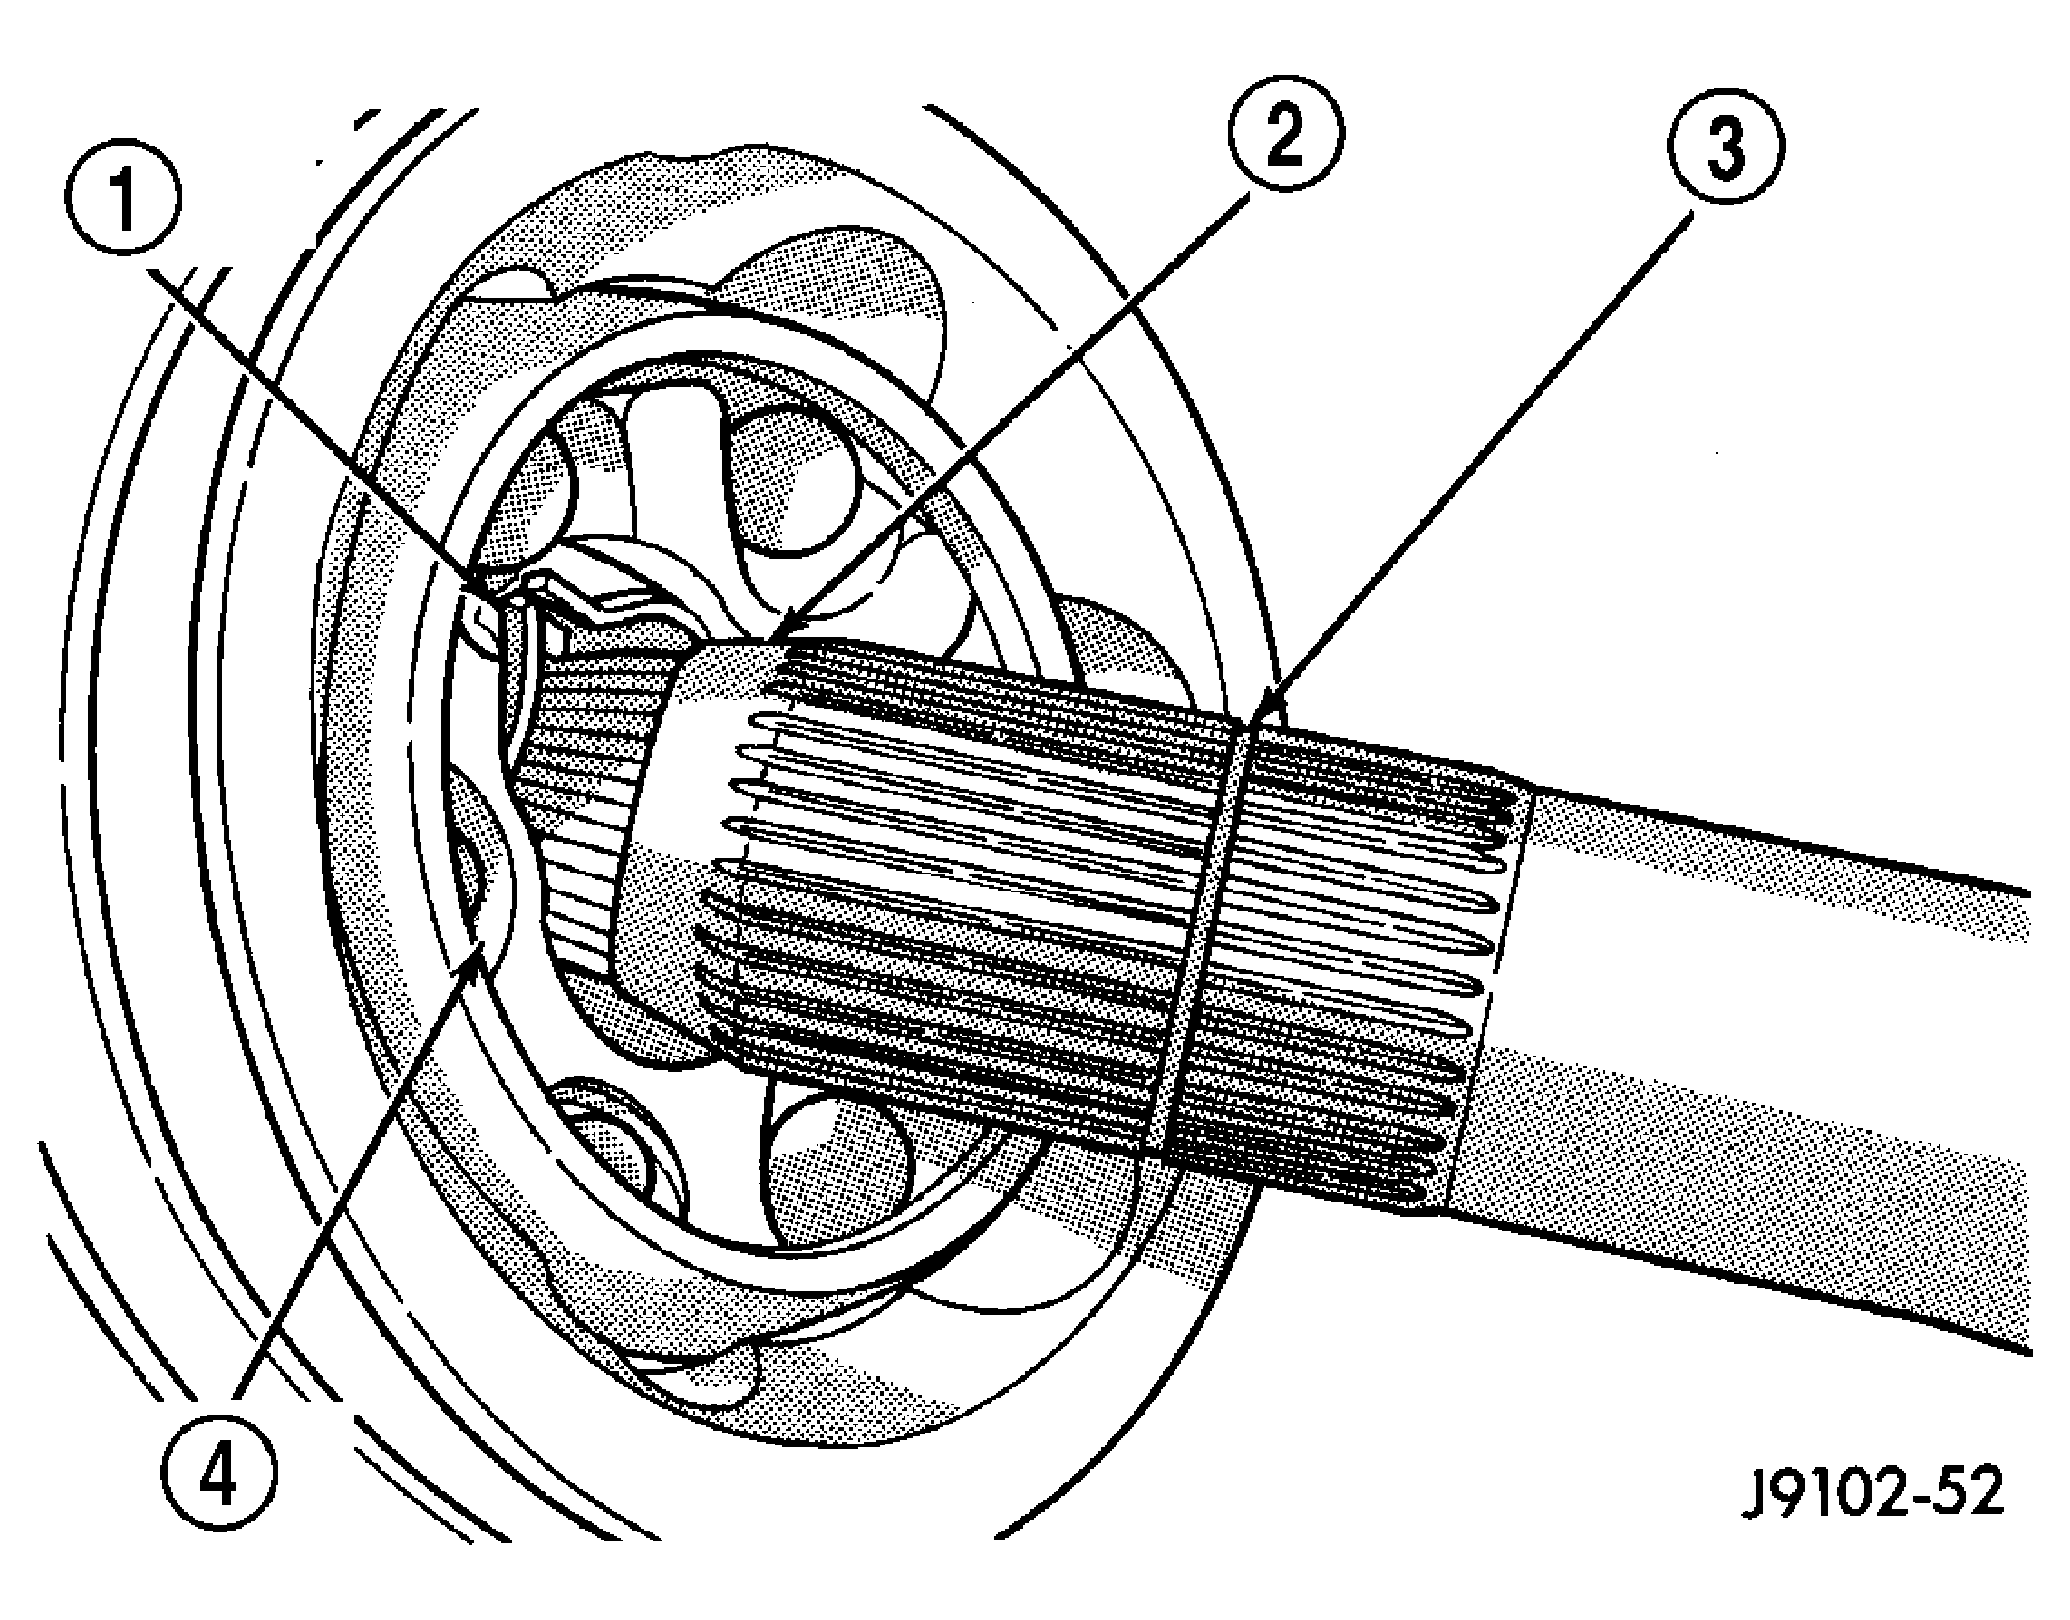 Courtesy of CHRYSLER LLC
- Place new clamps onto new boot and slide boot onto the shaft to its original position.
- Apply the rest of lubricant to the C/V joint and boot.
- Push the joint onto the shaft until the snap ring (1) seats in the groove (3). Pull on the joint to verify the span ring has engaged.
 Courtesy of CHRYSLER LLC
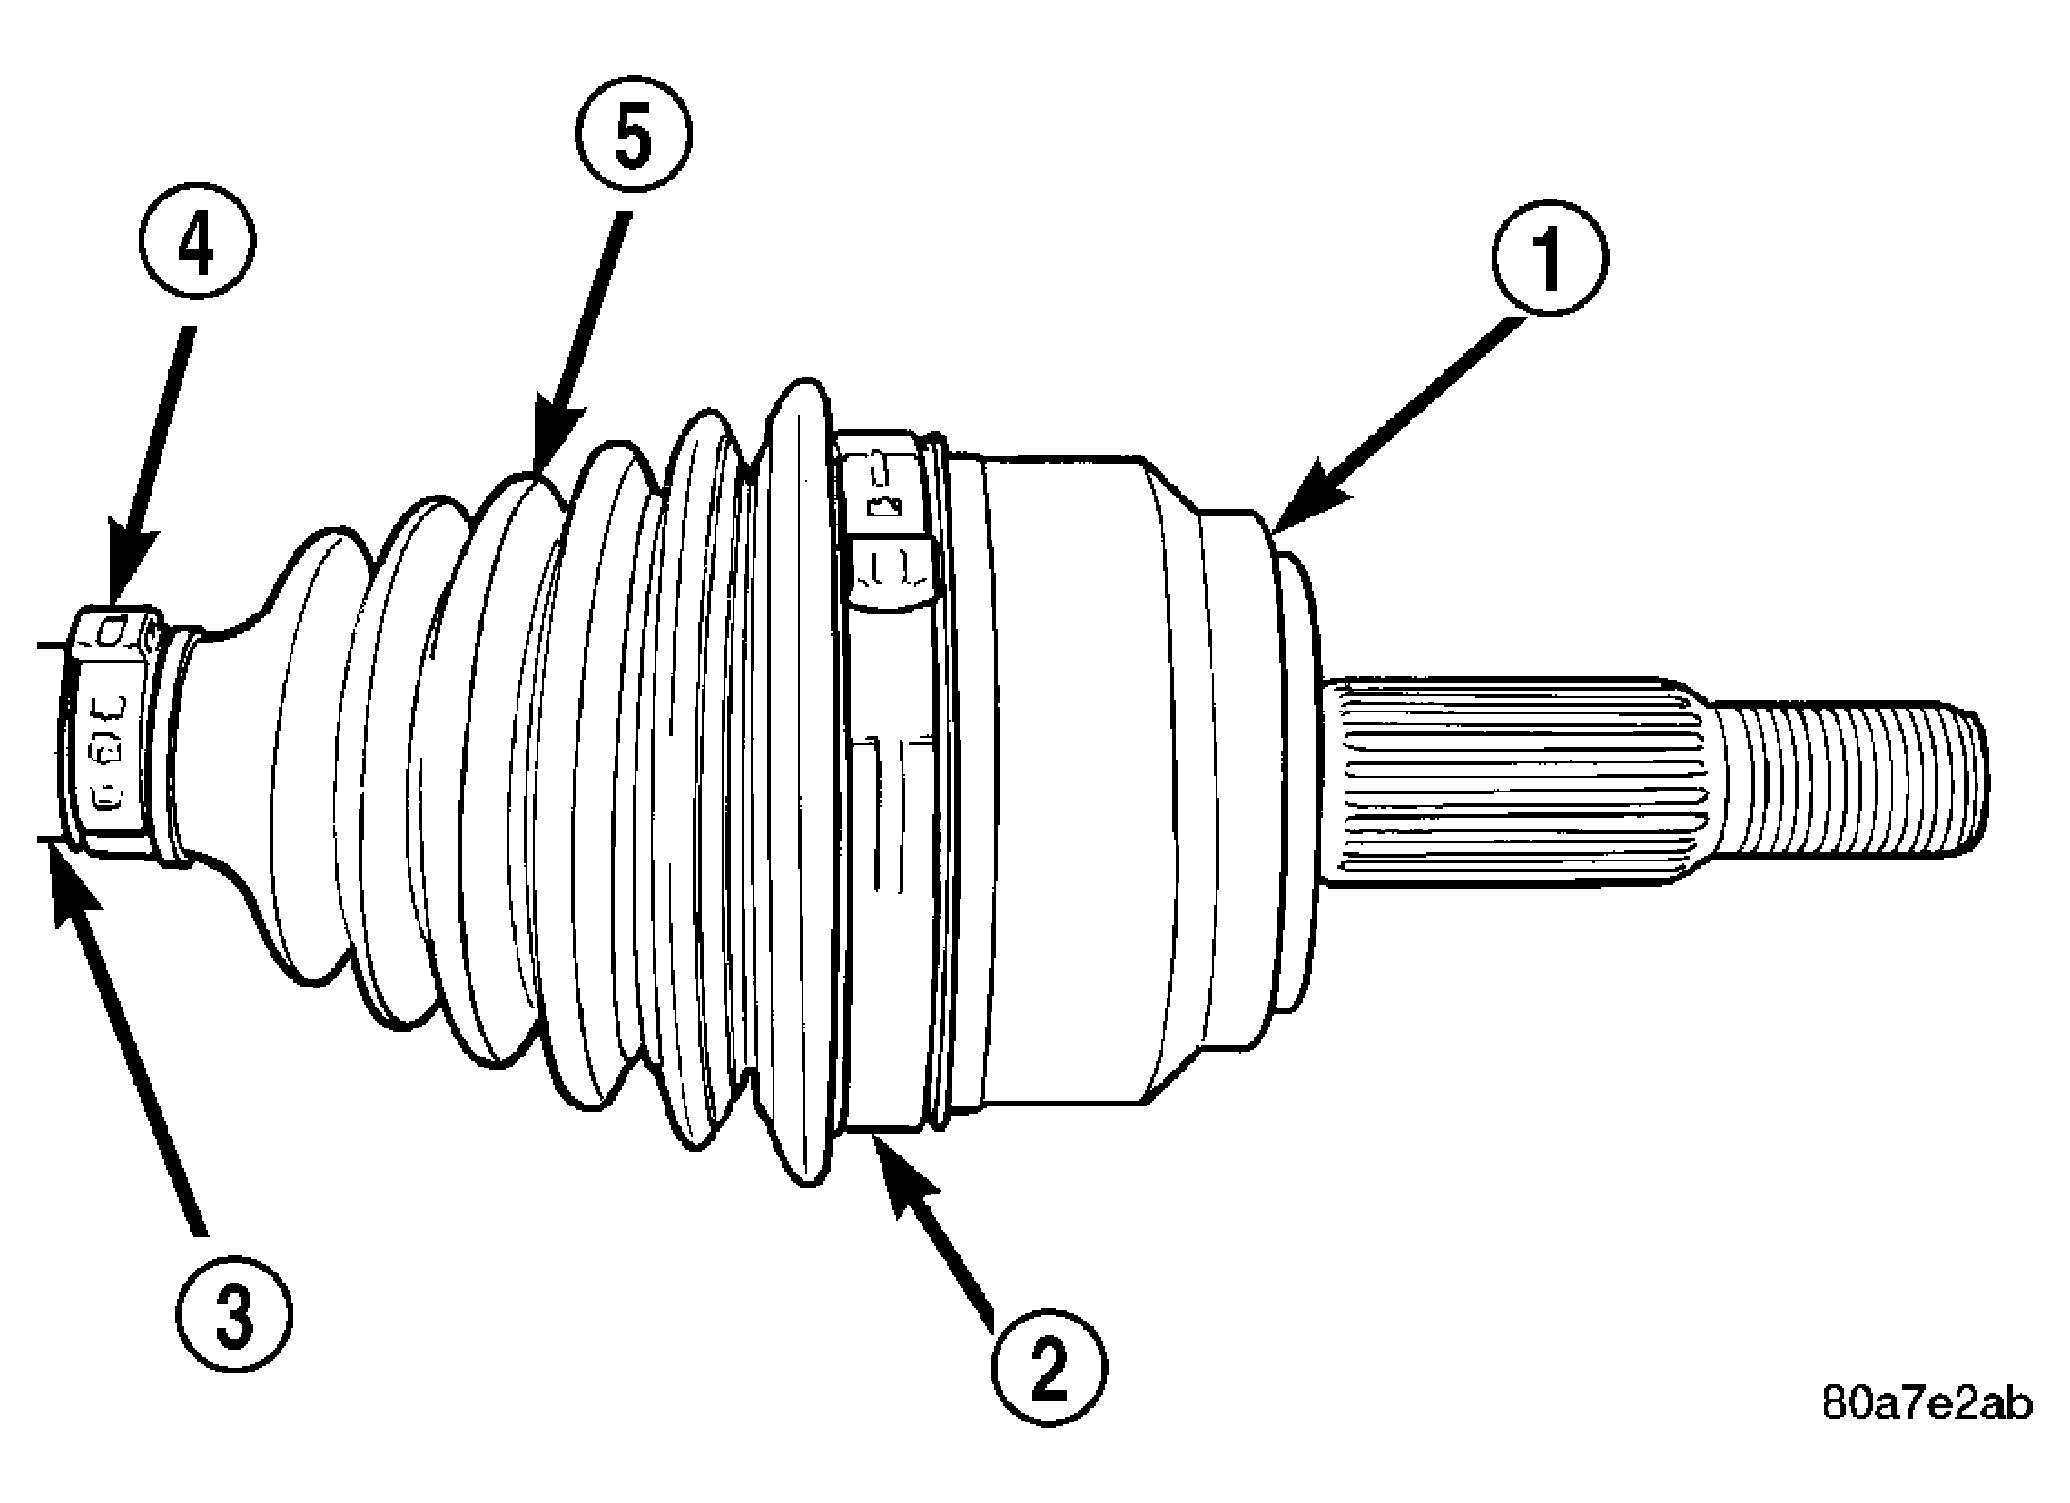
- Position boot on the joint in its original position. Ensure boot is not twisted and remove any excess air.
- Secure both boot clamps (2) (4) with Clamp Installer C-4975A. Place tool on clamp bridge and tighten tool until the jaws of the tool are closed.