Double Cardan Universal Joints
DOUBLE CARDAN UNIVERSAL JOINTSDISASSEMBLY
NOTE: Individual components of cardan universal joints are not serviceable they must be replaced as an assembly.
1. Remove the propeller shaft.
2. Mark the propeller shaft yoke and link yoke for assembly reference.
3. Tap the outside of the bearing cap assembly with drift to loosen snap rings.
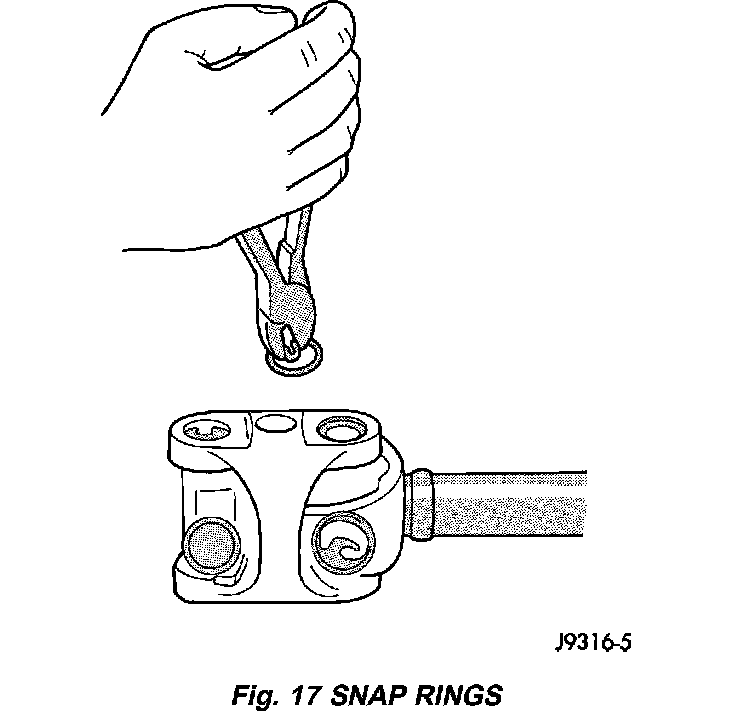
4. Remove all the bearing cap snap rings (Fig. 17).
5. Remove any grease fittings if equipped.
6. Position a socket on the press with an inside diameter large enough to receive the bearing cap under the link yoke.
7. Place another socket with an outside diameter smaller than the bearing cap on the upper bearing cap.
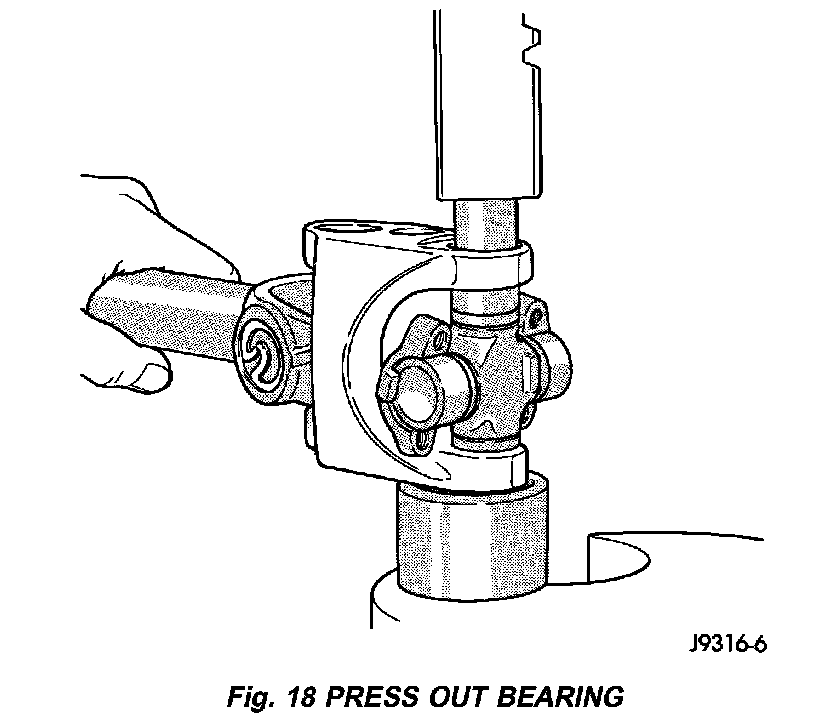
8. Press one bearing cap from the outboard side of the link yoke enough to grasp the cap with vise jaws (Fig. 18).
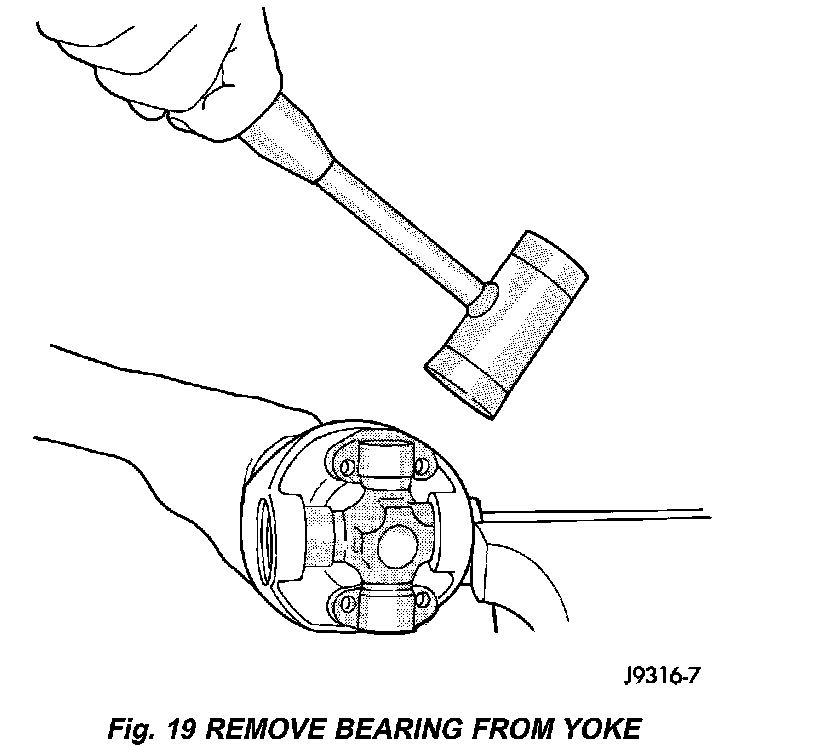
9. Grasp protruding bearing cap with vise jaws and tap link yoke with a mallet and drift to remove bearing cap (Fig. 19).
10. Flip assembly and repeat Step 6, Step 7, Step 8 and Step 9 to remove the opposite bearing cap.
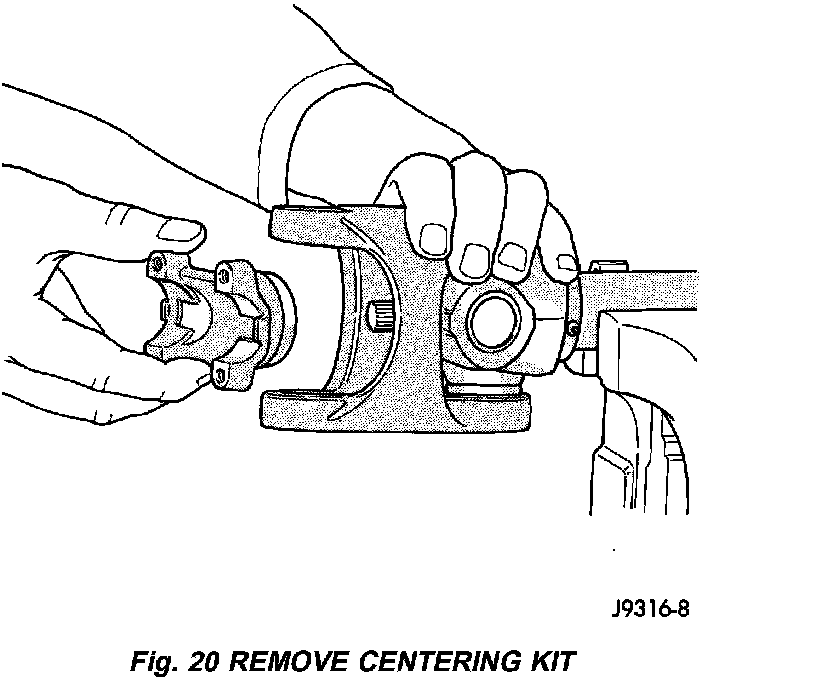
11. Remove the cross centering kit assembly and spring (Fig. 20).
12. Press the remaining bearing caps out the other end of the link yoke as described above to complete the disassembly.
ASSEMBLY
CAUTION: All alignment marks on the link yoke and propeller shaft yoke must be aligned during assembled.
1. Apply extreme pressure (EP) N.L.G.I. Grade 1 or 2 grease to inside of yoke bores.
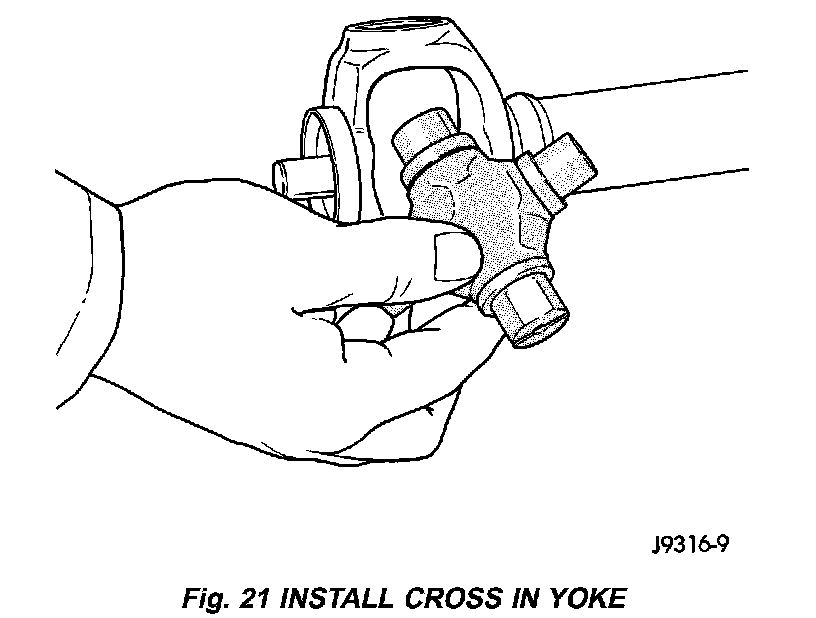
2. Fit a cross into the propeller shaft yoke (Fig. 21).
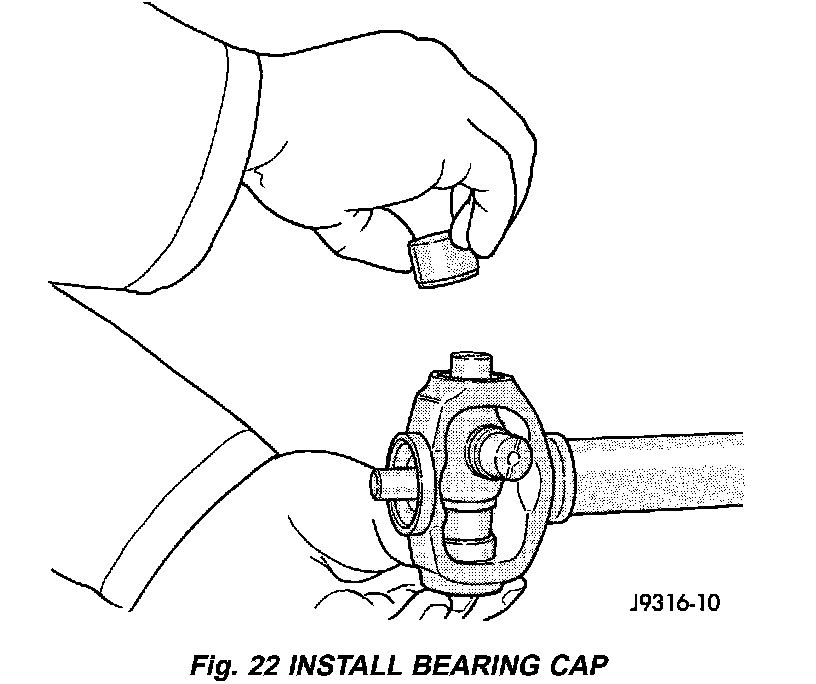
3. Place a bearing cap over the trunnion and align the cap with the yoke bore (Fig. 22). Keep needle bearings upright in the bearing cap.
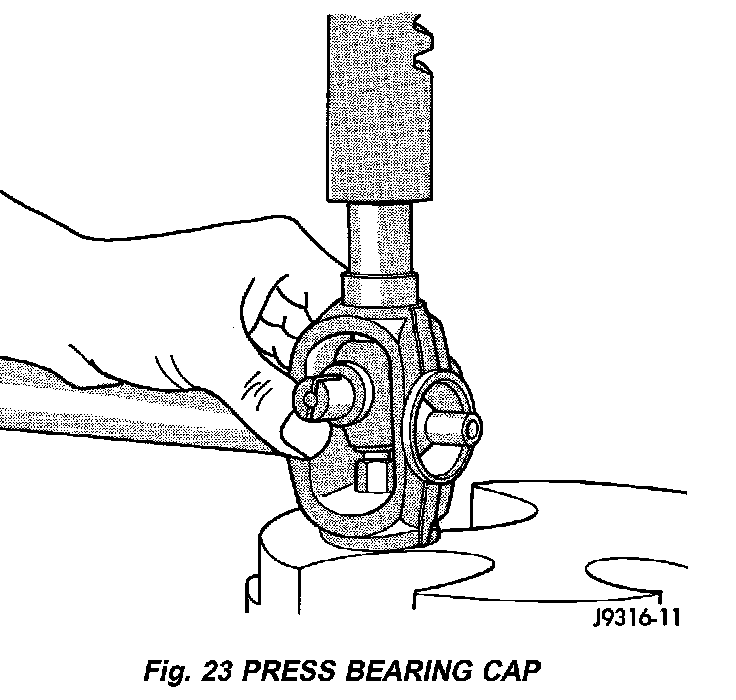
4. Press bearing cap into the yoke bore enough to clear snap ring groove (Fig. 23).
5. Install a snap ring.
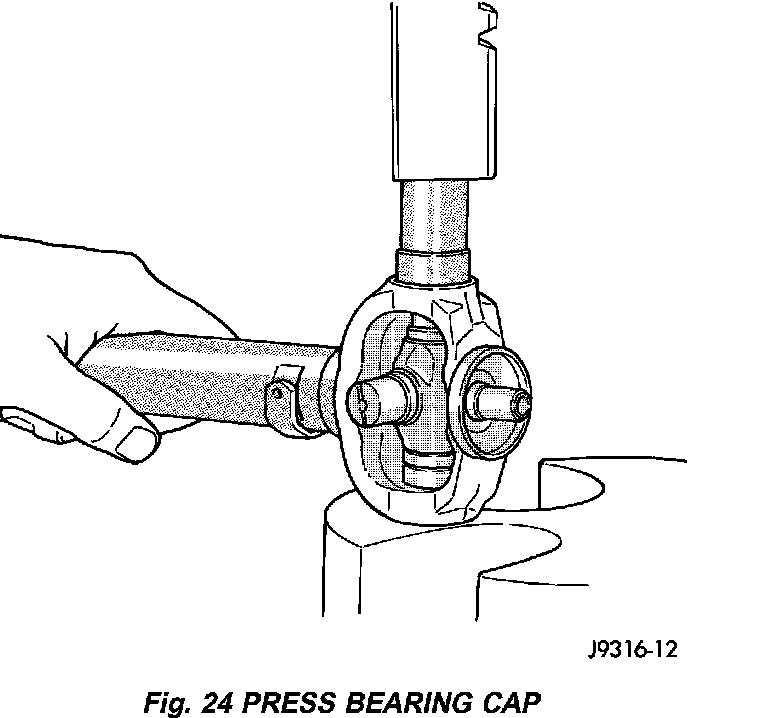
6. Flip propeller shaft yoke and install other bearing cap onto the opposite trunnion and install a snap ring (Fig. 24).
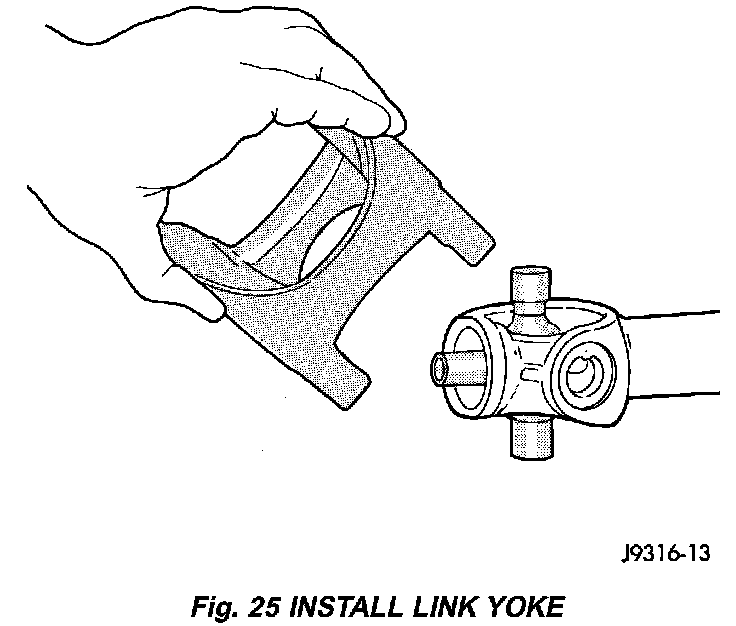
7. Fit the link yoke onto the remaining trunnions and press both bearing caps into place and install snap rings (Fig. 25).
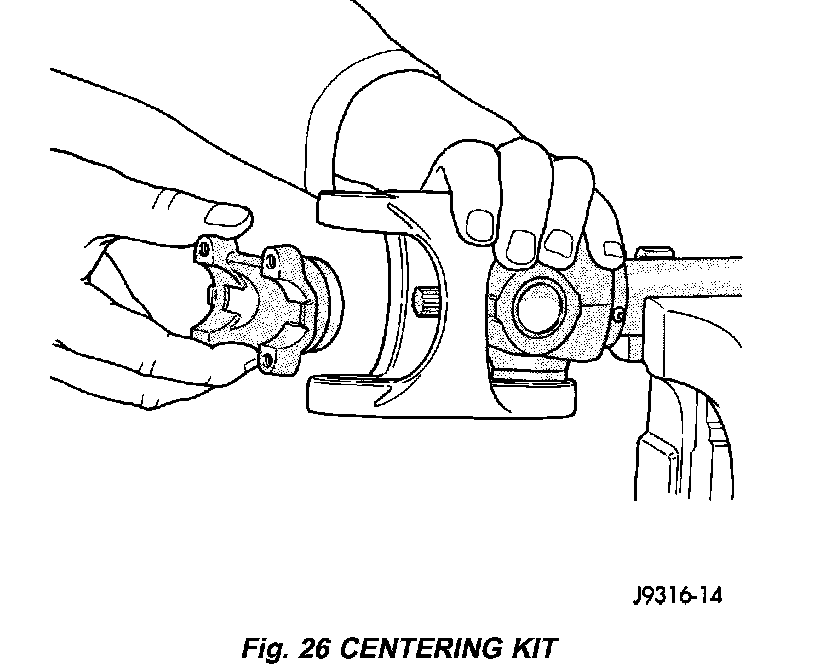
8. Install centering kit assembly inside the link yoke (Fig. 26).
NOTE: Making sure the spring is properly positioned.
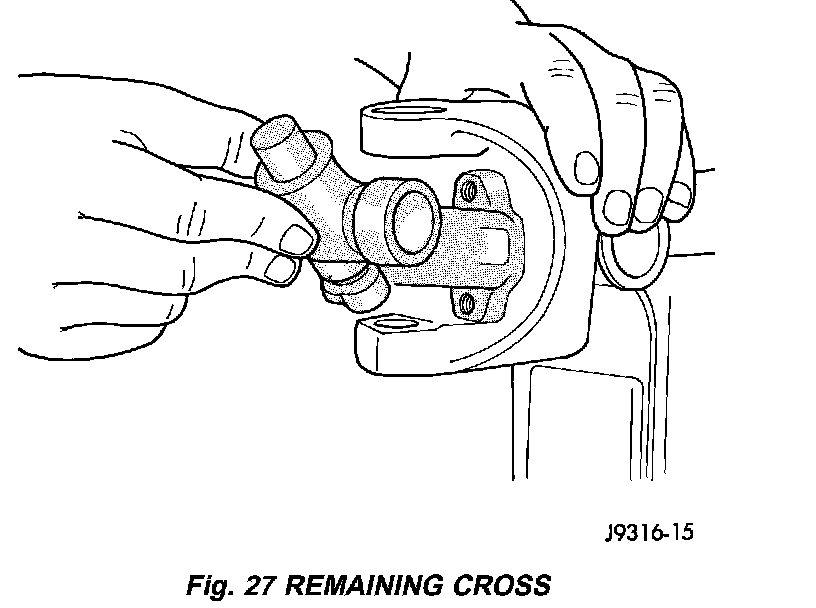
9. Place two bearing caps on opposite trunnions of the remaining cross. Fit the open trunnions into the link yoke bores and the bearing caps into the centering kit (Fig. 27).
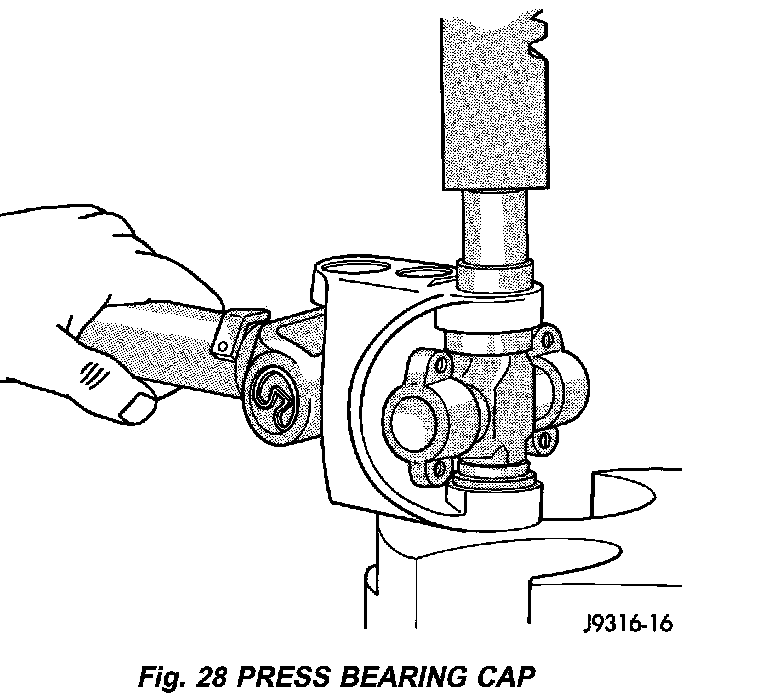
10. Press the remaining two bearing caps into place and install snap rings (Fig. 28).
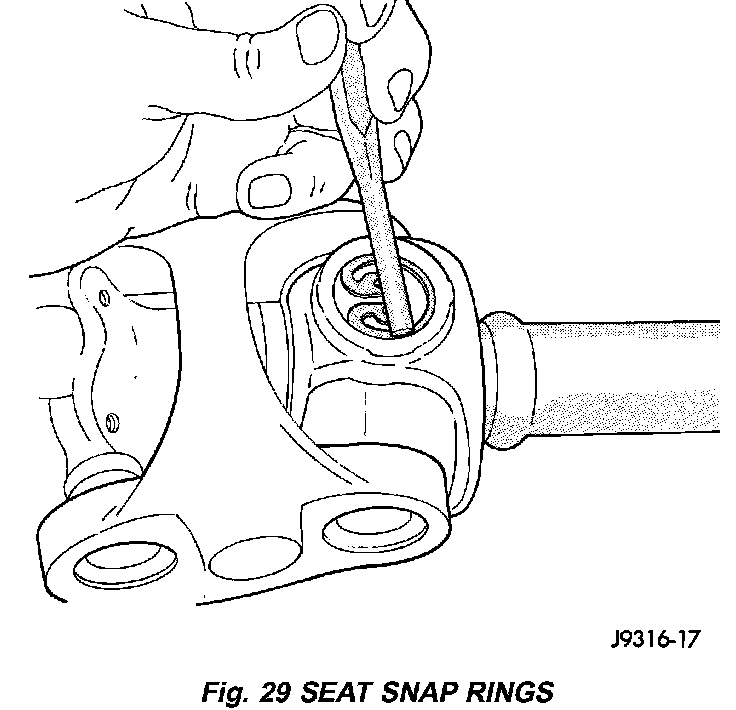
11. Tap the snap rings to seat them into the grooves (Fig. 29).
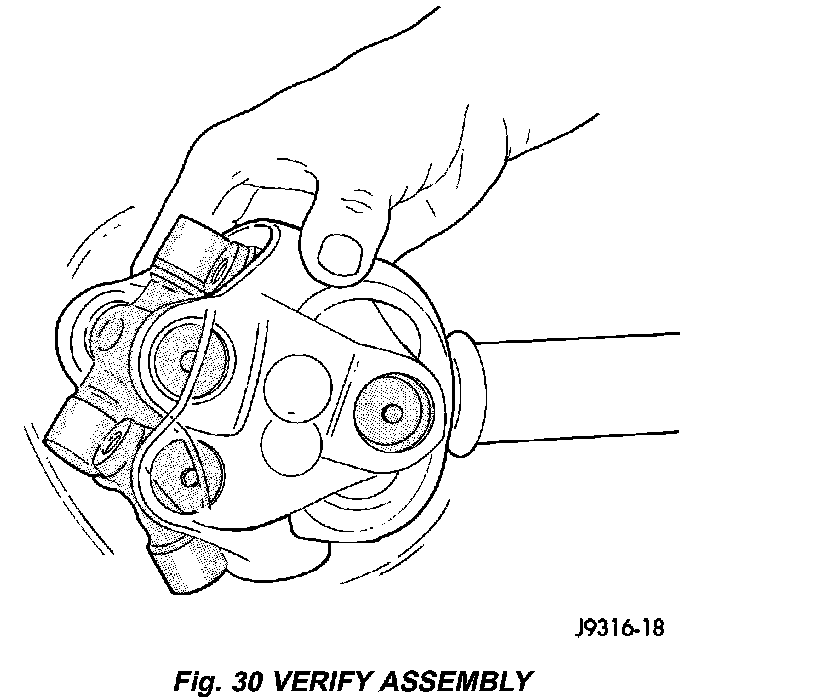
12. Verify for proper assembly. Flexing the joint beyond center, the joint should snap over-center in both directions if correctly assembled (Fig. 30).
13. Install the propeller shaft.