Pinion Seal
PINION SEALREMOVAL
1. Raise and support the vehicle.
2. Remove wheel and tire assemblies.
3. Remove rear brake calipers and rotors.
4. Mark propeller shaft and pinion yoke for installation reference.
5. Remove the propeller shaft from the yoke.
6. Rotate pinion gear three or four times and verify that pinion rotates smoothly.
7. Record torque necessary to rotate the pinion gear with a inch pound dial-type torque wrench.
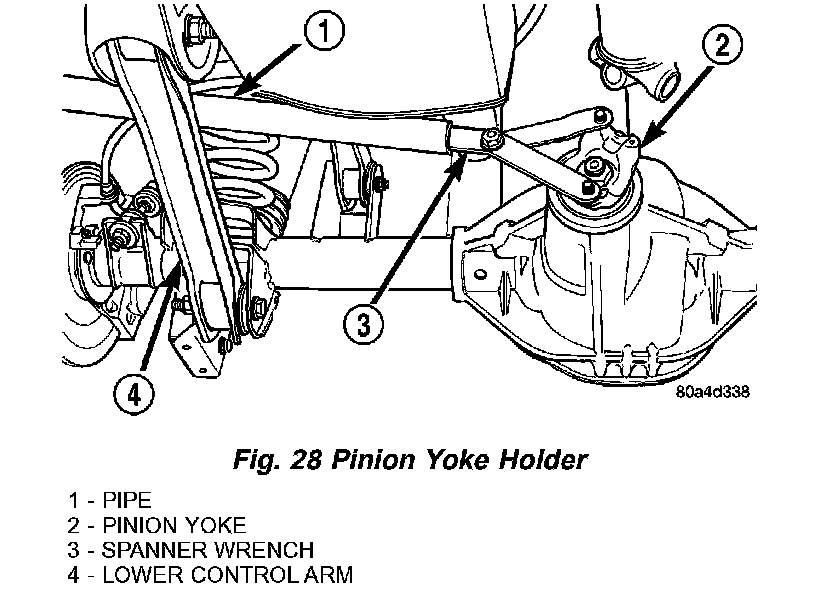
8. Using a short piece of pipe and Spanner Wrench 6958 to hold the pinion yoke and remove pinion nut and washer (Fig. 28).
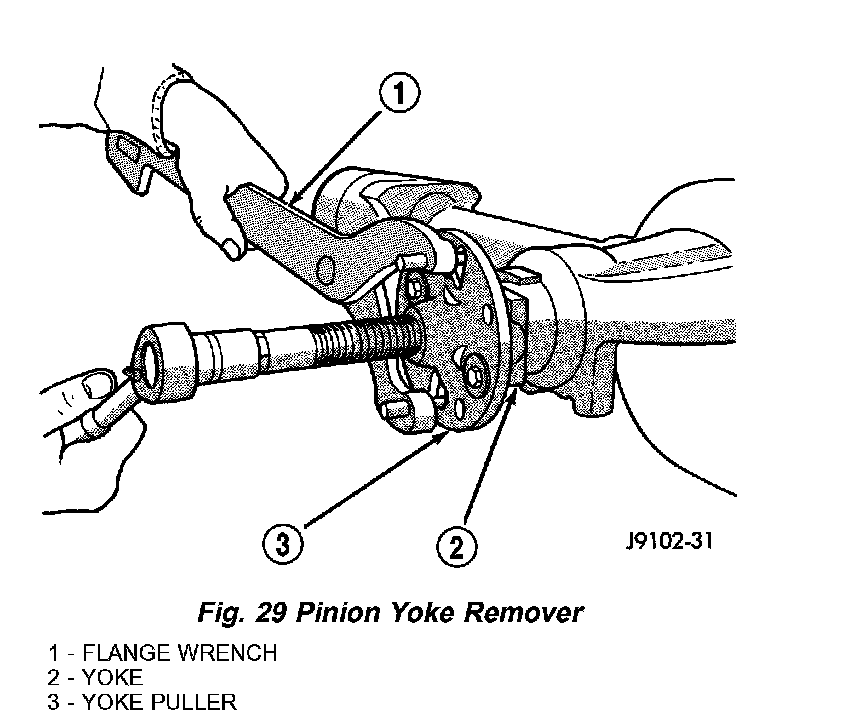
9. Remove pinion companion flange with Remover C-452 and Flange Wrench C-3281. (Fig. 29)
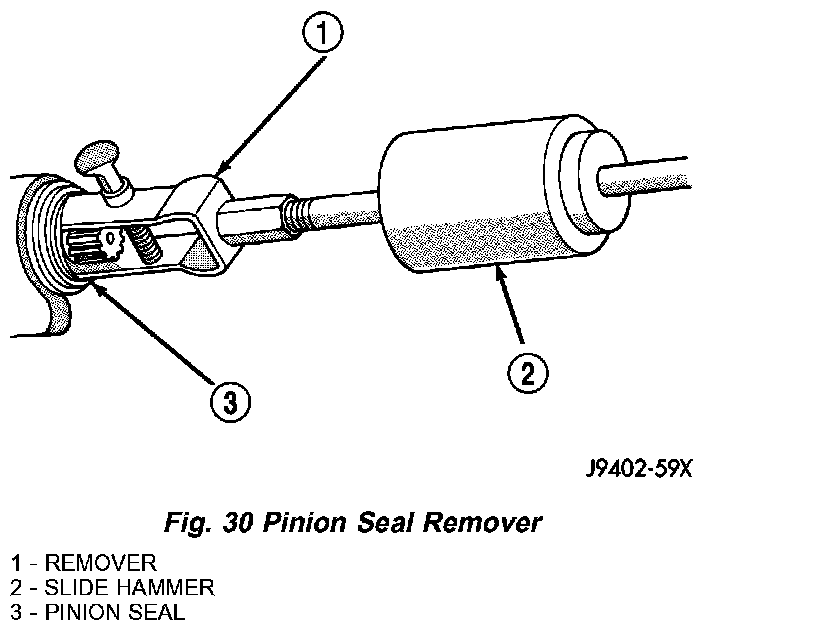
10. Remove pinion seal with Remover 7794-A and a slide hammer (Fig. 30).
INSTALLATION
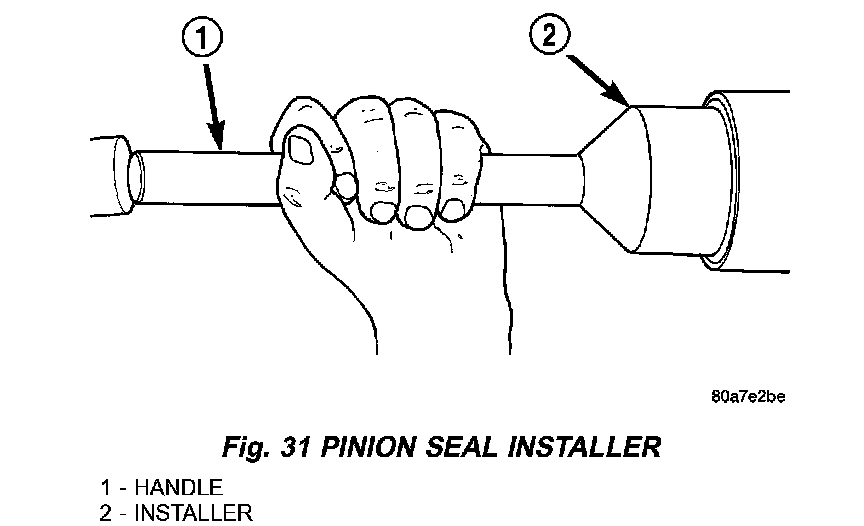
1. Apply a light coating of gear lubricant on the lip of pinion seal. Install seal with an appropriate in installer (Fig. 31).
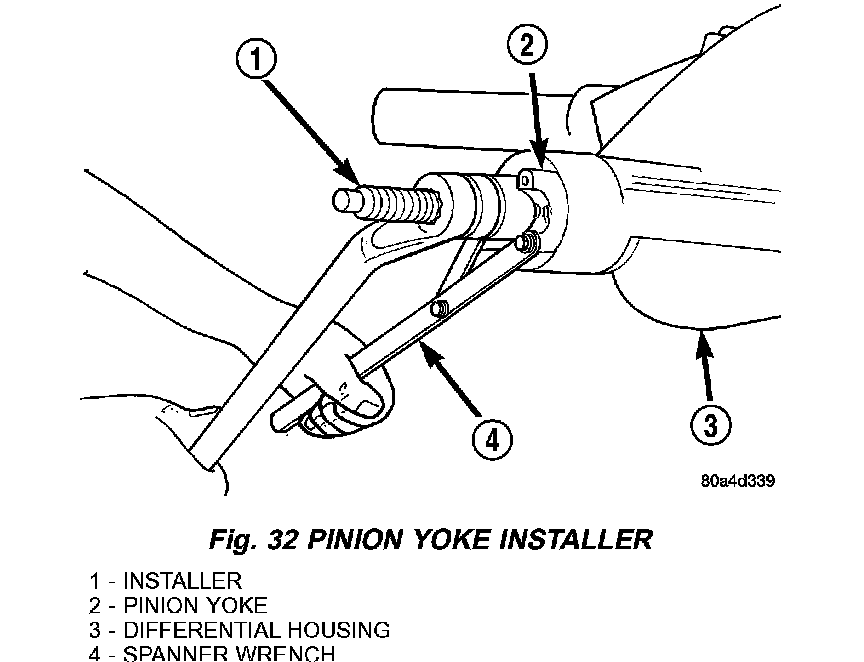
2. Install yoke on the pinion gear with Installer C-3718 and Spanner Wrench 6958 (Fig. 32).
3. Install a new nut on the pinion gear. Tighten the nut only enough to remove the shaft end play.
CAUTION: Do not exceed the minimum tightening torque 298 Nm (220 ft. lbs.) when installing the pinion yoke retaining nut at this point. Damage to bearings may result.
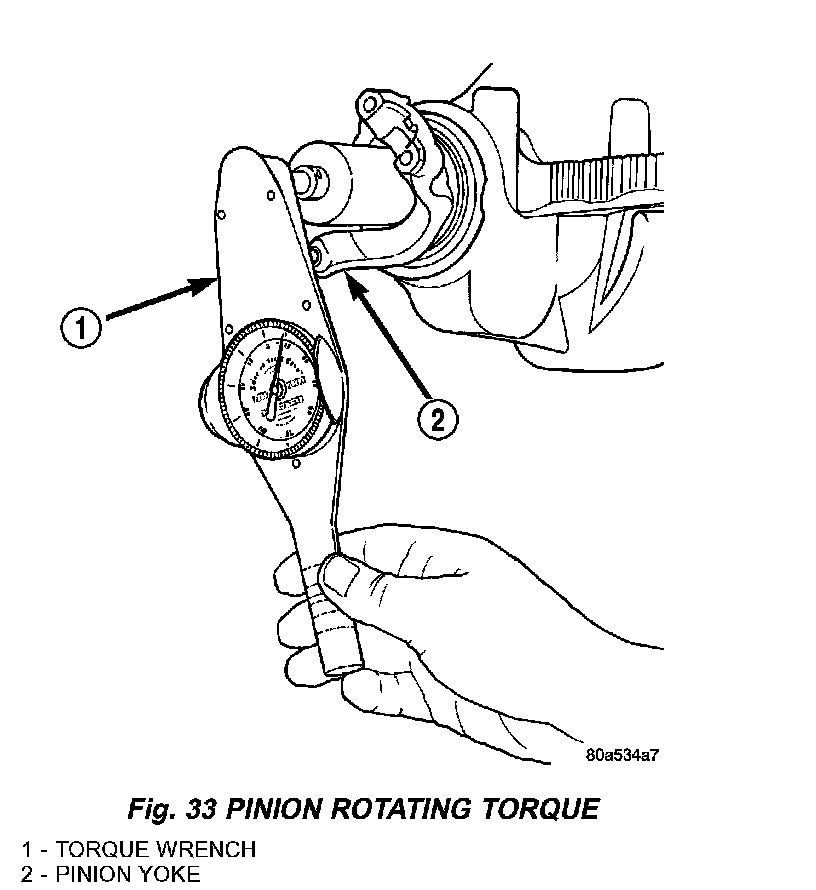
4. Rotate the pinion a minimum of ten times and verify pinion rotates smoothly. Rotate the pinion shaft using an inch pound torque wrench. Rotating torque should be equal to the reading recorded during removal, plus 0.56 Nm (5 in. lbs.) (Fig. 33).
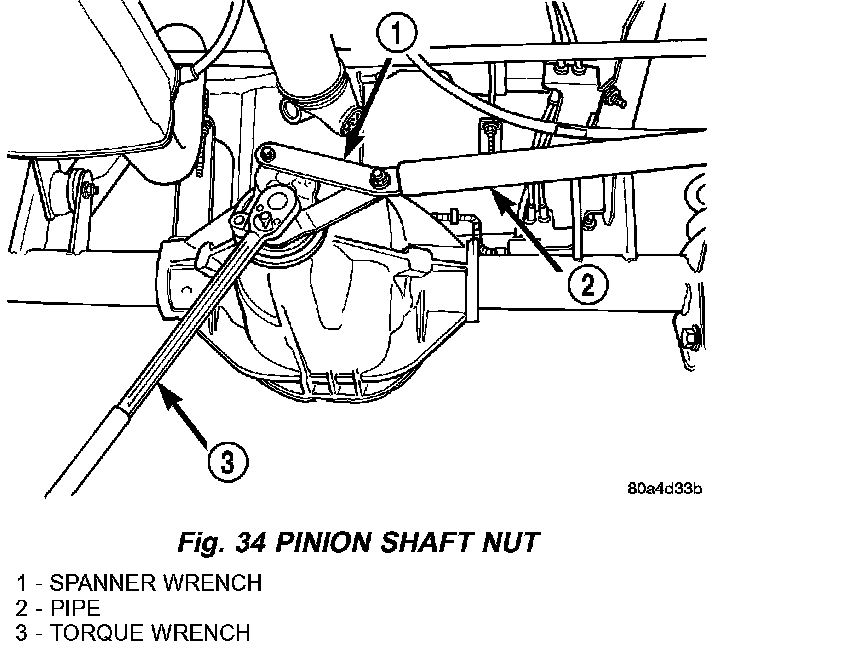
5. If rotating torque is low, use Wrench 6958 to hold the pinion yoke (Fig. 34) and tighten the pinion shaft nut in 6.8 Nm (5 ft. lbs.) increments until rotating torque is achieved.
CAUTION: If the maximum tightening torque is reached prior to reaching the required rotating torque, the collapsible spacer may have been damaged. Replace the collapsible spacer.
6. Install propeller shaft with reference marks aligned.
7. Fill differential with gear lubricant.
8. Install the brake rotors and calipers.
9. Install wheel and tire assemblies.
10. Lower the vehicle.