Headliner: Service and Repair
HEADLINERREMOVAL
CAUTION: The headliner is a one-piece, molded component. It has limited flexibility and must not be bent. Damage may possibly result.
1. Record radio presets and disconnect negative battery cable.
2. Remove a-pillar trim moldings (Refer to Trim Panel).
3. Remove b-pillar upper trim moldings (Refer to Trim Panel).
4. Remove c-pillar trim moldings (Refer to Trim Panel).
5. Remove d-pillar trim molding (Refer to Trim Panel).
6. Remove the sun visors.
7. Disconnect the vanity lamp electrical connector.
8. Remove assist handles from roof rails.
9. Remove dome lamp and overhead console, if equipped.
10. Remove rear cargo/dome lamp.
11. Roll sunroof welt under headliner edge so headliner can be removed.
Fig. 10:
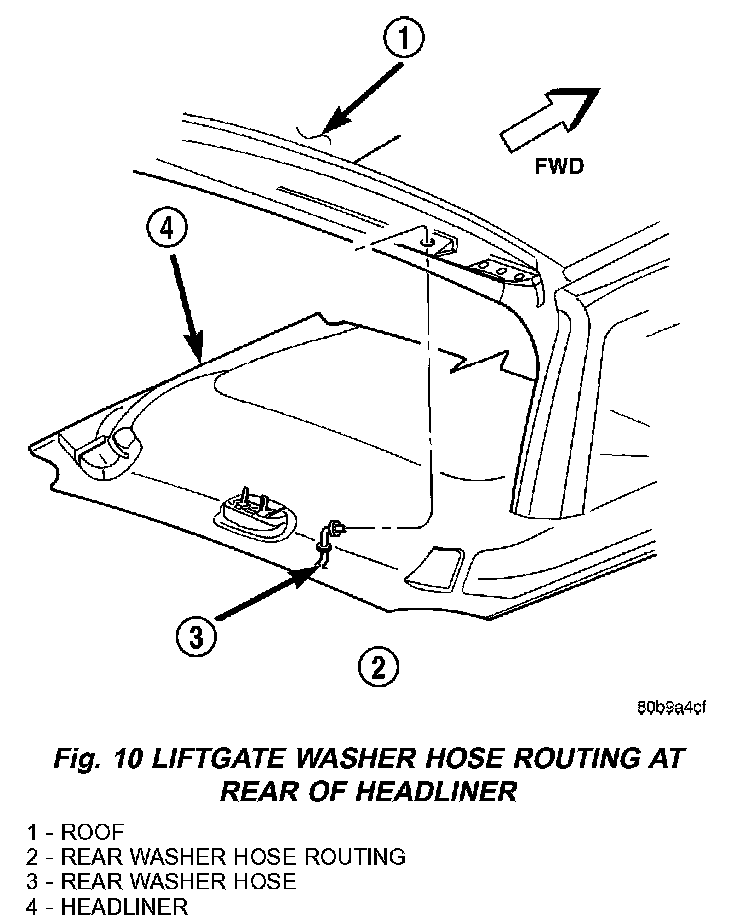
12. Disengage rear washer hose from liftgate (Fig. 10).
13. Disengage the wire harness connectors at rear of headliner.
Fig. 11:
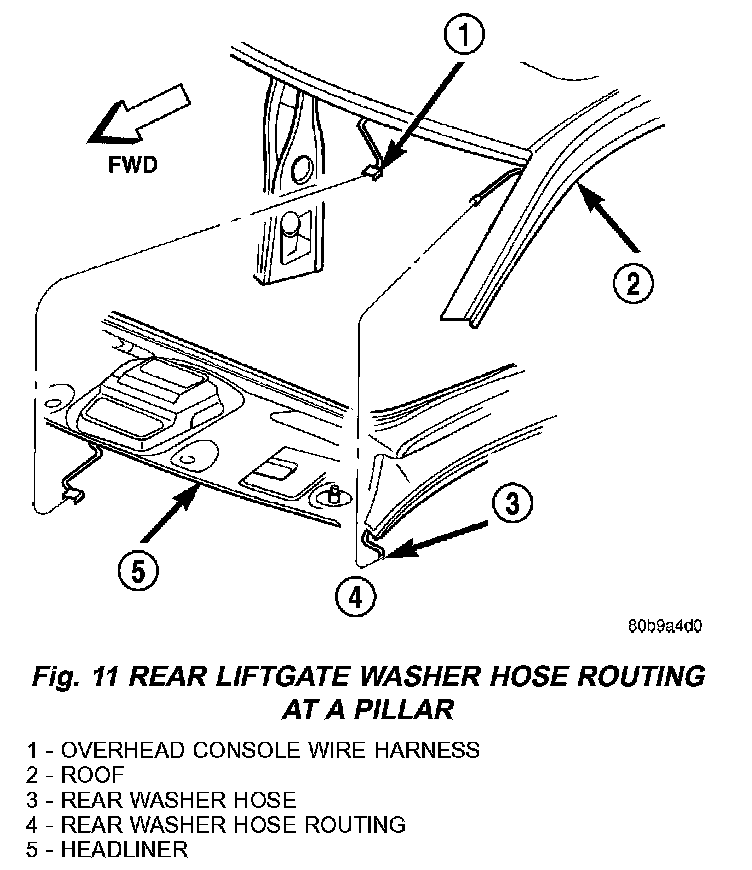
14. Disconnect the rear washer hose at the left a-pillar (Fig. 11).
15. Disengage the wire harness for the sunroof, if equipped.
16. Fold down the rear seats, move the front seats full forward, and lower the front seat backs.
Fig. 12:
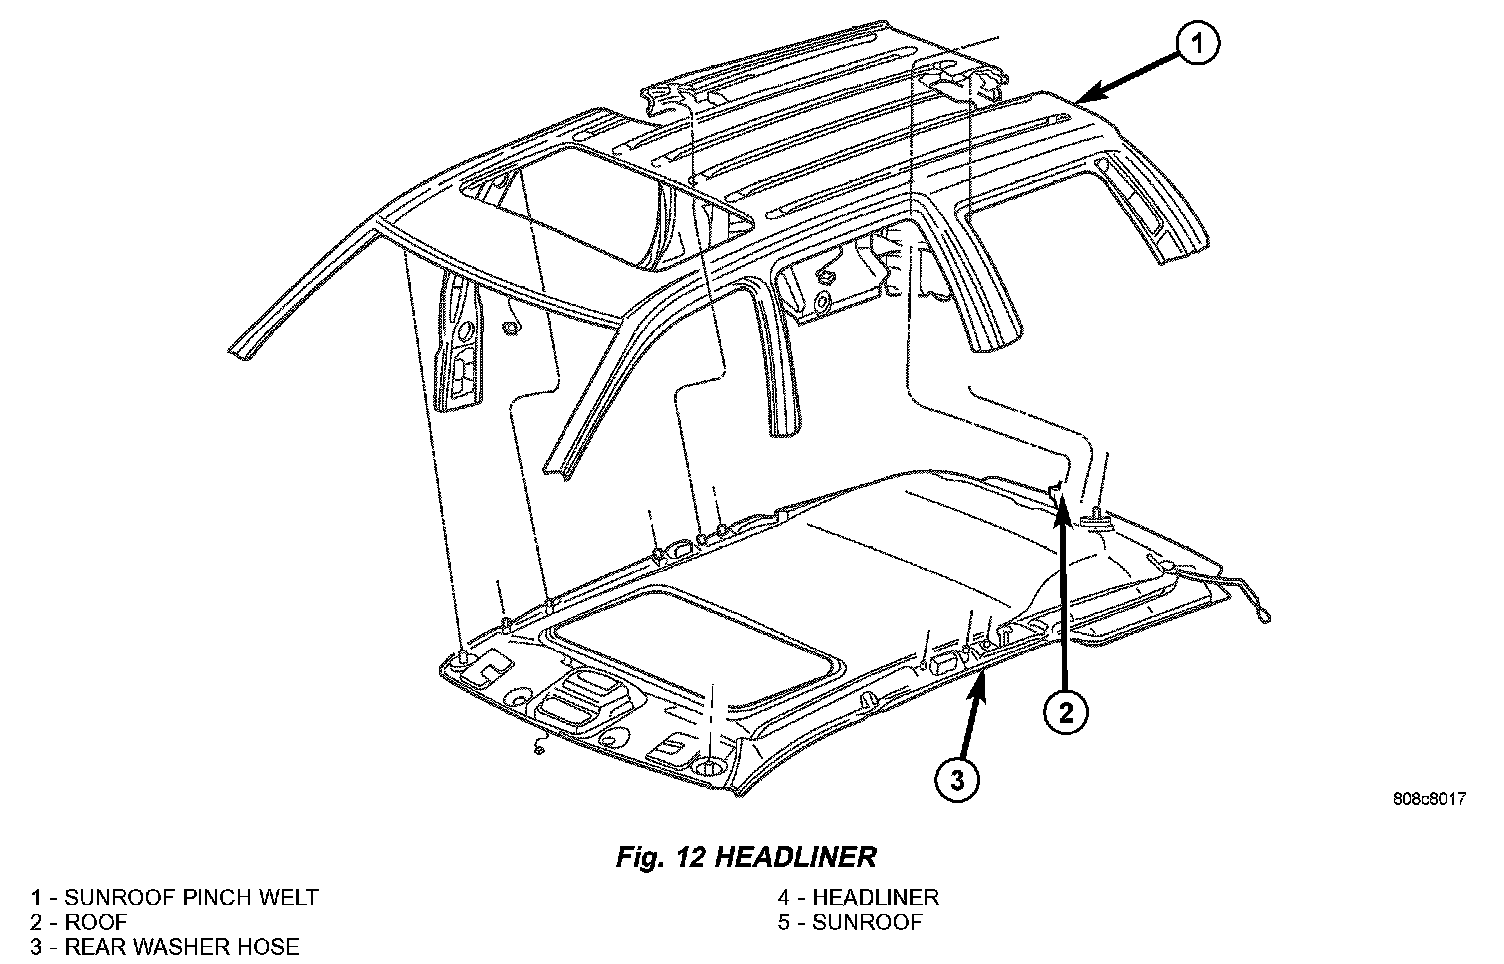
17. Partially lower the headliner and disengage the sunroof drain hoses, if equipped (Fig. 12).
18. With the aid of an assistant, remove the headliner through the liftgate opening.
INSTALLATION
1. With the aid of an assistant, position the headliner in the vehicle.
2. Connect the sunroof drain hoses, if equipped.
3. Connect the sunroof harness, the rear wire harnesses, and the washer hose at the a-pillar and at the liftgate.
4. Roll sunroof weld edge back over headliner edge.
5. Install the roof rail assist handles.
6. Install the sun visors.
7. Install the overhead console, if equipped.
8. Install the rear cargo/dome lamp.
9. Install the d-pillar trim.
10. Install the c-pillar trim.
11. Install the upper b-pillar trim.
12. Install the a-pillar trim.
13. Connect the negative battery cable.