Antenna Body & Cable
ANTENNA BODY & CABLEWARNING: DISABLE THE AIRBAG SYSTEM BEFORE ATTEMPTING ANY STEERING WHEEL, STEERING COLUMN, SEAT BELT TENSIONER, SIDE AIRBAG, OR INSTRUMENT PANEL COMPONENT DIAGNOSIS OR SERVICE. DISCONNECT AND ISOLATE THE BATTERY NEGATIVE (GROUND) CABLE, THEN WAIT TWO MINUTES FOR THE AIRBAG SYSTEM CAPACITOR TO DISCHARGE BEFORE PERFORMING FURTHER DIAGNOSIS OR SERVICE. THIS IS THE ONLY SURE WAY TO DISABLE THE AIRBAG SYSTEM. FAILURE TO TAKE THE PROPER PRECAUTIONS COULD RESULT IN ACCIDENTAL AIRBAG DEPLOYMENT AND POSSIBLE PERSONAL INJURY.
REMOVAL
1. Disconnect and isolate the battery negative cable.
2. Remove the scuff plate from the right front door sill.
3. Remove the trim panel from the right inner cowl side.
Fig. 4 Antenna Base And Load Remove/Install:
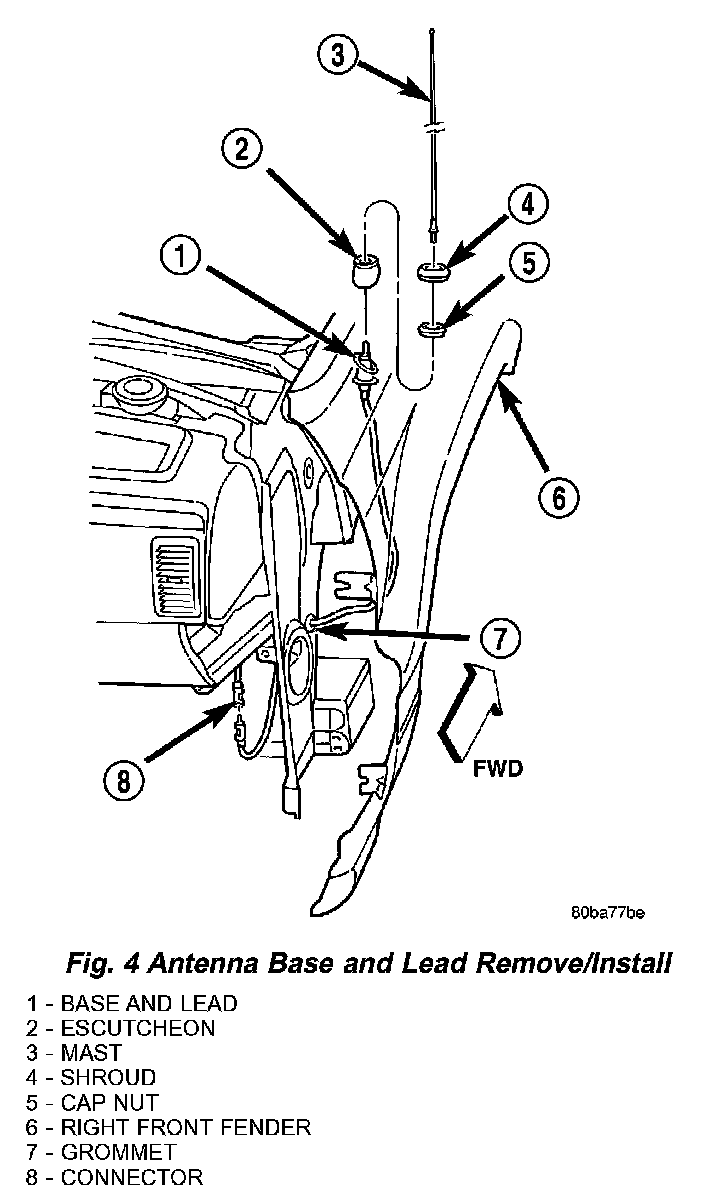
4. Reach under the passenger side of the instrument panel near the right cowl side inner panel to disconnect the antenna coaxial cable connector by pulling it apart while twisting the metal connector halves. Do not pull on the cable.
5. Remove the lower rear half of the inner liner from the right front fender wheel house.
6. Reach through the rear of the right front fender wheel house opening to access and unseat the antenna lead grommet from the hole in the right cowl side outer panel.
7. Pull the antenna lead coaxial cable and connector out of the passenger compartment and into the right front fender wheel house through the hole in the right cowl side outer panel.
Fig. 5 Antenna Mast Remove/Install - Typical:
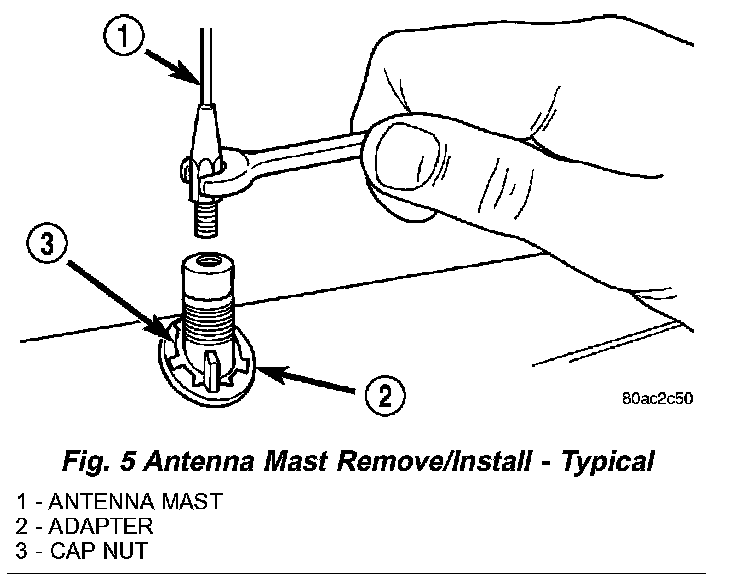
8. Unscrew the antenna mast from the antenna base.
9. Remove the plastic shroud from the antenna base cap nut.
Fig. 6 Antenna Base Cap Nut Remove/Install - Typical:
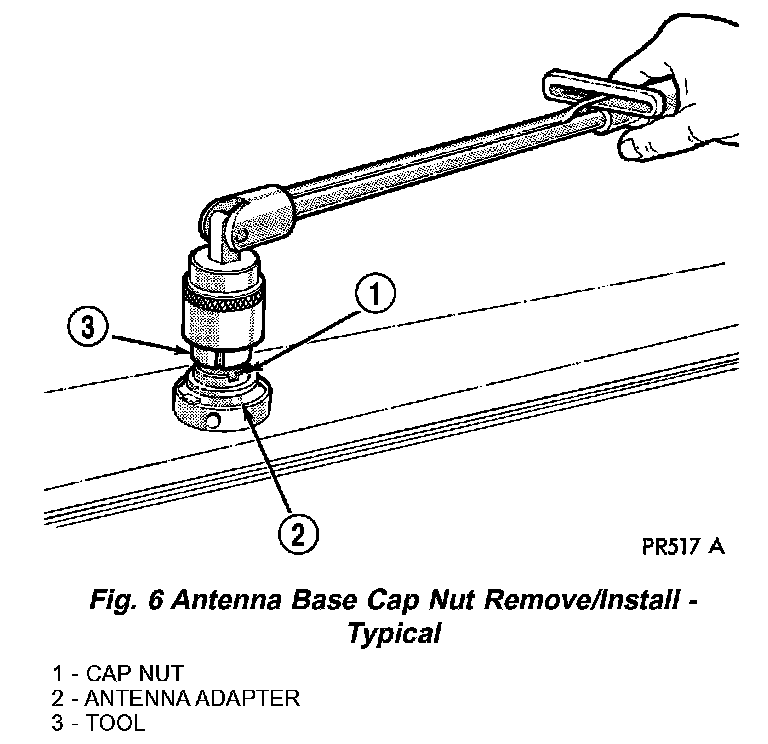
10. Remove the antenna base cap nut using an antenna nut wrench (Special Tool C-4816).
11. Remove the antenna escutcheon from the antenna base on the top of the right front fender.
12. Lower the antenna base from the mounting hole in the top of the right front fender.
13. Remove the antenna base and lead from the rear of the right front fender wheel house opening.
INSTALLATION
1. Position the antenna base and lead into the rear of the right front fender wheel house opening.
2. Insert the antenna base into the mounting hole in the top of the right front fender.
3. Install the antenna escutcheon onto the antenna base on the top of the right front fender.
4. Install and tighten the antenna base cap nut using an antenna nut wrench (Special Tool C-4816). Tighten the cap nut to 6.8 Nm (60 in. lbs.).
5. Install the plastic shroud onto the antenna base cap nut.
6. Install and tighten the antenna mast onto the antenna base. Tighten the antenna mast to 3.3 Nm (30 in. lbs.).
7. Reach through the rear of the right front fender wheel house opening to access and insert the antenna lead coaxial cable and connector into the passenger compartment through the hole in the right cowl side outer panel.
8. From the right front fender wheel house, seat the antenna lead grommet into the hole in the right cowl side outer panel.
9. Install the lower rear half of the inner liner into the right front fender wheel house.
10. Reach under the passenger side of the instrument panel near the right cowl side inner panel to reconnect the antenna coaxial cable connector halves.
11. Install the trim panel onto the right inner cowl side
12. Install the scuff plate onto the right front door sill
13. Reconnect the battery negative cable.