Repair Procedure
1. Raise and support vehicle.2. Remove both front wheel and tire assemblies.
3. Remove a small amount of brake fluid from the brake master cylinder reservoir with a clean suction gun.
4. Starting with one of the brake/rotor assemblies, bottom the caliper pistons into the caliper by prying the caliper over.
5. Clean the banjo fitting at the end of the brake hose. Remove the brake hose banjo fitting from the caliper. Discard both used banjo copper gasket washers.
6. Remove the two caliper attaching bolts used to secure the caliper mounting bracket (including caliper) to the steering knuckle. Discard the old caliper, mounting bracket, and both attaching bolts.
7. Remove and discard the old brake rotor.
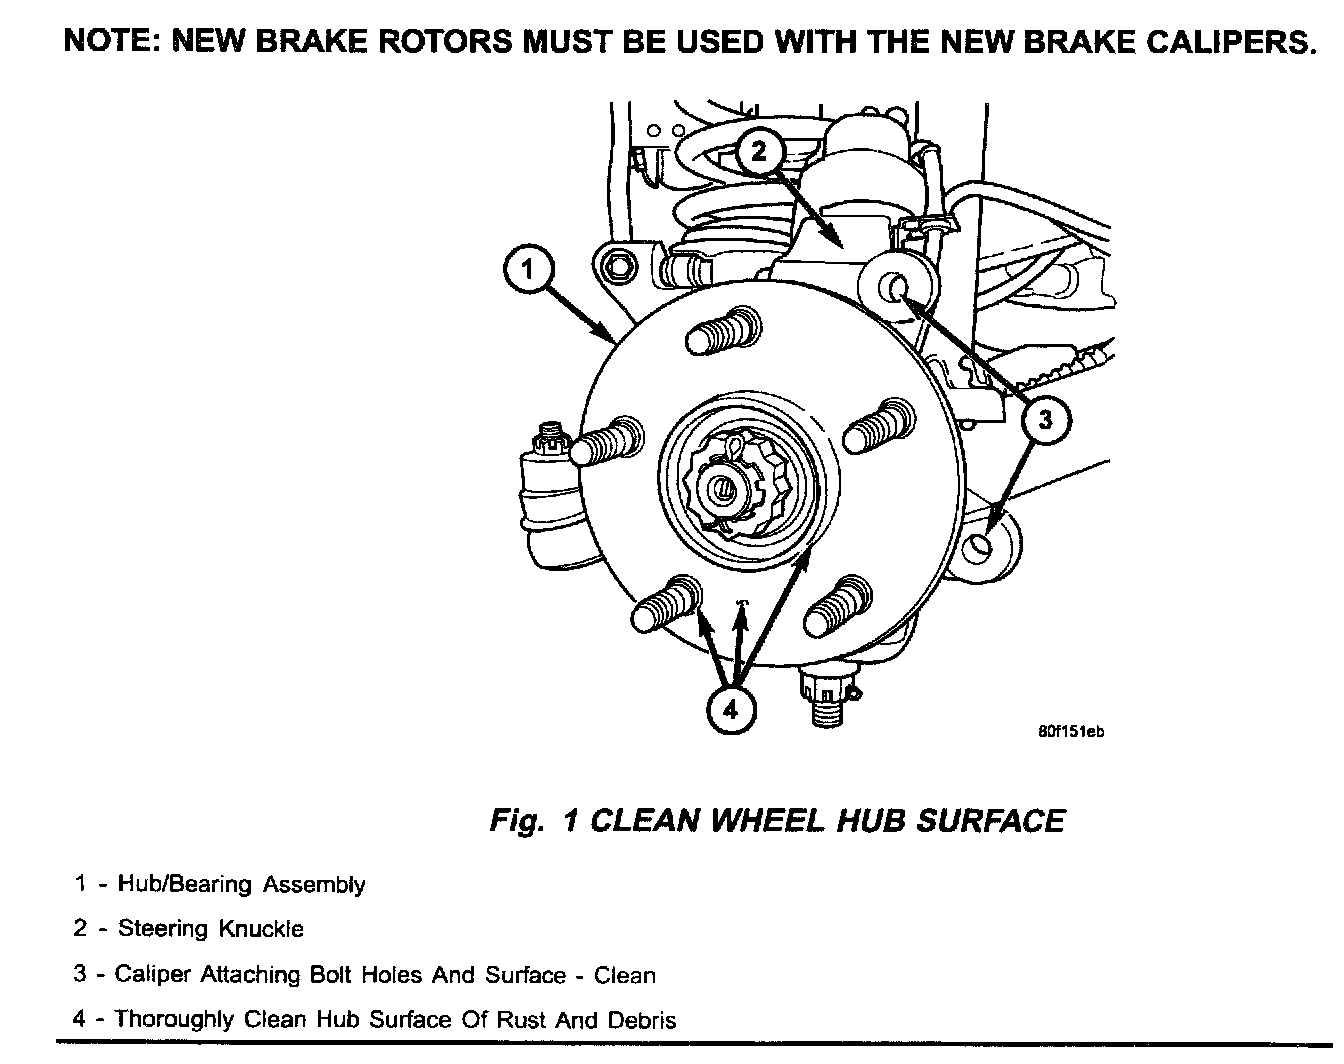
8. Thoroughly clean the surface of the wheel hub/bearing assembly where it mates to the brake rotor. The hub surface must be free of corrosion and dirt so that the new brake rotor rests flush against the hub. This important step will prevent excess rotor lateral runout (Fig. 1).
9. Inspect the new brake rotor and its mating surface with the hub/bearing assembly. Install the new brake rotor to the hub/bearing assembly.
10. Using a dial indicator, match mount the brake rotor to the hub/bearing assembly until the minimum lateral runout for the new brake rotor and hub/bearing assembly combination is obtained. This important step will prevent excess rotor runout.
NOTE:
USE A DIAL INDICATOR TO INSURE THAT MINIMUM LATERAL RUNOUT IS ACHIEVED FOR EACH ROTOR.
11. Verify that the maximum allowable lateral runout of the brake rotor and hub/bearing assembly combination does not exceed 0.025 mm (0.001 in.). If the lateral runout is in excess of specification then the cause must be determined and corrected before proceeding further with this repair.
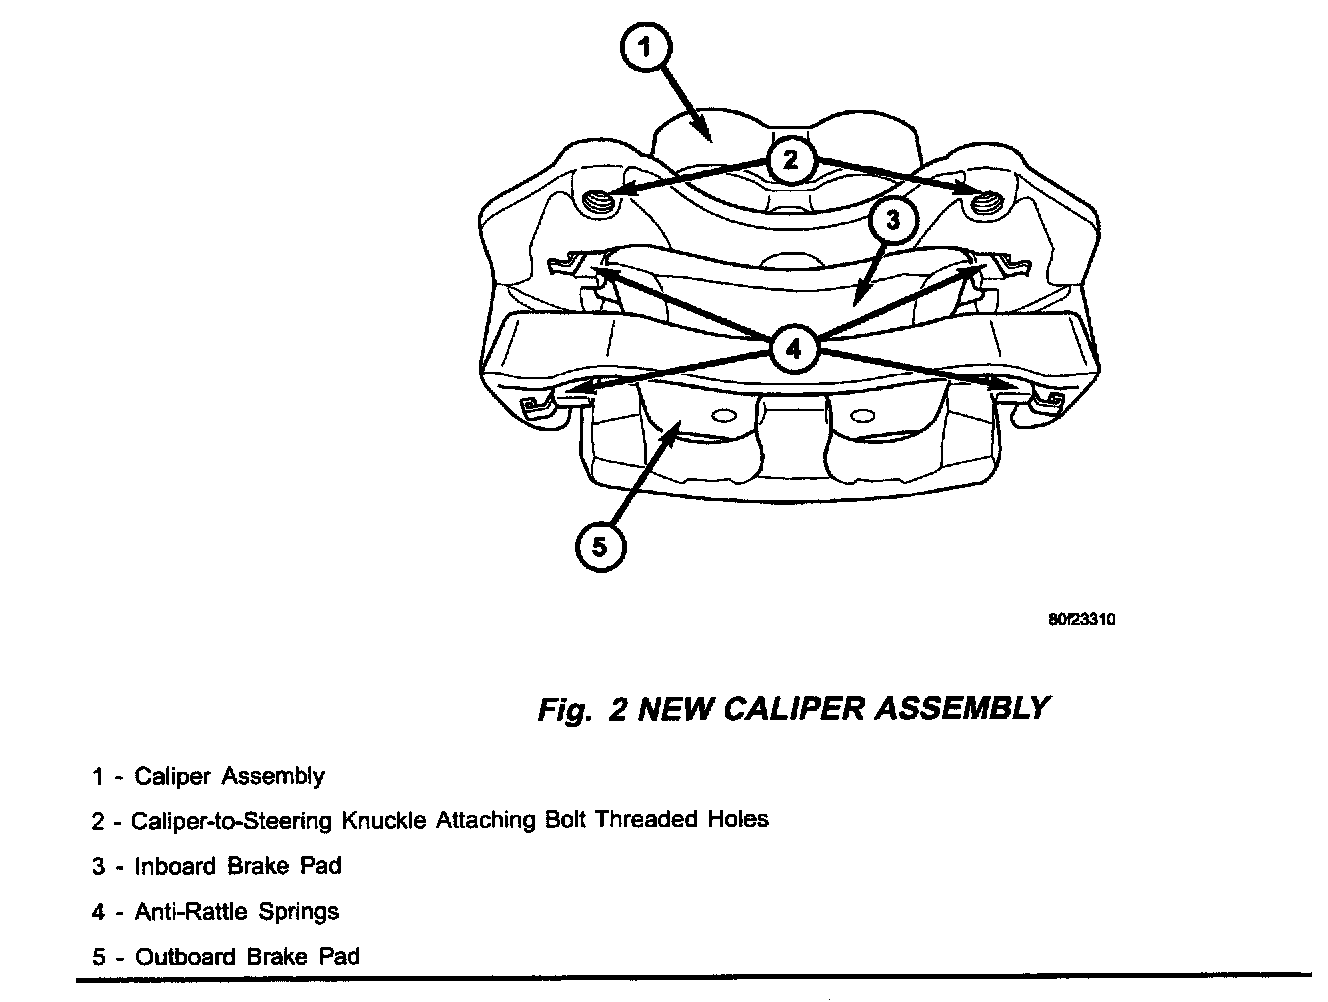
12. Inspect the new caliper. Each caliper has a letter "L" or "R" to denote left side or right side of vehicle respectively. Be careful not to dislodge the caliper brake pads and anti-rattle springs when handling the caliper. Remove shipping packing (Fig. 2).
13. Install the new caliper assembly to a clean steering knuckle mating surface.
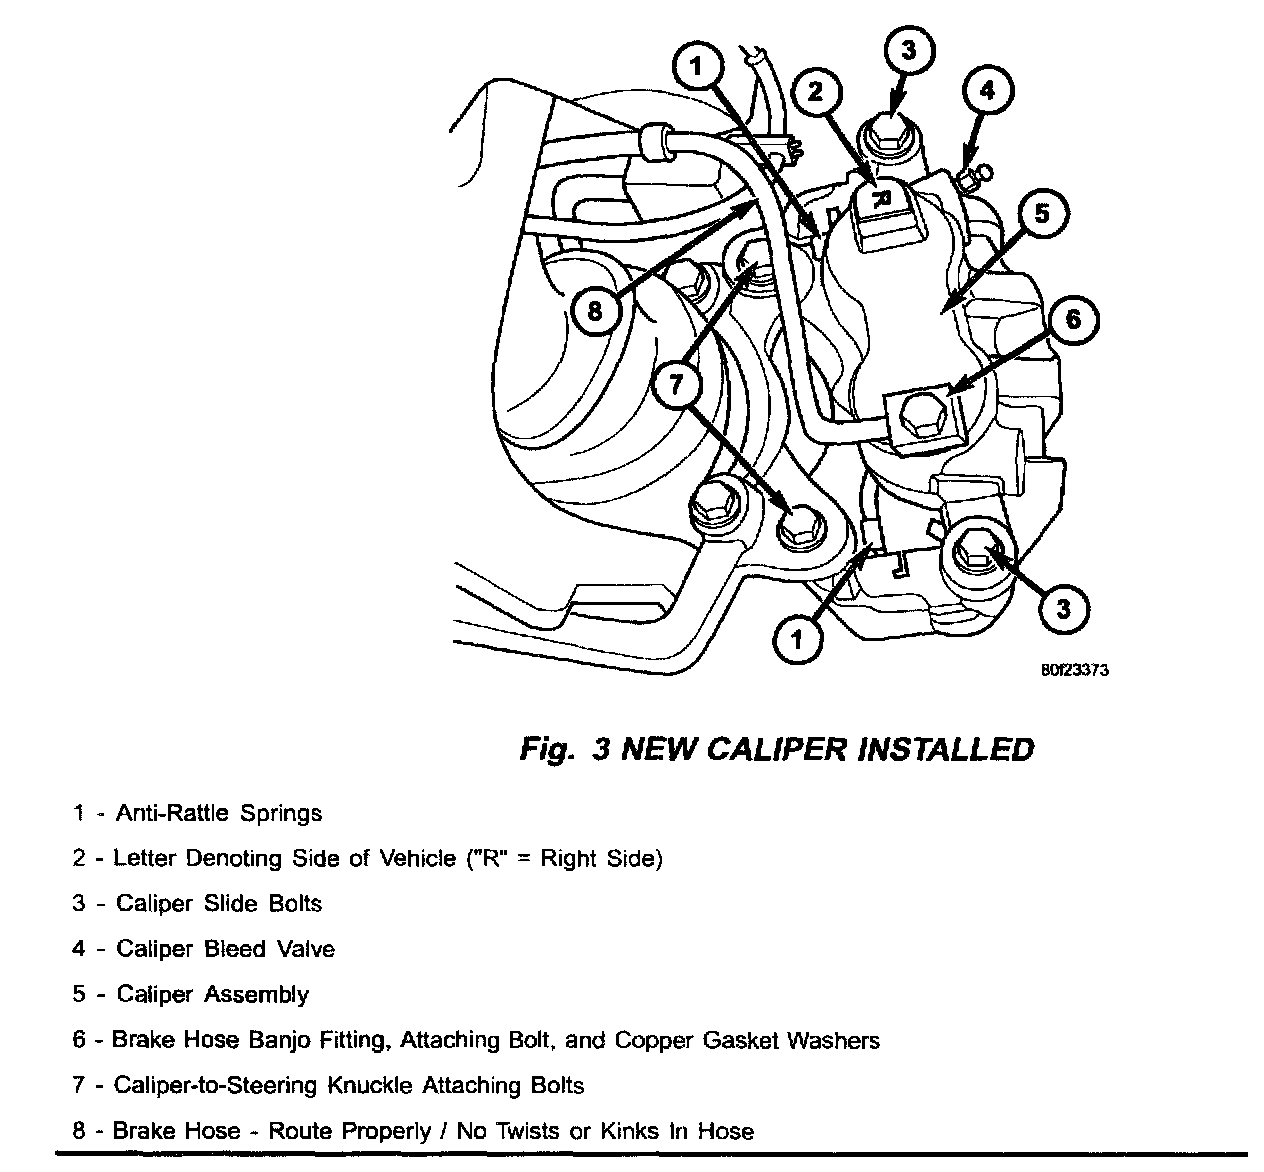
14. Install two new caliper assembly attaching bolts (included in front brake package) Tighten each bolt to 90 - 115 Nm (66 - 85 ft. lbs.).
15. Verify that the brake hose banjo fitting, attaching bolt, and caliper port are clean.
16. Install a new copper gasket washer (included in front brake package) on each side of the brake hose banjo fitting.
17. Using a banjo bolt, attach the brake hose fitting and new copper gasket washers to the caliper.
NOTE:
VERIFY THAT THE BRAKE HOSE IS NOT TWISTED OR KINKED. MAKE SURE THE HOSE IS ROUTED PROPERLY.
18. Tighten the attaching banjo bolt to 31 Nm (23 ft. lbs.) (Fig. 3).
19. Repeat steps 4 to 18 on the opposite side brake caliper assembly.
20. Fill and bleed the brake system. Pump the brake pedal to insure that the front caliper brake pads are seated to the brake rotors. Check brake fluid level frequently.
21. Install both front wheel and tire assemblies. Tighten the front lug nuts to 135 Nm (100 ft lbs.). This important step helps to prevent warping of the brake rotor(s)
22. Lower vehicle.
23. Verify correct brake fluid level and brake system operation.