B. Replace Vapor Canister Assembly
NOTE:Only vapor canister assemblies that have a misrouted vent hose on vehicles that have been driven more than 20 miles, as determined by the inspection in Section A, require replacement. Very few vehicles are expected to require vapor canister assembly replacement.
1. Disconnect the leak detection pump electrical connector and then disconnect the harness clips from the canister support bracket.
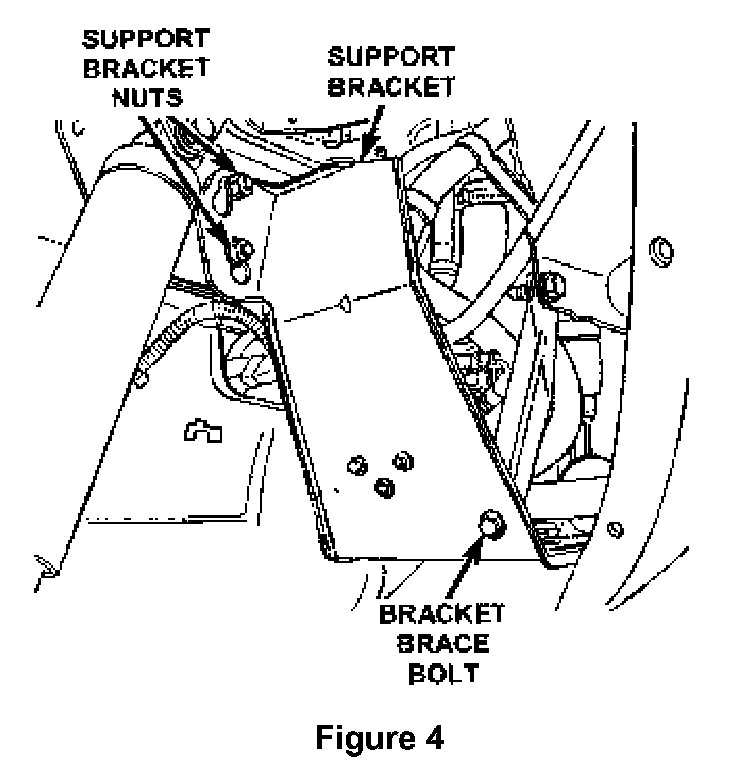
2. Remove the canister support bracket brace bolt (Figure 4).
3. Remove the two (2) nuts at the front top of the canister support bracket (Figure 4).
4. For vehicles equipped with tow hooks but WITHOUT a trailer hitch:
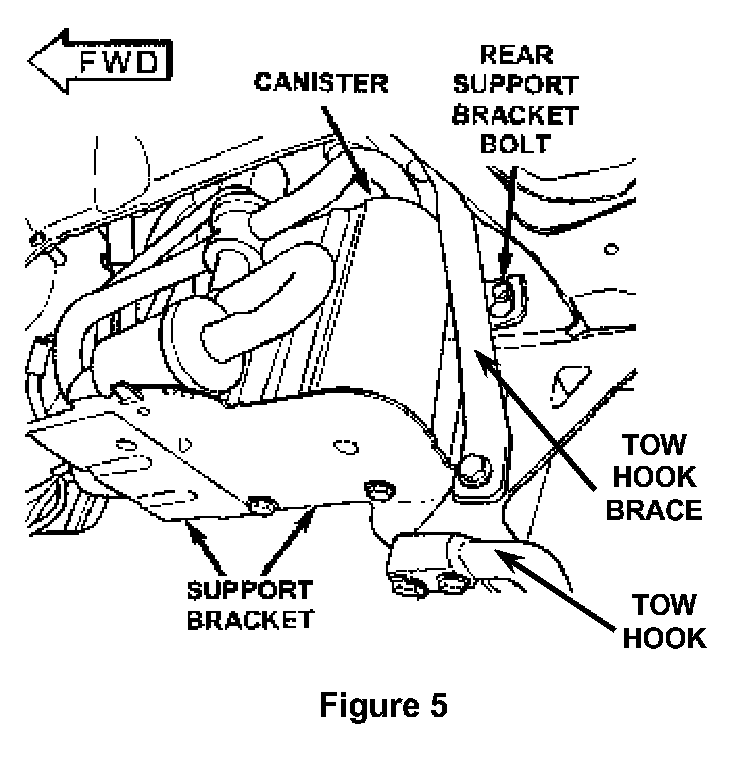
a. Remove the lower tow hook brace bolt (Figure 5).
b. Working through the wheel well with an 18-mm swivel socket and a long extension, remove the upper tow hook brace bolt and then remove the brace (Figure 5).
5. Loosen, but do NOT remove, the bolt at the rear top of the canister support bracket (Figure 5).
6. Carefully lower the front of the canister assembly to gain access to the canister vapor hoses.
7. Disconnect the 3/16" vacuum hose from the tee in the vacuum hose near the leak detection pump.
8. Disconnect the two vapor hoses from the top of the canister.
9. Remove the vapor canister assembly from the vehicle and discard it.
10. Lower the vehicle.
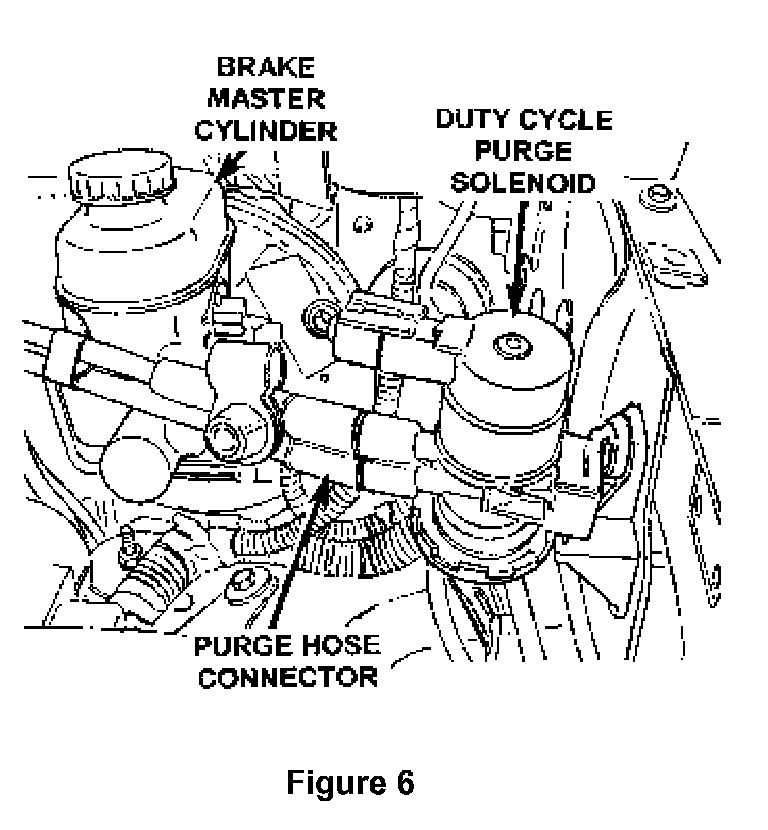
11. Raise the hood and locate the duty cycle purge solenoid near the brake booster (Figure 6).
12. Disconnect the purge hoses from the purge solenoid. (Figure 6)
13. Blow compressed air through the evaporative purge hose that connects to the canister assembly (upper hose on the solenoid connector to remove any contamination or moisture from the line (Figure 6).
14. Inspect both purge solenoid ports and remove any debris if necessary.
15. Connect the purge hoses to the purge solenoid.
16. Raise the vehicle on the hoist.
17. Position the new vapor canister assembly into the vehicle. Support the assembly by hanging it from the rear bracket bolt (Figure 5). Do not install the assembly on the front bracket studs. This will allow access to the vapor hoses.
18. Connect the two vapor hoses to the top of the canister.
19. Connect the 3/16" vacuum hose to the vacuum tee near the leak detection pump.
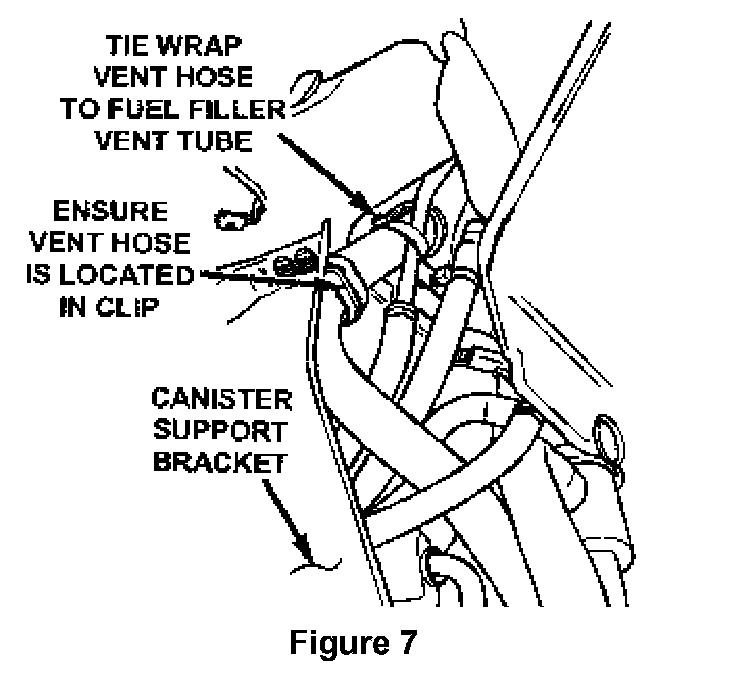
20. Verify that the ORVR system vent hose is routed through the plastic clip and that it is positioned approximately vertical next to the fuel filler vent tube. Loosely secure the vent hose to the fuel filler vent tube with the tie strap (Figure 7).
21. Raise the canister assembly into position and install the two front top bracket nuts (Figure 4).
22. Tighten the front bracket nuts and the rear bracket bolt to 250 in-lbs (28 N.m).
23. For vehicles equipped with tow hooks but WITHOUT a trailer hitch:
a. Place the tow hook brace into position and then loosely install the lower tow hook brace bolt (Figure 5).
b. Working through the wheel well with an 18-mm swivel socket and a long extension, install the upper tow hook brace bolt (Figure 5). Tighten the bolt to 50 ft-lbs (68 N.m).
c. Tighten the lower tow hook brace bolt to 50 ft-lbs (68 N.m).
24. Install the canister bracket brace bolt (Figure 4) and tighten it to 250 in-lbs (28 N.m).
25. Connect the leak detection pump electrical connector. Secure the connector harness to the canister bracket with the two clips.
26. Tighten the tie strap to secure the ORVR vent hose to the fuel filler vent tube (Figure 7).
27. Continue with Section C. - Inspect Fuel Filler Inlet Check Valve.