Headlamp: Adjustments
HEADLAMP UNIT ADJUSTMENTSVehicle Preparation For Lamp Alignment
1. Verify headlamp dimmer switch and high beam indicator operation.
2. Correct defective components that could hinder proper lamp alignment.
3. Verify proper tire inflation.
4. Clean lamp lenses.
5. Verify that luggage area is not heavily loaded.
6. Fuel tank should be FULL. Add 2.94 kg (6.5 lbs.) of weight over the fuel tank for each estimated gallon of missing fuel.
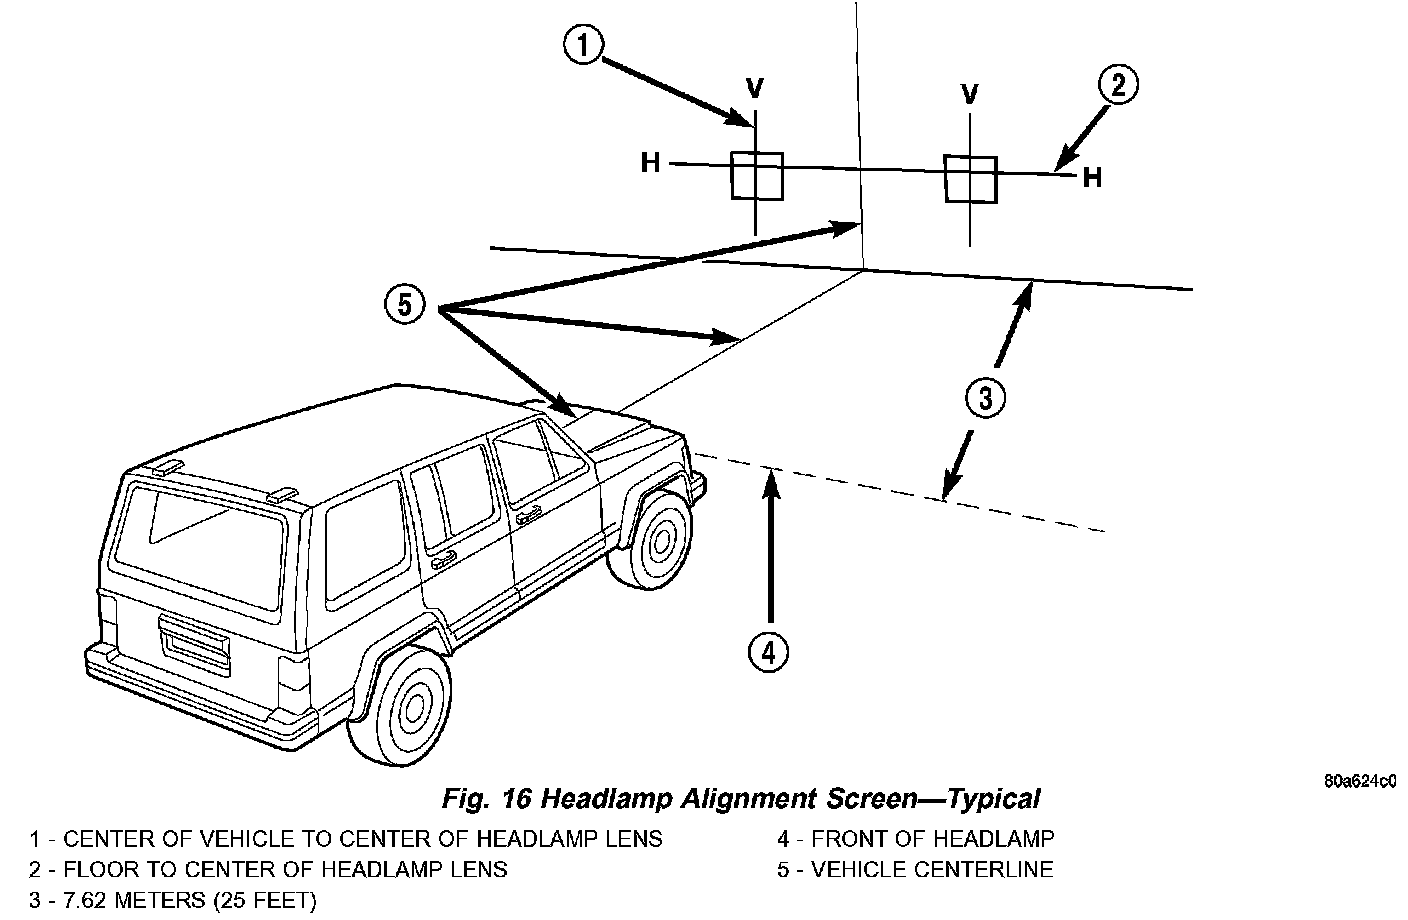
Fig.16 Headlamp Alignment Screen - Typical:
Lamp Alignment Screen Preparation
1. Position vehicle on a level surface perpendicular to a flat wall 7.62 meters (25 ft) away from front of headlamp lens.
2. If necessary, tape a line on the floor 7.62 meters (25 ft) away from and parallel to the wall.
3. Measure from the floor up 1.27 meters (5 ft) and tape a line on the wall at the centerline of the vehicle. Sight along the centerline of the vehicle (from rear of vehicle forward) to verify accuracy of the line placement.
4. Rock vehicle side-to-side three times to allow suspension to stabilize.
5. Jounce front suspension three times by pushing downward on front bumper and releasing.
6. Measure the distance from the center of headlamp lens to the floor. Transfer measurement to the alignment screen (with tape). Use this line for up/down adjustment reference.
7. Measure distance from the centerline of the vehicle to the center of each headlamp being aligned. Transfer measurements to screen (with tape) to each side of vehicle centerline. Use these lines for left/right adjustment reference.
Headlamp Adjustment
Fig.17 Low Beam Pattern:
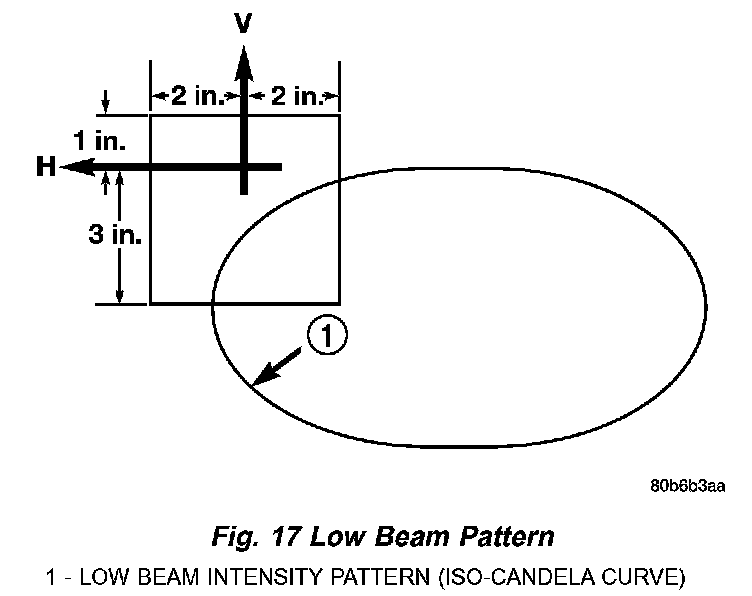
A properly aimed low beam will project the top edge of the beam intensity pattern on the screen from 25 mm (1 in.) above to 75 mm (3 in.) below headlamp centerline. The side-to-side left edge of the beam intensity pattern should be from 50 mm (2 in.) left to 50 mm (2 in.) right of headlamp centerline.
1. Clean front of the headlamps.
2. Place headlamps on LOW beam.
3. Cover front of the headlamp that is not being adjusted.
Fig.18 Headlamp Beam Adjustment Screw:
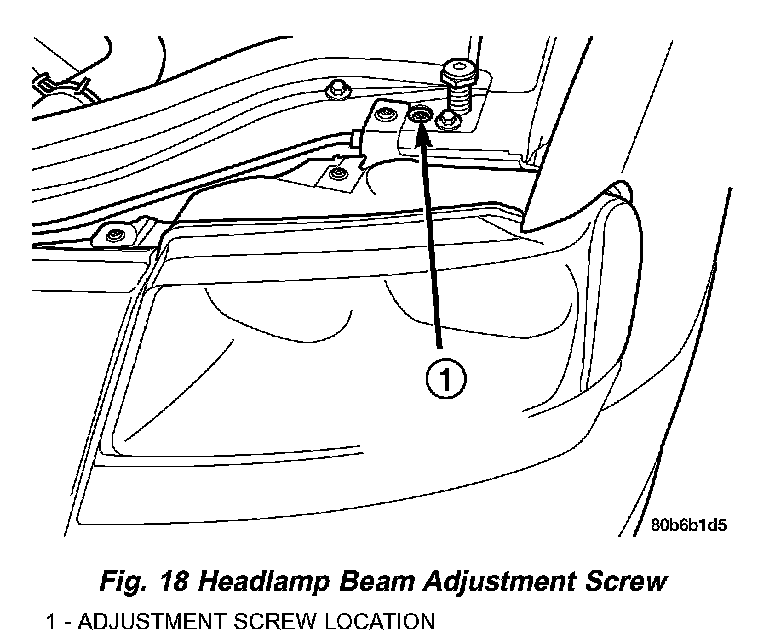
Fig.19 Headlamp Beam Adjustment:
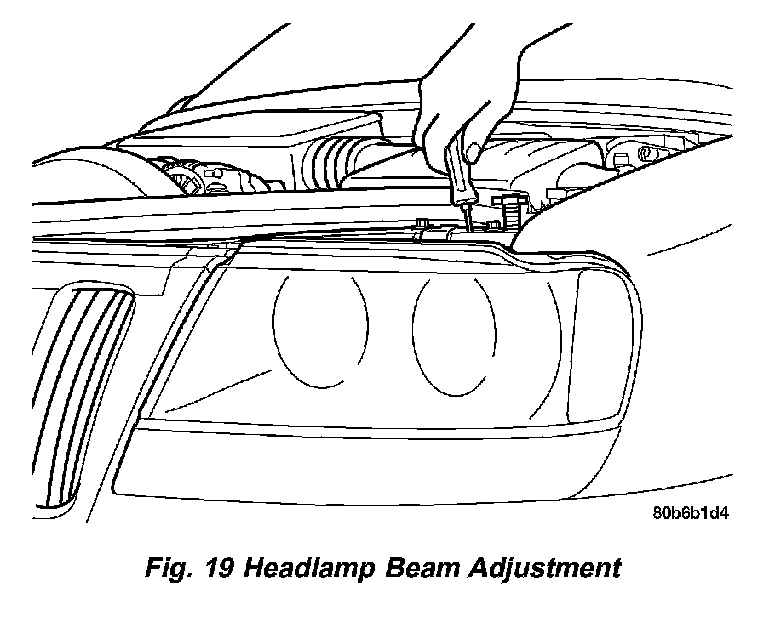
4. Turn adjustment screw and until the top edge of the beam intensity pattern is positioned within 25 mm (1 in.) above or 75 mm (3 in.) below the headlamp horizontal centerline.
5. Cover front of the headlamp and adjust the other headlamp beam as instructed below.
6. Rotate the adjustment screw until the top edge of the beam intensity pattern is positioned within 25 mm (1 in) above or 75 mm (3 in) below the headlamp horizontal centerline.