Front Door Hinge: Service and Repair
HINGEREMOVAL
NOTE: The hinges may be removed and replaced one at a time to make the door fit adjustment easier.
1. Open and support door with a suitable lifting device.
2. Using a grease pencil or equivalent, mark the hinge location.
3. Disconnect the door wire harness.
Fig. 7:
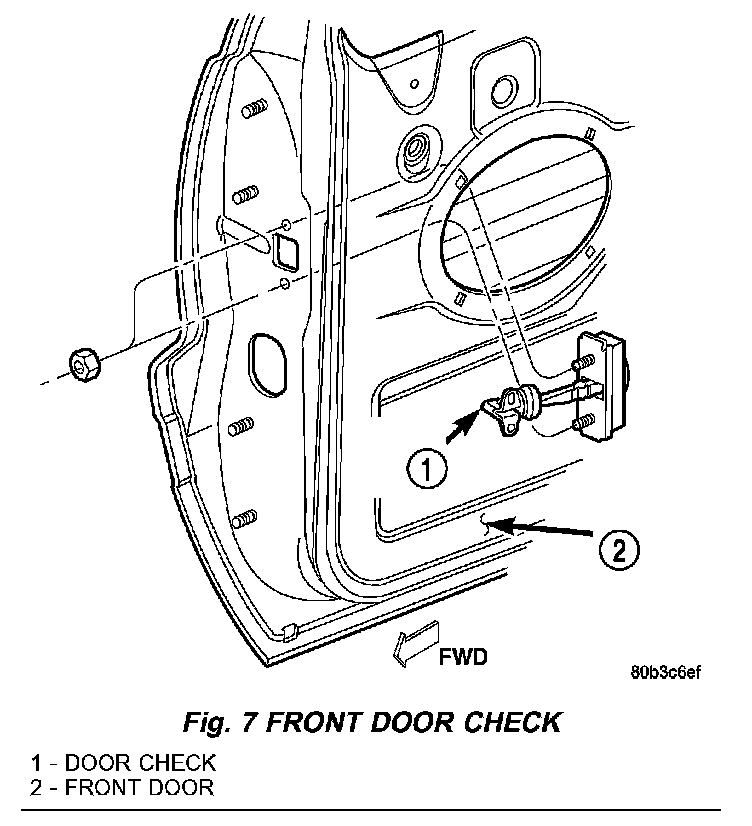
4. If replacing both hinges at the same time, remove the bolts and disconnect the door check from the a-pillar. (Fig. 7)
NOTE: The epoxy coated washers should not be removed from the hinges. If the washers are removed the door may have to be re-adjusted.
Fig. 8:
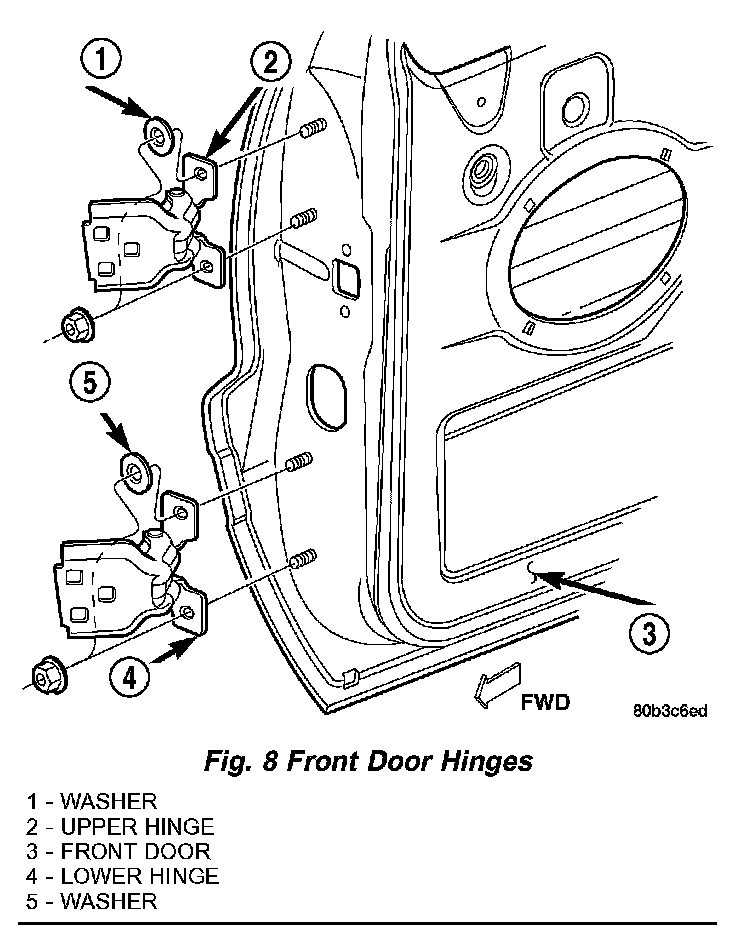
5. Remove the door hinge to the door nuts. (Fig.8)
6. If replacing both hinges at the same time, remove the door.
7. Remove the bolts and remove the hinge from the a-pillar.
INSTALLATION
NOTE: Use 3M(R) Fast and Firm or equivalent on the hinge to body mating surface as a sealant.
1. Position hinge on a-pillar.
2. Install hinge to body bolts, but do not tighten.
3. Align the hinge to the reference marks and torque the bolts to 28 N.m (21 ft. lbs.).
4. Install the door on the hinge and align with the reference marks.
5. Install the nuts and washers and tighten 31 N.m (23 ft. lbs.). (Fig. 8)
6. Check and adjust the door position if necessary.