Removal and Replacement
Throttle Body Assembly ReplacementRemoval Procedure
NOTICE: Handle the electronic throttle control components carefully. Use cleanliness in order to prevent damage. Do not drop the electronic throttle control components. Do not roughly handle the electronic throttle control components. Do not immerse the electronic throttle control components in cleaning solvents of any type.
IMPORTANT: DO NOT for any reason, insert a screwdriver or other small hand tool into the throttle body to hold open the throttle plate, as the throttle body could be damaged.
1. Raise the cab.
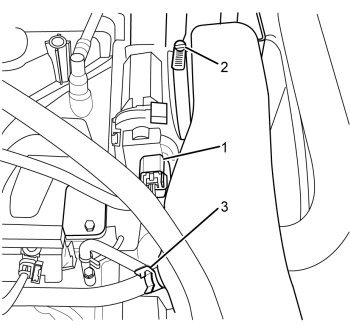
2. Disconnect the engine wiring harness electrical connector (1) from the electronic throttle control.
3. Remove the clamp and hose (3).
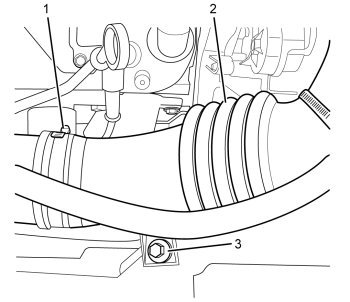
4. Loosen the hose clamp (2).
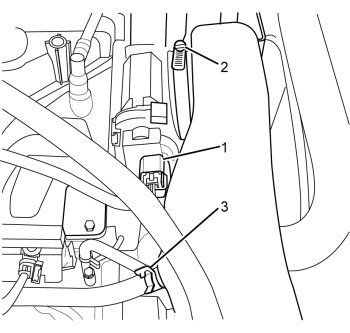
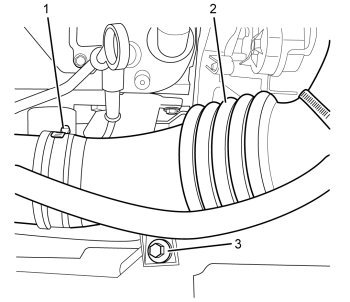
5. Remove the air cleaner outlet duct bolt (3).
6. Loosen the hose clamp (1).
7. Remove the air cleaner outlet duct (2) and set aside.
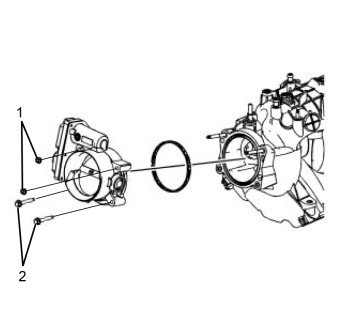
8. Remove the throttle body nuts (1) and bolts (2).
9. Remove the throttle body.
10. Remove and discard the throttle body gasket.
Installation Procedure
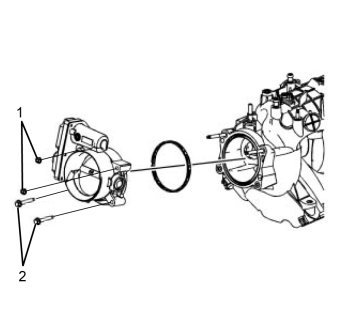
1. Install a NEW throttle body gasket to the intake manifold. Align the gasket with the notch in the manifold.
NOTICE: Fastener Notice
2. Install the throttle body, bolts (2), and nuts (1).
Tighten
Tighten the bolts/nuts to 10 N.m (89 lb in)
IMPORTANT: Verify that the engine wiring harness electrical connector seal for the electronic throttle control is properly installed and not damaged.
3. Install the air cleaner outlet duct.
4. Install the air cleaner outlet duct bolt (3) and tighten.
5. Tighten the hose clamp (1).
6. Connect the engine wiring harness electrical connector (3) to the electronic throttle control.
7. Tighten the hose clamp (2).
8. Install the hose and clamp (3).
9. Lower the cab.
10. Perform the Throttle Learn procedure. Testing and Inspection