Removal Procedure
 Courtesy of GENERAL MOTORS CORP.
- Remove the seat from the vehicle. Refer to Front Seat Replacement - Bucket or Split Bench Seat Replacement .
- Remove the cupholder from the seat by pulling it straight off the bracket.
- Remove the front seat cushion outer trim panel. Refer to Seat Cushion Outer Trim Panel Replacement .
 Courtesy of GENERAL MOTORS CORP.
- Remove the 3 bolts (1) securing the cupholder bracket to the seat frame, if equipped.
 Courtesy of GENERAL MOTORS CORP.
- Unclip the front, rear, and side J-strips (1, 2) on the underside of the seat.
- Remove the lumbar knob by pulling the knob straight away from the seat, if equipped.
- Remove the seat switch bezel, if equipped. Refer to Driver Seat and Passenger Seat Adjuster Switch Bezel Replacement .
- Remove the recliner handle. Refer to Driver Seat and Passenger Seat Recliner Handle Replacement .
 Courtesy of GENERAL MOTORS CORP.
- Remove the 2 bolts (1) securing the seat recliner to the seat adjuster.
- Remove the seat back assembly from the seat cushion assembly.
 Courtesy of GENERAL MOTORS CORP.
- Disconnect the seat belt buckle electrical connector (1).
- Remove any clips or straps securing the electrical harness to the bottom of the seat cushion frame.
 Courtesy of GENERAL MOTORS CORP.
- Remove the bolt (2) securing the seat belt buckle assembly (1) to the seat adjuster.
- Remove the seat cushion cover and foam.
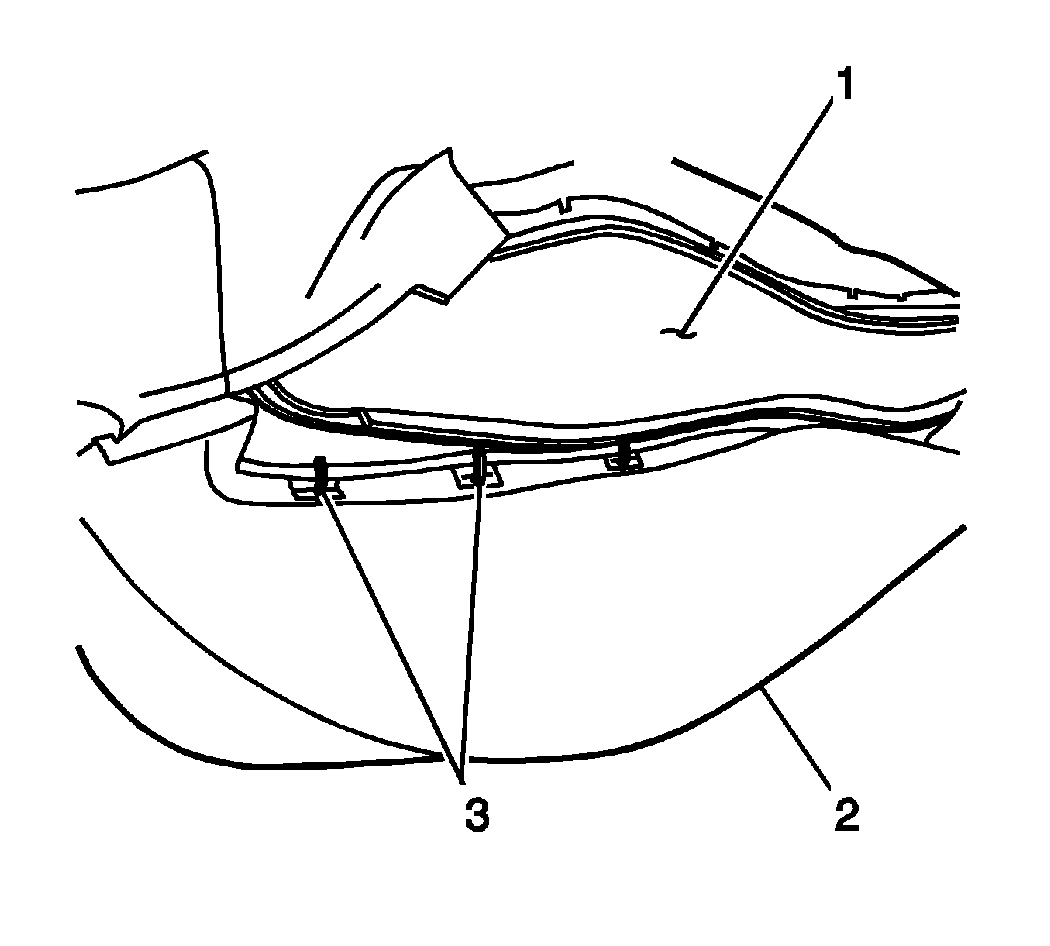 Courtesy of GENERAL MOTORS CORP.
- Remove the hog rings (3) securing the cover (1) to the pad (2).
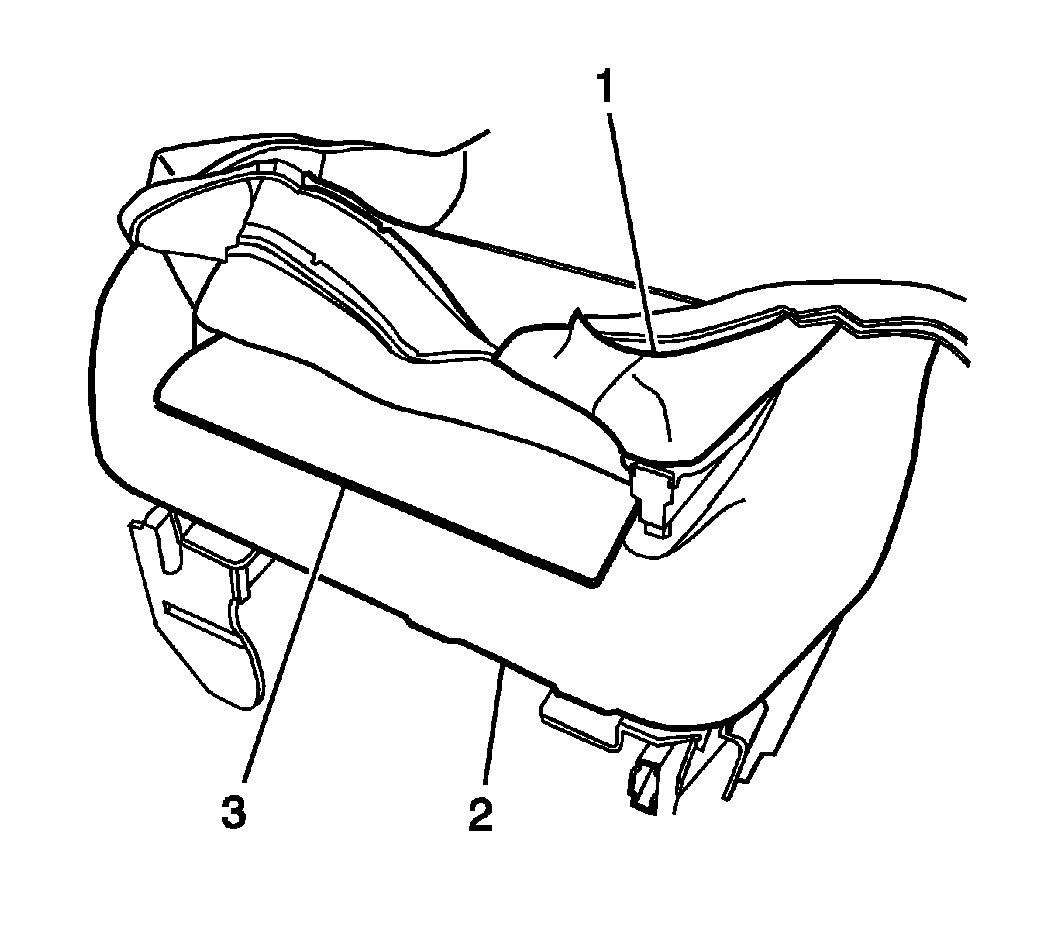 Courtesy of GENERAL MOTORS CORP.
- If the pad is being replaced, peel the heating element (3) off of the pad (2), if equipped.