Removal Procedure
- Remove the left front door sill plate. Refer to Front Side Door Sill Plate Replacement
.
- Remove the left closeout/insulator panel. Refer to Instrument Panel Insulator Panel Replacement - Left Side
.
- Remove the grille. Refer to Grille Replacement (Envoy)
, Grille Replacement (Rainier)
or Grille Replacement (TrailBlazer)
.
- Remove the hood latch. Refer to Hood Latch Replacement .
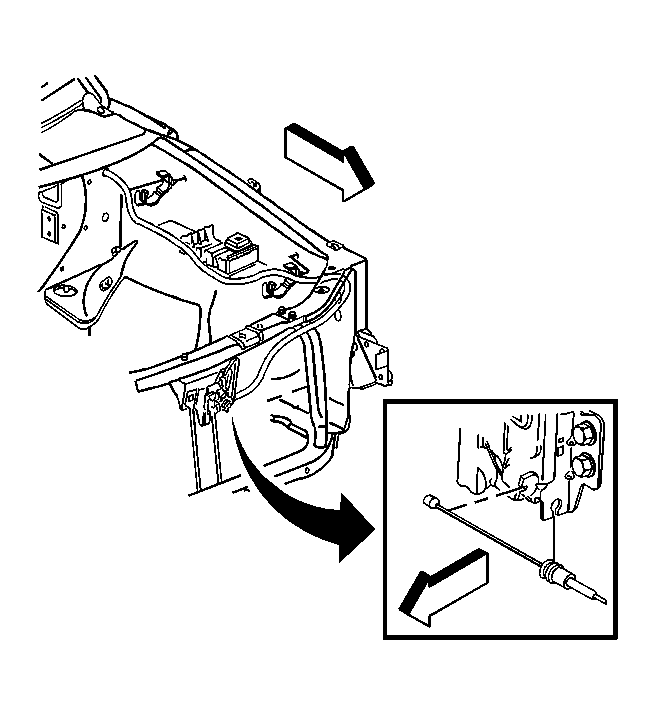 Courtesy of GENERAL MOTORS CORP.
- Release the hood latch release cable from the hood latch assembly.
- Attach a length of mechanic's wire to the exterior end of the cable and note the routing of the cable for later installation.
- Release the retainers securing the cable to the inner fender.
- Feed the cable out from between the headlamp housing panel and the radiator.
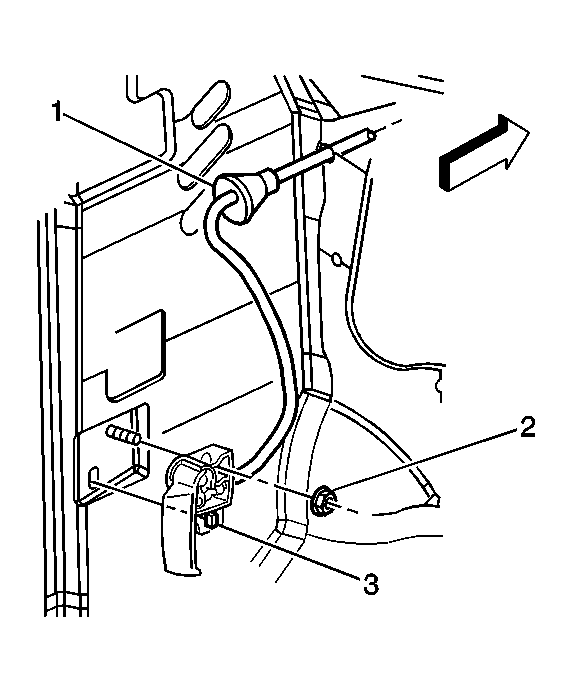 Courtesy of GENERAL MOTORS CORP.
- Push the cable grommet (1) through the bulkhead and into the interior of the vehicle.
- Remove the nut (2) attaching the hood release handle (3) to the cowl trim panel on the left side.
- Remove the cable from the release handle (3).
- Pull the cable the rest of the way through the cowl panel and out from behind the sound insulation.
- Detach the mechanic's wire from the cable, leaving the wire in position for aid in installation of the cable.
- Remove the cable from the vehicle.