Removal Procedure
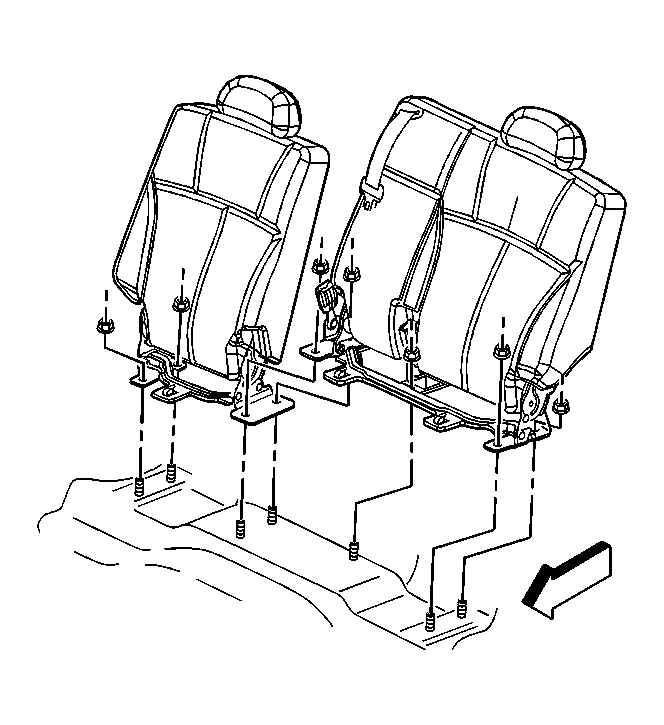 Courtesy of GENERAL MOTORS CORP.
- Tumble the left seat back in order to gain access to the left 2 rear seat back mounting nuts.
- Remove the left 3 rear seat back mounting nuts.
- Return the left seat back to the upright position.
- Remove the left 2 front seat back mounting nuts.
- Remove the left seat back from the vehicle.
- If removing the right seat back, perform the following:
- Remove the left seat back first.
- Tumble the right seat back in order to gain access to the right rear seat back mounting nut.
- Remove the right rear seat back mounting nut.
- Return the right seat back to the upright position.
- Remove the right front seat back mounting nut.
- Remove the navigation control processor bracket from the floor panel, if equipped. Refer to Bracket Assembly Replacement - OnStar Module (Trailblazer EXT, Envoy XL)
or Bracket Assembly Replacement - OnStar Module (Trailblazer, Envoy, Rainier)
.
- Remove the right seat back from the vehicle.