Evaporative Emission (EVAP) Canister Replacement (TrailBlazer EXT, Envoy XL, Envoy XUV)
EVAPORATIVE EMISSION (EVAP) CANISTER REPLACEMENT
REMOVAL PROCEDURE
1. Remove the fuel tank.
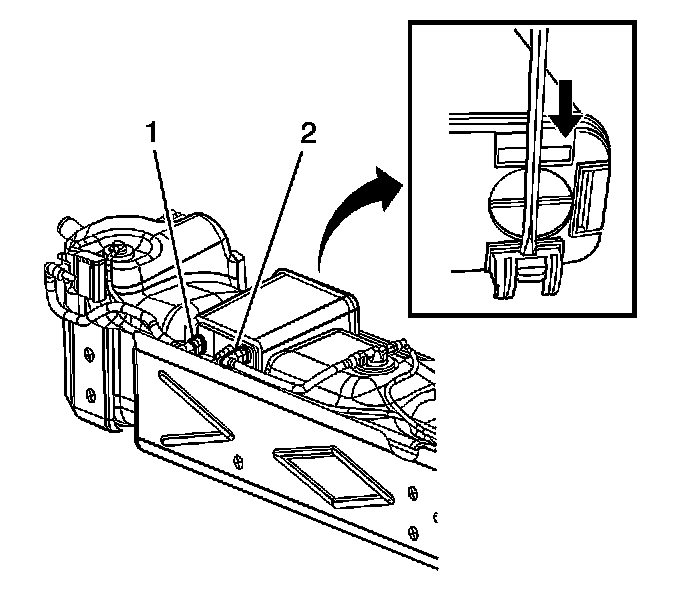
2. Disconnect the evaporative emission (EVAP) vapor pipe (2) from the EVAP canister.
3. Disconnect the EVAP vent pipe (1) from the EVAP canister.
4. Disconnect the EVAP purge pipe from the EVAP canister. The purge pipe is the small pipe next to the vapor pipe (2).
5. Remove the EVAP canister from the tabs of the canister bracket by inserting a flat head screwdriver into the center slots of the tabs as indicated in the illustration.
IMPORTANT: Do not pry against the surface of the evaporative emissions canister. This could damage the canister.
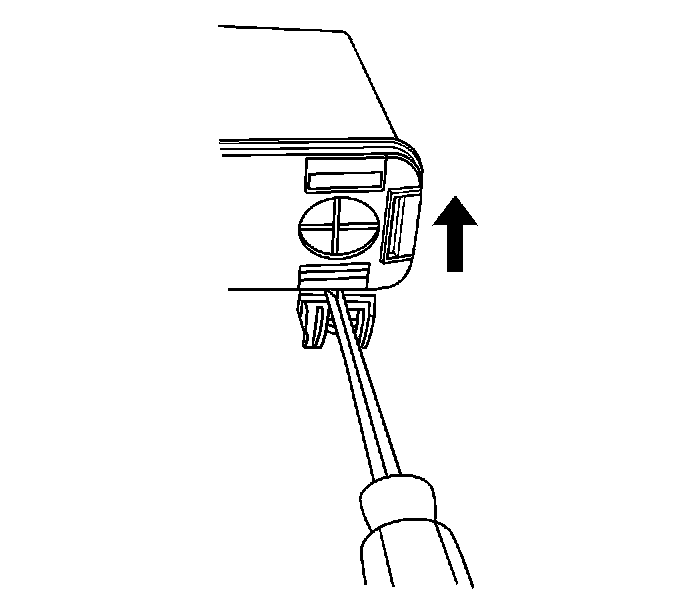
6. Pry the canister away from the tabs as indicated in the illustration.
7. Slide the canister away from the single tab side to disengage the EVAP canister from the bracket.
INSTALLATION PROCEDURE
1. Slide the EVAP canister into the single tab side and press the canister into the 2 tab side. Ensure the tabs have completely engaged.
IMPORTANT: Considerable force may be necessary to install the EVAP canister into the 2 tab side.
2. Connect the EVAP purge pipe to the EVAP canister. The purge pipe is the small pipe next to the vapor pipe (2).
3. Connect the EVAP vent pipe (1) to the EVAP canister.
4. Connect the EVAP vapor pipe (2) to the EVAP canister.
5. Install the fuel tank.