Inflator Module
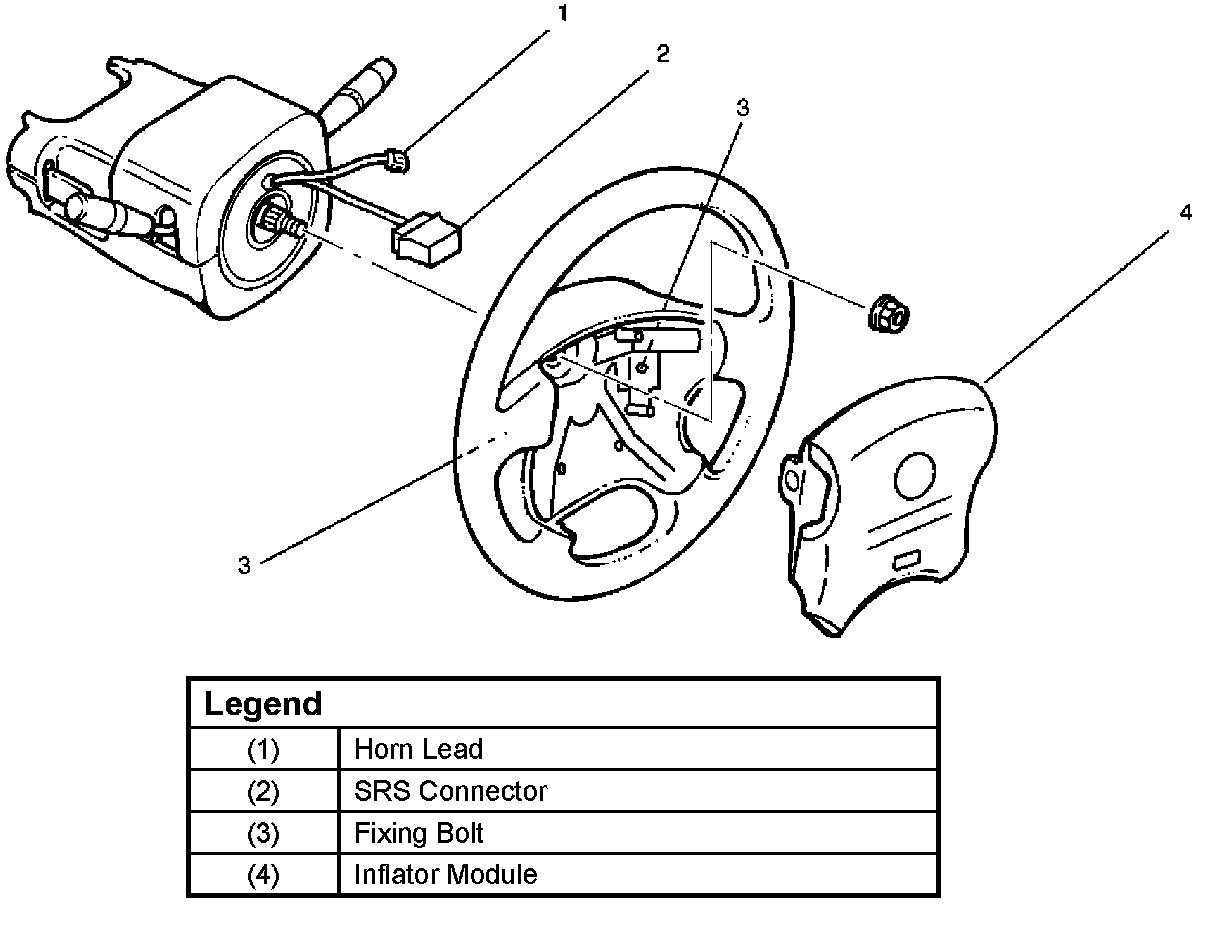
Removal
1. Turn the steering wheel so that the vehicle's wheels are pointing straight ahead.
2. Turn the ignition switch to "LOCK".
3. Disconnect the battery "-" terminal cable, and wait at least 5 minutes.
4. Disconnect the yellow 2-way SRS connector located under the steering column.
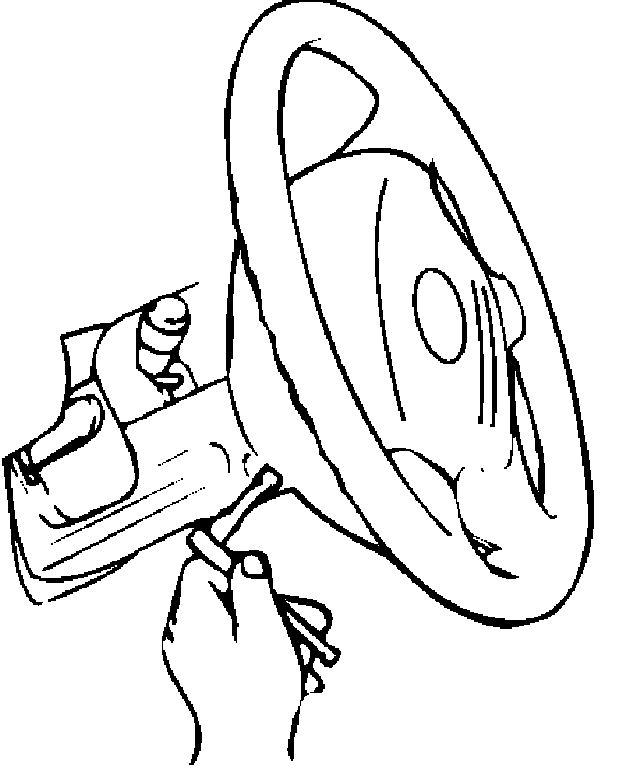
5. Loosen the inflator module fixing bolt from behind the steering wheel assembly using a TORX driver or equivalent until the inflator module can be released from steering assembly .
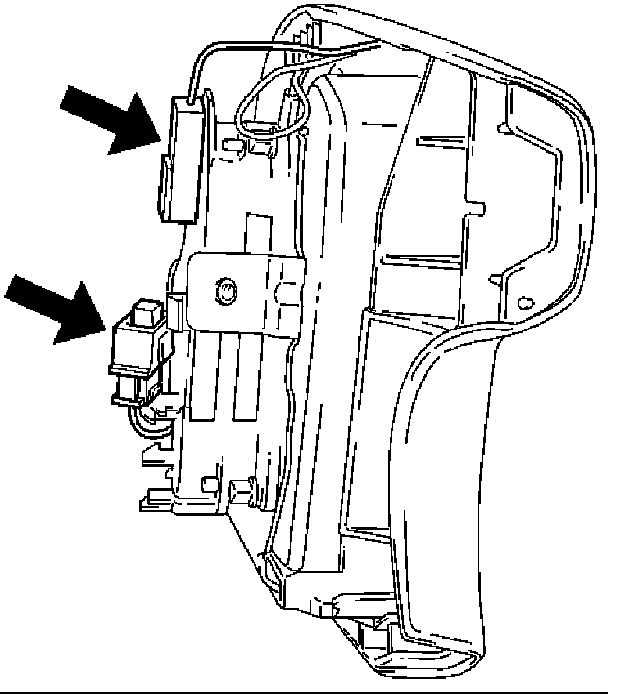
6. Disconnect the yellow 2-way SRS connector and horn lead located behind the inflator module.
7. Remove inflator module.
Inspection and Repair
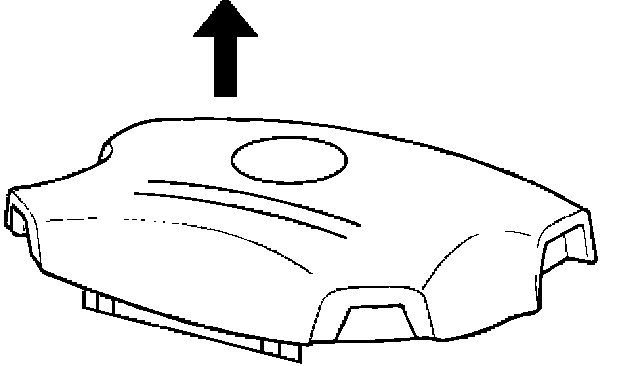
WARNING: THE INFLATOR MODULE SHOULD ALWAYS BE CARRIED WITH THE TRIM COVER AWAY. FROM YOUR BODY AND SHOULD ALWAYS BE LAID ON A FLAT SURFACE WITH THE URETHANE SIDE UP. THIS IS NECESSARY BECAUSE A FREE SPACE IS PROVIDED TO ALLOW THE AIR CUSHION TO EXPAND IN THE UNLIKELY EVENT OF ACCIDENTAL DEPLOYMENT. OTHERWISE, PERSONAL INJURY MAY RESULT.
The inflator module consists of a cover, air bag, inflator, and retainer. Inspect the inflator module mainly for the following:
^ Check for holes, cracks, severe blemishes and deformation on the cover.
^ Check that the retainer is not deformed.
^ Check for defects such as damage and breakage in the lead wire for the igniter.
Replace the inflator module if a defect is found during inspection.
Installation
1. Install inflator module.
2. Support the module and carefully connect the module connector and horn lead.
Note: Pass the lead wire through the tabs on the plastic cover (wire protector) of inflator to prevent lead wire from being pinched.
3. Tighten bolts to specified torque.
Torque: 9 Nm (78 inch lbs.)
4. Connect the yellow 2-way SRS connector located under the steering column.
5. Connect the battery ground cable.
6. Set ignition to "ON" while watching warning light. Light should flash 7 times and then go off. If lamp does not operate correctly, refer to Restraints Systems.