Removal and Installation: Removal
- Remove console upper finisher.
- Open the console lid.
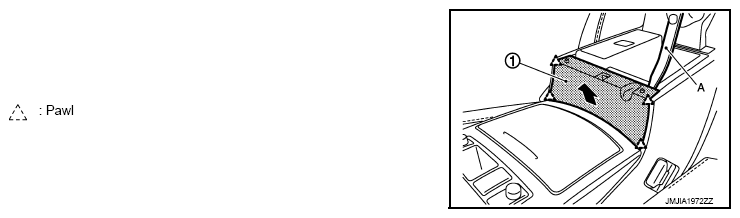
- Remove console upper finisher (1) fixing pawls with remover tool (A).
- Pull back console upper finisher.
 Courtesy of NISSAN NORTH AMERICA, INC.
- Remove console finisher assembly.
- Remove selector lever knob. Refer to
"REMOVAL AND INSTALLATION
".
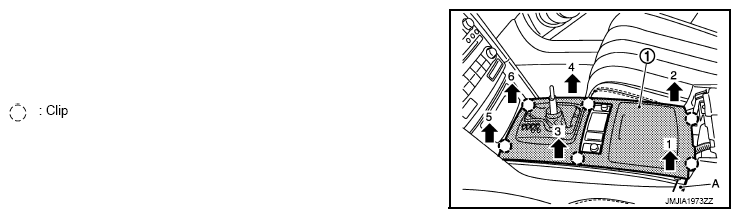
- Remove console finisher assembly (1) fixing clips with remover tool (A).
- Pull up console finisher assembly.
- Disconnect harness connector.
 Courtesy of NISSAN NORTH AMERICA, INC.
- Remove console switch finisher.
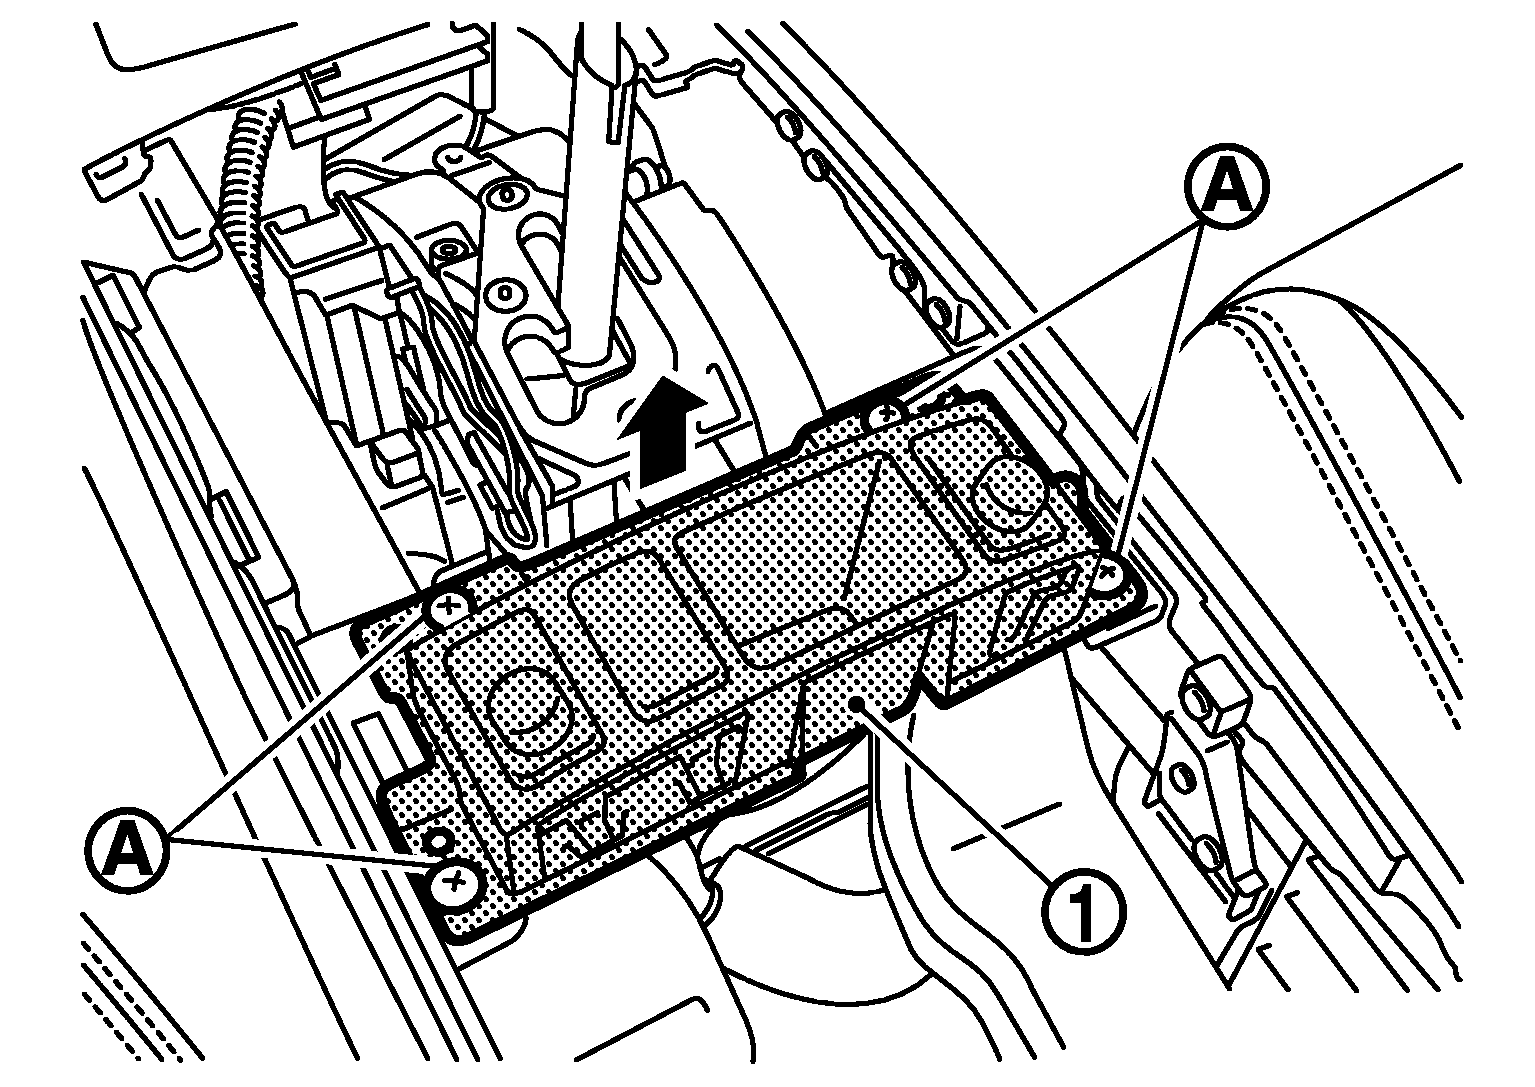
- Remove console switch finisher (1) fixing screws (A).
- Pull up console switch finisher.
- Disconnect harness connectors.
 Courtesy of NISSAN NORTH AMERICA, INC.
- Remove console pocket assembly.
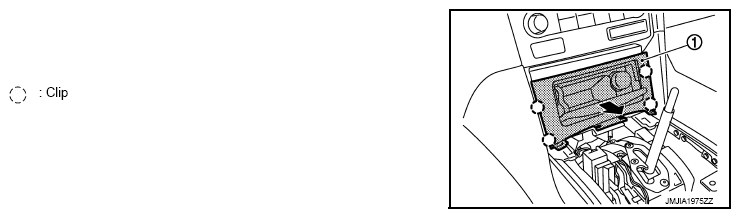
- Pull back console pocket assembly (1), and disengage clips.
- Disconnect harness connector.
 Courtesy of NISSAN NORTH AMERICA, INC.
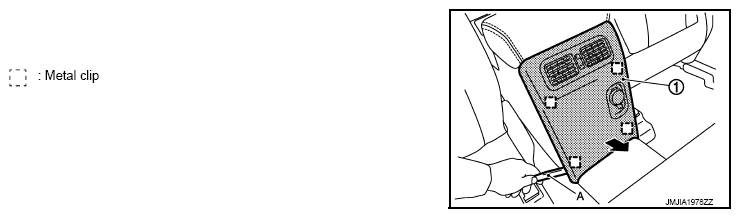
- Remove console rear finisher.
- Put front seat to front must position.
- Pull back the console rear finisher (1) with remover tool (A).
- Disconnect harness connectors.
 Courtesy of NISSAN NORTH AMERICA, INC.
- Remove rear ventilator duct. Refer to
"REAR VENTILATOR DUCT 1: REMOVAL AND INSTALLATION
".
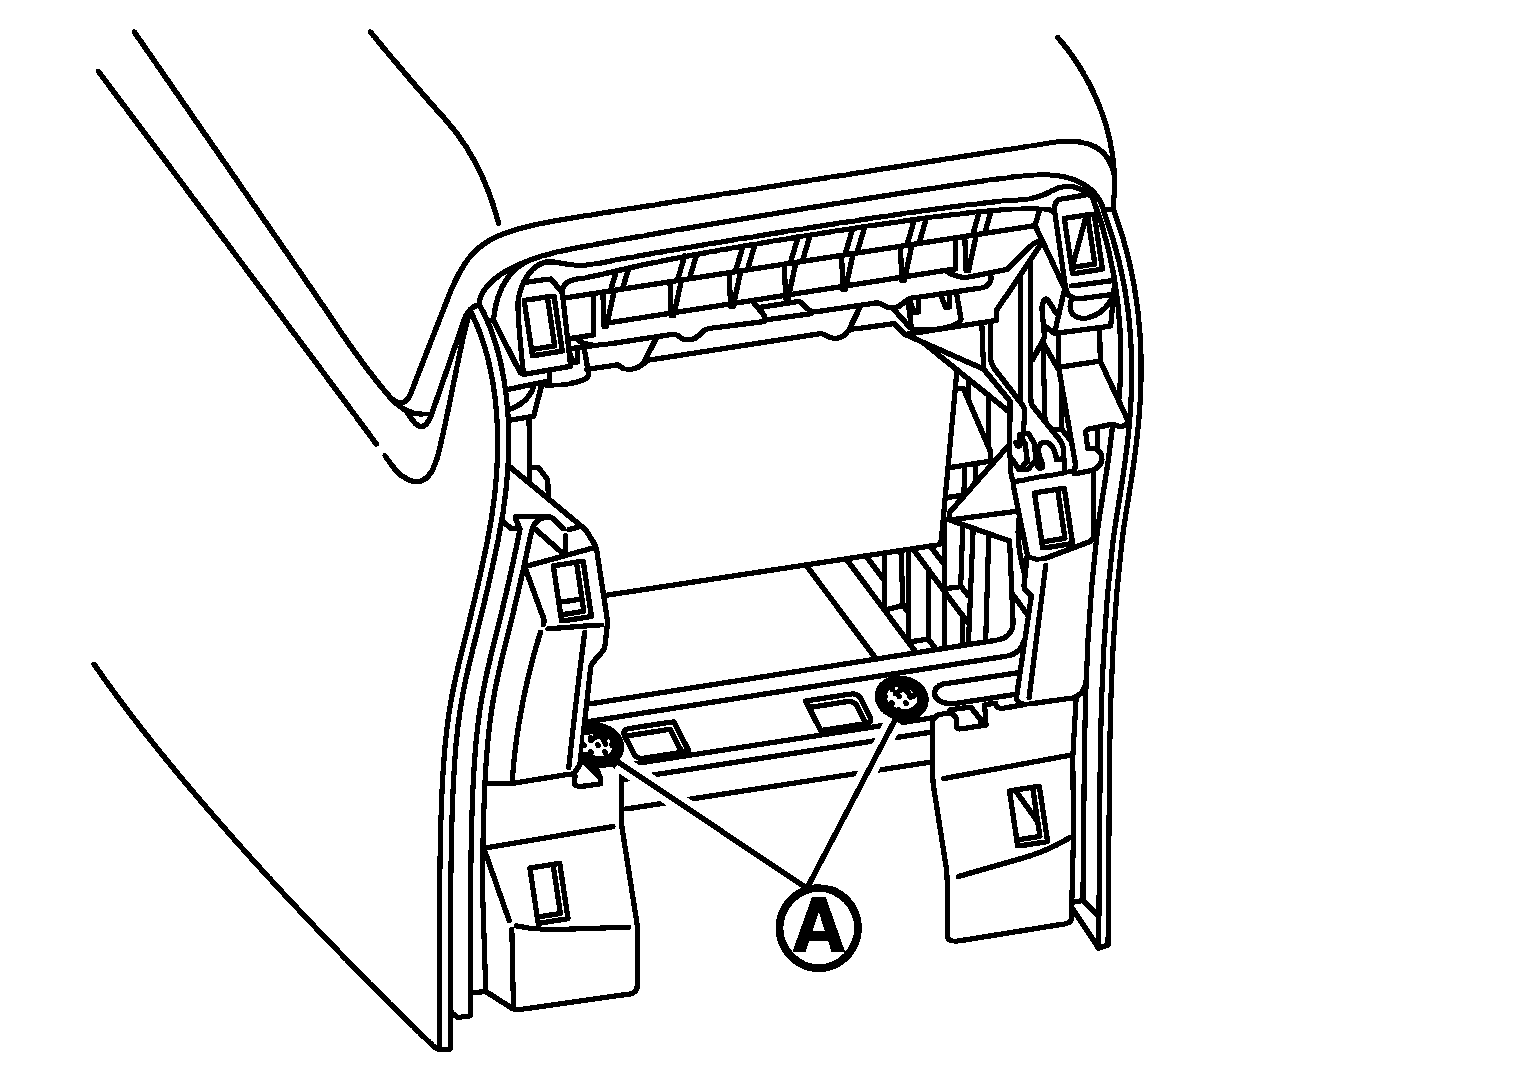
- Remove center console assembly.
- Remove center console fixing screws (A).
 Courtesy of NISSAN NORTH AMERICA, INC.
- Disconnect USB connector harness connector. Refer to
"CONSOLE POWER SOCKET: REMOVAL AND INSTALLATION
".
- Disconnect console power socket harness connector. Refer to
"CONSOLE POWER SOCKET: REMOVAL AND INSTALLATION
".
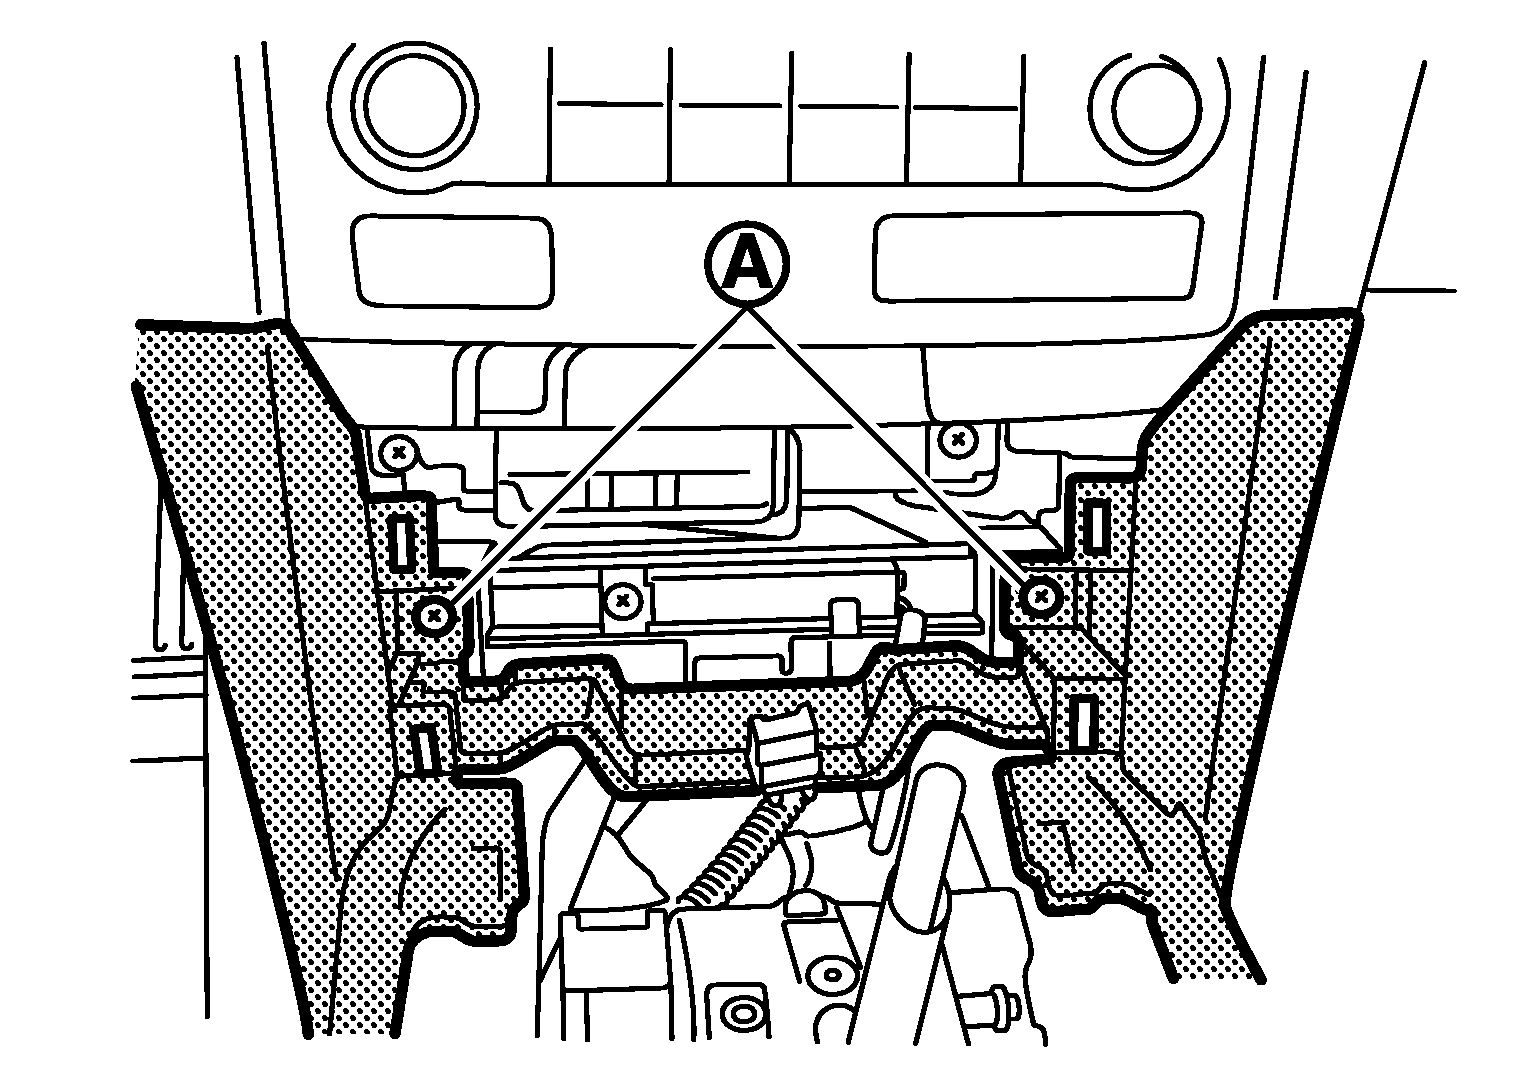
- Remove center console assembly fixing screws (A).
 Courtesy of NISSAN NORTH AMERICA, INC.
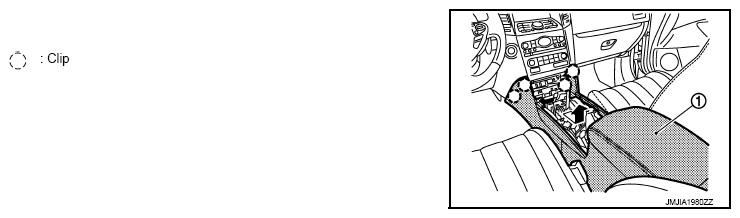
- Pull back and lift up center console assembly (1).
 Courtesy of NISSAN NORTH AMERICA, INC.