Removal and Installation: Removal
- Put selector lever in drive position. (A/T Models only)
- Remove selector lever knob. (A/T Models only)
- Remove shift lever knob. (M/T Models only) Refer to
"REMOVAL AND INSTALLATION
".
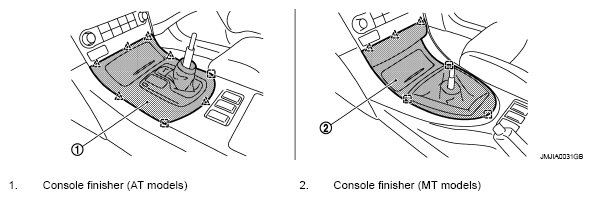
- Remove console finisher.
 Courtesy of NISSAN MOTOR CO., U.S.A.
- Remove clips from rear of console finisher, and then remove pawl of front. Pull console finisher upward to disengage from center console.
- Disconnect harness connectors.
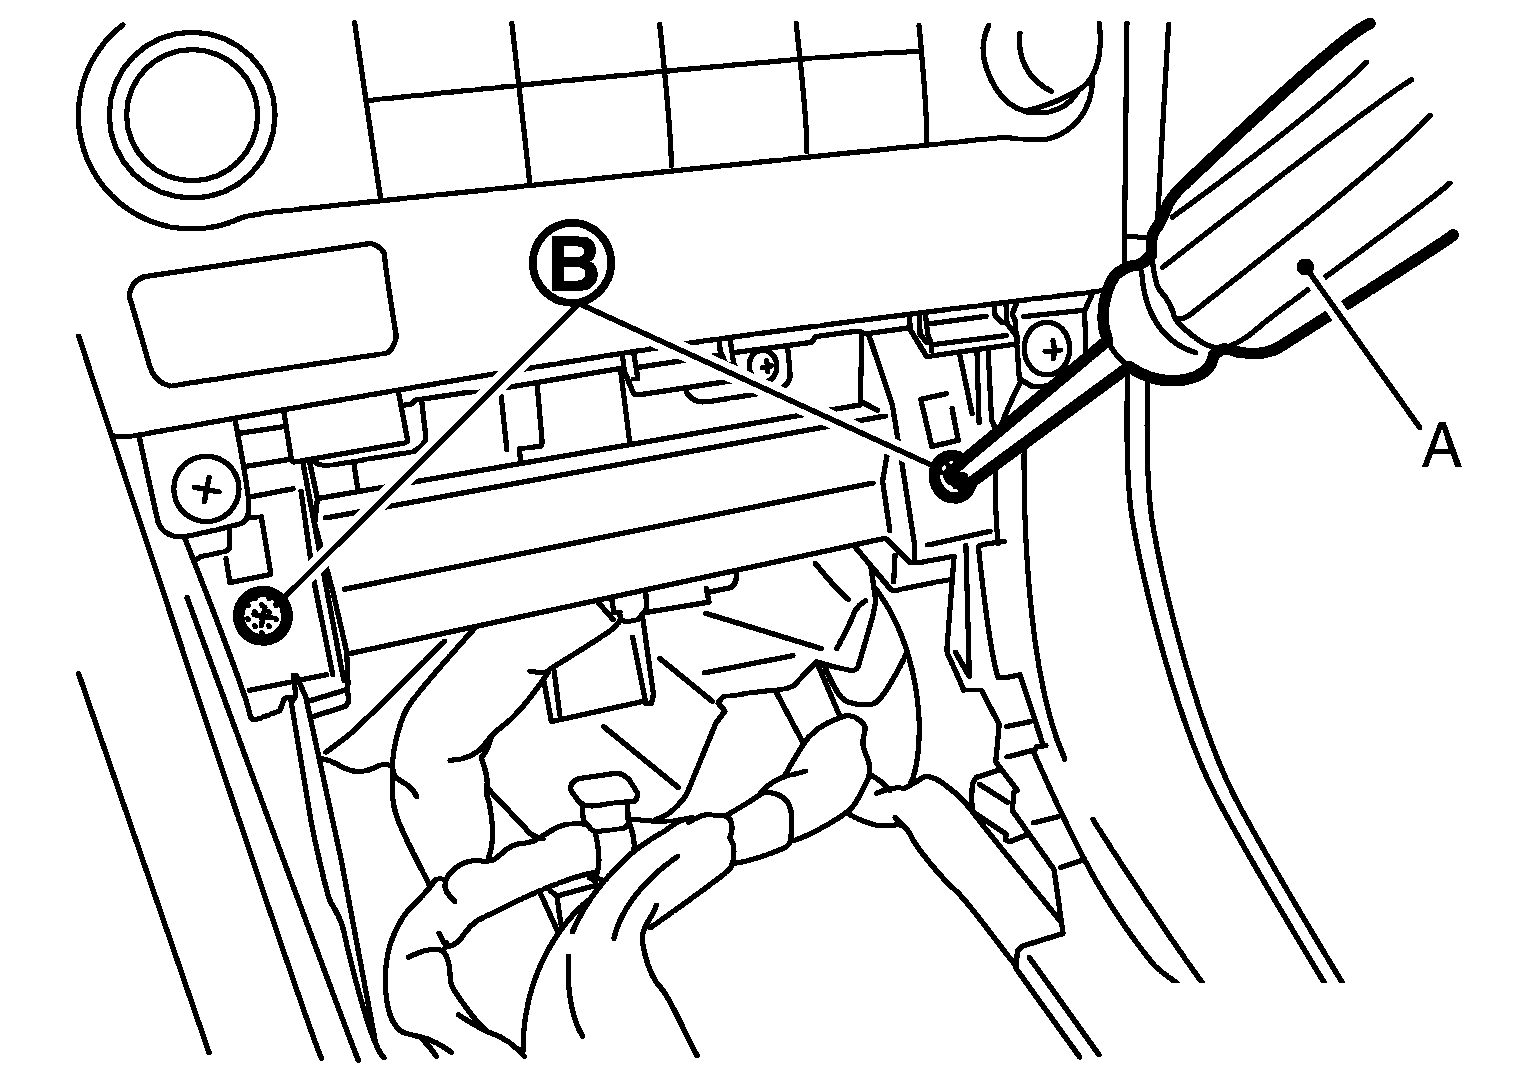
- Remove screws (B) of center console front side with screw driver (A).
 Courtesy of NISSAN MOTOR CO., U.S.A.
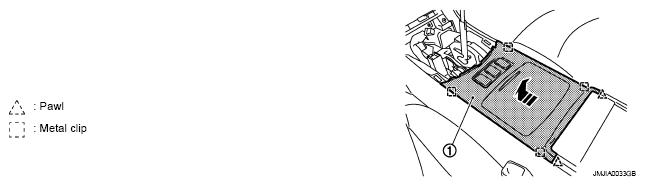
- Remove rear upper console assembly. (AT Models only)
- Slide to front, pull up rear upper console assembly (1), and disconnect metal clips.
- Disconnect heated seat switch harness connectors. (with heated seat)
 Courtesy of NISSAN MOTOR CO., U.S.A.
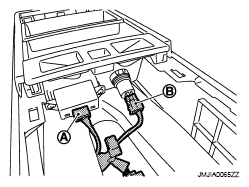
- Disconnect auxiliary input jacks connector (A) and power socket harness connector (B). (AT Models only)
 Courtesy of NISSAN MOTOR CO., U.S.A.
- Disconnect console sub harness connectors (A). (MT Models only)
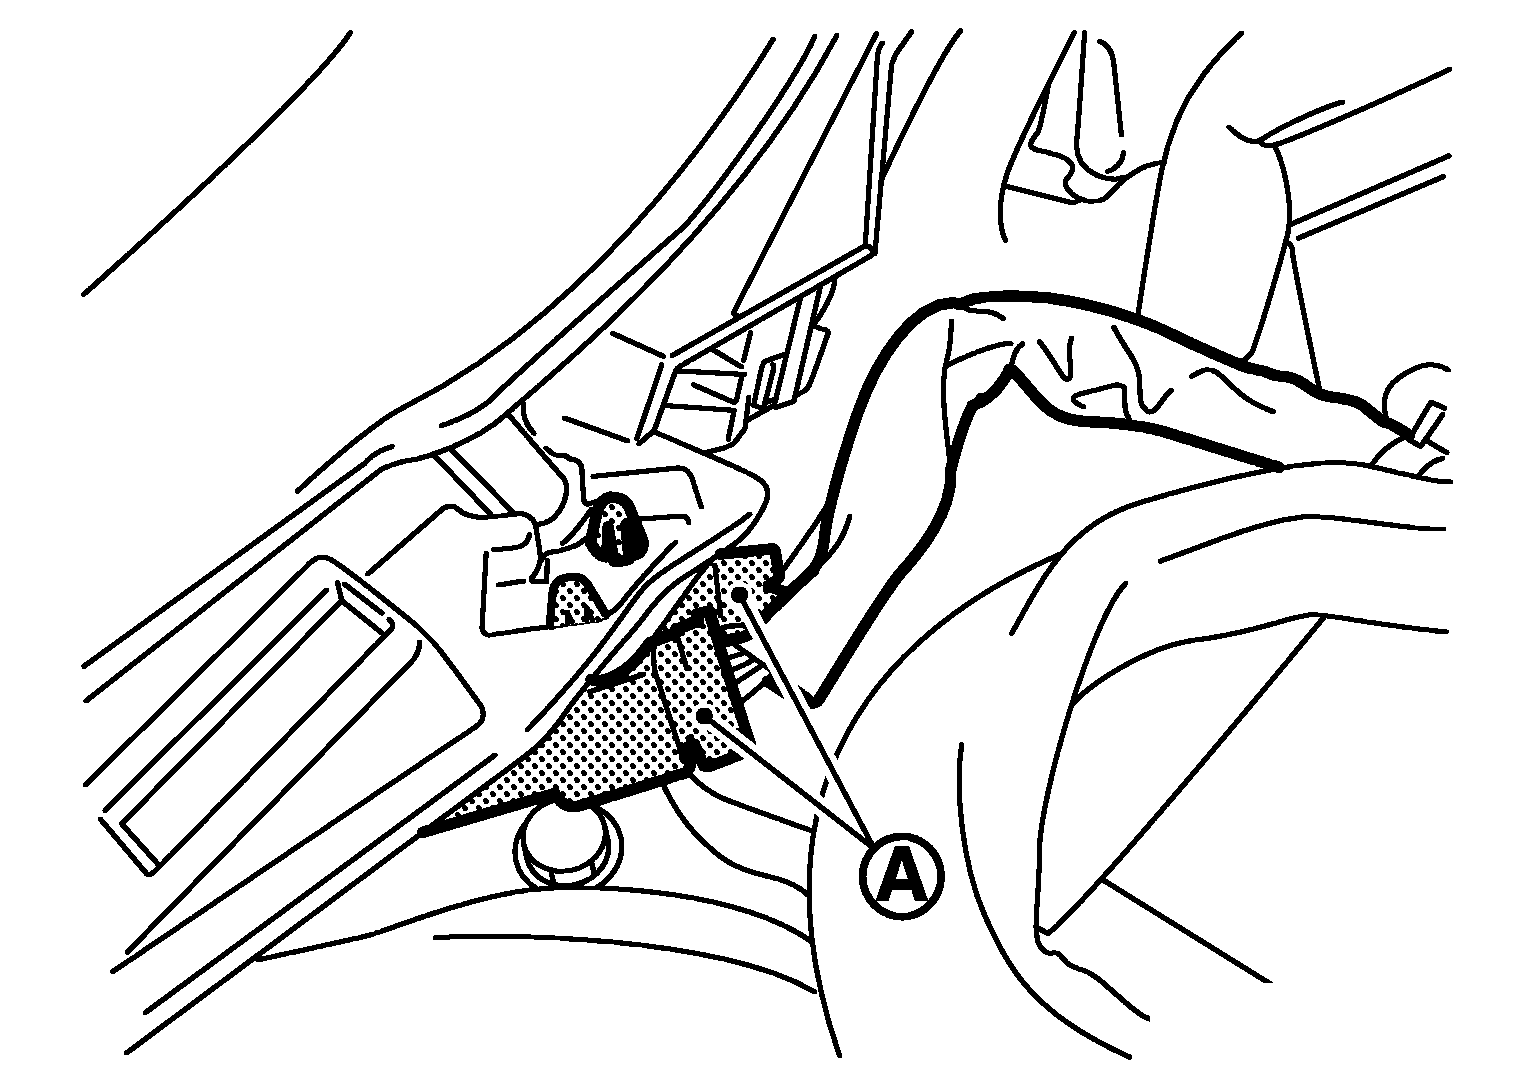 Courtesy of NISSAN MOTOR CO., U.S.A.
- Disconnect heated seat switch connector (A). (MT models with heated seat only)
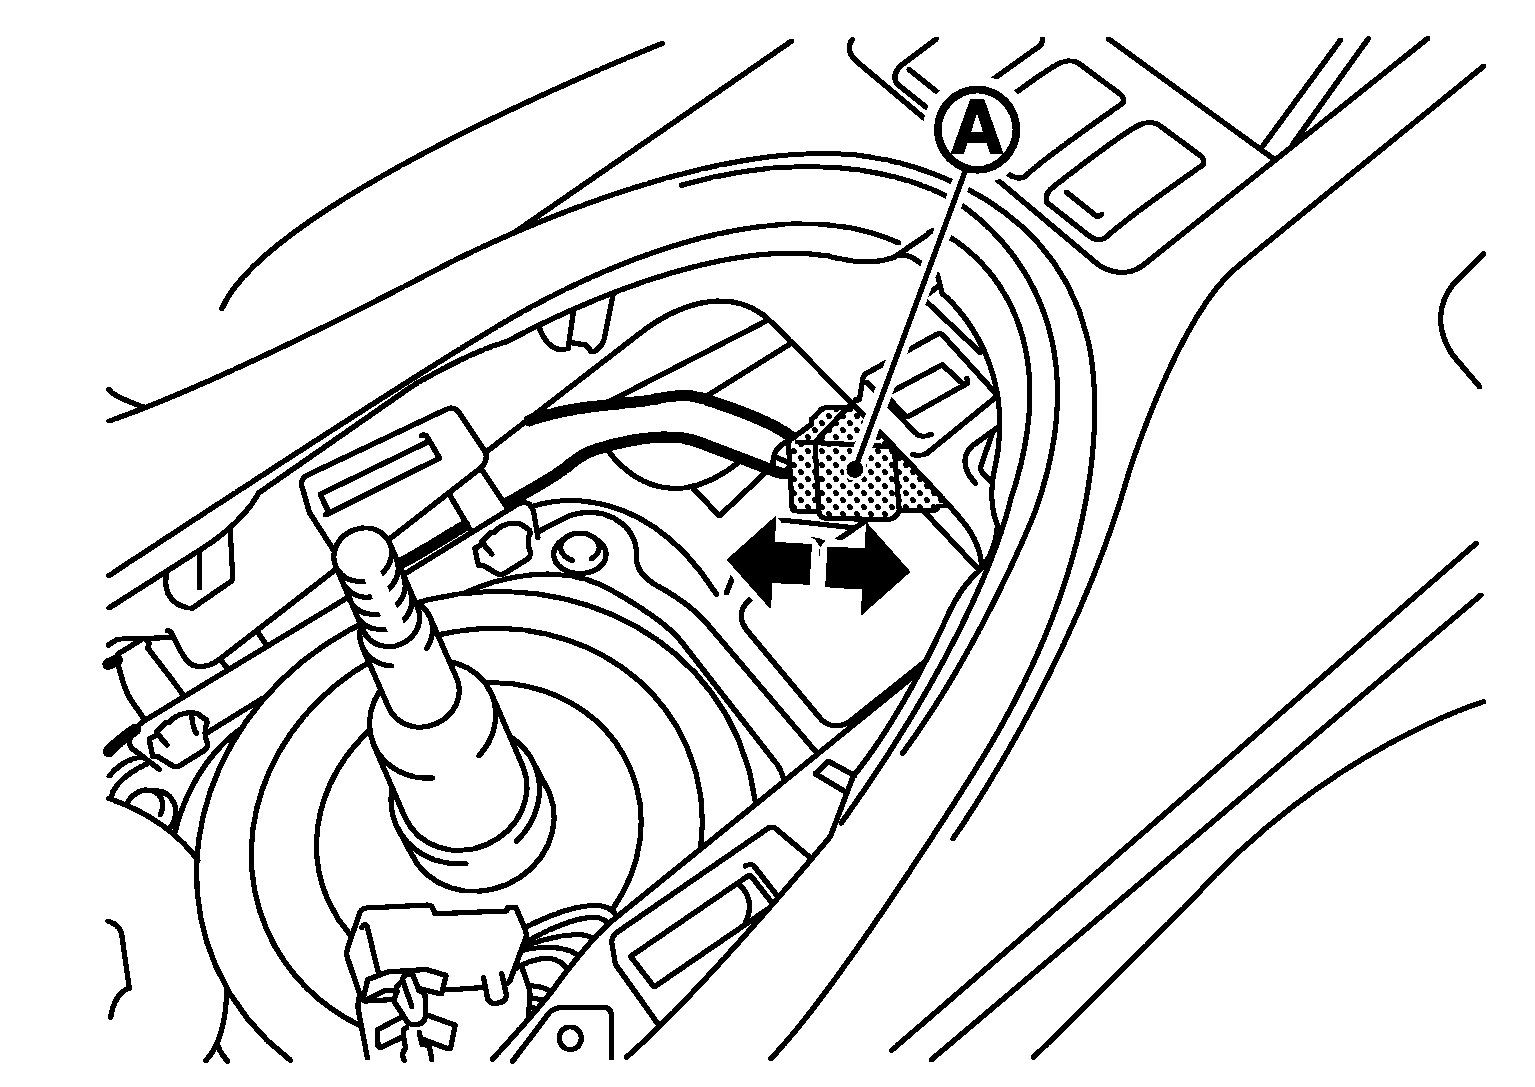 Courtesy of NISSAN MOTOR CO., U.S.A.
- Remove coin pocket fixing pawl using a remover tool (A), and then remove coin pocket (1). (MT Models only)
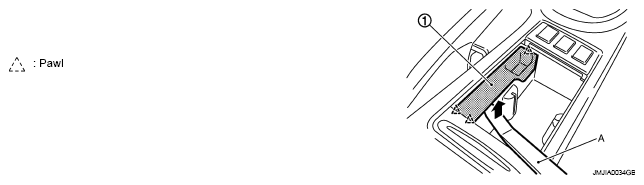 Courtesy of NISSAN MOTOR CO., U.S.A.
- Insert a deep-well socket wrench (A) to rotate adjusting nut to loosen cable sufficiently. (MT Models only) Refer to
"LEVER TYPE : INSPECTION AND ADJUSTMENT
".
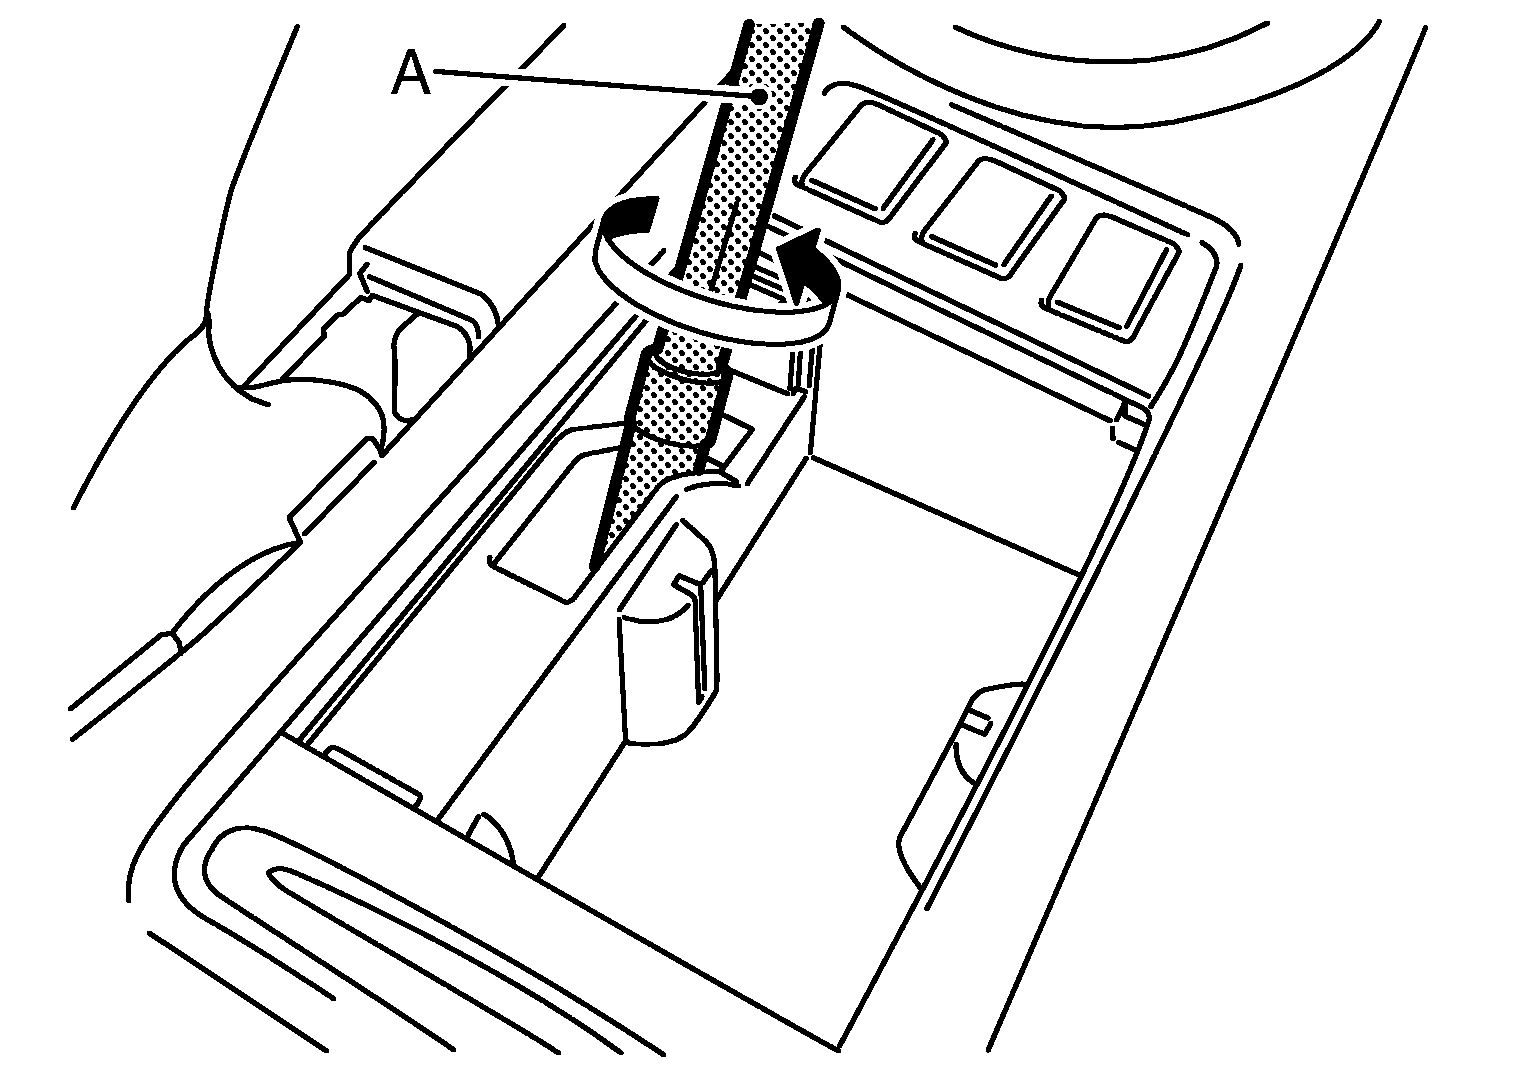 Courtesy of NISSAN MOTOR CO., U.S.A.
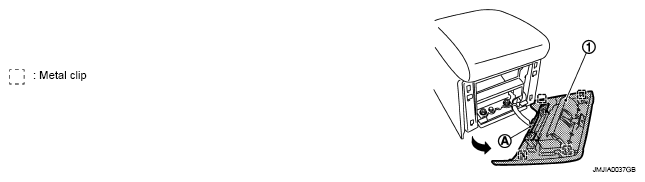
- Remove console rear finisher.
- Pull back the console rear finisher (1).
- Disconnect inside key antenna connector (A).
 Courtesy of NISSAN MOTOR CO., U.S.A.
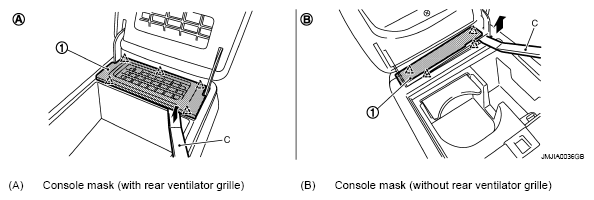
- Remove console mask.
 Courtesy of NISSAN MOTOR CO., U.S.A.
- Open the console lid.
- Pull up console mask (1) by using a remover tool (C), and disengage pawls.
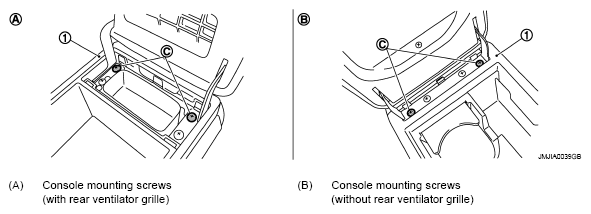
- Remove screws (C) of center console rear side, and then remove center console assembly (1).
 Courtesy of NISSAN MOTOR CO., U.S.A.