Removal and Installation of Instrument Panel & Pad: Removal
- Remove cup holder.
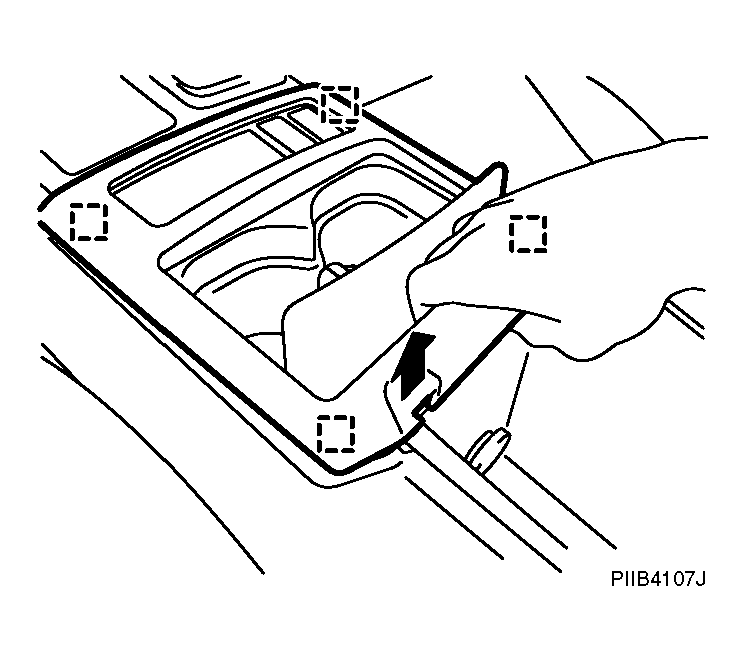 Courtesy of NISSAN MOTOR CO., U.S.A.
- Remove switch finisher.
- Disconnect harness connector.
- Remove A/T console finisher.
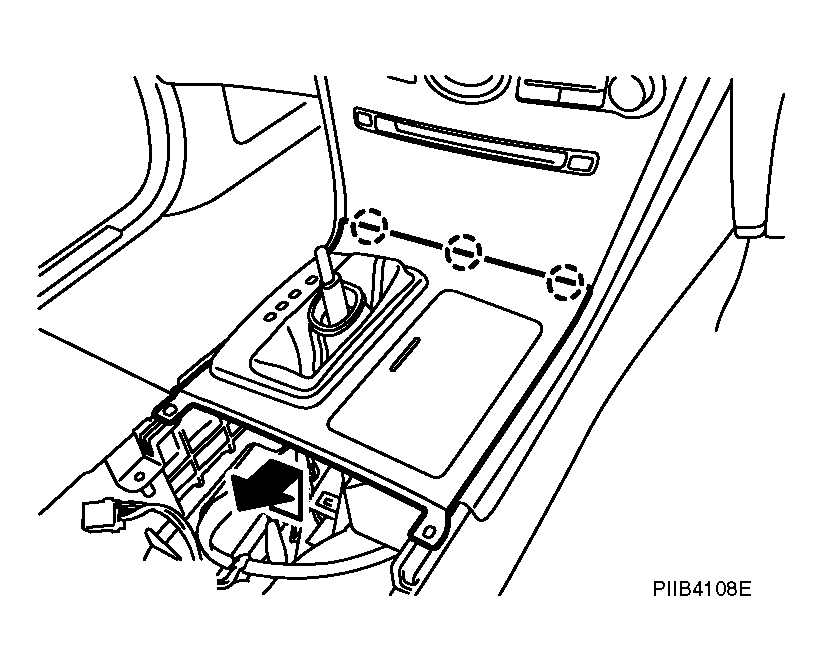 Courtesy of NISSAN MOTOR CO., U.S.A.
- Remove cluster lid C.
- Pull back.
- Disconnect harness connector.
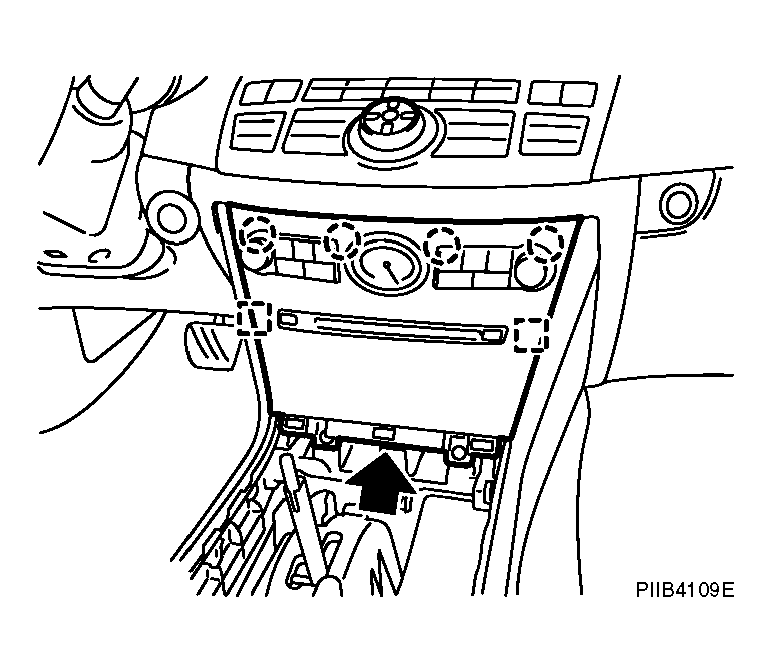 Courtesy of NISSAN MOTOR CO., U.S.A.
- Remove console rear finisher.
- Insert a remover into upper space of console rear finisher.
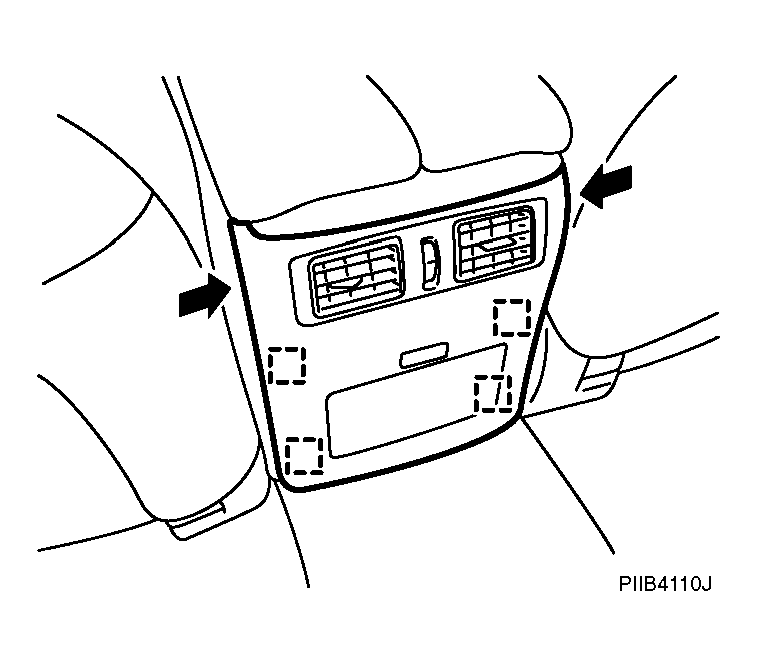 Courtesy of NISSAN MOTOR CO., U.S.A.
- Remove center console with power tool.
- Disconnect harness connector.
- Remove glove box.
- Remove damper pin to left side.
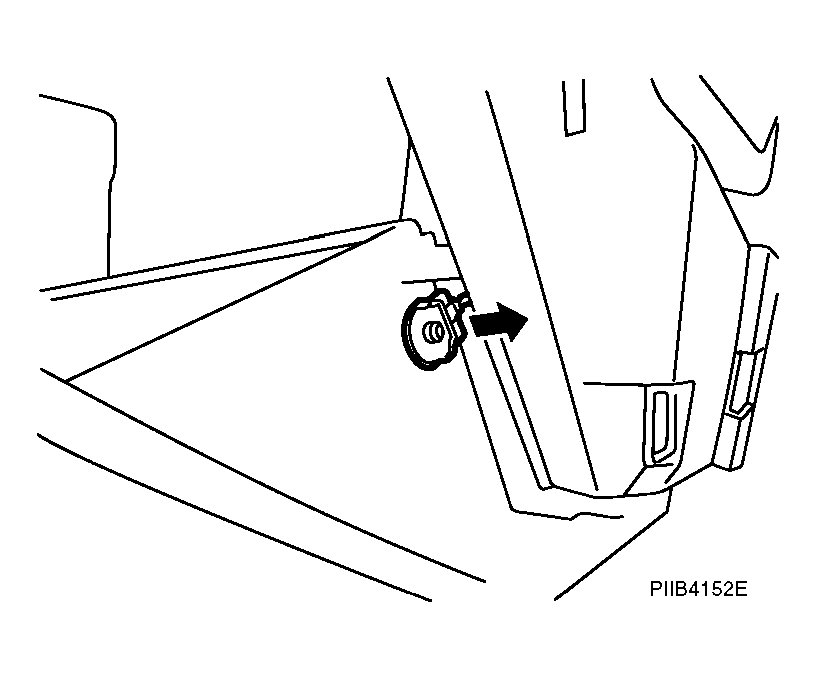 Courtesy of NISSAN MOTOR CO., U.S.A.
- Remove instrument passenger lower cover.
- Disconnect harness connector.
- Remove instrument side finisher (RH).
- Insert a remover into lower space.
- Remove glove box cover with power tool.
- Remove instrument finisher B.
- Insert a remover into right space.
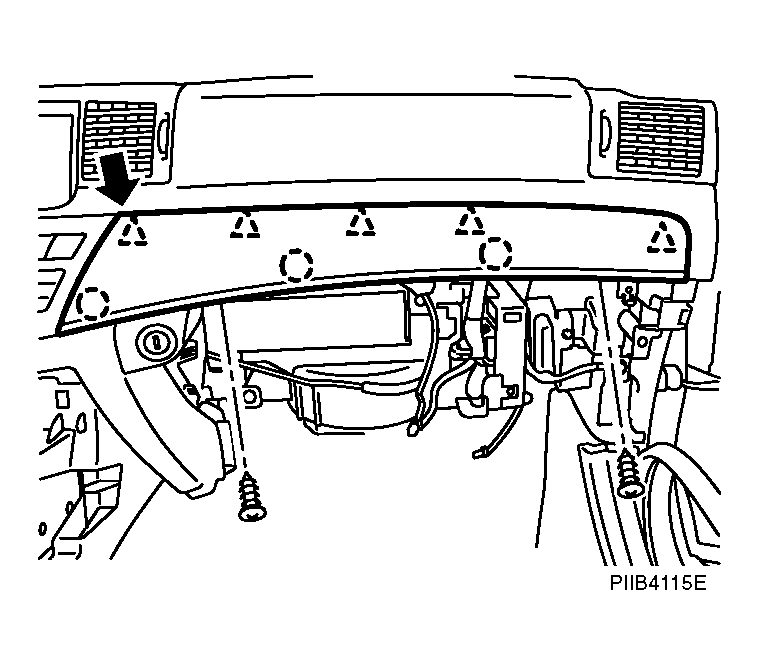 Courtesy of NISSAN MOTOR CO., U.S.A.
- Remove instrument side finisher (LH).
- Insert a remover into lower space.
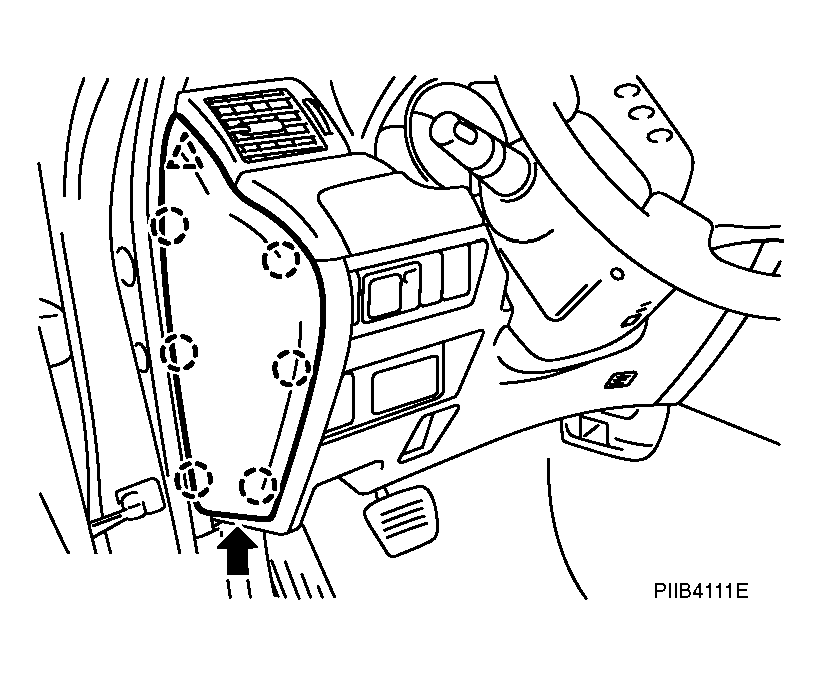 Courtesy of NISSAN MOTOR CO., U.S.A.
- Remove instrument driver lower panel.
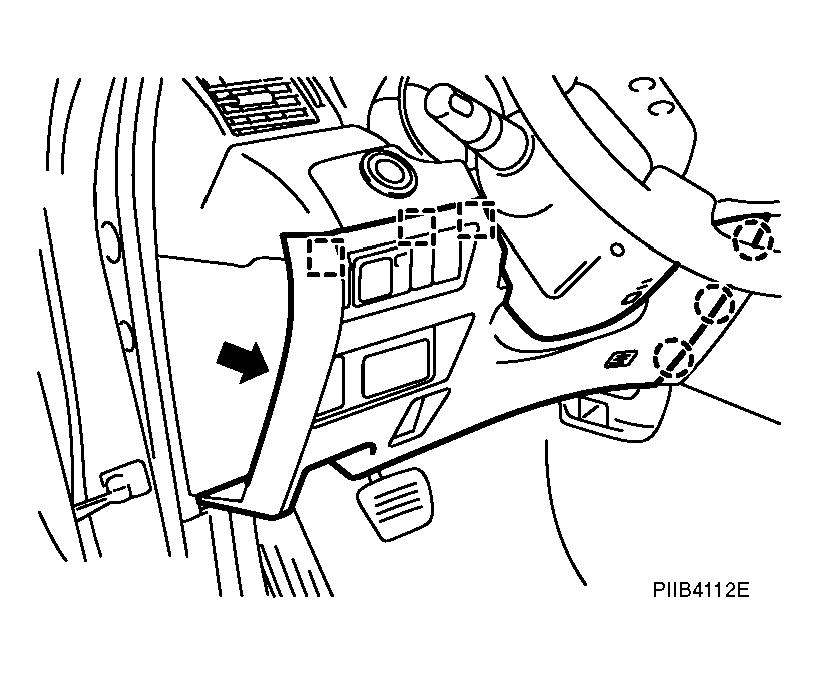 Courtesy of NISSAN MOTOR CO., U.S.A.
- Remove instrument finisher A.
- Insert a remover into upper space.
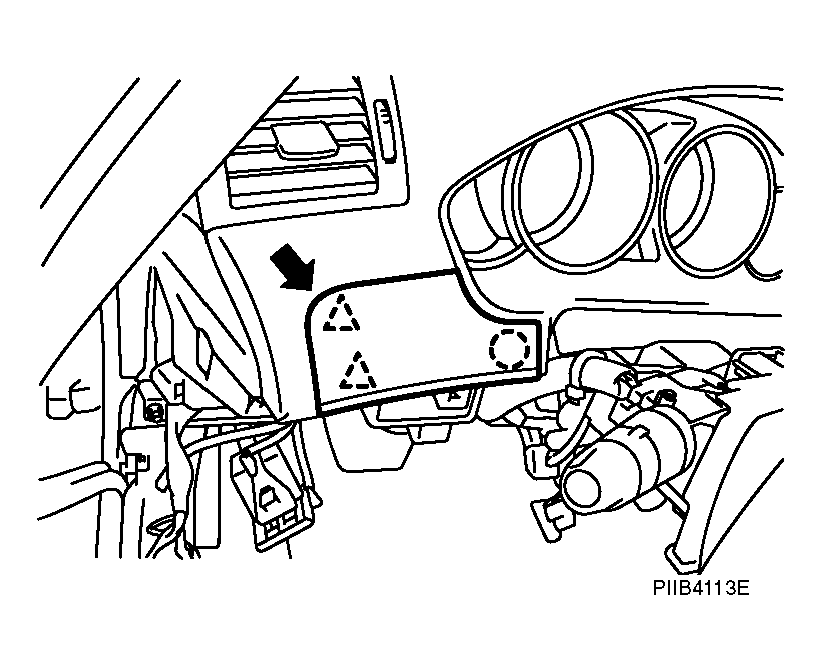 Courtesy of NISSAN MOTOR CO., U.S.A.
- Remove instrument finisher C.
- Insert a remover into upper space
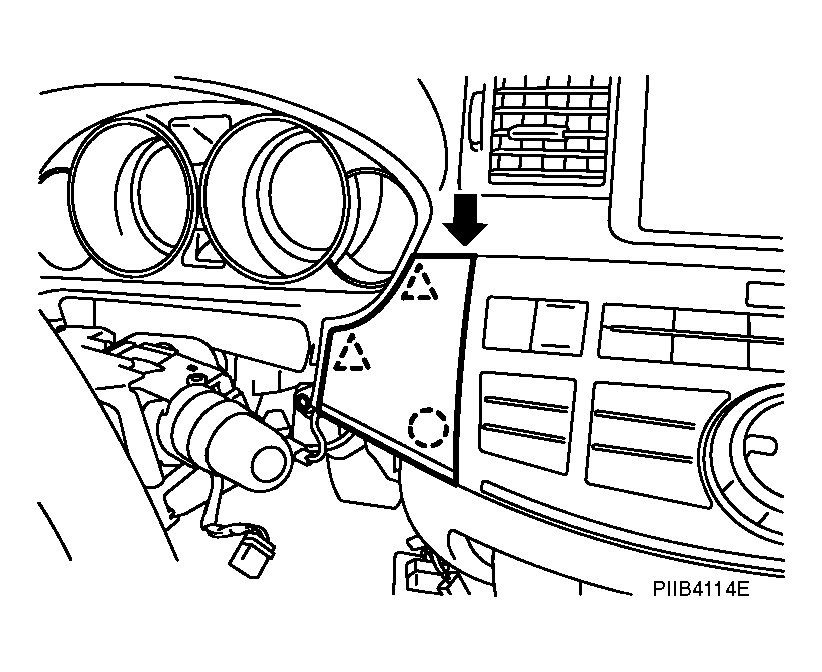 Courtesy of NISSAN MOTOR CO., U.S.A.
- Remove cluster lid A
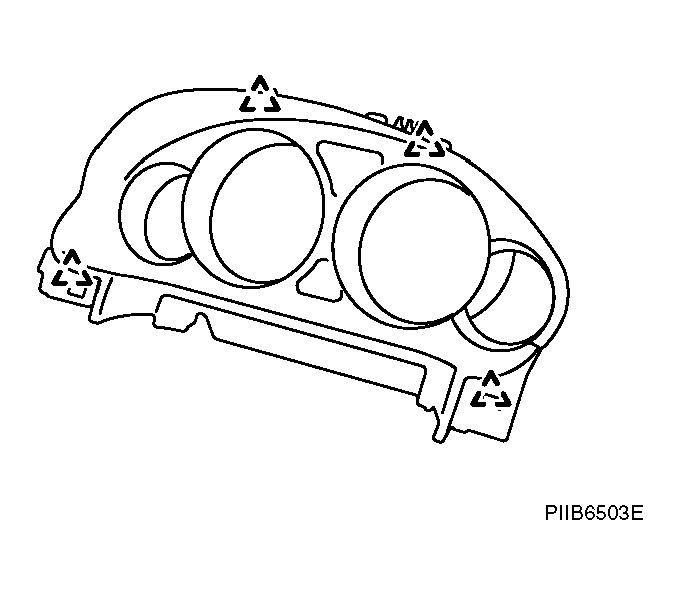 Courtesy of NISSAN MOTOR CO., U.S.A.
- Remove combination meter. Refer to
"REMOVAL AND INSTALLATION OF COMBINATION METER
".
- Remove steering column cover with power tool.
- Remove upper ventilator grille. Refer to
"DUCTS AND GRILLES
".
- Remove center ventilator grille.
- Insert a remover into rear lower space.
- Pull up.
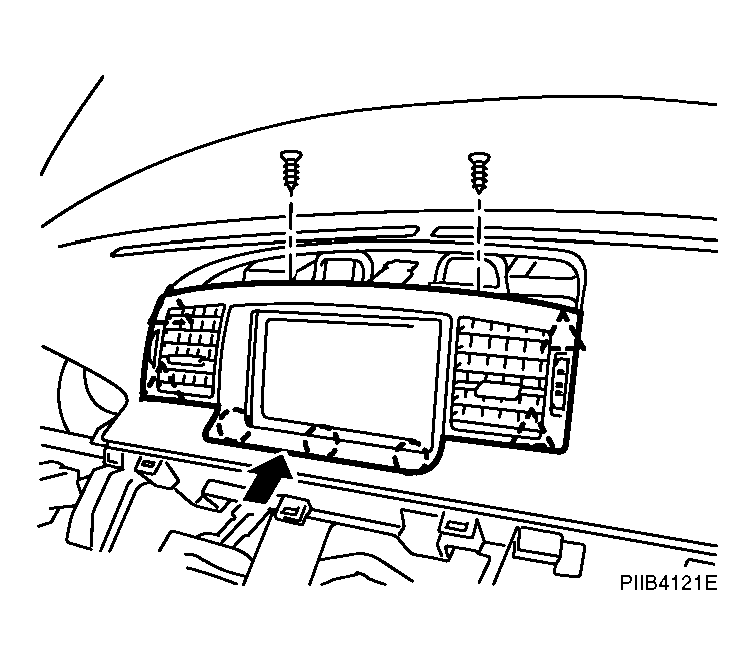 Courtesy of NISSAN MOTOR CO., U.S.A.
- Remove multifunction switch. Refer to
"MULTIFUNCTION SWITCH
".
- Remove front display unit. Refer to
"FRONT DISPLAY UNIT
".
- Remove audio assembly. Refer to
"AUDIO UNIT
".
- Remove NAVI C/U. Refer to
"AV (NAVI) CONTROL UNIT
".
- Remove side ventilator grille (RH/LH).
- Insert a remover into lower space.
- Pull back.
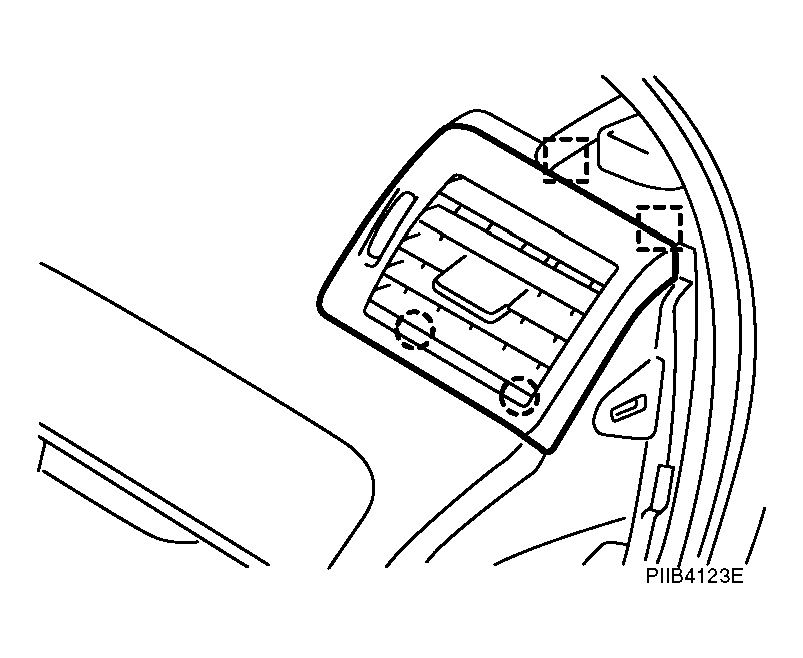 Courtesy of NISSAN MOTOR CO., U.S.A.
- Remove front defroster grille.
- Insert a remover into back space.
- Disconnect harness connector.
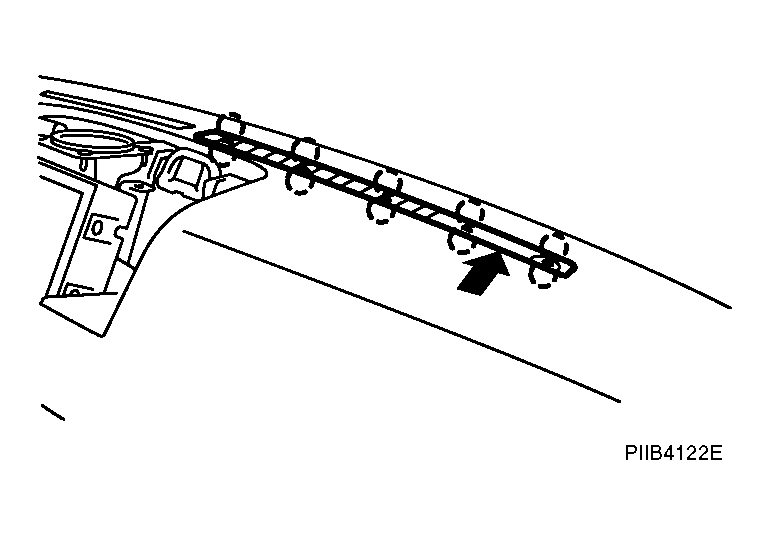 Courtesy of NISSAN MOTOR CO., U.S.A.
- Remove instrument panel & pad.