Oil Pan: Installation
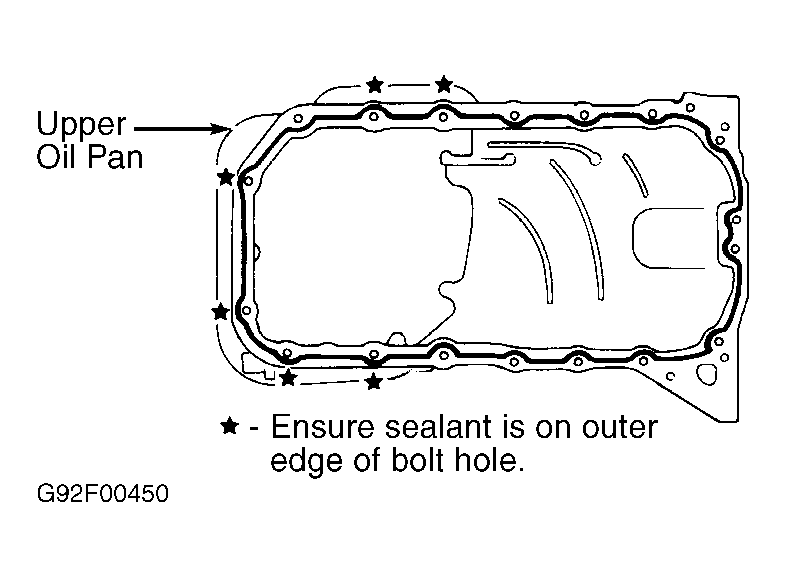
- Apply a continuous .157-.197" (3.99-5.00 mm) diameter bead of sealant to groove on upper oil pan sealing surface. Ensure sealant is positioned on outside surface of proper bolt holes. See Fig 1
.
- Install upper oil pan. Tighten retaining bolts to specification in sequence. See Figure
. Install 2 engine-to-transaxle bolts. Install retaining bolts and rear cover plate. Tighten retaining bolts to specification. See TORQUE SPECIFICATIONS
.
- Install A/C compressor retaining bolts at upper oil pan. On A/T models, reconnect shift control cable. On all models, install crossmember and baffle plate. Tighten bolts to specification. See TORQUE SPECIFICATIONS
.
- Install exhaust pipe located below oil pan. Apply a continuous.157-.197" (3.99-5.00 mm) diameter bead of sealant to groove on lower oil pan sealing surface. Ensure sealant is positioned on inside of bolt holes.
- Install lower oil pan. Tighten retaining bolts to specification in sequence. See Figure
. See TORQUE SPECIFICATIONS
. Wait at least 30 minutes, and then refill with engine oil.
 Courtesy of NISSAN MOTOR CO., U.S.A.