Testing Fuel Gauge
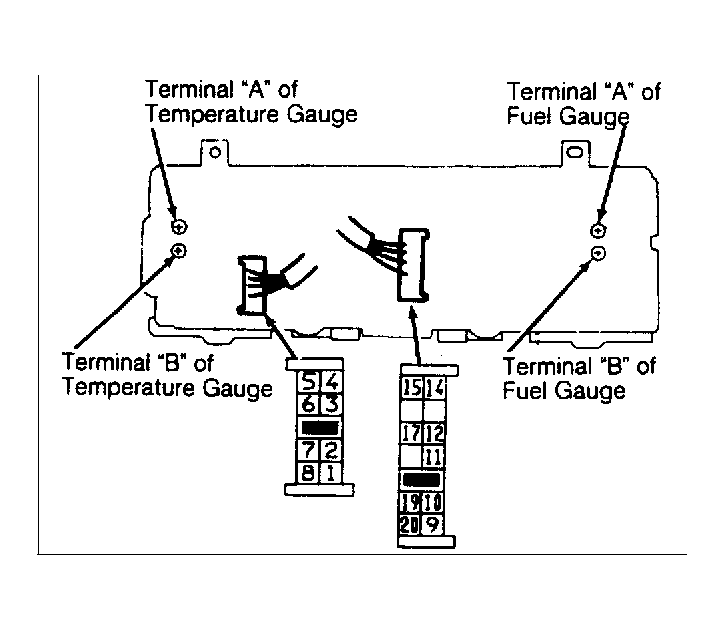
- To check power source, turn ignition switch on. Check voltage between terminal No. 9 and ground. See Fig 15
. If battery voltage is present, go to step 3).
- If battery voltage is NOT present, check for blown fuse or fusible link. Check harness continuity between battery terminal and combination meter. Check ignition relay and/or ignition switch for malfunction.
- Turn ignition switch on. Check voltage between fuel gauge terminal "B" and ground. If approximately 8 volts are present, go to step 5).
- If approximately 8 volts are NOT present, check combination meter printed circuit. If printed circuit is okay, check combination meter voltage regulator.
- Turn ignition switch on. Connect a jumper wire with a 3.4 watt light bulb between fuel gauge terminal "A" and ground for less than 10 seconds. Ensure fuel gauge moves smoothly from EMPTY to FULL.
- If fuel gauge does not move smoothly from EMPTY to FULL, replace fuel gauge. If fuel gauge moves smoothly from EMPTY to FULL, check wire harness continuity between terminal No. 15 and ground.
- If continuity does NOT exist, repair or replace wire harness between combination meter and fuel gauge unit. If continuity exists, test fuel gauge sending unit. See FUEL GAUGE SENDING UNIT.
 Courtesy of NISSAN MOTOR CO., U.S.A.
 Courtesy of NISSAN MOTOR CO., U.S.A.
 Courtesy of NISSAN MOTOR CO., U.S.A.
 Courtesy of NISSAN MOTOR CO., U.S.A.
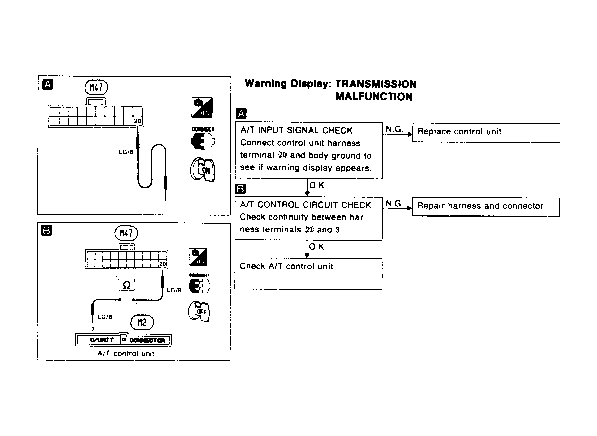 Courtesy of NISSAN MOTOR CO., U.S.A.
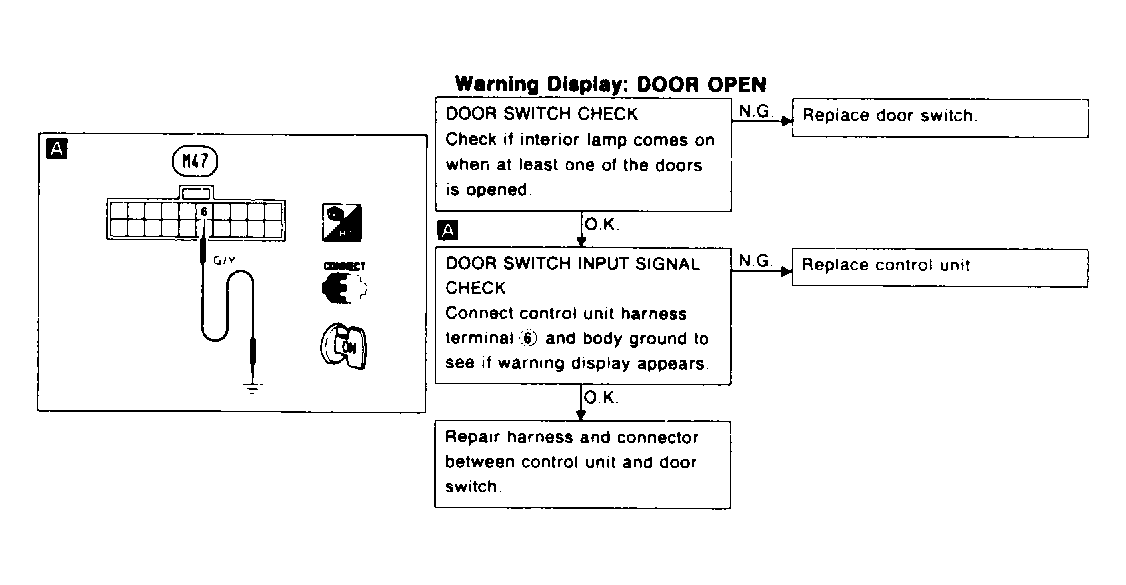 Courtesy of NISSAN MOTOR CO., U.S.A.
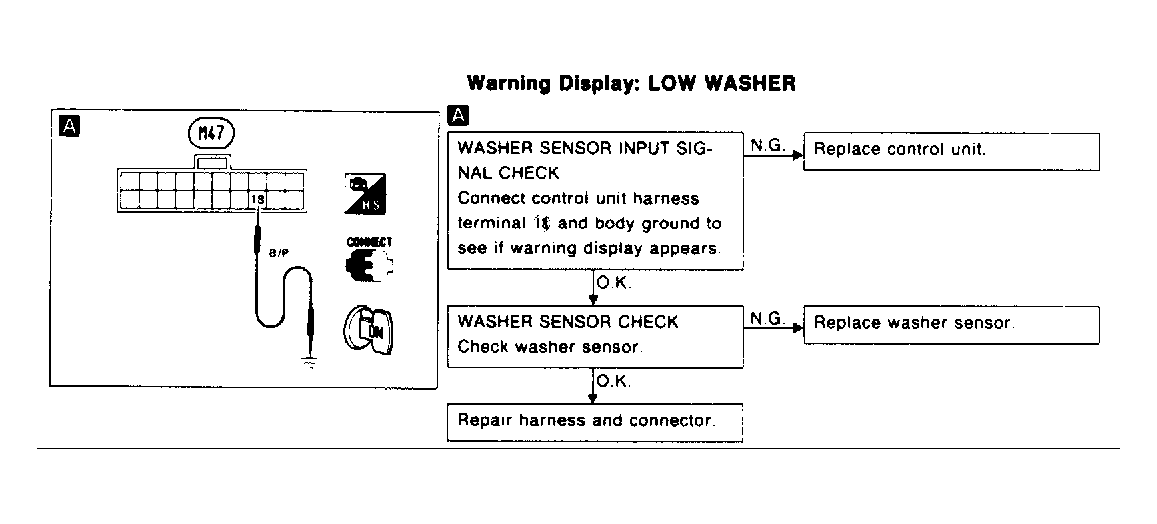 Courtesy of NISSAN MOTOR CO., U.S.A.
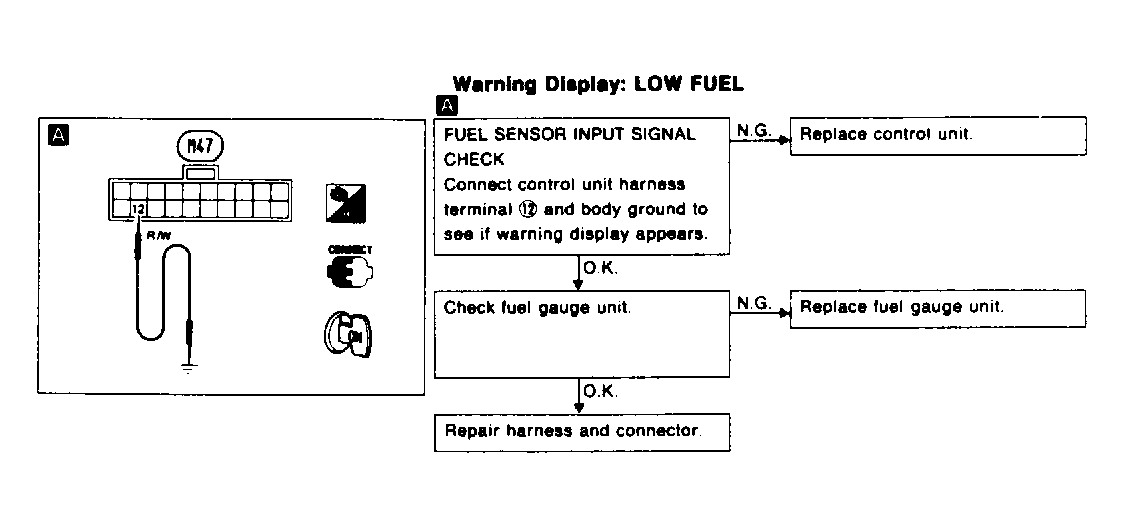 Courtesy of NISSAN MOTOR CO., U.S.A.
 Courtesy of NISSAN MOTOR CO., U.S.A.
 Courtesy of NISSAN MOTOR CO., U.S.A.
 Courtesy of NISSAN MOTOR CO., U.S.A.
 Courtesy of NISSAN MOTOR CO., U.S.A.
 Courtesy of NISSAN MOTOR CO., U.S.A.
 Courtesy of NISSAN MOTOR CO., U.S.A.
 Courtesy of NISSAN MOTOR CO., U.S.A.
- If battery voltage is NOT present, check for blown fuse or fusible link. Check harness continuity between battery terminal and combination meter. Check ignition relay and/or ignition switch for malfunction.
- Turn ignition switch on. Connect a jumper wire with a 3.4 watt light bulb between fuel gauge terminal "B" and ground for less than 10 seconds. Ensure fuel gauge moves smoothly from EMPTY to FULL.
- If fuel gauge does not move smoothly from EMPTY to FULL, replace fuel gauge. If fuel gauge moves smoothly from EMPTY to FULL, check wire harness continuity between terminal No. 28 and ground.
- If continuity does NOT exist, repair or replace wire harness between combination meter and fuel gauge unit. If continuity exists, test fuel gauge sending unit. See FUEL GAUGE SENDING UNIT.