Rear Door Panel: Service and Repair
REPLACEMENTREAR DOOR TRIM REPLACEMENT
NOTE:
- Take care not to scratch the door trim and other parts.
- Put on gloves to protect your hands.
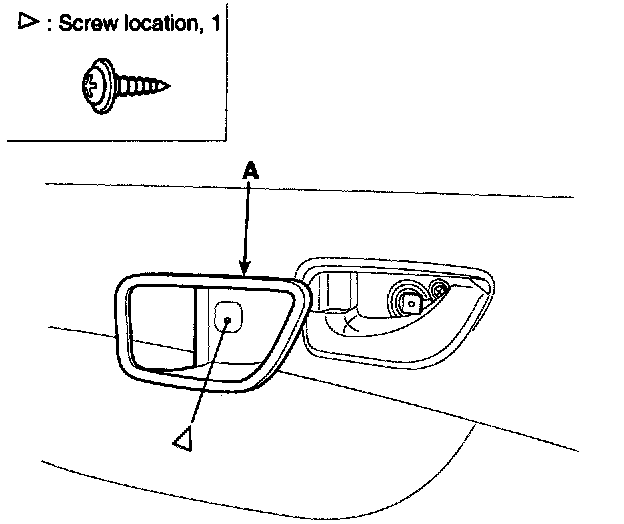
1. Remove the inside handle cover (A).
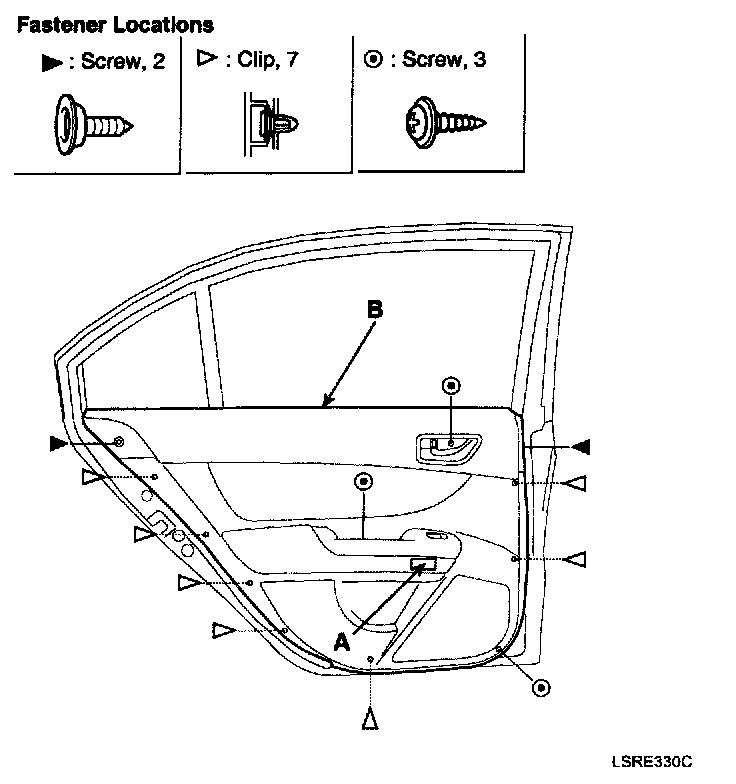
2. Loosen the door trim (B) mounting screws. Release the clips that hold the door trim, then remove the door trim by pulling it upward. Disconnect the power window switch connector(A).
3. Installation is the reverse of removal.
NOTE:
- Make sure the connectors are plugged in properly and each rod is connected securely
- Make sure the door lock and opens properly
GLASS REPLACEMENT
NOTE: Put on gloves to protect your hands.
1. Remove the rear door trim.
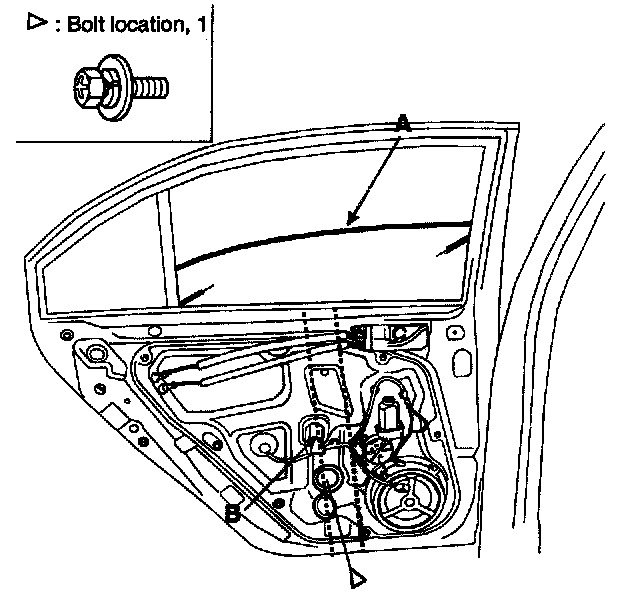
2. Carefully move the glass (A) until you can see the bolts, then loosen them. Separate the glass from the glass run and carefully pull the glass out through the window slot (B).
CAUTION: Take care not to drop to glass and scratch the glass surface.
3. Installation is the reverse of removal.
NOTE:
- Roll the glass up and down to see if it moves freely without binding.
- Adjust the position of the glass as necessary.
POWER WINDOW MOTOR REPLACEMENT
1. Remove the rear door trim.
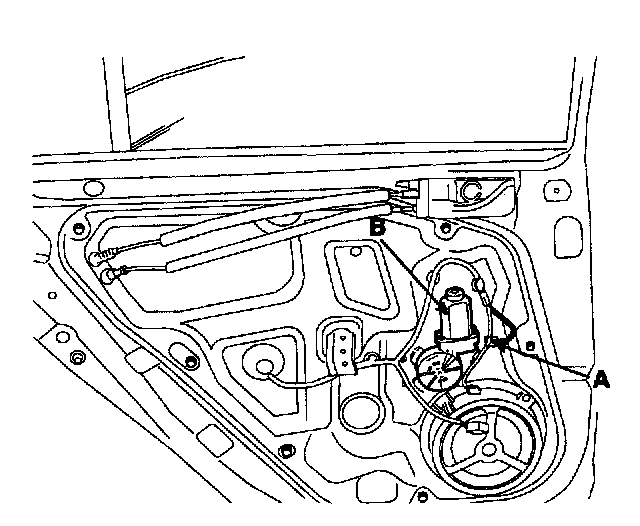
2. After disconnecting the connector (A), remove the power window motor(B).
3. Installation is the reverse of removal.
NOTE: Roll the glass up and down to see if it moves freely without binding.
OUT SIDE HANDLE REPLACEMENT
1. Remove the rear door trim.
2. Remove the glass.
3. Remove inside handle.
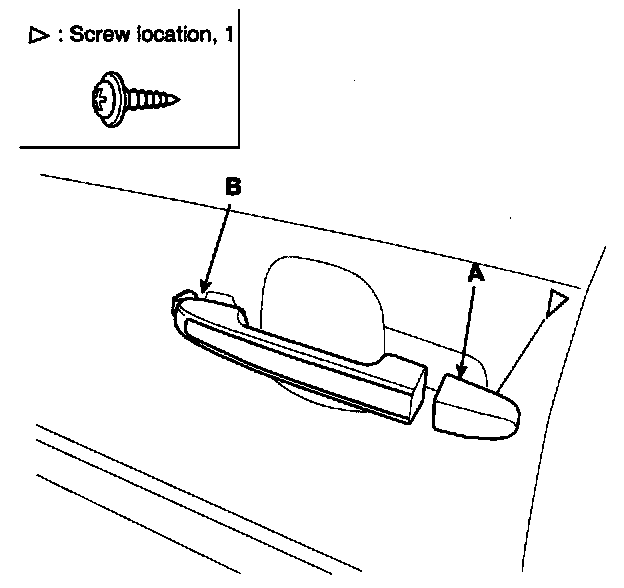
4. After disconnecting the cover (A), remove the outside handle base(B).
5. Remove rear door module.
6. Installation is the reverse of removal.
REAR DOOR LATCH REPLACEMENT
1. Remove the rear door trim.
2. Remove the glass.
3. Remove the inside handle.
4. Remove the door module.
5. Remove the outside handle.
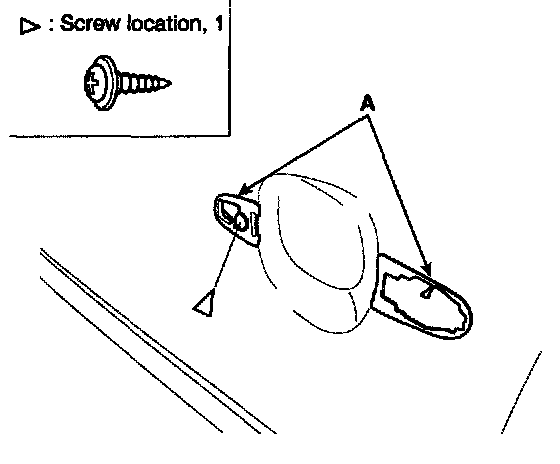
6. Remove the outside handle pad (A).
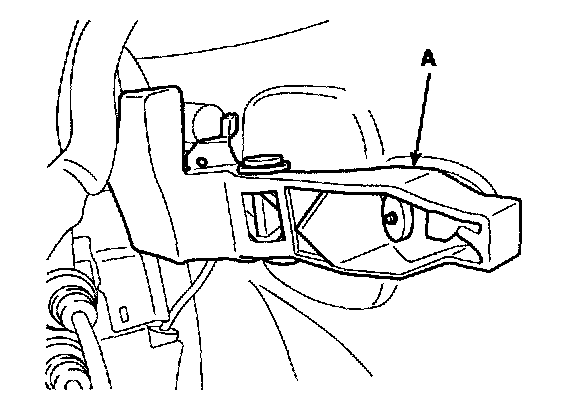
7. Remove the outside handle base (A).
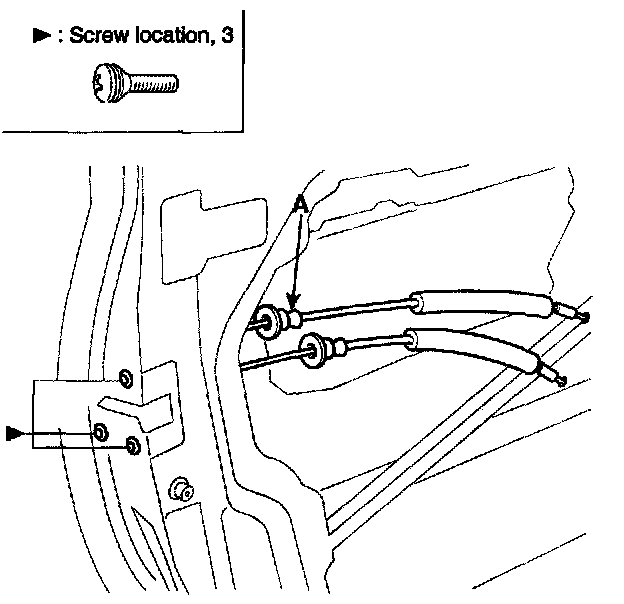
8. After loosening the latch mounting bolts, remove the rear door latch(A).
9. Installation is the reverse the removal.
NOTE: Make sure the door locks and opens properly
REAR DOOR MODULE REPLACEMENT
1. Remove the rear door trim.
2. Remove the glass.
3. Remove the inside handle.
4. Remove the outside handle.
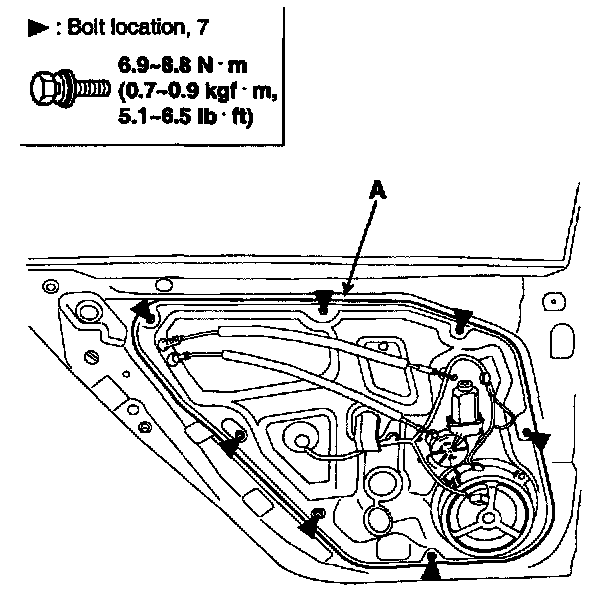
5. After loose the door module mounting bolts, remove the door module (A).
6. Installation is the reverse of removal.
NOTE:
- Make sure the connector is plugged in properly and each rod is connected securely
- Make sure the door locks and opens properly
INSIDE HANDLE REPLACEMENT
1. Remove the rear door trim.
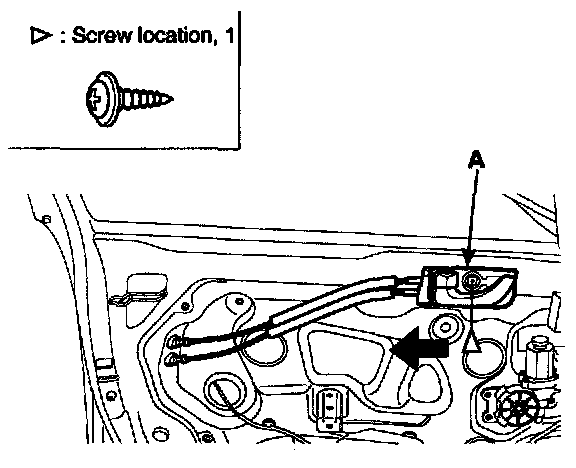
2. Loose the inside handle (A) mounting screw. Push the inside handle rearward to disconnect from the door module.
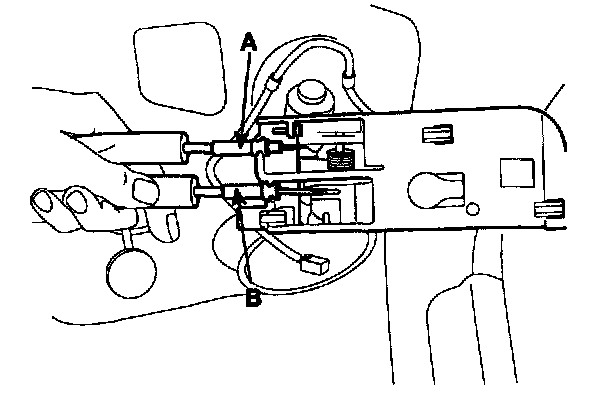
3. Disconnect the lock cable and (A) inside connect cable (B).
4. Installation is the reverse of removal.
NOTE: Make sure the door locks and opens properly
DOOR BELT WEATHERSTRIP REPLACEMENT
1. Remove the rear door trim.
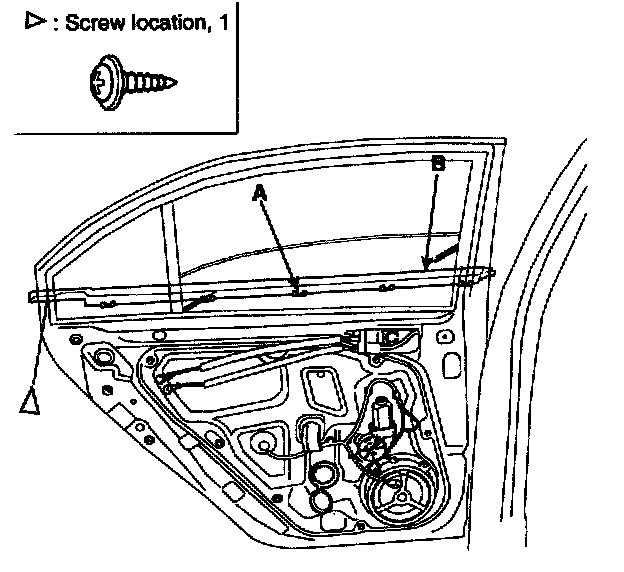
2. Release the hook (A), and then remove the door belt weatherstrip (B).
3. Installation is the reverse of removal.
GLASS RUN REPLACEMENT
1. Remove the rear door trim.
2. Remove the glass.
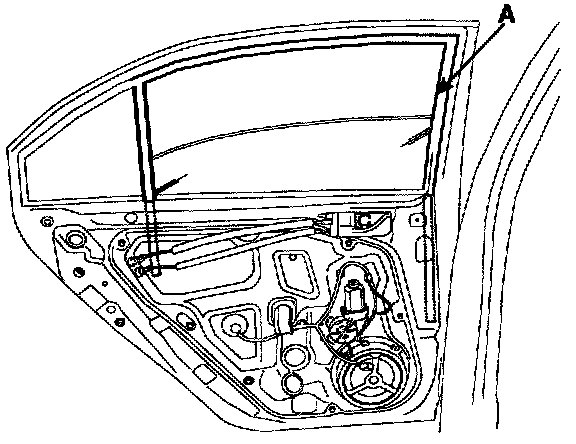
3. Remove the glass run channel (A) front the lower part.
4. Installation is the reverse of removal.
BODY WEATHERSTRIP REPLACEMENT
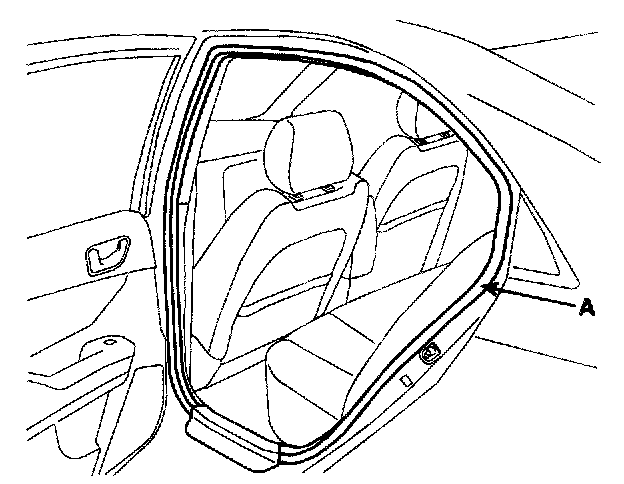
1. Release the clips then remove the body weatherstrip (A).
2. Installation is the reverse of removal.