Front Driveshaft (Glaenzer Interior-Angular Contact)
FRONT DRIVESHAFT (GLAENZER INTERIOR-ANGULAR CONTACT)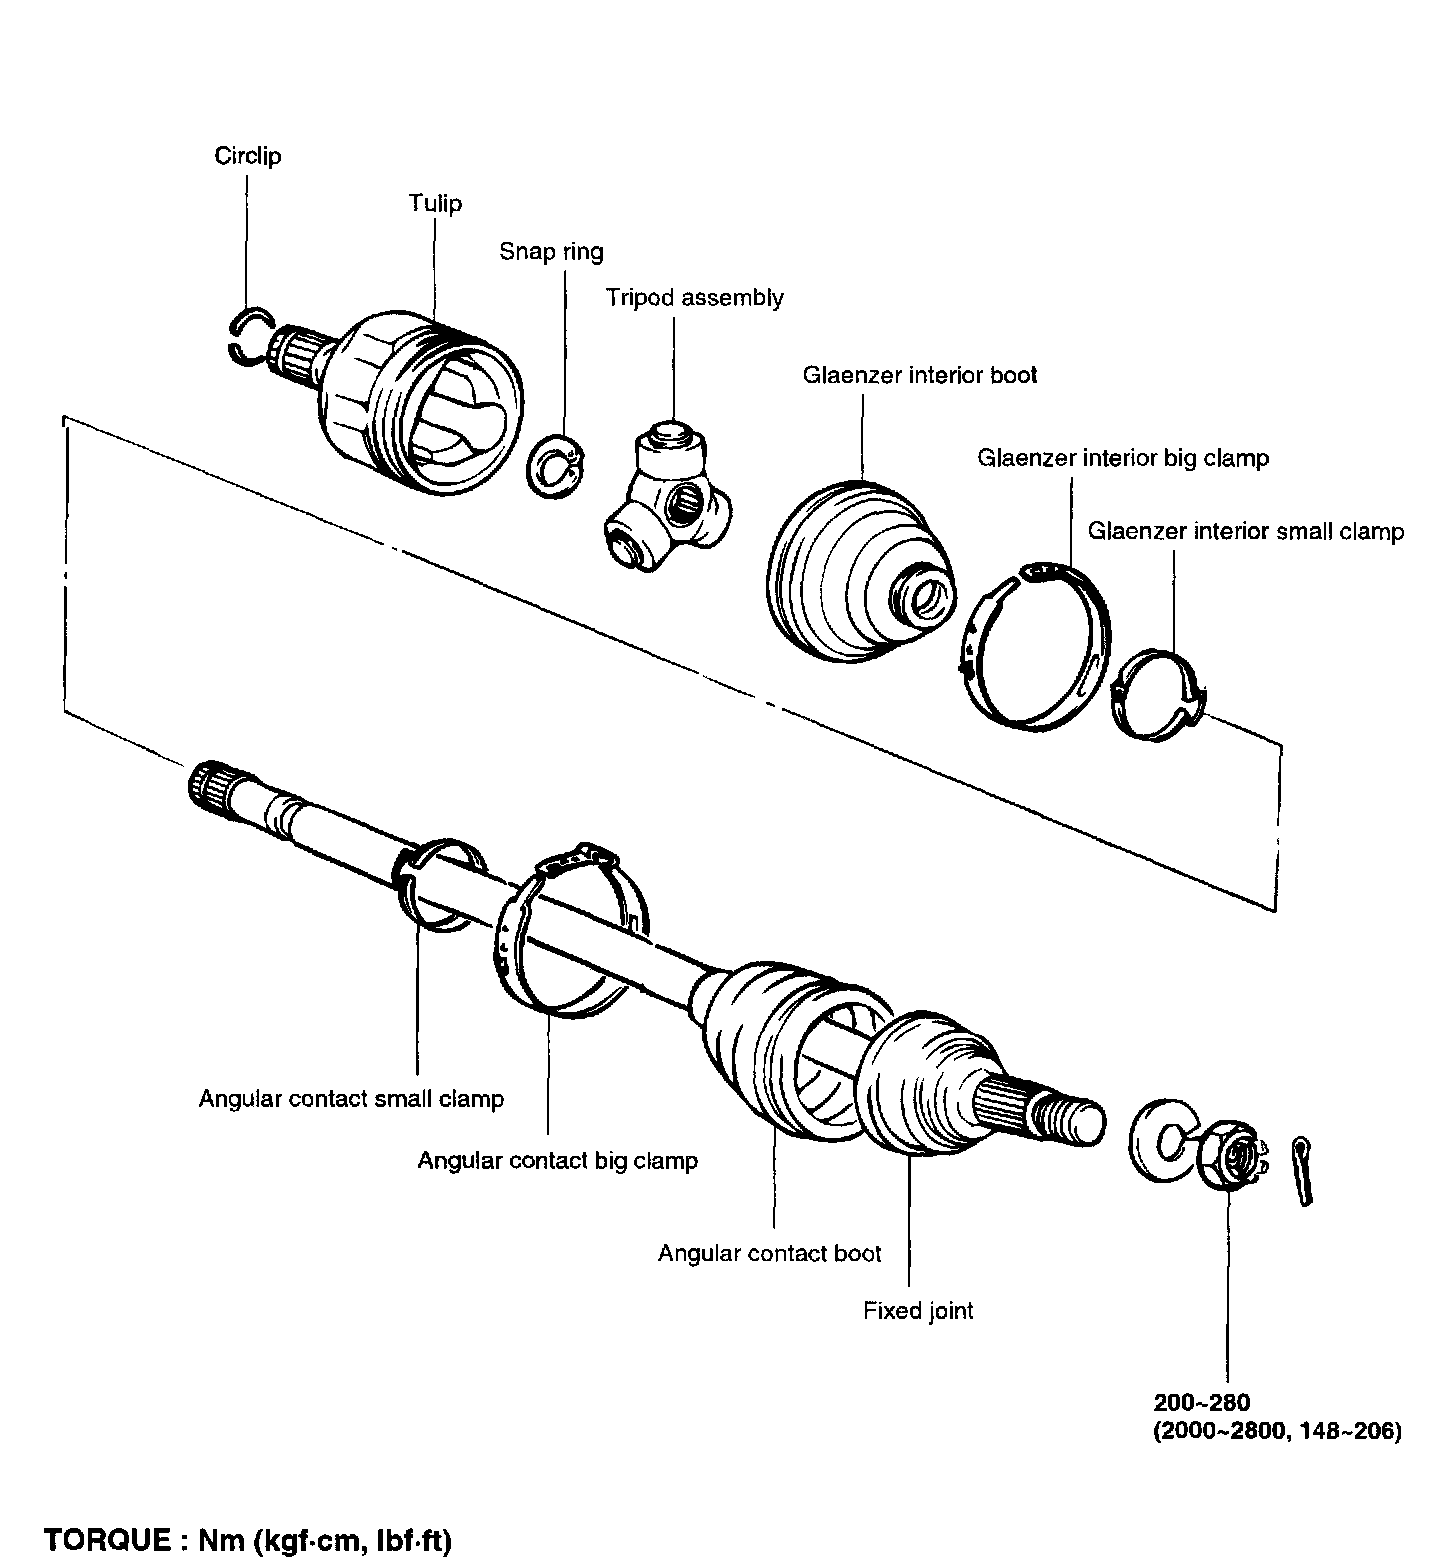
COMPONENTS
DISASSEMBLY
NOTE:
^ Do not disassemble the tripod assembly.
^ The driveshaft joint requires special grease. Do not substitute another type of grease for it.
^ The boot clamp should be replaced with a new one.
^ The boot should be replaced with a new one.
1. Using a side cutter, cut the glaenzer interior type joint and angular contact type joint big clamps and remove them.
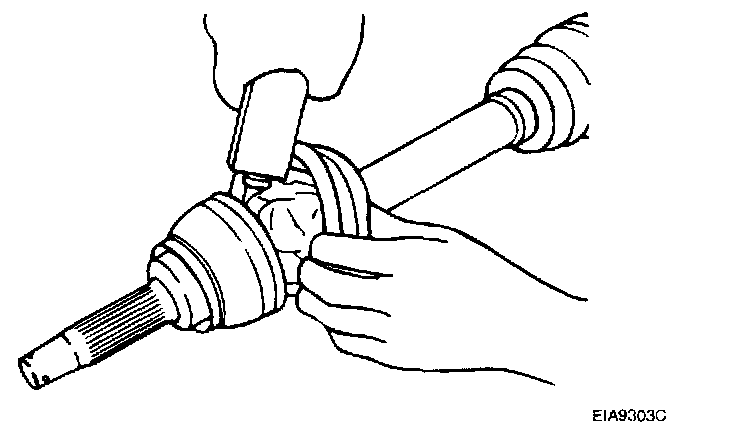
2. Using a brass bar and hammer, remove the glaenzer interior type joint and angular contact type joint small clamps.
3. Place marks on the tripod and the tulip.
NOTE: Do not punch the mark.
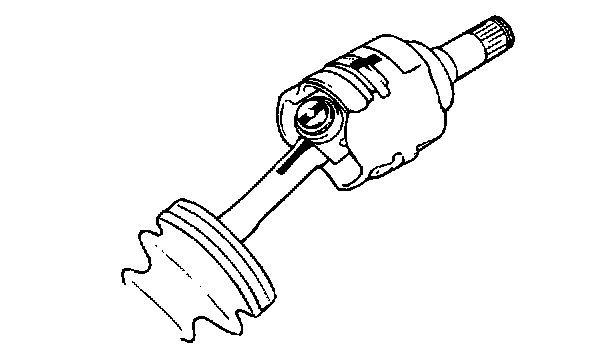
4. Remove the tulip assembly from the driveshaft.
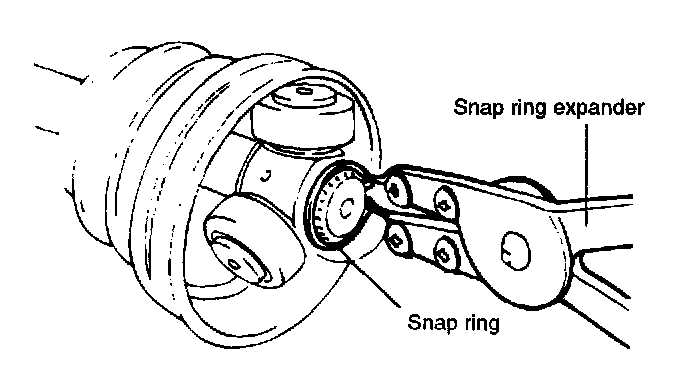
5. Using a snap ring expander, remove the snap ring.
6. Place marks on the tripod and the joint shaft.
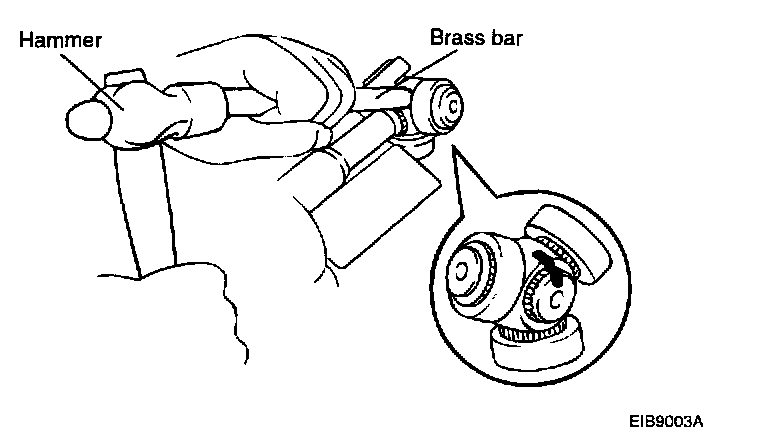
7. Using a brass bar and hammer, remove the tripod from the joint shaft.
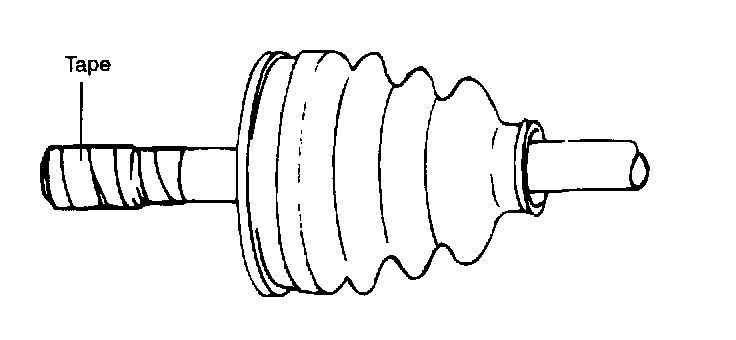
8. Remove the angular contact type joint boot clamps and pull out the glaenzer interior type joint boot and angular contact type joint boot.
INSPECTION
1. Check the driveshaft spline part for wear or damage.
2. Check for inflow of water or foreign material into a angular contact type joint.
3. Check the tripod assembly for roller rotation, wear or corrosion.
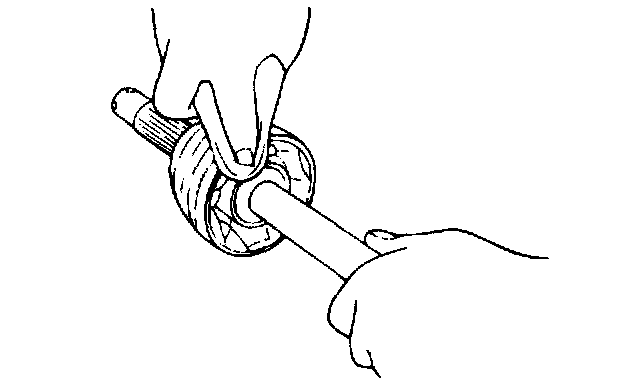
4. Check the groove inside tulip for wear or corrosion.
REASSEMBLY
1. Wrap a tape around the driveshaft splines (Glaenzer interior type joint side) to prevent the boots from being damaged.
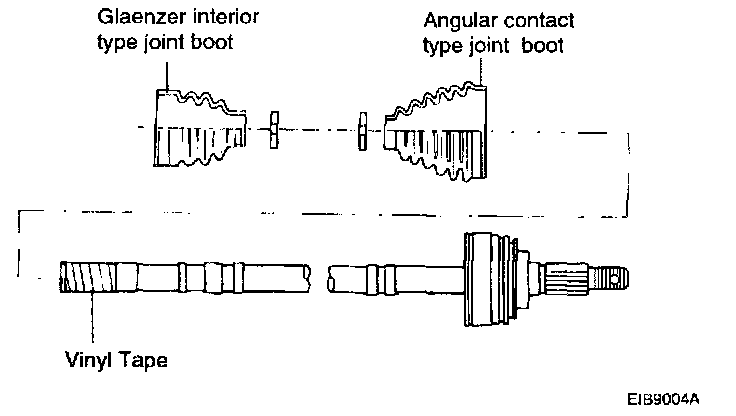
2. Before installing the boots, place a new clamps to the small boot ends and install them to the driveshaft.
3. After aligning the marks, place the beveled side of the tripod axial spline toward the angular contact type joint.
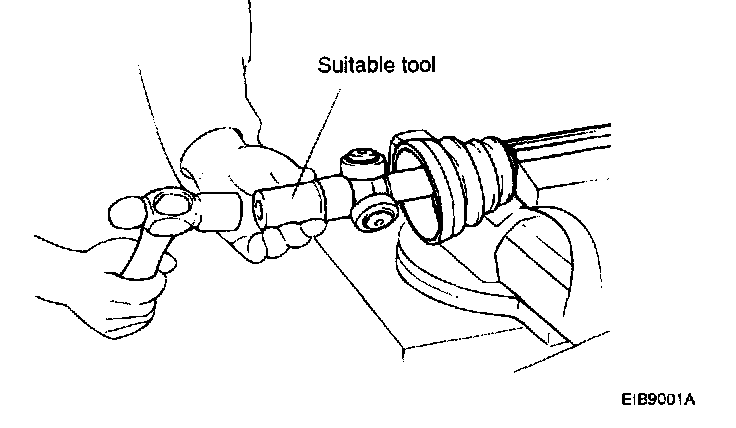
4. Using suitable tool and hammer, tap the tripod in the driveshaft.
5. Install the new snap ring.
6. Add specified grease to the angular contact type joint and boot, as much as was removed at the time of inspection.
7. Apply specified grease to the glaenzer interior type joint and boot.
8. Align the marks and install the glaenzer interior type joint to the shaft.
9. Install the boots.
NOTE:
^ Make sure that the 2 boots are on the shaft groove.
^ Make sure that the 2 boots are not stretched.
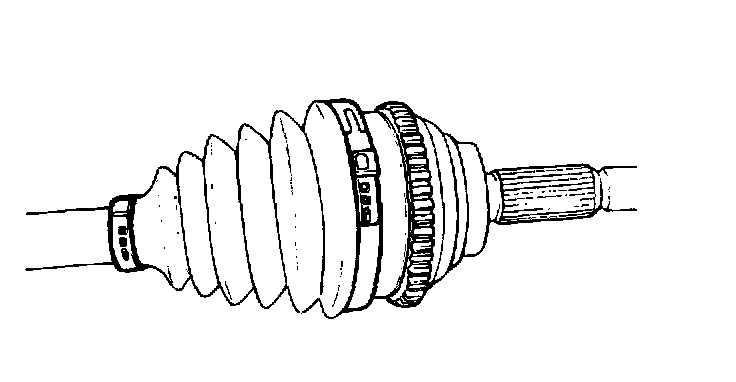
10. Position the holes in the clamp's free end to the closing hooks.
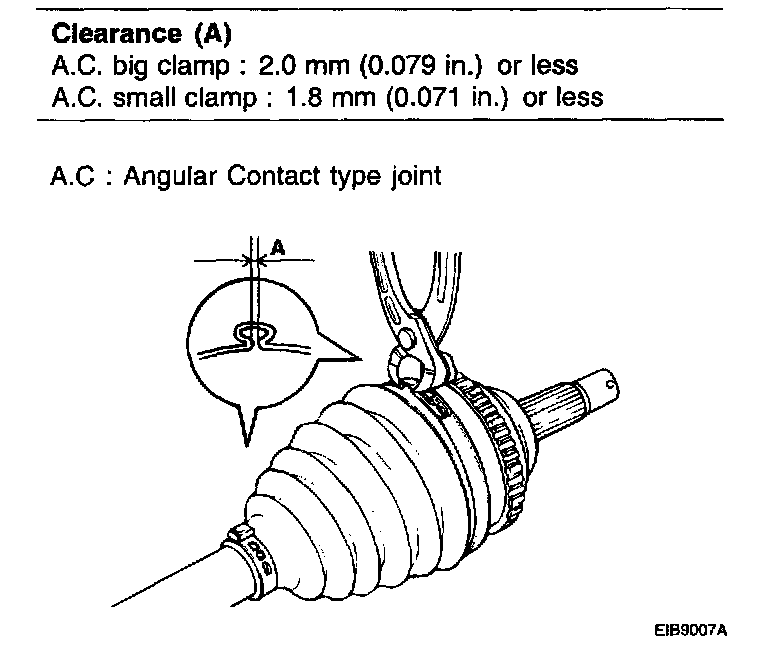
11. Using pliers, secure the clamps.
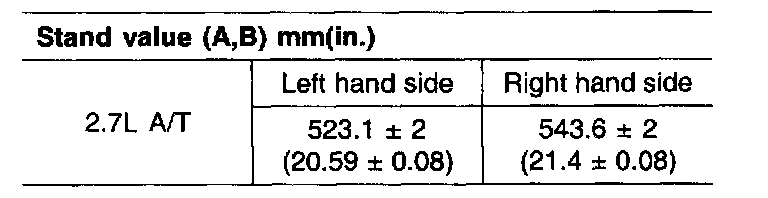
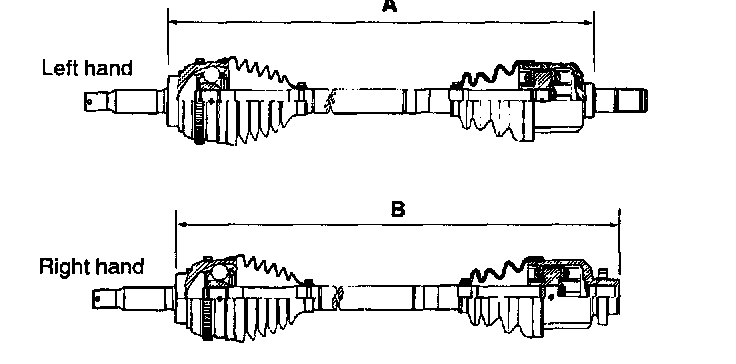
12. To control the air in the glaenzer interior type joint boot, keep the specified distance between the boot clamps when they are tightened.
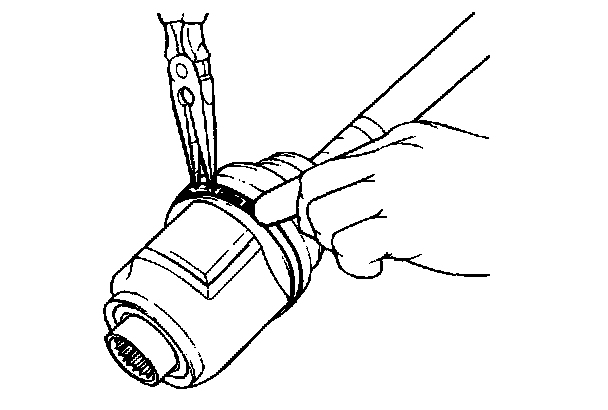
13. Holding the glaenzer interior type joint big clamp near the closing hook with long noise pliers, position the hole in the clamps free end over the closing hook.
14. Secure the clamp by drawing the closing hooks together.
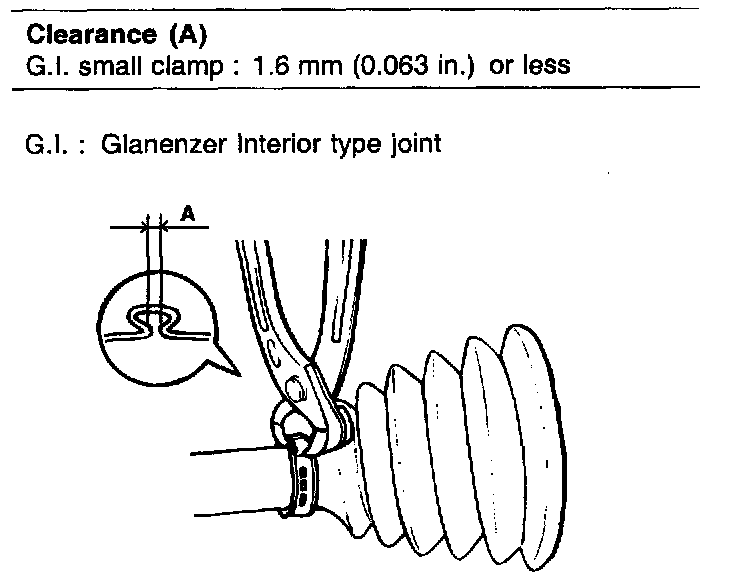
15. Using pliers, secure the glaenzer interior type joint small clamp.