Auxiliary Heater Pipe Replacement - Rear
Auxiliary Heater Pipe Replacement - Rear
Removal Procedure
1. Drain the engine coolant. Refer to Cooling System Draining and Filling (Vac-N-Fill) (Service and Repair)Cooling System Draining and Filling (Static Fill) (Service and Repair).
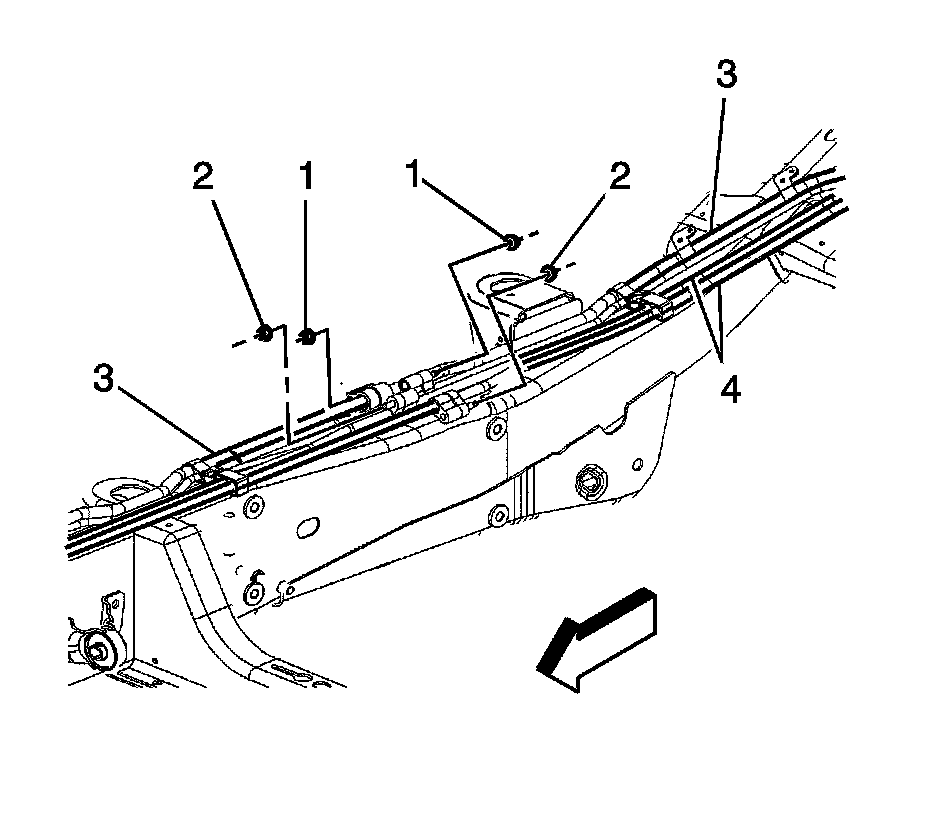
2. Raise the vehicle. Refer to Lifting and Jacking the Vehicle (Service and Repair).
3. Remove the right assist step if necessary. Refer to Assist Step Replacement (Tubular BVE) (Assist Step Replacement (Tubular BVE))Assist Step Replacement (w/WS2, BVX) (Assist Step Replacement (w/WS2, BVX)).
4. Remove the rear wheelhouse liner. Refer to Wheelhouse Panel Replacement (Service and Repair).
5. Remove the auxiliary heater tubes connector nuts (2) from the intermediate connection point.
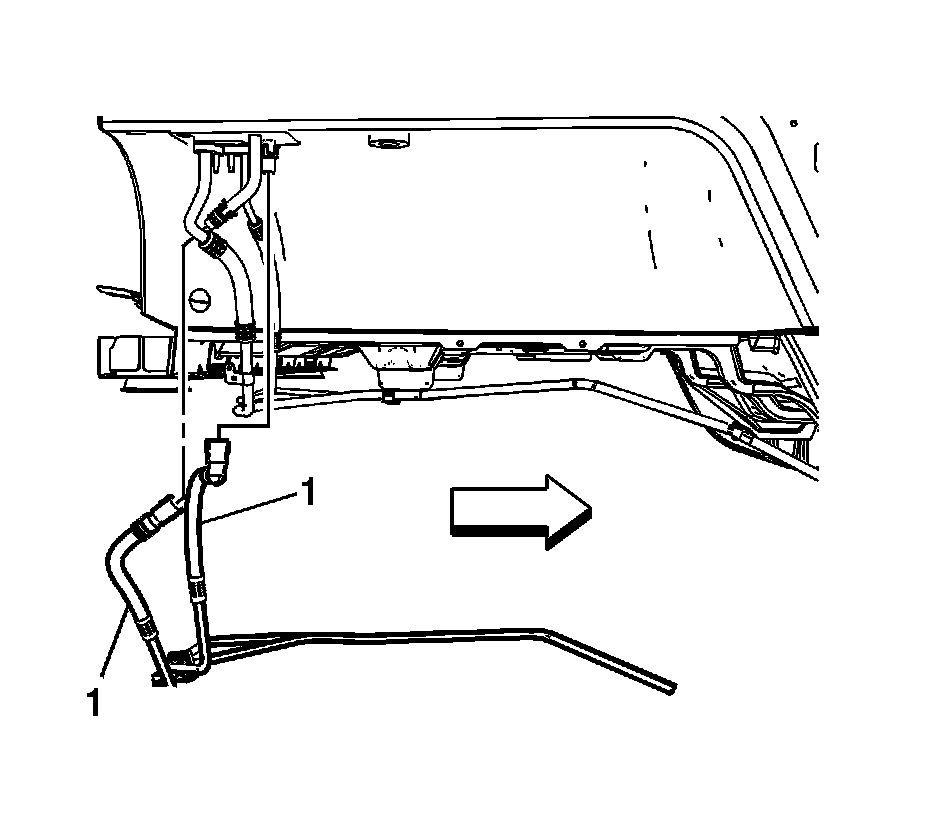
6. Pinch the tabs together at auxiliary HVAC module fittings to remove the auxiliary heater tubes (1).
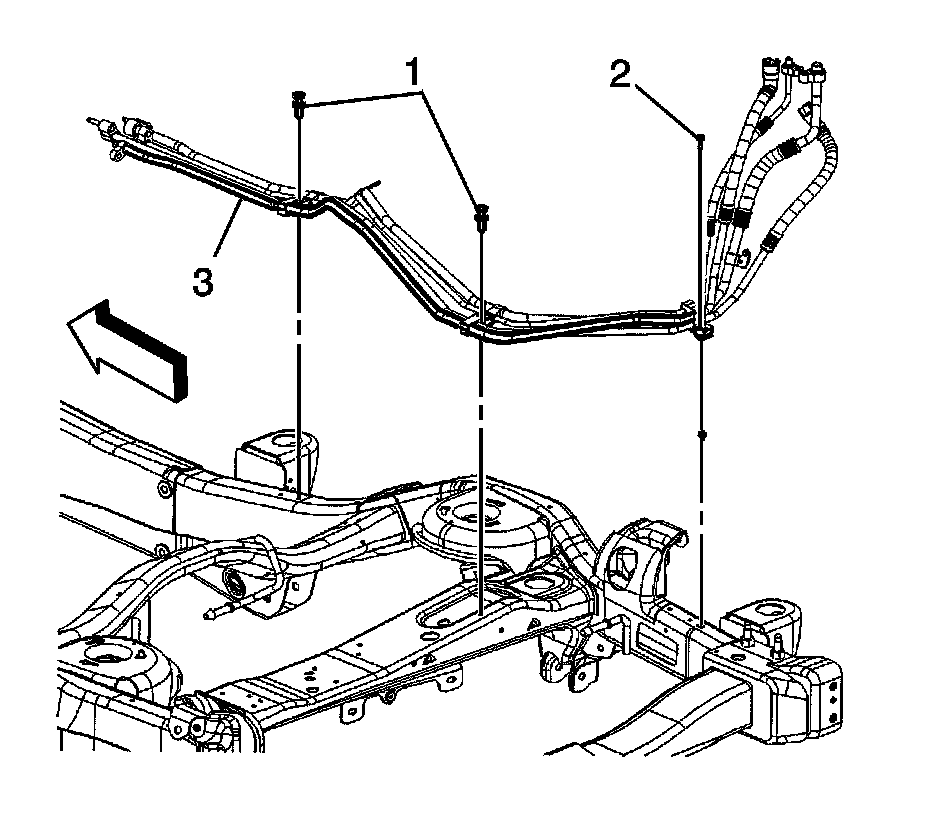
7. Remove the heater tubes retaining push pins (1) at the frame locations.
8. Remove the heater tubes retaining bolt (2) at the frame location.
9. Remove the auxiliary heater tubes (3) from the frame.
10. Remove the auxiliary heater tubes from the vehicle.
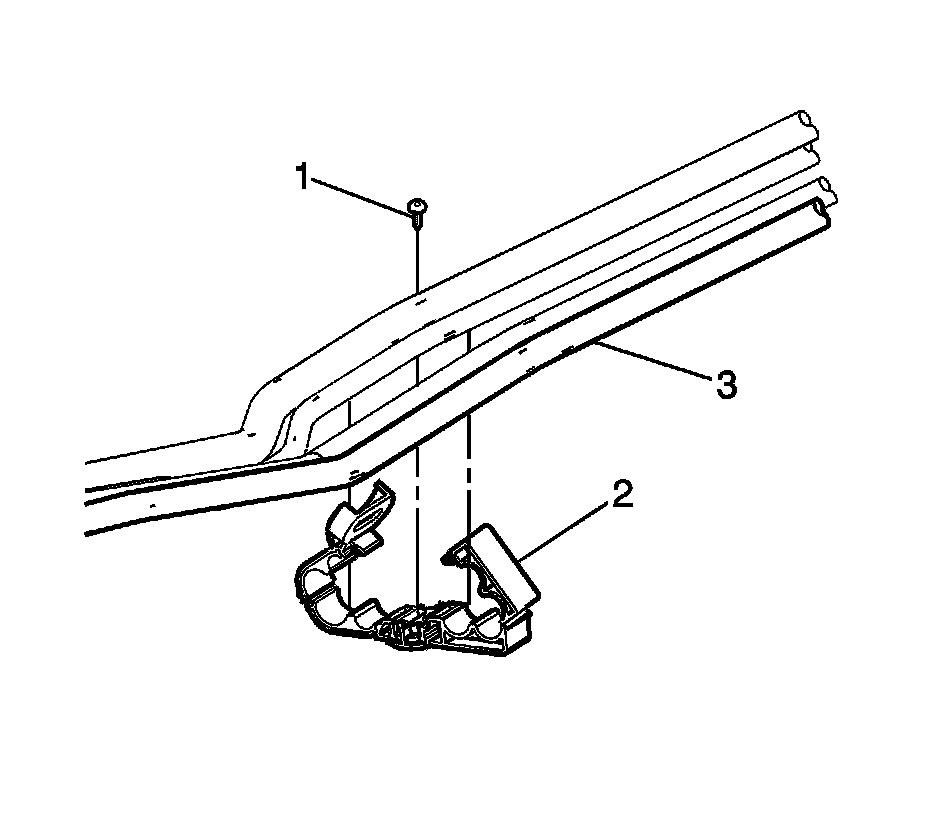
11. Remove auxiliary heater tubes clip retaining push pin/bolt (1) if necessary.
12. Use a flat-bladed release tool to open retaining clips (2).
13. Remove auxiliary heater tubes from vehicle.
Installation Procedure
Note: The replacement A/C and heater pipes are shipped in front and rear sections.
1. Install the auxiliary heater tubes (3) to the retaining clips (2).
2. Install the auxiliary heater tubes (3) to the vehicle.
Caution: Refer to Fastener Caution (Fastener Caution).
3. Install the auxiliary heater tube nut (2).
Tighten the nut to 7 Nm (62 lb in).
4. Install the auxiliary heater tube push pins (1).
5. Install the auxiliary heater tubes (1) to the auxiliary HVAC module.
Note: Use a adjustable wrench or equivalent holding tool at tube connections to prevent twisting.
Note: Mandatory torque sequence required for proper connections.
6. Install the auxiliary heater tube connection nuts (2) to the intermediate connection point.
Tighten the nuts to 16 Nm (12 lb ft).
7. Install the rear wheelhouse liner. Refer to Wheelhouse Panel Replacement (Service and Repair).
8. Install the right assist step if necessary. Refer to Assist Step Replacement (Tubular BVE) (Assist Step Replacement (Tubular BVE))Assist Step Replacement (w/WS2, BVX) (Assist Step Replacement (w/WS2, BVX)).
9. Lower the vehicle.
10. Fill the engine coolant. Refer to Cooling System Draining and Filling (Vac-N-Fill) (Service and Repair)Cooling System Draining and Filling (Static Fill) (Service and Repair).