Camshaft Replacement
Camshaft Replacement
Removal Procedure
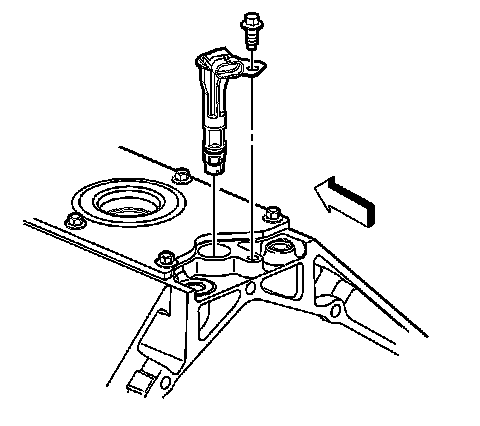
1. Remove the hood. Refer to Hood Replacement (Hood Replacement).
2. Remove the radiator support. Refer to Radiator Support Replacement ().
3. Remove the valve lifters from both cylinder heads. Refer to Valve Lifter Replacement (Service and Repair).
4. Remove the camshaft sensor bolt and sensor.
5. Remove the engine front cover. Refer to Engine Front Cover Removal (Overhaul).
6. Rotate the engine until the timing marks are aligned.
Caution: Do not turn the crankshaft assembly after the timing chain has been removed in order to prevent damage to the piston assemblies or the valves.
7. Remove the camshaft sprocket bolts.
8. Remove the camshaft sprocket and reposition the timing chain.
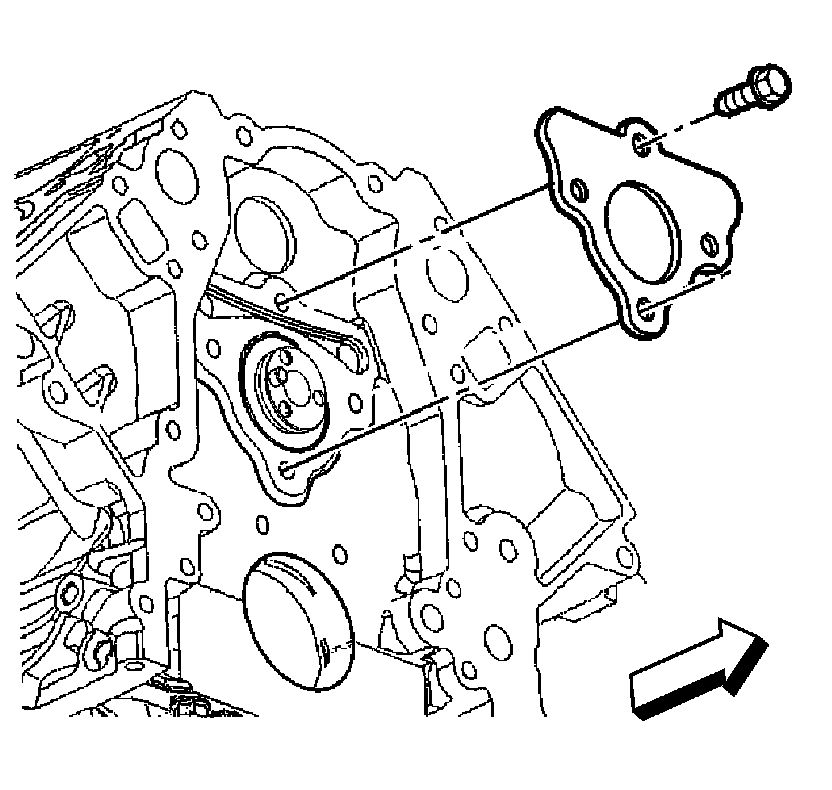
9. Remove the camshaft retainer bolts and retainer.
Caution: All camshaft journals are the same diameter, so care must be used in removing or installing the camshaft to avoid damage to the camshaft bearings.
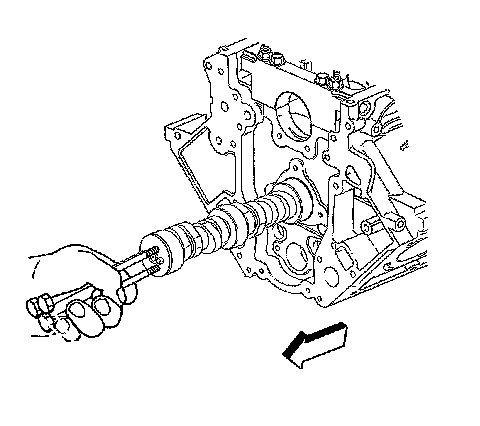
10. Remove the camshaft.
1. Install three M8 - 1.25 x 100 mm (M8 - 1.25 x 4.0 in) bolts to the bolt holes in the front of the camshaft.
2. Using the bolts as a handle, carefully rotate and pull the camshaft out of the engine block.
3. Remove the three bolts from the camshaft.
11. Clean and inspect the camshaft and bearings. Refer to Camshaft and Bearings Cleaning and Inspection (Overhaul).
Installation Procedure
Note: If camshaft replacement is required, the valve lifters must also be replaced.
1. Lubricate the camshaft journals and the bearings with clean engine oil.
2. Install three M8 - 1.25 x 100 mm (M8 - 1.25 x 4.0 in) bolts to the bolt holes in the front of the camshaft.
Caution: All camshaft journals are the same diameter, so care must be used in removing or installing the camshaft to avoid damage to the camshaft bearings.
3. Using the bolts as a handle, carefully install the camshaft into the engine block.
4. Remove the three bolts from the front of the camshaft.
Note: The gasket surface on the engine block should be clean and free of dirt and/or debris.
Caution: Refer to Fastener Caution (Fastener Caution).
5. Install the camshaft retainer and bolts.
Tighten the camshaft retainer bolts to 25 Nm (18 lb ft).
6. Inspect the camshaft sensor O-ring seal. If the O-ring seal is not cut or damaged, it may be reused.
7. Lubricate the O-ring seal with clean engine oil.
8. Install the camshaft sensor and bolt.
Tighten the camshaft sensor bolt to 25 Nm (18 lb ft).
9. Install the camshaft sprocket and timing chain. Refer to Camshaft Timing Chain and Sprocket Replacement (Service and Repair).
10. Install the engine front cover. Refer to Engine Front Cover Removal (Overhaul).
11. Install the valve lifters. Refer to Valve Lifter Replacement (Service and Repair).
12. Install the radiator support. Refer to Radiator Support Replacement ().
13. Install the hood. Refer to Hood Replacement (Hood Replacement).
14. Lower the hood to the normal position.