Removal Procedure
- Remove the midgate hinge covers. Refer to Midgate Hinge Finish Cover Replacement (SUT)
.
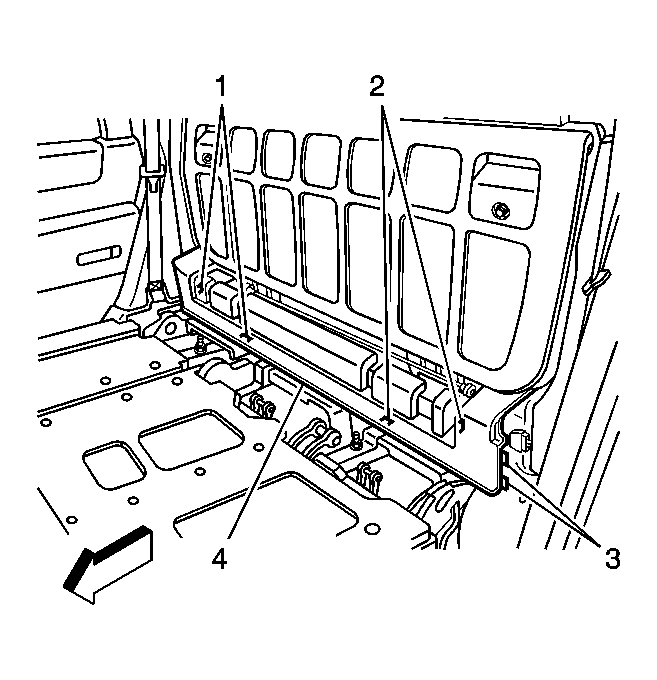 Courtesy of GENERAL MOTORS CORP.
- Remove the lower center garnish molding (4). Refer to Endgate Center Molding Replacement (SUT)
.
- Disconnect the midgate harness electrical connector.
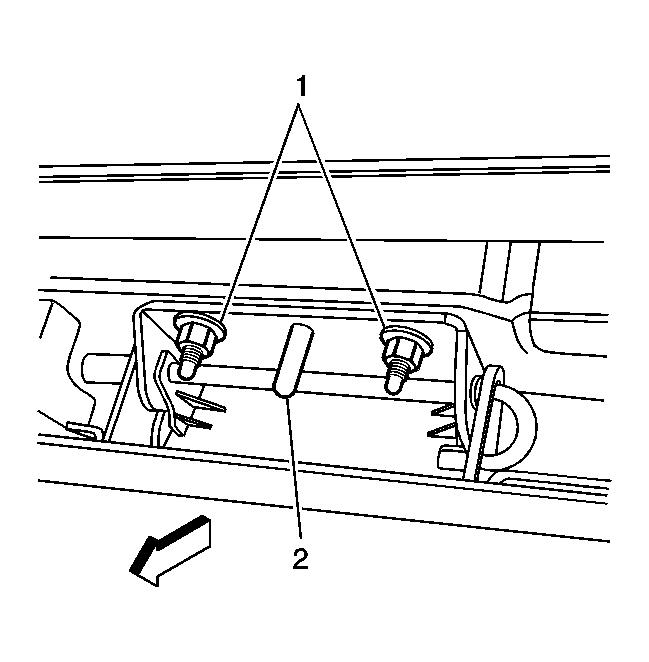 Courtesy of GENERAL MOTORS CORP.
- Remove the nuts (1) securing the midgate hinge to the body.
- With the aid of an assistant, remove the midgate and place the midgate on a clean, protected surface.
- Remove the midgate inner panel. Refer to Midgate Inner Panel Replacement .
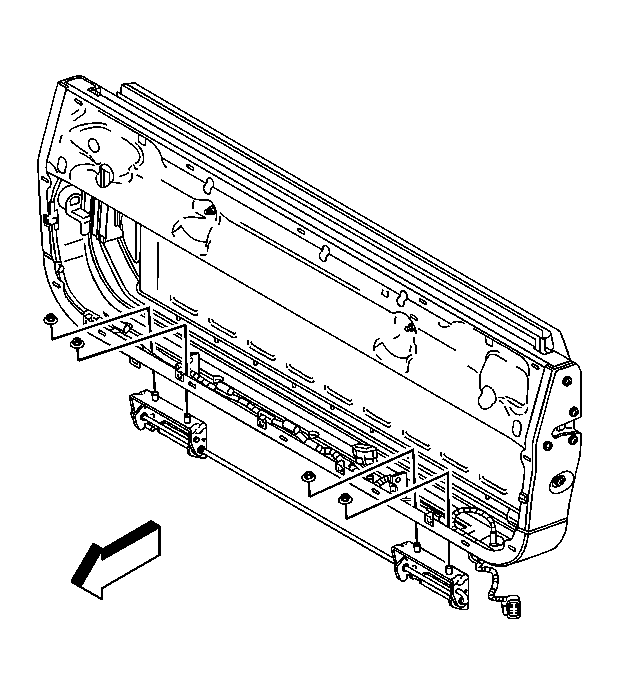 Courtesy of GENERAL MOTORS CORP.
- Remove the nuts securing the midgate hinge to the structure.
- Remove the hinge assembly from the midgate structure.