Removal Procedure
- Open the spare tire carrier to the full open position.
- Open the endgate.
- Remove the right rear sail panel molding. Refer to Sail Panel Molding Replacement (Left Side)
.
- Open the midgate.
- Release the exterior midgate weatherstrip up to the stationary opera quarter window.
- Remove the bolts securing the rear floor cargo liner tie down loops to the body.
- Remove the bolts, loops and floor liner from the vehicle.
- Unlock and open the jack stowage lid.
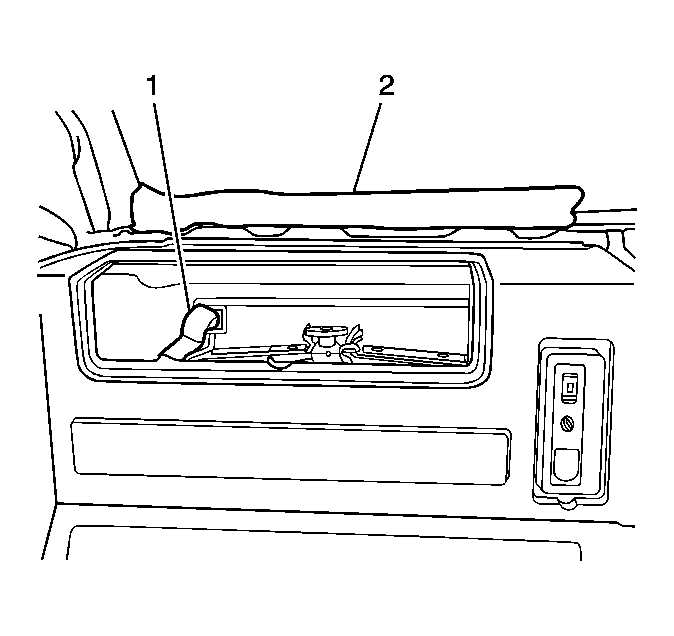 Courtesy of GENERAL MOTORS CORP.
- Release the hook and loop attachment (1) for the jack handles (2) at the front of the jack stowage box.
- Remove the jack handles.
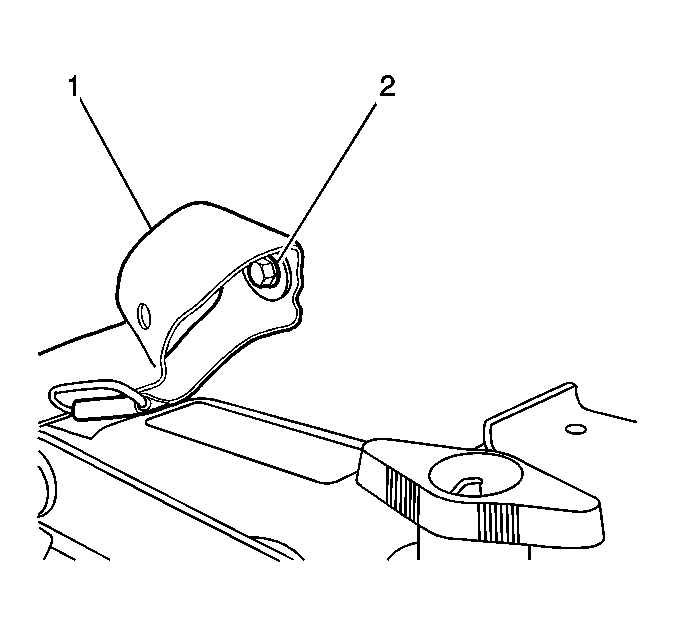 Courtesy of GENERAL MOTORS CORP.
- Remove the bolts (2) securing the hook and loop attachment at the rear of the jack stowage box.
- Remove the nut securing the wheel blocks to the jack plate.
- Remove the wheel blocks from the jack stowage compartment.
- Remove the nut securing the jack to the jack plate.
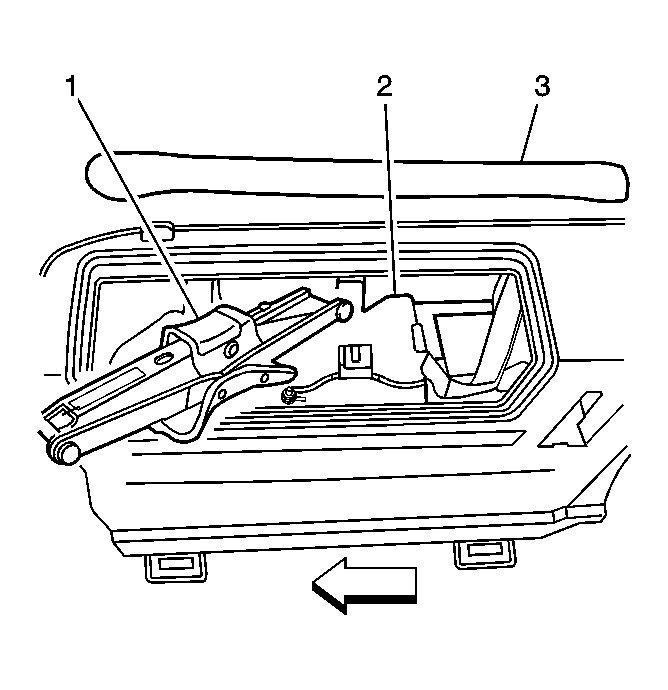 Courtesy of GENERAL MOTORS CORP.
- Remove the jack (1).
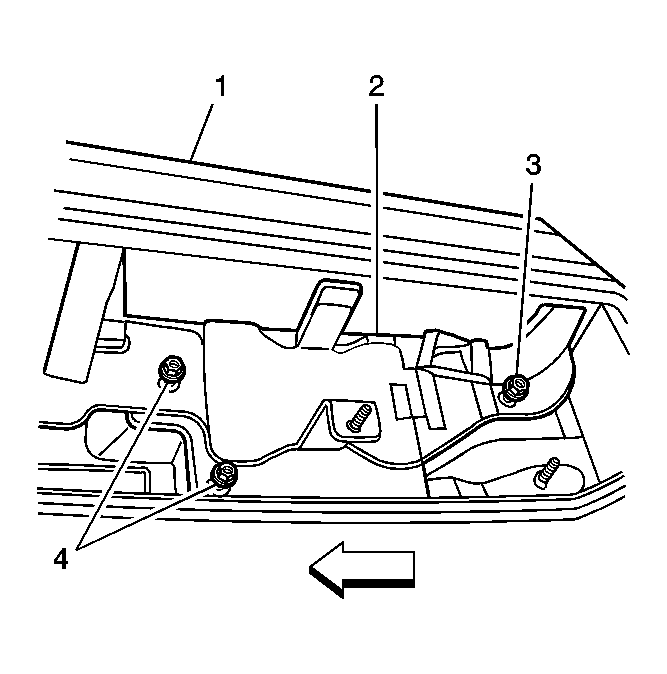 Courtesy of GENERAL MOTORS CORP.
- Remove the nuts (3, 4) securing the jack plate (2) to the stowage box.
- Remove the jack plate (2).
- Remove the cap, nut and washer securing the inflator line to the rear accessory power outlet.
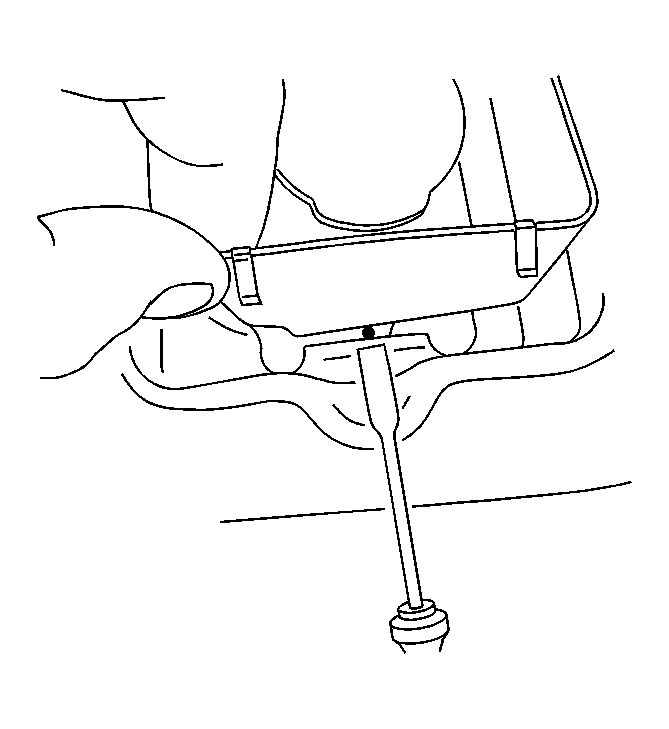 Courtesy of GENERAL MOTORS CORP.
- With a flat-bladed tool, release the bottom edge of the accessory power outlet.
- Release the accessory power outlet from the right hand compartment side trim panel.
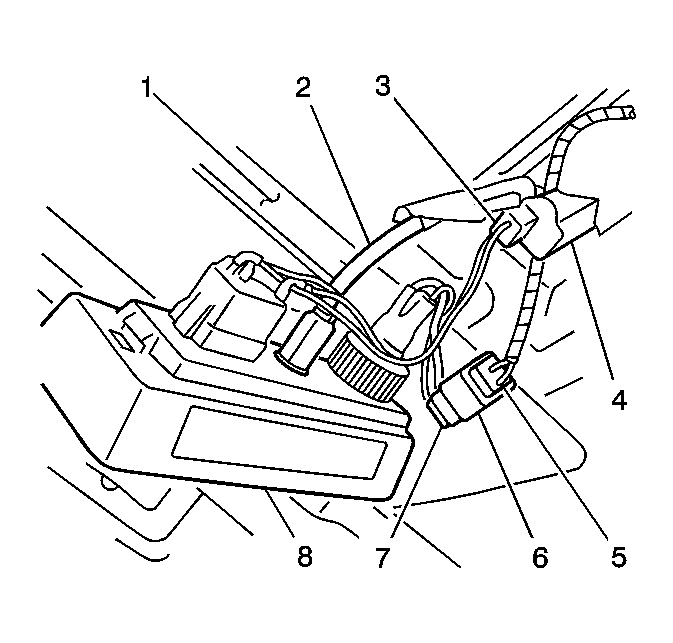 Courtesy of GENERAL MOTORS CORP.
- Disconnect the inflator switch electrical connector (3).
- Remove the inflator line (2).
- Disconnect the electrical connector (7) for the 12-volt accessory outlet.
- Remove the accessory outlet panel (8) from the right hand compartment side trim panel.
- Remove the right hand rear compartment side trim panel from the pickup box.