Intake Manifold Removal and Installation: Removal
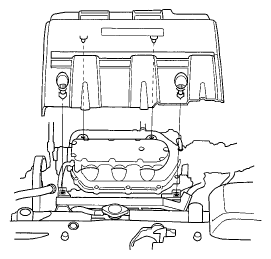
- Remove the engine cover.
 Courtesy of AMERICAN HONDA MOTOR CO., INC.
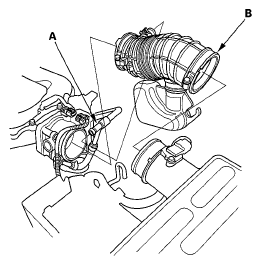
- Remove the breather pipe (A), then remove the air intake duct (B).
 Courtesy of AMERICAN HONDA MOTOR CO., INC.
- Disconnect the engine wire harness connectors from the intake manifold.
- Throttle actuator connector
- MAP sensor connector
- EVAP canister purge valve connector
- IMT valve actuator connector
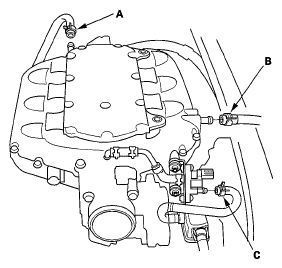
- Disconnect the PCV hose (A), the brake booster vacuum hose (B), and the EVAP canister purge hose (C).
 Courtesy of AMERICAN HONDA MOTOR CO., INC.
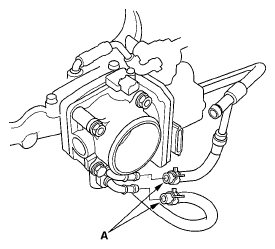
- Disconnect the water bypass hoses (A), then plug the water bypass hoses.
 Courtesy of AMERICAN HONDA MOTOR CO., INC.
- Remove the upper cover mounting bolts and nuts sequentially, in three steps, then remove the upper cover.
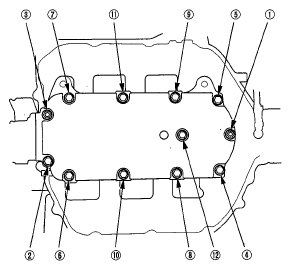 Courtesy of AMERICAN HONDA MOTOR CO., INC.
- Remove the intake manifold mounting bolts and nuts sequentially in three steps, then remove the intake manifold and the spacer.
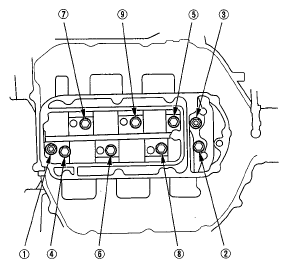 Courtesy of AMERICAN HONDA MOTOR CO., INC.