CVT Clutch Pressure Control Solenoid Valve Removal/Installation
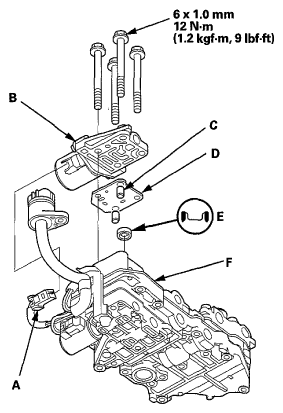
- Disconnect the CVT clutch pressure control solenoid valve 2P connector (A).
 Courtesy of AMERICAN HONDA MOTOR CO., INC.
- Remove the CVT clutch pressure control solenoid valve (B), the dowel pins (C), and the separator plate (D).
- Check that the filter (E) is in good condition, replace it if it is clogged or damaged.
- Install the CVT clutch pressure control solenoid valve with the two dowel pins and the separator plate on the lower valve body (F).
- Connect the CVT clutch pressure control solenoid valve 2P connector.