Outboard Joint Side
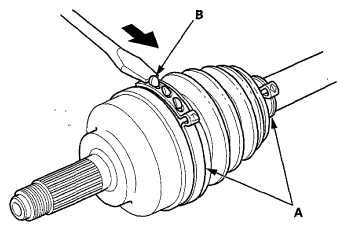
- Remove the boot bands (A). Lift up the three tabs (B) using a flat-tipped screwdriver, then release the band. Be careful not to damage the boot.
 Courtesy of AMERICAN HONDA MOTOR CO., INC.
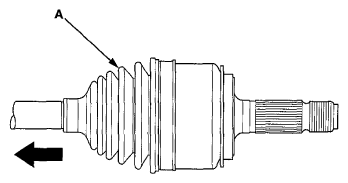
- Slide the outboard boot (A) partially toward the inboard joint side. Be careful not to damage the boot.
 Courtesy of AMERICAN HONDA MOTOR CO., INC.
- Wipe off the grease to expose the driveshaft and the outboard joint inner race.
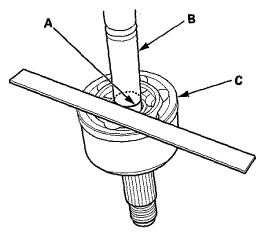
- Make a mark (A) on the driveshaft (B) at the same level as the outboard joint end (C).
 Courtesy of AMERICAN HONDA MOTOR CO., INC.
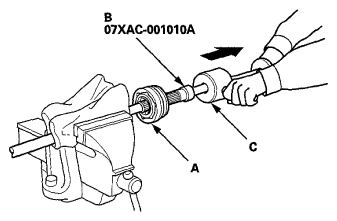
- Securely clamp the driveshaft in a bench vise with a shop towel wrapped around the driveshaft.
- Remove the outboard joint (A) using the 22 x 1.5 mm threaded adapter (B) and a commercially available 5/8"-18 UNF slide hammer (C).
 Courtesy of AMERICAN HONDA MOTOR CO., INC.
- Remove the driveshaft from the bench vise.
- Remove the stop ring (A) from the driveshaft.
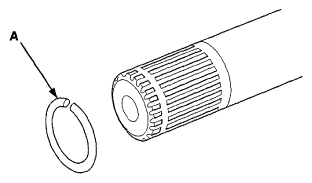 Courtesy of AMERICAN HONDA MOTOR CO., INC.
- Wrap the splines on the driveshaft with vinyl tape (A) to prevent damaging the boot.
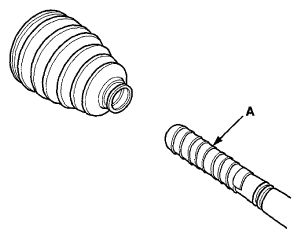 Courtesy of AMERICAN HONDA MOTOR CO., INC.
- Remove the outboard boot. Be careful not to damage the boot.
- Remove the vinyl tape.