Major Adjustment (to be done when replacing parking brake shoes and after lining surface break-in)
- Raise and support the vehicle (see LIFT AND SUPPORT POINTS
).
- Release the parking brake pedal fully.
- Remove the adjusting nut cap (A), then loosen the parking brake adjusting nut (B).
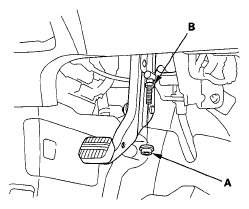 Courtesy of AMERICAN HONDA MOTOR CO., INC.
- Remove the rear wheels.
- Remove the access plug (A).
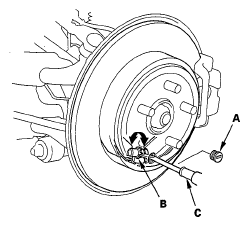 Courtesy of AMERICAN HONDA MOTOR CO., INC.
- Turn the ratchet teeth on the adjuster nut (B) with a flat-tip screwdriver (C) until the shoes lock against the parking brake drum. Then back off the adjuster 10 clicks, and install the access plug.
- Clean the mating surface of the brake disc/drum and the inside of the wheel, then install the rear wheels.
- Do the minor adjustment procedure.