Intake Manifold Chamber Removal and Installation: Removal
- Remove the under-cowl panel (see UNDER-COWL PANEL REPLACEMENT
).
- Remove the air cleaner housing assembly (see AIR CLEANER REMOVAL/INSTALLATION
).
- Remove the engine wire harness connectors and wire harness clamps from the intake manifold chamber.
- Throttle actuator connector
- Manifold absolute pressure (MAP) sensor connector
- Disconnect the brake booster vacuum hose (A) and remove the harness clamp (B).
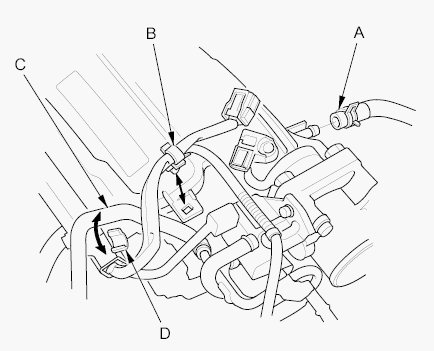 Courtesy of AMERICAN HONDA MOTOR CO., INC.
- Remove the water bypass hose (C) from the clamp (D).
- Remove the throttle body (A) without disconnecting the water bypass hoses.
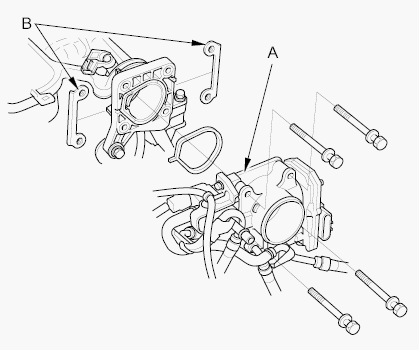 Courtesy of AMERICAN HONDA MOTOR CO., INC.
- Remove the throttle flange plates (B).
- Remove the intake manifold bracket mounting bolts.
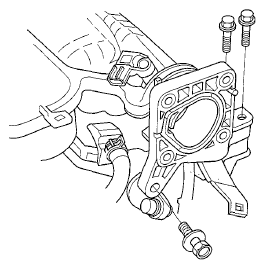 Courtesy of AMERICAN HONDA MOTOR CO., INC.
- Remove the intake manifold chamber (A) and the intake manifold flange plate (B).
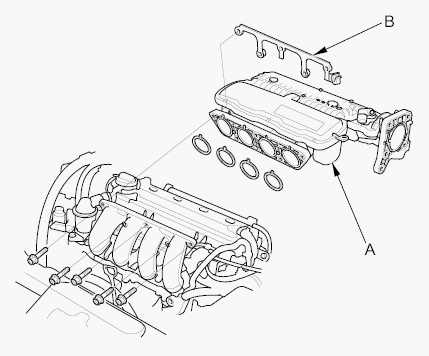 Courtesy of AMERICAN HONDA MOTOR CO., INC.