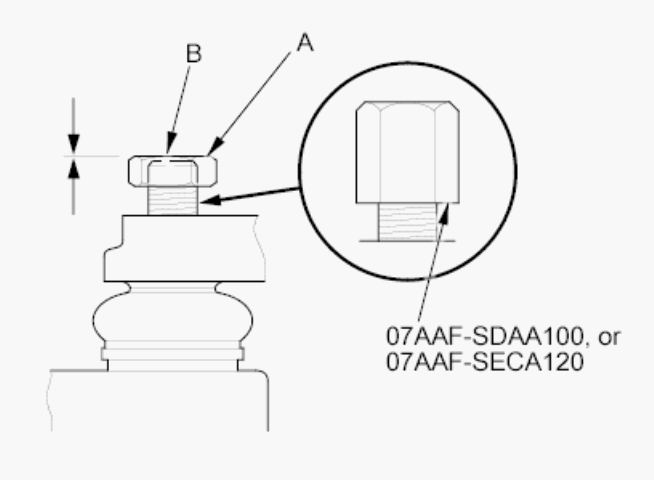
- Install a hex nut (A) or the ball joint thread protector onto the threads of the ball joint (B).
NOTE:
When using a hex nut, make sure the nut is flush with the ball joint pin end to prevent damage to the threaded end of the ball joint pin.
 Courtesy of AMERICAN HONDA MOTOR CO., INC.
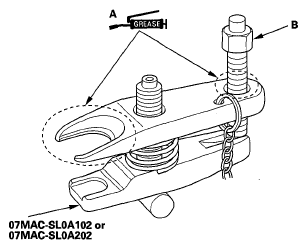
- Apply grease to the ball joint remover on the areas shown (A). This will ease installation of the tool and prevent damage to the pressure bolt (B) threads.
 Courtesy of AMERICAN HONDA MOTOR CO., INC.
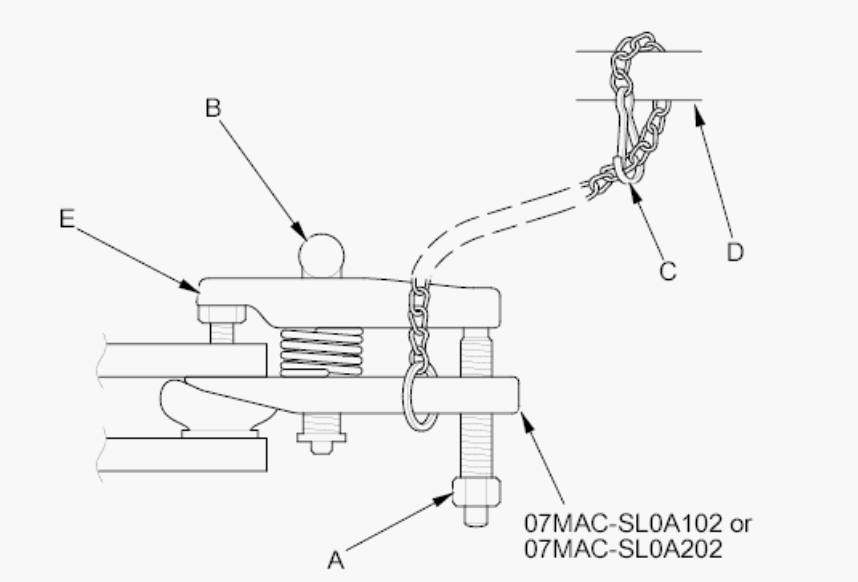
- Loosen the pressure bolt (A), and install the ball joint remover as shown. Insert the jaws carefully, making sure not to damage the ball joint boot. Adjust the jaw spacing by turning the adjusting bolt (B).
NOTE:
Fasten the safety chain (C) securely to a suspension arm or the subframe (D). Do not fasten it to a brake line or wire harness.
 Courtesy of AMERICAN HONDA MOTOR CO., INC.
- After adjusting the adjusting bolt, make sure the head of the adjusting bolt is in the position shown to allow the jaw (E) to pivot.
- With a wrench, tighten the pressure bolt until the ball joint pin pops loose from the ball joint pin hole. If necessary, apply penetrating type lubricant to loosen the ball joint pin.
NOTE:
Do not use pneumatic or electric tools on the pressure bolt.
- Remove the tool, then remove the nut from the end of the ball joint pin, and pull the ball joint out of the ball joint pin hole. Inspect the ball joint boot, and replace it if damaged.