Active Noise Cancellation Microphone Removal/Installation
Active Noise Cancellation Microphone Removal/Installation
FRONT
NOTE:
- Put on gloves to protect your hands.
- Take care not to scratch the dashboard and related parts.
- Lay a workshop towel under the parts when working on them to protect the face panel from scratches or other damage.
1. Remove the roof console Service and Repair.
2. Remove the screws and the front active noise cancellation microphone (A).
With HomeLink
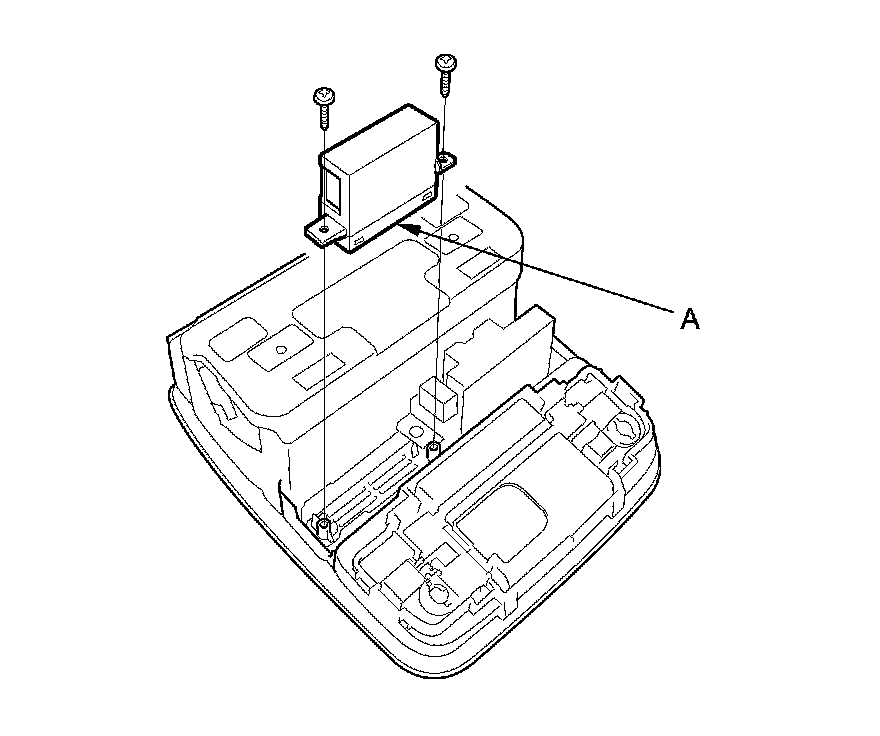
Without HomeLink
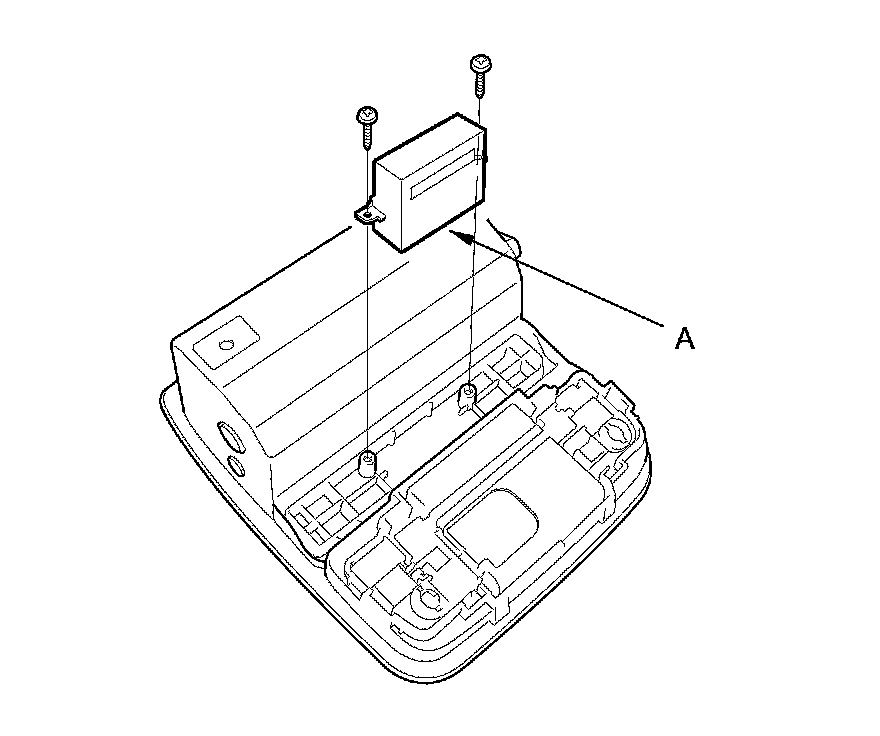
3. Install the microphone in the reverse order of removal.
REAR
1. Remove the headliner Service and Repair.
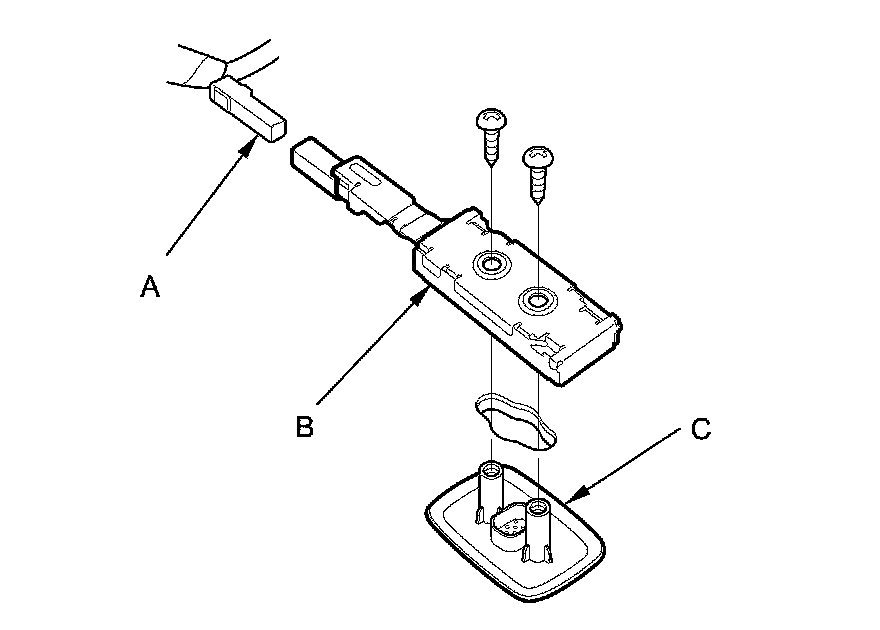
2. Disconnect the connector (A), then remove the screws, the rear active noise cancellation microphone (B), and the cap (C) from the headliner.
3. Install the microphone in the reverse order of removal.