A/T Clutch Pressure Control Solenoid Valve B And C Replacement
A/T Clutch Pressure Control Solenoid Valve B and C Replacement
1. Do the battery removal procedure Removal and Replacement.
2. Remove the battery base.
3. Disconnect the A/T clutch pressure control solenoid valve B and C connectors.
4. Remove the mounting bolts, harness clamp brackets (A), and A/T clutch pressure control solenoid valves B and C.
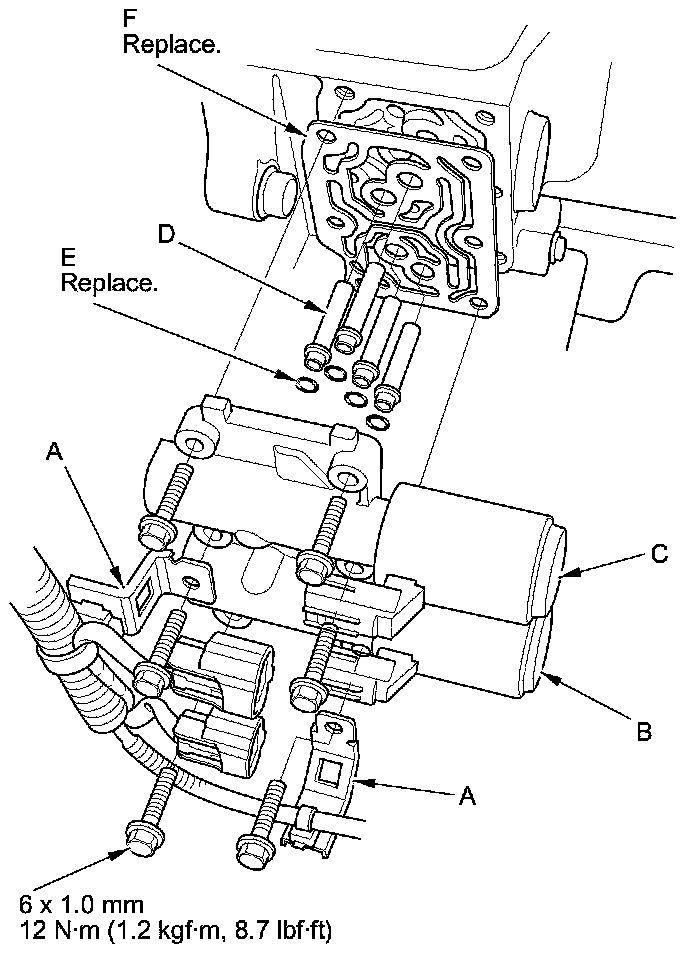
5. Remove the ATF joint pipes (D), the O-rings (E), and the gasket (F).
6. Clean the mounting surface and the fluid passages of the transmission housing.
7. Install a new gasket on the transmission housing, and install the ATF joint pipes. Install new O-rings over the ATF joint pipes.
NOTE: Be sure to install a new gasket with the blue side toward the transmission housing.
8. Install new A/T clutch pressure control solenoid valves B and C, and the harness clamp brackets.
9. Check the connectors for corrosion, dirt, or oil, and clean or repair if necessary, then connect the connectors securely.
10. Install the battery base.
11. Do the battery installation procedure Removal and Replacement.