No Sound Is Heard From the Speaker(s) (Display Is Normal) (Without Premium Audio)
Audio System Symptom Troubleshooting - No Sound is heard from the speaker(s) (display is normal) (without premium audio)
No Sound is heard from the speaker(s) (display is normal) (without premium audio)
NOTE:
- Check the vehicle battery condition first Testing and Inspection.
- Check the connectors for poor connections or loose terminals.
- Set the fader and balance positions to the center.
- Before doing symptom troubleshooting, do the audio unit power switch will not turn on troubleshooting Audio Unit Power Switch Will Not Turn on (No Information Display and No Sound).
1. Turn the ignition switch to ON (II).
2. Turn on the audio unit and make sure the volume button is not set to the MIN level.
Is it at the MIN level?
YES -
Raise the volume level, and recheck the function.�
NO -
Go to step 3.
3. Go to the speaker check mode in the audio system Self-diagnostic Function Audio System Self-Diagnostic Function.
Do all speakers produce a tone?
YES -
Intermittent failure; the system is OK at this time. Check for poor connections at the audio unit and speakers.
NO -
Go to step 4.
4. Turn the ignition switch to LOCK (0).
5. Check the speaker(s) with no sound for any damage.
Is there any damage?
YES -
Substitute the speaker Speaker Test/Replacement and recheck.�
NO -
Go to step 6.
6. Check the speaker 2P connector for a loose or poor connection.
Reconnect the speaker connector, and recheck the symptom; is the condition still present?
YES -
Go to step 7.
NO -
Intermittent failure. Operation is normal.�
7. Test the speaker(s) Speaker Test/Replacement.
Is the speaker OK?
YES -
Go to step 8.
NO -
Replace the speaker(s) Speaker Test/Replacement.�
8. Reconnect the speaker connector(s).
9. Disconnect audio unit connector A (24P).
NOTE: Eject all the CDs before removing the audio unit and CD changer to prevent damaging the CD player's load mechanism.
10. Check for continuity between audio unit connector A (24P) and body ground according to the table.
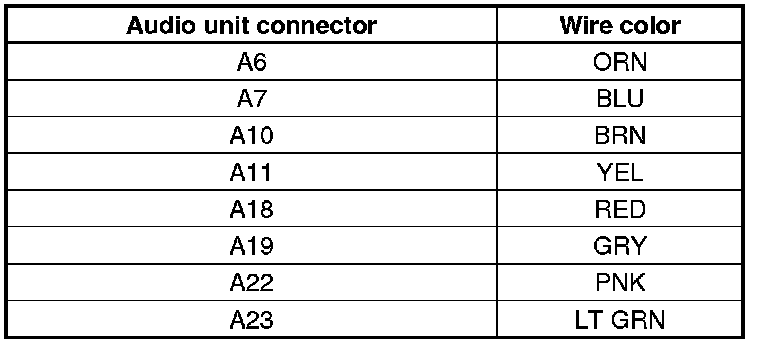
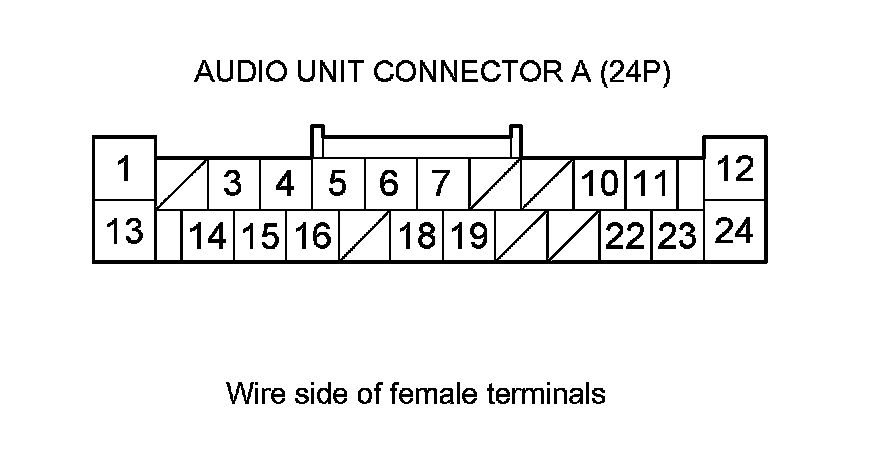
Is there continuity?
YES -
Repair a short to body ground in the wire(s) between the audio unit and the speaker(s).�
NO -
Go to step 11.
11. Disconnect the tweeter 2P connectors.
12. Measure the resistance between each pair of speaker terminals at audio unit connector A (24P) according to the table.
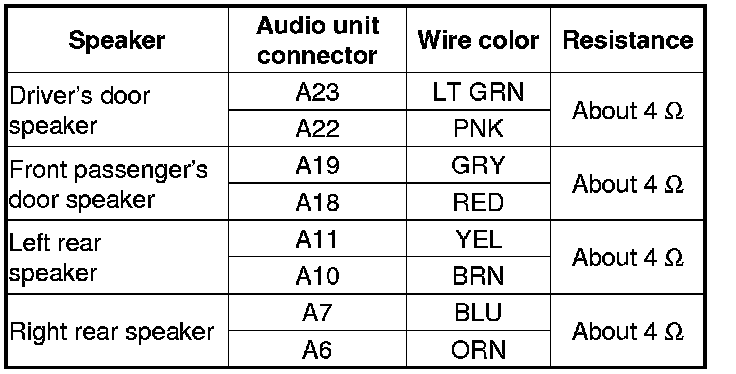
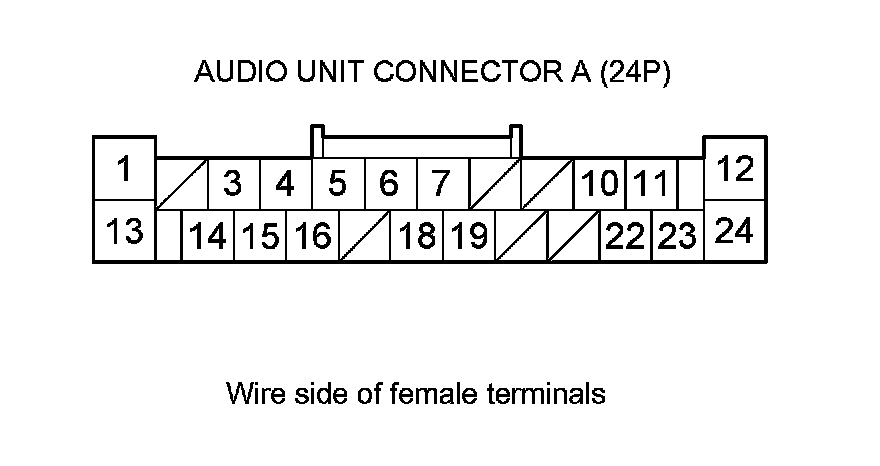
Is the resistance OK?
YES -
Go to step 13.
NO -
Repair an open or a short in the wire between the audio unit and the speaker(s).�
13. Disconnect the door speaker 2P connectors.
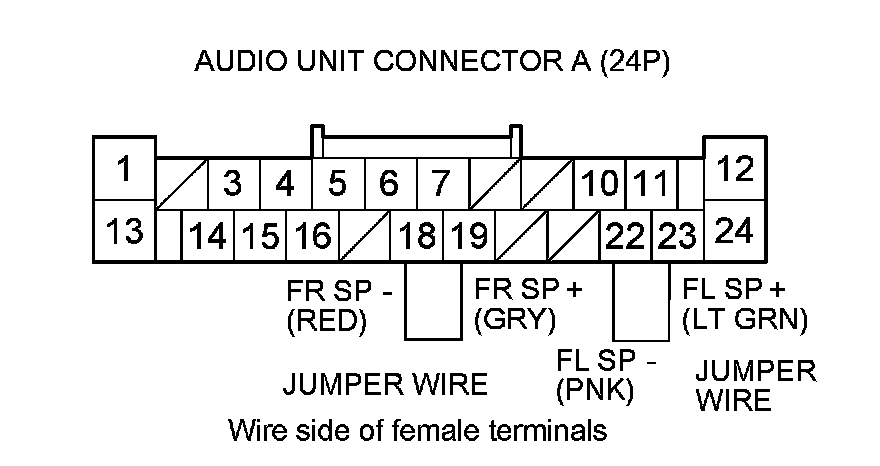
14. Connect audio unit connector A (24P) terminals with a jumper wire as shown.
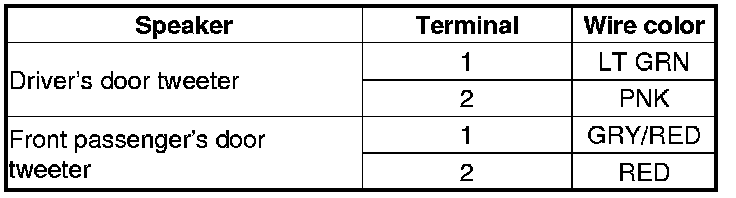
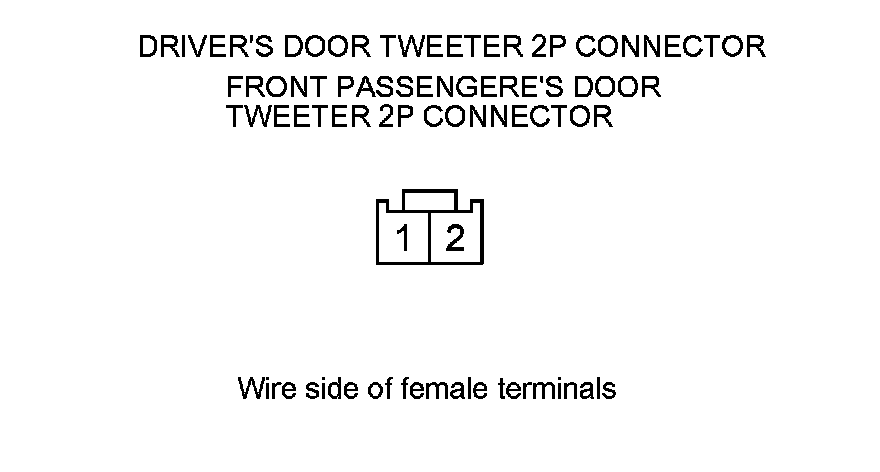
15. Check for continuity between the tweeter 2P connector according to the table.
Is there continuity?
YES -
Replace the audio unit Audio Unit Removal/Installation (Without Navigation).�
NO -
Repair an open in the wire between the audio unit and the tweeter.